- Matplotlib 基礎
- Matplotlib - 首頁
- Matplotlib - 簡介
- Matplotlib - 與 Seaborn 對比
- Matplotlib - 環境設定
- Matplotlib - Anaconda 發行版
- Matplotlib - Jupyter Notebook
- Matplotlib - Pyplot API
- Matplotlib - 簡單繪圖
- Matplotlib - 儲存圖形
- Matplotlib - 標記
- Matplotlib - 圖形
- Matplotlib - 樣式
- Matplotlib - 圖例
- Matplotlib - 顏色
- Matplotlib - 顏色對映
- Matplotlib - 顏色對映歸一化
- Matplotlib - 選擇顏色對映
- Matplotlib - 色標
- Matplotlib - 文字
- Matplotlib - 文字屬性
- Matplotlib - 子圖示題
- Matplotlib - 影像
- Matplotlib - 影像蒙版
- Matplotlib - 註釋
- Matplotlib - 箭頭
- Matplotlib - 字型
- Matplotlib - 什麼是字型?
- 全域性設定字型屬性
- Matplotlib - 字型索引
- Matplotlib - 字型屬性
- Matplotlib - 刻度
- Matplotlib - 線性和對數刻度
- Matplotlib - 對稱對數和 Logit 刻度
- Matplotlib - LaTeX
- Matplotlib - 什麼是 LaTeX?
- Matplotlib - 用於數學表示式的 LaTeX
- Matplotlib - 註釋中的 LaTeX 文字格式
- Matplotlib - PostScript
- 在註釋中啟用 LaTeX 渲染
- Matplotlib - 數學表示式
- Matplotlib - 動畫
- Matplotlib - 藝術家
- Matplotlib - 使用 Cycler 樣式化
- Matplotlib - 路徑
- Matplotlib - 路徑效果
- Matplotlib - 變換
- Matplotlib - 刻度和刻度標籤
- Matplotlib - 弧度刻度
- Matplotlib - 日期刻度
- Matplotlib - 刻度格式化程式
- Matplotlib - 刻度定位器
- Matplotlib - 基本單位
- Matplotlib - 自動縮放
- Matplotlib - 反轉軸
- Matplotlib - 對數軸
- Matplotlib - Symlog
- Matplotlib - 單位處理
- Matplotlib - 帶單位的橢圓
- Matplotlib - 脊柱
- Matplotlib - 軸範圍
- Matplotlib - 軸刻度
- Matplotlib - 軸刻度
- Matplotlib - 格式化軸
- Matplotlib - Axes 類
- Matplotlib - 雙軸
- Matplotlib - Figure 類
- Matplotlib - 多圖
- Matplotlib - 網格
- Matplotlib - 面向物件介面
- Matplotlib - PyLab 模組
- Matplotlib - Subplots() 函式
- Matplotlib - Subplot2grid() 函式
- Matplotlib - 錨定藝術家
- Matplotlib - 手動等值線
- Matplotlib - 座標報告
- Matplotlib - AGG 過濾器
- Matplotlib - 帶狀框
- Matplotlib - 填充螺旋線
- Matplotlib - Findobj 演示
- Matplotlib - 超連結
- Matplotlib - 影像縮圖
- Matplotlib - 使用關鍵字繪圖
- Matplotlib - 建立徽標
- Matplotlib - 多頁 PDF
- Matplotlib - 多程序
- Matplotlib - 列印標準輸出
- Matplotlib - 複合路徑
- Matplotlib - Sankey 類
- Matplotlib - 帶 EEG 的 MRI
- Matplotlib - 樣式表
- Matplotlib - 背景顏色
- Matplotlib - Basemap
- Matplotlib 事件處理
- Matplotlib - 事件處理
- Matplotlib - 關閉事件
- Matplotlib - 滑鼠移動
- Matplotlib - 點選事件
- Matplotlib - 滾動事件
- Matplotlib - 按鍵事件
- Matplotlib - 選擇事件
- Matplotlib - 觀察鏡
- Matplotlib - 路徑編輯器
- Matplotlib - 多邊形編輯器
- Matplotlib - 定時器
- Matplotlib - Viewlims
- Matplotlib - 縮放視窗
- Matplotlib 小部件
- Matplotlib - 遊標小部件
- Matplotlib - 帶註釋的遊標
- Matplotlib - 按鈕小部件
- Matplotlib - 複選框
- Matplotlib - 套索選擇器
- Matplotlib - 選單小部件
- Matplotlib - 滑鼠遊標
- Matplotlib - 多遊標
- Matplotlib - 多邊形選擇器
- Matplotlib - 單選按鈕
- Matplotlib - 範圍滑塊
- Matplotlib - 矩形選擇器
- Matplotlib - 橢圓選擇器
- Matplotlib - 滑塊小部件
- Matplotlib - 跨度選擇器
- Matplotlib - 文字框
- Matplotlib 繪圖
- Matplotlib - 條形圖
- Matplotlib - 直方圖
- Matplotlib - 餅圖
- Matplotlib - 散點圖
- Matplotlib - 箱線圖
- Matplotlib - 小提琴圖
- Matplotlib - 等值線圖
- Matplotlib - 3D 繪圖
- Matplotlib - 3D 等值線
- Matplotlib - 3D 線框圖
- Matplotlib - 3D 曲面圖
- Matplotlib - Quiver 圖
- Matplotlib 有用資源
- Matplotlib - 快速指南
- Matplotlib - 有用資源
- Matplotlib - 討論
Matplotlib - 動畫
動畫是一種視覺技術,它透過一系列單獨的幀建立動態影像。每個幀代表一個特定的時間點,當以高速連續播放時,它們會產生運動的錯覺。例如,GIF 就是一個常見的動畫物件示例。以下是一個示例:

動畫的流行檔案格式包括 GIF、APNG(動畫行動式網路圖形)、mkv、mp4 等。
Matplotlib 中的動畫
Matplotlib 提供了一個專門的模組來建立動畫。在此上下文中,動畫是一系列幀,每個幀都與 Figure 上的一個繪圖相關聯。
為了將動畫功能整合到我們的工作環境中,我們可以使用以下命令匯入專用模組:
import matplotlib.animation as animation
建立動畫
在 Matplotlib 中建立動畫可以透過兩種不同的方法完成。matplotlib.animation 模組為此目的提供了兩個主要類:
- FuncAnimation
- ArtistAnimation
FuncAnimation 類
使用FuncAnimation類的方法是建立動畫的一種有效方法,它透過修改每個幀的繪圖資料來實現。它允許我們透過傳遞一個使用者定義的函式來建立動畫,該函式迭代地修改繪圖的資料。此類涉及生成初始幀的資料,然後隨後修改每個後續幀的此資料。
示例
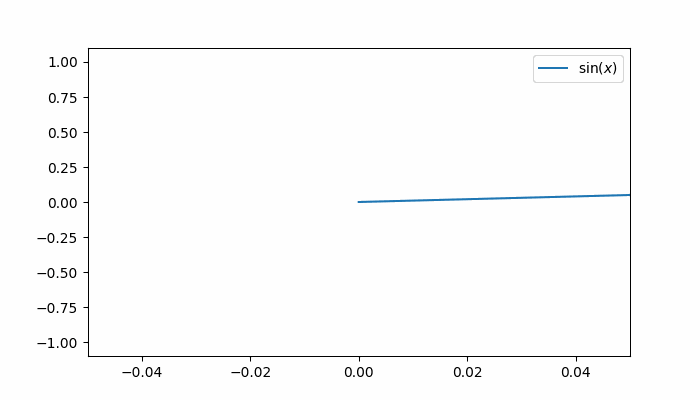
此示例演示瞭如何使用FuncAnimation類為正弦波繪圖建立動畫,說明了物件的運動。它還使用 Matplotlib 動畫更新 X 軸值。
import matplotlib.pyplot as plt
import numpy as np
import matplotlib.animation as animation

# Creating a figure and axis
fig, ax = plt.subplots(figsize=(7, 4))

# Generating x values
x = np.arange(0, 2*np.pi, 0.01)

# Plotting the initial sine curve
line, = ax.plot(x, np.sin(x))
ax.legend([r'$\sin(x)$'])

# Function to update the plot for each frame of the animation
def update(frame):
   line.set_ydata(np.sin(x + frame / 50))
   ax.set_xlim(left=0, right=frame)
   return line

# Creating a FuncAnimation object
ani = animation.FuncAnimation(fig=fig, func=update, frames=40, interval=30)

# Displaying the output
plt.show()
輸出
以上示例產生以下輸出:
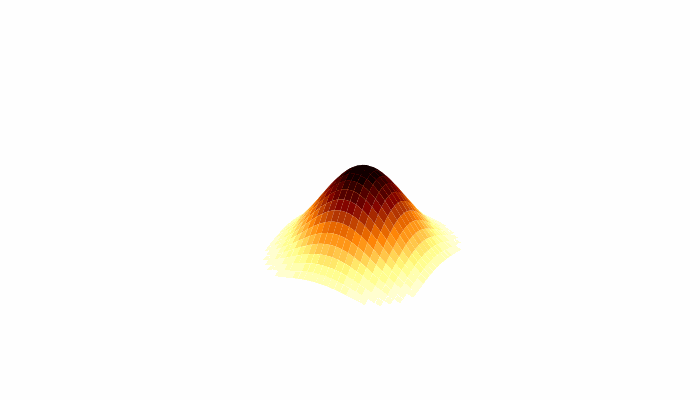
示例
以下是一個使用FuncAnimation類建立動畫 3D 曲面圖的示例。
import numpy as np
import matplotlib.pyplot as plt
import matplotlib.animation as animation

# Generate data
N = 50
fps = 250
frn = 75
x = np.linspace(-2, 2, N + 1)
x, y = np.meshgrid(x, x)
zarray = np.zeros((N + 1, N + 1, frn))
f = lambda x, y, sig: 1 / np.sqrt(sig) * np.exp(-(x ** 2 + y ** 2) / sig ** 2)

# Create data array
for i in range(frn):
   zarray[:, :, i] = f(x, y, 1.5 + np.sin(i * 2 * np.pi / frn))

# Update plot function
def change_plot(frame_number, zarray, plot):
   plot[0].remove()
   plot[0] = ax.plot_surface(x, y, zarray[:, :, frame_number], cmap="afmhot_r")

# Create figure and subplot
fig = plt.figure(figsize=(7, 4))
ax = fig.add_subplot(111, projection='3d')

# Initial plot
plot = [ax.plot_surface(x, y, zarray[:, :, 0], color='0.75', rstride=1, cstride=1)]

# Set axis limits
ax.set_zlim(0, 1.1)

# Animation
ani = animation.FuncAnimation(fig, change_plot, frn, fargs=(zarray, plot), interval=1000 / fps)

# Turn off axis and grid
ax.axis('off')
ax.grid(False)

# Show plot
plt.show()
輸出
以上示例產生以下輸出:
ArtistAnimation
ArtistAnimation 是一種靈活的方法,適用於需要按順序對不同藝術家進行動畫處理的場景。此方法涉及生成一個藝術家列表(可迭代),以便將它們繪製到動畫的每個幀中。
示例
此示例演示瞭如何使用 ArtistAnimation 類建立動畫。
import matplotlib.pyplot as plt
import numpy as np
import matplotlib.animation as animation

# Create a figure and axis
fig, ax = plt.subplots(figsize=(7,4))

# Define the function
def f(x, y):
   return np.sin(x) + np.cos(y)

# Generate x and y values for the function
x = np.linspace(0, 2 * np.pi, 180)
y = np.linspace(0, 2 * np.pi, 100).reshape(-1, 1)

# ims is a list of lists, each row is a list of artists to draw in the current frame
ims = []

# Generate frames for the animation
for i in range(60):
   x += np.pi / 10
   y += np.pi / 30
   im = ax.imshow(f(x, y), animated=True)
   if i == 0:
      ax.imshow(f(x, y))  # show an initial one first
   ims.append([im])

# Create an ArtistAnimation with the specified interval, blit, and repeat_delay
ani = animation.ArtistAnimation(fig, ims, interval=50, blit=True, repeat_delay=1000)
# Display the animation
plt.show()
輸出
以上程式碼生成以下結果:

儲存動畫
可以使用不同的多媒體寫入器(如 Pillow、ffmpeg 和 imagemagick)將動畫物件儲存到磁碟。但是,需要注意的是,並非所有影片格式都受每個寫入器支援。主要有四種類型的寫入器
- PillowWriter
- HTMLWriter
- 基於管道的寫入器
- 基於檔案的寫入器
PillowWriter
它使用 Pillow 庫以各種格式(如 GIF、APNG 和 WebP)儲存動畫。
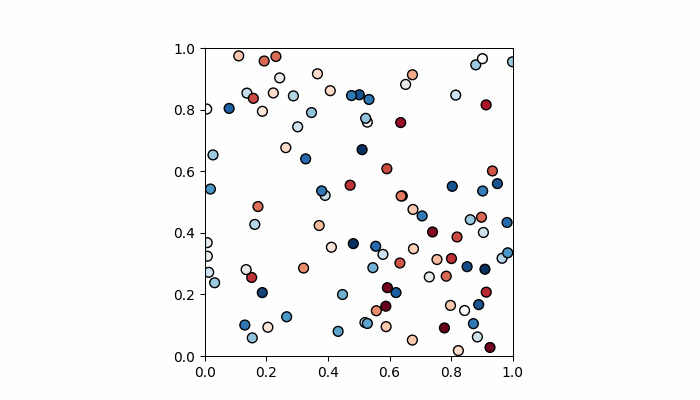
示例
一個示例演示瞭如何為散點圖建立動畫,並使用 PillowWriter將其儲存為 GIF。
import matplotlib.pyplot as plt
import matplotlib.animation as animation
import numpy as np

# Generate data
steps = 50
nodes = 100
positions = []
solutions = []

for i in range(steps):
   positions.append(np.random.rand(2, nodes))
   solutions.append(np.random.random(nodes))

# Create a figure and axes
fig, ax = plt.subplots(figsize=(7, 4))
marker_size = 50

# Function to update the plot for each frame of the animation
def animate(i):
   fig.clear()
   ax = fig.add_subplot(111, aspect='equal', autoscale_on=False, xlim=(0, 1), ylim=(0, 1))
   ax.set_xlim(0, 1)
   ax.set_ylim(0, 1)
   s = ax.scatter(positions[i][0], positions[i][1], s=marker_size, c=solutions[i], cmap="RdBu_r", marker="o", edgecolor='black')

plt.grid(None)

# Creating a FuncAnimation object
ani = animation.FuncAnimation(fig, animate, interval=100, frames=range(steps))

# Save the animation as a GIF using the PillowWriter
ani.save('animation.gif', writer='pillow')
如果您訪問儲存輸出的資料夾,您可以觀察到以下 gif 檔案:
輸出
HTMLWriter
HTMLWriter 用於建立基於 JavaScript 的動畫,支援 HTML 和 PNG 格式。此寫入器可用於將動畫嵌入網頁中。
基於管道的寫入器
這些寫入器使用 FFMpegWriter 和 ImageMagickWriter 等外部實用程式來建立動畫。它們支援各種影片格式,並且幀被管道傳輸到實用程式,該實用程式將它們拼接在一起以建立動畫。
基於檔案的寫入器
基於檔案的寫入器(FFMpegFileWriter 和 ImageMagickFileWriter)速度稍慢,但具有在建立最終動畫之前儲存每個幀的優點。
示例
以下示例演示瞭如何為 matplotlib.animation 正確啟用ffmpeg。此處,繪圖使用動畫影像矩陣和動畫色標建立。
import numpy as np
import matplotlib.pyplot as plt
import matplotlib.animation as animation
from mpl_toolkits.axes_grid1 import make_axes_locatable

plt.rcParams["figure.figsize"] = [7.50, 3.50]
plt.rcParams["figure.autolayout"] = True
plt.rcParams['animation.ffmpeg_path'] = 'ffmpeg'

fig = plt.figure()
ax = fig.add_subplot(111)
div = make_axes_locatable(ax)
cax = div.append_axes('right', '5%', '5%')
data = np.random.rand(5, 5)
im = ax.imshow(data)
cb = fig.colorbar(im, cax=cax)
tx = ax.set_title('Frame 0')

cmap = ["copper", 'RdBu_r', 'Oranges', 'cividis', 'hot', 'plasma']

def animate(i):
   cax.cla()
   data = np.random.rand(5, 5)
   im = ax.imshow(data, cmap=cmap[i%len(cmap)])
   fig.colorbar(im, cax=cax)
   tx.set_text('Frame {0}'.format(i))

ani = animation.FuncAnimation(fig, animate, frames=10)
FFwriter = animation.FFMpegWriter()
ani.save('plot.mp4', writer=FFwriter)
輸出
執行以上程式碼後,您將獲得以下輸出:
