- Android 基礎
- Android - 首頁
- Android - 概述
- Android - 環境設定
- Android - 架構
- Android - 應用程式元件
- Android - Hello World 示例
- Android - 資源
- Android - 活動
- Android - 服務
- Android - 廣播接收器
- Android - 內容提供程式
- Android - 碎片
- Android - 意圖/過濾器
- Android - 使用者介面
- Android - UI 佈局
- Android - UI 控制元件
- Android - 事件處理
- Android - 樣式和主題
- Android - 自定義元件
- Android 高階概念
- Android - 拖放
- Android - 通知
- 基於位置的服務
- Android - 傳送電子郵件
- Android - 傳送簡訊
- Android - 電話呼叫
- 釋出 Android 應用程式
- Android 有用示例
- Android - 警報對話方塊
- Android - 動畫
- Android - 音訊捕獲
- Android - 音訊管理器
- Android - 自動完成
- Android - 最佳實踐
- Android - 藍牙
- Android - 相機
- Android - 剪貼簿
- Android - 自定義字型
- Android - 資料備份
- Android - 開發者工具
- Android - 模擬器
- Android - Facebook 整合
- Android - 手勢
- Android - Google 地圖
- Android - 影像效果
- Android - ImageSwitcher
- Android - 內部儲存
- Android - JetPlayer
- Android - JSON 解析器
- Android - Linkedin 整合
- Android - 載入微調器
- Android - 本地化
- Android - 登入螢幕
- Android - MediaPlayer
- Android - 多點觸控
- Android - 導航
- Android - 網路連線
- Android - NFC 指南
- Android - PHP/MySQL
- Android - 進度圓圈
- Android - 進度條
- Android - 推送通知
- Android - RenderScript
- Android - RSS 閱讀器
- Android - 螢幕錄製
- Android - SDK 管理器
- Android - 感測器
- Android - 會話管理
- Android - 共享首選項
- Android - SIP 協議
- Android - 拼寫檢查器
- Android - SQLite 資料庫
- Android - 支援庫
- Android - 測試
- Android - 文字轉語音
- Android - TextureView
- Android - Twitter 整合
- Android - UI 設計
- Android - UI 模式
- Android - UI 測試
- Android - WebView 佈局
- Android - Wi-Fi
- Android - 小部件
- Android - XML 解析器
- Android 有用資源
- Android - 問答
- Android - 有用資源
- Android - 討論
Android - 拖放
Android 拖放框架允許使用者使用圖形拖放手勢將資料從當前佈局中的一個檢視移動到另一個檢視。從API 11開始,支援將檢視拖放到其他檢視或檢視組上。框架包括以下三個重要元件來支援拖放功能:
拖動事件類.
拖動偵聽器.
輔助方法和類.
拖放過程
拖放過程中基本上有四個步驟或狀態:
開始 - 當您開始在佈局中拖動專案時,您的應用程式會呼叫startDrag()方法來告訴系統開始拖動。startDrag()方法內的引數提供了要拖動的資料、此資料的元資料以及用於繪製拖動陰影的回撥。
系統首先透過回撥到您的應用程式以獲取拖動陰影來響應。然後它在裝置上顯示拖動陰影。
接下來,系統向當前佈局中所有 View 物件的註冊拖動事件偵聽器傳送一個操作型別為ACTION_DRAG_STARTED的拖動事件。
要繼續接收拖動事件(包括可能的放下事件),拖動事件偵聽器必須返回true,如果拖動事件偵聽器返回false,則它將不會接收當前操作的拖動事件,直到系統傳送一個操作型別為ACTION_DRAG_ENDED的拖動事件。
繼續 - 使用者繼續拖動。系統向拖動點進入的 View 的註冊拖動事件偵聽器傳送 ACTION_DRAG_ENTERED 操作,然後傳送 ACTION_DRAG_LOCATION 操作。偵聽器可以選擇更改其 View 物件的外觀以響應事件,或者可以透過突出顯示其 View 來做出反應。
在使用者將拖動陰影移出 View 的邊界框後,拖動事件偵聽器會接收 ACTION_DRAG_EXITED 操作。
放下 - 使用者在 View 的邊界框內釋放拖動的專案。系統向 View 物件的偵聽器傳送一個操作型別為 ACTION_DROP 的拖動事件。
結束 - 緊隨操作型別 ACTION_DROP 之後,系統會發送一個操作型別為 ACTION_DRAG_ENDED 的拖動事件,以指示拖動操作已結束。
DragEvent 類
DragEvent表示在拖放操作期間系統在不同時間發出的事件。此類提供了一些常量和重要方法,我們在拖放過程中使用這些方法。
常量
以下是作為 DragEvent 類一部分提供的所有常量整數。
| 序號 | 常量和描述 |
|---|---|
| 1 |
ACTION_DRAG_STARTED 表示拖放操作的開始。 |
| 2 |
ACTION_DRAG_ENTERED 向 View 發出訊號,表示拖動點已進入 View 的邊界框。 |
| 3 | ACTION_DRAG_LOCATION 如果拖動陰影仍在 View 物件的邊界框內,則在 ACTION_DRAG_ENTERED 之後傳送到 View。 |
| 4 | ACTION_DRAG_EXITED 表示使用者已將拖動陰影移出 View 的邊界框。 |
| 5 | ACTION_DROP 向 View 發出訊號,表示使用者已釋放拖動陰影,並且拖動點位於 View 的邊界框內。 |
| 6 |
ACTION_DRAG_ENDED 向 View 發出訊號,表示拖放操作已結束。 |
方法
以下是作為 DragEvent 類一部分提供的一些重要且最常用的方法。
| 序號 | 常量和描述 |
|---|---|
| 1 | int getAction() 檢查此事件的操作值。 |
| 2 | ClipData getClipData() 返回作為對 startDrag() 的呼叫的部分發送到系統的 ClipData 物件。 |
| 3 |
ClipDescription getClipDescription() 返回 ClipData 中包含的 ClipDescription 物件。 |
| 4 |
boolean getResult() 返回拖放操作結果的指示。 |
| 5 |
float getX() 獲取拖動點的 X 座標。 |
| 6 | float getY() 獲取拖動點的 Y 座標。 |
| 7 | String toString() 返回此 DragEvent 物件的字串表示形式。 |
偵聽拖動事件
如果希望佈局中的任何檢視都應該響應拖動事件,則您的檢視要麼實現View.OnDragListener,要麼設定onDragEvent(DragEvent)回撥方法。當系統呼叫方法或偵聽器時,它會將上面解釋的 DragEvent 物件傳遞給它們。您可以為 View 物件同時擁有偵聽器和回撥方法。如果發生這種情況,系統首先呼叫偵聽器,然後定義回撥,只要偵聽器返回 true。
onDragEvent(DragEvent)方法和View.OnDragListener的組合類似於在舊版本的 Android 中與觸控事件一起使用的onTouchEvent()和View.OnTouchListener的組合。
開始拖動事件
您首先要為要移動的資料建立一個ClipData和ClipData.Item。作為ClipData物件的一部分,提供儲存在ClipDescription物件中的元資料(位於 ClipData 中)。對於不代表資料移動的拖放操作,您可能希望使用null而不是實際物件。
接下來,您可以擴充套件View.DragShadowBuilder來為拖動檢視建立拖動陰影,或者只需使用View.DragShadowBuilder(View)來建立一個預設的拖動陰影,該陰影與傳遞給它的 View 引數大小相同,觸控點位於拖動陰影的中心。
示例
以下示例展示了使用View.setOnLongClickListener()、View.setOnTouchListener()和View.OnDragEventListener()進行簡單拖放的功能。
| 步驟 | 描述 |
|---|---|
| 1 | 您將使用 Android Studio IDE 建立一個 Android 應用程式,並將其命名為My Application,放在包com.example.saira_000.myapplication下。 |
| 2 | 修改src/MainActivity.java檔案,並新增程式碼以定義事件偵聽器以及對示例中使用的徽標影像的回撥方法。 |
| 3 | 將影像 abc.png 複製到res/drawable-*資料夾中。如果您想為不同的裝置提供不同的解析度,則可以使用不同解析度的影像。 |
| 4 | 修改佈局 XML 檔案res/layout/activity_main.xml以定義徽標影像的預設檢視。 |
| 5 | 執行應用程式以啟動 Android 模擬器並驗證對應用程式所做的更改的結果。 |
以下是修改後的主活動檔案src/MainActivity.java的內容。此檔案可以包含每個基本生命週期方法。
package com.example.saira_000.myapplication;

import android.app.Activity;

import android.content.ClipData;
import android.content.ClipDescription;

import android.support.v7.app.ActionBarActivity;
import android.os.Bundle;
import android.util.Log;

import android.view.DragEvent;
import android.view.Menu;
import android.view.MenuItem;
import android.view.MotionEvent;
import android.view.View;

import android.widget.ImageView;
import android.widget.RelativeLayout;


public class MainActivity extends Activity {
   ImageView img;
   String msg;
   private android.widget.RelativeLayout.LayoutParams layoutParams;

   @Override
   protected void onCreate(Bundle savedInstanceState) {
      super.onCreate(savedInstanceState);
      setContentView(R.layout.activity_main);
      img=(ImageView)findViewById(R.id.imageView);

      img.setOnLongClickListener(new View.OnLongClickListener() {
         @Override
         public boolean onLongClick(View v) {
            ClipData.Item item = new ClipData.Item((CharSequence)v.getTag());
            String[] mimeTypes = {ClipDescription.MIMETYPE_TEXT_PLAIN};

            ClipData dragData = new ClipData(v.getTag().toString(),mimeTypes, item);
            View.DragShadowBuilder myShadow = new View.DragShadowBuilder(img);

            v.startDrag(dragData,myShadow,null,0);
            return true;
         }
      });

      img.setOnDragListener(new View.OnDragListener() {
         @Override
         public boolean onDrag(View v, DragEvent event) {
            switch(event.getAction()) {
               case DragEvent.ACTION_DRAG_STARTED:
               layoutParams = (RelativeLayout.LayoutParams)v.getLayoutParams();
               Log.d(msg, "Action is DragEvent.ACTION_DRAG_STARTED");

               // Do nothing
               break;

               case DragEvent.ACTION_DRAG_ENTERED:
               Log.d(msg, "Action is DragEvent.ACTION_DRAG_ENTERED");
               int x_cord = (int) event.getX();
               int y_cord = (int) event.getY();
               break;

               case DragEvent.ACTION_DRAG_EXITED :
               Log.d(msg, "Action is DragEvent.ACTION_DRAG_EXITED");
               x_cord = (int) event.getX();
               y_cord = (int) event.getY();
               layoutParams.leftMargin = x_cord;
               layoutParams.topMargin = y_cord;
               v.setLayoutParams(layoutParams);
               break;

               case DragEvent.ACTION_DRAG_LOCATION  :
               Log.d(msg, "Action is DragEvent.ACTION_DRAG_LOCATION");
               x_cord = (int) event.getX();
               y_cord = (int) event.getY();
               break;

               case DragEvent.ACTION_DRAG_ENDED   :
               Log.d(msg, "Action is DragEvent.ACTION_DRAG_ENDED");

               // Do nothing
               break;

               case DragEvent.ACTION_DROP:
               Log.d(msg, "ACTION_DROP event");

               // Do nothing
               break;
               default: break;
            }
            return true;
         }
      });

      img.setOnTouchListener(new View.OnTouchListener() {
         @Override
         public boolean onTouch(View v, MotionEvent event) {
            if (event.getAction() == MotionEvent.ACTION_DOWN) {
               ClipData data = ClipData.newPlainText("", "");
               View.DragShadowBuilder shadowBuilder = new View.DragShadowBuilder(img);

               img.startDrag(data, shadowBuilder, img, 0);
               img.setVisibility(View.INVISIBLE);
               return true;
            } else {
               return false;
            }
         }
      });
   }
}
res/layout/activity_main.xml檔案的內容如下:
在以下程式碼中,abc 表示 tutorialspoint.com 的徽標。
<RelativeLayout xmlns:android="http://schemas.android.com/apk/res/android"
   xmlns:tools="http://schemas.android.com/tools"
   android:layout_width="match_parent"
   android:layout_height="match_parent"
   android:paddingLeft="@dimen/activity_horizontal_margin"
   android:paddingRight="@dimen/activity_horizontal_margin"
   android:paddingTop="@dimen/activity_vertical_margin"
   android:paddingBottom="@dimen/activity_vertical_margin"
   tools:context=".MainActivity">

   <TextView
      android:layout_width="wrap_content"
      android:layout_height="wrap_content"
      android:text="Drag and Drop Example"
      android:id="@+id/textView"
      android:layout_alignParentTop="true"
      android:layout_centerHorizontal="true"
      android:textSize="30dp" />

   <TextView
      android:layout_width="wrap_content"
      android:layout_height="wrap_content"
      android:text="Tutorials Point"
      android:id="@+id/textView2"
      android:layout_below="@+id/textView"
      android:layout_centerHorizontal="true"
      android:textSize="30dp"
      android:textColor="#ff14be3c" />>

   <ImageView
      android:layout_width="wrap_content"
      android:layout_height="wrap_content"
      android:id="@+id/imageView"
      android:src="@drawable/abc"
      android:layout_below="@+id/textView2"
      android:layout_alignRight="@+id/textView2"
      android:layout_alignEnd="@+id/textView2"
      android:layout_alignLeft="@+id/textView2"
      android:layout_alignStart="@+id/textView2" />

</RelativeLayout>
res/values/strings.xml的內容將如下所示,以定義兩個新常量:
<?xml version="1.0" encoding="utf-8"?>
<resources>
   <string name="app_name">My Application</string>
</resources>
AndroidManifest.xml的預設內容如下:
<?xml version="1.0" encoding="utf-8"?>
<manifest xmlns:android="http://schemas.android.com/apk/res/android"
   package="com.example.saira_000.myapplication" >

   <application
      android:allowBackup="true"
      android:icon="@drawable/ic_launcher"
      android:label="@string/app_name"
      android:theme="@style/AppTheme" >

      <activity
         android:name=".MainActivity"
         android:label="@string/app_name" >

         <intent-filter>
            <action android:name="android.intent.action.MAIN" />
            <category android:name="android.intent.category.LAUNCHER" />
         </intent-filter>

      </activity>

   </application>
</manifest>
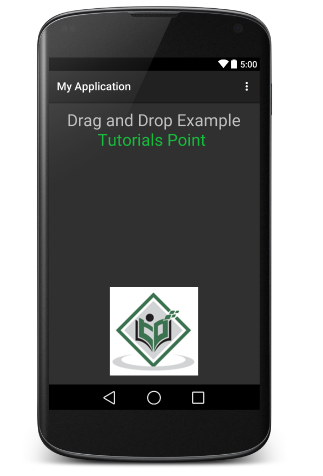
讓我們嘗試執行您的My Application應用程式。我假設您在進行環境設定時已建立了您的AVD。要從Android Studio執行應用程式,請開啟專案中的一個Activity檔案,然後點選工具欄中的執行 圖示。Android Studio會將應用程式安裝到您的AVD上並啟動它,如果您的設定和應用程式一切正常,它將顯示以下模擬器視窗:

現在,長按顯示的TutorialsPoint徽標,您會看到徽標影像在長按1秒後稍微移動,這時您應該開始拖動影像。您可以將其拖動到螢幕周圍,並將其放置在新位置。