- Google AMP 教程
- Google AMP - 首頁
- Google AMP - 概覽
- Google AMP - 簡介
- Google AMP - 圖片
- Google AMP - 表單
- Google AMP - Iframes
- Google AMP - 影片
- Google AMP - 按鈕
- Google AMP - Timeago
- Google AMP - Mathml
- Google AMP - 適應文字
- Google AMP - 日期倒計時
- Google AMP - 日期選擇器
- Google AMP - 故事
- Google AMP - 選擇器
- Google AMP - 連結
- Google AMP - 字型
- Google AMP - 列表
- Google AMP - 使用者通知
- Google AMP - 下一頁
- Google AMP - 屬性
- 樣式和自定義 CSS
- Google AMP - 動態 CSS 類
- Google AMP - 操作和事件
- Google AMP - 動畫
- Google AMP - 資料繫結
- Google AMP - 佈局
- Google AMP - 廣告
- Google AMP - 分析
- Google AMP - 社交小部件
- Google AMP - 媒體
- HTML 頁面到 AMP 頁面
- Google AMP - 基本語法
- Google AMP - 驗證
- Google AMP - 快取
- Google AMP - 自定義 JavaScript
- Google AMP - CORS
- Google AMP 有用資源
- Google AMP - 快速指南
- Google AMP - 有用資源
- Google AMP - 討論
Google AMP - 故事
amp-story 是一個 amp 元件,用於顯示內容,讓使用者參與到故事中。例如,使用一系列圖片講述一個品牌的的故事。
要使用 amp-story,我們需要包含如下所示的指令碼:
<script async custom-element = "amp-story"
   src = "https://cdn.ampproject.org/v0/amp-story-1.0.js">
</script>
在本章中,讓我們瞭解什麼是 amp-story 以及它是如何工作的。假設我們有一個圖片庫,並希望在頁面上顯示它。在 amp 頁面中,我們可以使用 amp-story 元件使它對使用者看起來更美觀和互動。
amp-story 標籤的格式如下所示:
<amp-story standalone> ---> Main story Tag
   <amp-story-page id = "page-1"> ---> Pages inside the story e.g page1
      <amp-story-grid-layer template = "fill"> -->
         Layers for the page1.You can have more than one layer.
         //Add html elements here or amp components
      </amp-story-grid-layer>
      <amp-story-grid-layer template = "fill"> -->
         Layers for the page1.You can have more than one layer.
         //Add html elements here or amp components
      </amp-story-grid-layer>
      ...
   </amp-story-page>

   <amp-story-page id = "page-2"> ---> Pages inside the story e.g page2
      <amp-story-grid-layer template = "fill"> -->
         Layers for the page2.You can have more than one layer.
         //Add html elements here or amp components
      </amp-story-grid-layer>
      ...
   </amp-story-page>
   ...
</amp-story>
amp-story 還有一些額外的屬性,如下所示:
<amp-story standalone title = "My Story"
   publisher = "The AMP Team"
   publisher-logo-src = "publisherlogo image here"
   poster-portrait-src = "poster portrait here"
   poster-square-src = "poster square image here"
   poster-landscape-src = "poster landscape image here">
此功能使使用 amp 講故事變得非常互動。
以下程式碼顯示了 amp-story 的一個工作示例。桌面和移動模式下的輸出也顯示了出來。
示例
<!doctype html>
<html amp lang = "en">
   <head>
      <meta charset = "utf-8">
      <script async src = "https://cdn.ampproject.org/v0.js"></script>
      <script async custom-element = "amp-story" src = "https://cdn.ampproject.org/v0/amp-story-1.0.js"></script>
      <title>Google AMP - Story</title>
      <meta name = "viewport" content = "width = device-width,minimum-scale = 1,initial-scale=1">
      <link rel = "canonical" href = "/stories/introduction/amp_story_hello_world/">

      <style amp-boilerplate>
         body{
            -webkit-animation:
            -amp-start 8s steps(1,end) 0s 1 normal both;-moz-animation:
            -amp-start 8s steps(1,end) 0s 1 normal both;-ms-animation:
            -amp-start 8s steps(1,end) 0s 1 normal both;animation:
            -amp-start 8s steps(1,end) 0s 1 normal both
         }
         @-webkit-keyframes
         -amp-start{from{visibility:hidden}to{visibility:visible}}@-moz-keyframes
         -amp-start{from{visibility:hidden}to{visibility:visible}}@-ms-keyframes
         -amp-start{from{visibility:hidden}to{visibility:visible}}@-o-keyframes
         -amp-start{from{visibility:hidden}to{visibility:visible}}@keyframes
         -amp-start{from{visibility:hidden}to{visibility:visible}}
      </style>

      <noscript>
         <style amp-boilerplate>
            body{
               -webkit-animation:
               none;-moz-animation:none;
               -ms-animation:none;
               animation:none}
         </style>
      </noscript>

      <style amp-custom>
         amp-story {
            font-family: Roboto, Helvetica, Arial, sans-serif;
         }
         amp-story-page * {
            color: white;
            text-align: center;
         }
      </style>
   </head>
   <body>
      <amp-story standalone title = "Stories in AMP - Hello World" publisher = "AMP Project">
         <amp-story-page id = "page-1">
            <amp-story-grid-layer template = "fill">
               <amp-img src = "images/christmas1.jpg"
                  width = "300" height = "250"
                  layout = "responsive">
               </amp-img>
            </amp-story-grid-layer>
               <amp-story-grid-layer template = "vertical">
                  <h1>Hello World</h1>
                  <p>This is an AMP Story.</p>
               </amp-story-grid-layer>
            </amp-story-page>

            <amp-story-page id = "page-2">
               <amp-story-grid-layer template = "fill">
                  <amp-img src = "images/christmas5.jpg"
                     width = "300" height = "250"
                     layout = "responsive">
                  </amp-img>
               </amp-story-grid-layer>
               <amp-story-grid-layer template = "vertical">
                  <h1>Hello World</h1>
                  <p>This is an AMP Story.</p>
               </amp-story-grid-layer>
            </amp-story-page>

            <amp-story-page id = "page-3">
               <amp-story-grid-layer template = "fill">
                  <amp-img src = "images/christmas3.jpg"
                     width = "300" height = "250"
                     layout = "responsive">
                  </amp-img>
               </amp-story-grid-layer>
               <amp-story-grid-layer template = "vertical">
                  <h1>Hello World</h1>
                  <p>This is an AMP Story.</p>
               </amp-story-grid-layer>
            </amp-story-page>

            <amp-story-page id = "page-4">
               <amp-story-grid-layer template = "fill">
                  <amp-img src = "images/christmas4.jpg"
                     width = "300" height="250"
                     layout = "responsive">
                  </amp-img>
               </amp-story-grid-layer>
               <amp-story-grid-layer template = "vertical">
                  <h1>Hello World</h1>
                  <p>This is an AMP Story.</p>
              </amp-story-grid-layer>
            </amp-story-page>

            <amp-story-bookend src = "ampstory.json" layout = "nodisplay">
         </amp-story-bookend>
      </amp-story>
   <body>
</html>
ampstory.json
{
   "bookendVersion": "v1.0",
   "shareProviders": [
      "email",
      "twitter",
      "tumblr",
      {
         "provider": "facebook",
         "app_id": "254325784911610"
      }
   ],
      "components": [
      {
         "type": "heading",
         "text": "Introduction"
      },
      {
         "type": "small",
         "title": "Next Story is on Car Brands",
         "url": "ampcarbrand.html",
         "image": "images/audi.jpg"
      }
   ]
}
桌面輸出
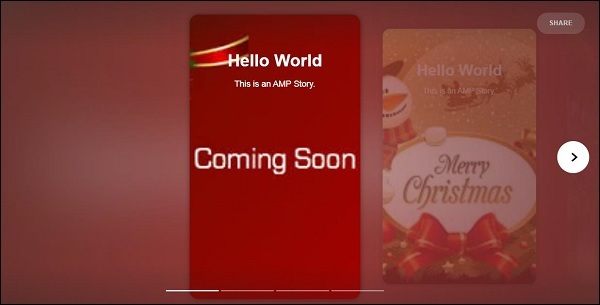

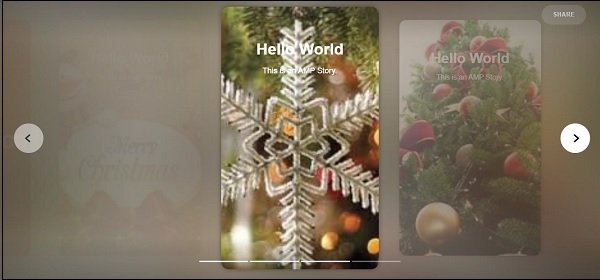
這就是故事部分的顯示方式。您還可以新增影片或任何其他 amp 元件,使故事更具互動性。
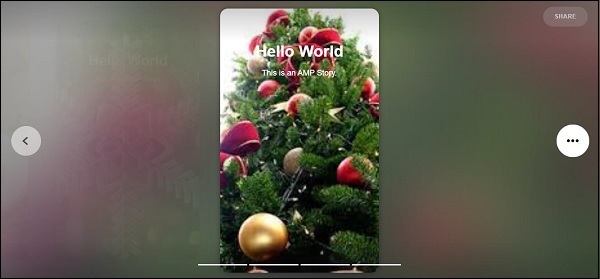
到達故事結尾時,它將顯示 amp-bookend 中給出的內容,如下所示:
<amp-story-bookend
   src = "ampstory.json" layout = "nodisplay">
</amp-story-bookend>
我們向 amp-bookend 提供了一個 ampstory.json 檔案。json 檔案包含下一個故事預覽的詳細資訊,如下所示。當用戶點選右側顯示的三個點時,將顯示以下螢幕:

它提供了一個重播按鈕,該按鈕將重新載入故事。您可以點選汽車的圖片,它將顯示汽車品牌的 故事。
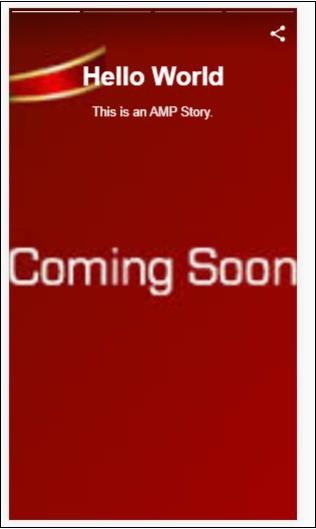
移動模式下的輸出如下所示:


廣告