- Google AMP 教程
- Google AMP - 首頁
- Google AMP - 概述
- Google AMP - 簡介
- Google AMP - 圖片
- Google AMP - 表單
- Google AMP - 內嵌框架
- Google AMP - 影片
- Google AMP - 按鈕
- Google AMP - Timeago
- Google AMP - Mathml
- Google AMP - 適應文字
- Google AMP - 日期倒計時
- Google AMP - 日期選擇器
- Google AMP - 故事
- Google AMP - 選擇器
- Google AMP - 連結
- Google AMP - 字型
- Google AMP - 列表
- Google AMP - 使用者通知
- Google AMP - 下一頁
- Google AMP - 屬性
- 樣式和自定義 CSS
- Google AMP - 動態 CSS 類
- Google AMP - 操作和事件
- Google AMP - 動畫
- Google AMP - 資料繫結
- Google AMP - 佈局
- Google AMP - 廣告
- Google AMP - 分析
- Google AMP - 社交小部件
- Google AMP - 媒體
- HTML 頁面轉換為 AMP 頁面
- Google AMP - 基本語法
- Google AMP - 驗證
- Google AMP - 快取
- Google AMP - 自定義 JavaScript
- Google AMP - CORS
- Google AMP 有用資源
- Google AMP - 快速指南
- Google AMP - 有用資源
- Google AMP - 討論
Google AMP - HTML 頁面轉換為 AMP 頁面
在本節中,我們將瞭解如何將一個普通的 HTML 頁面轉換為 AMP 頁面。我們還將驗證 AMP 頁面,並在最後檢查輸出。
首先,讓我們以下面的普通 HTML 頁面為例:
test.html
<!DOCTYPE html>
<html>
   <head>
      <meta charset = "utf-8">
      <title>Tutorials</title>
      <link href = "style.css" rel = "stylesheet" />
      <meta name = "viewport" content = "width = device-width, initial-scale = 1.0">
      <script src = "js/jquery.js"></script>
   </head>
   <body>
      <header role = "banner">
         <h2>Tutorials</h2>
      </header>
      <h2>Some Important Tutorials List</h2>
      <article>
         <section>
            <img src = "images/tut1.png" width="90%" height = "90%"/>
         </section>
         <section>
            <img src = "images/tut2.png" width="90%" height = "90%"/>
         </section>
         <section>
            <img src = "images/tut3.png" width="90%" height = "90%"/>
         </section>
         <section>
            <img src = "images/tut4.png" width="90%" height = "90%"/>
         </section>
      </article>
      <footer>
         <p>For More tutorials Visit <a href =
         "https://tutorialspoint.tw/">Tutorials Point</a></p>
      </footer>
   </body>
</html>
請注意,我們在其中使用了 style.css,並且 CSS 檔案的詳細資訊如下所示:
h1 {color: blue;text-align: center;}
   h2 {text-align: center;}
      img {
         border: 1px solid #ddd;
         border-radius: 4px;
         padding: 5px;
      }
      article {
         text-align: center;
      }
      header{
         width: 100%;
         height: 50px;
         margin: 5px auto;
         border: 1px solid #000000;
         text-align: center;
         background-color: #ccc;
      }
      footer {
         width: 100%;
         height: 35px;
         margin: 5px auto;
         border: 1px solid #000000;
         text-align: center;
         background-color: yellow;
      }
請注意,我們還在上面列出的 .html 中使用了 jquery.js 檔案。
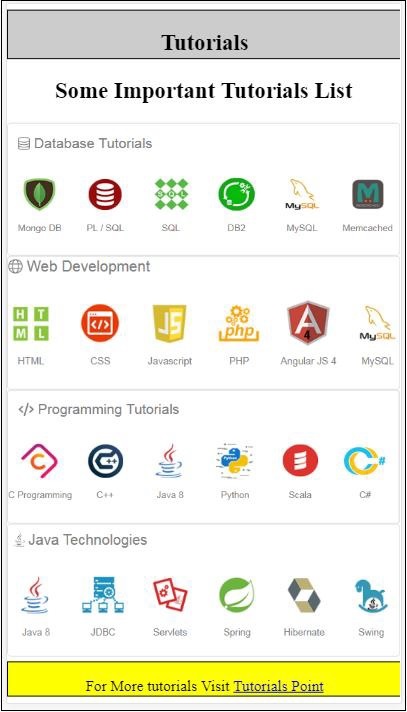
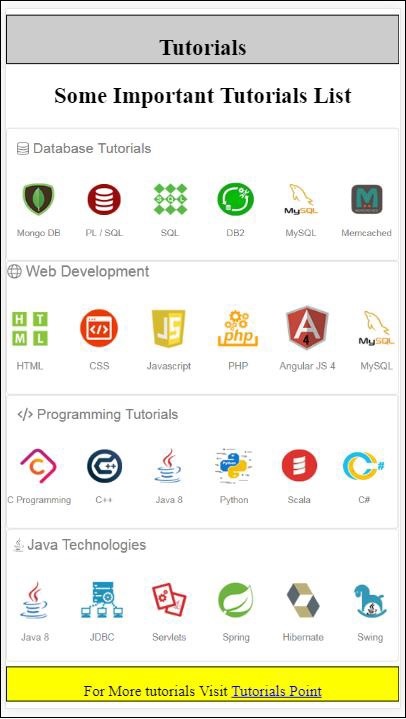
現在,在本地主機 test.html 並檢視此處提供的連結中顯示的輸出:
https://:8080/googleamp/test.html

現在,讓我們一步一步地將上面的 test.html 檔案更改為 test_amp.html 檔案。
首先,我們必須將 test.html 儲存為 test_amp.html 並按照以下步驟操作。
步驟 1 - 在頭部部分新增 AMP 庫,如下所示:
<script async src = "https://cdn.ampproject.org/v0.js">
</script>
例如,一旦新增到 test_amp.html 中,它將如下所示:
<head>
   <meta charset = "utf-8">
   <title>Tutorials</title>
   <script async src = "https://cdn.ampproject.org/v0.js">
   </script>
   <link href = "style.css" rel = "stylesheet" />
   <meta name = "viewport" content = "width = device-width, initial-scale = 1.0">
      <script src = "js/jquery.js"></script>
</head>
現在在瀏覽器中執行 test_amp.html 頁面並開啟瀏覽器控制檯。它將顯示如下所示的控制檯訊息:

要了解您的 HTML 檔案是否為有效的 AMP,請在 HTML 頁面 URL 末尾新增 #development=1,如下所示:
https://:8080/googleamp/test_amp.html#development=1
在瀏覽器和 Google Chrome 控制檯中點選上述 URL。它會列出 AMP 認為從 AMP 規範角度來看無效的錯誤。
我們為 test_amp.html 獲取的錯誤如下所示:
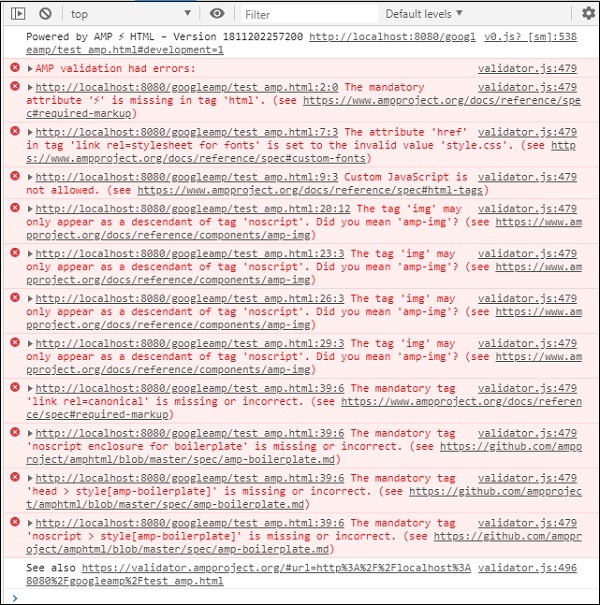
現在讓我們一個接一個地修復它們,直到我們收到 AMP 成功訊息。
步驟 2 - 我們可以在控制檯中看到以下錯誤:

我們可以透過為 HTML 標籤新增 ⚡ 或 amp 來修復它。我們將如下所示將 amp 新增到 HTML 標籤中:
<html amp>
步驟 3 - 請確保在頭部標籤中包含帶有字元集和 name="viewport" 的元標籤,如下所示:
<head>
   <meta charset = "utf-8">
   <meta name = "viewport" content = "width = device-width, initial-scale = 1.0">
</head>
步驟 4 - 我們遇到的下一個錯誤如下所示:

它表示 link rel=stylesheet 中的 href,即以下連結引發錯誤。這是因為 AMP 不允許將使用帶有 href 的 link 的外部樣式表放在頁面內。
<link href = "style.css" rel = "stylesheet" />
We can add the all the css in style.css as follows −
<style amp-custom>
   /*All styles from style.css please add here */
</style>
因此,style.css 中存在的 CSS 資料必須新增到具有 amp-custom 屬性的 style 中。
<style amp-custom>
   h1 {color: blue;text-align: center;}
   h2 {text-align: center;}
      img {
         border: 1px solid #ddd;
         border-radius: 4px;
         padding: 5px;
      }
      article {
         text-align: center;
      }
      header{
         width: 100%;
         height: 50px;
         margin: 5px auto;
         border: 1px solid #000000;
         text-align: center;
         background-color: #ccc;
      }
      footer {
         width: 100%;
         height: 35px;
         margin: 5px auto;
         border: 1px solid #000000;
         text-align: center;
         background-color: yellow;
      }
</style>
將 style 標籤新增到您的 AMP 頁面。現在讓我們在瀏覽器中使用上面的 style 標籤測試它。我們迄今為止對 test_amp.html 所做的更改如下所示:
<!DOCTYPE html>
<html amp>
   <head>
      <meta charset = "utf-8">
      <title>Tutorials</title>
      <script async src = "https://cdn.ampproject.org/v0.js">
      </script>
      <meta name = "viewport" content = "width = device-width, initial-scale = 1.0">
      <script src = "js/jquery.js"></script>
      <style amp-custom>
         h1 {color: blue;text-align: center;}
         h2 {text-align: center;}
            img {
               border: 1px solid #ddd;
               border-radius: 4px;
               padding: 5px;
            }

            article {
               text-align: center;
            }
            header{
               width: 100%;
               height: 50px;
               margin: 5px auto;
               border: 1px solid #000000;
               text-align: center;
               background-color: #ccc;
            }
            footer {
               width: 100%;
               height: 35px;
               margin: 5px auto;
               border: 1px solid #000000;
               text-align: center;
               background-color: yellow;
            }
      </style>
   </head>
   <body>
      <header role = "banner">
         <h2>Tutorials</h2>
      </header>
      <h2>Some Important Tutorials List</h2>
      <article>
         <section>
            <img src = "images/tut1.png" width = "90%" height = "90%"/>
         </section>
         <section>
            <img src = "images/tut2.png" width = "90%" height = "90%"/>
         </section>
         <section>
            <img src = "images/tut3.png" width = "90%" height = "90%"/>
         </section>
         <section>
            <img src = "images/tut4.png" width="90%" height = "90%"/>
         </section>
      </article>
      <footer>
         <p>For More tutorials Visit <a href =
         "https://tutorialspoint.tw/">Tutorials Point</a></p>
      </footer>
   </body>
</html>
讓我們檢視上面頁面的輸出和控制檯中的錯誤。觀察以下螢幕截圖:

控制檯中顯示的錯誤如下:

現在,您可以看到,對於某些 AMP 錯誤,樣式已刪除。現在讓我們修復其餘的錯誤。
步驟 5 - 我們在列表中看到的下一個錯誤如下:

我們添加了呼叫 jquery 檔案的 script 標籤。請注意,AMP 頁面不允許在頁面中使用任何自定義 JavaScript。我們必須將其刪除,並確保使用可用的 amp-component。
例如,如果需要任何動畫,我們有 amp-animation,如果要將 Google Analytics 程式碼新增到頁面,則有 amp-analytics。類似地,我們有 amp-ad 元件來顯示要在頁面上顯示的廣告。還有一個 amp-iframe 元件,我們可以將其 src 指向相同來源,並在需要時在 amp-iframe 中呼叫任何自定義 JavaScript。
現在,讓我們從頁面中刪除 script 標籤。
步驟 6 - 顯示的下一個錯誤如下:

上述錯誤指向我們在頁面上使用的 image 標籤。AMP 不允許在頁面內使用 <img src="" /> 標籤。請注意,我們需要使用 amp-img 標籤代替。
讓我們用 <amp-img> 替換 <img> 標籤,如下所示:
<section>
   <amp-img alt = "Beautiful Flower"
      src = "images/tut1.png"
      width = "500"
      height = "160"
      layout = "responsive">
   </amp-img>
</section>
<section>
   <amp-img alt = "Beautiful Flower"
      src = "images/tut2.png"
      width = "500"
      height = "160"
      layout = "responsive">
   </amp-img>
</section>
<section>
   <amp-img alt = "Beautiful Flower"
      src = "images/tut3.png"
      width = "500"
      height = "160"
      layout = "responsive">
   </amp-img>
</section>
<section>
   <amp-img alt = "Beautiful Flower"
      src = "images/tut4.png"
      width = "500"
      height = "160"
      layout = "responsive">
   </amp-img>
</section>
我們已將所有 <img> 標籤替換為 <amp-img>,如上所示。現在,讓我們在瀏覽器中執行該頁面以檢視輸出和錯誤:
錯誤

觀察到錯誤現在越來越少了。
步驟 7 - 控制檯中顯示的下一個錯誤如下:

我們需要在頭部部分新增 link rel=canonical 標籤。請注意,這是一個必需標籤,應始終在頭部新增,如下所示:
<link rel = "canonical" href =
   "http://example.ampproject.org/article-metadata.html">
步驟 8 - 控制檯中顯示的下一個錯誤是缺少noscript 標籤,如下所示:

我們需要在頭部部分新增用 amp-boilerplate 括起來的 <noscript> 標籤,如下所示:
<noscript>
   <style amp-boilerplate>
      body{
         -webkit-animation:none;
         -moz-animation:none;
         -ms-animation:none;
         animation:none}
   </style>
</noscript>
步驟 9 - 顯示的下一個錯誤如下:

另一個必需標籤是帶有 amp-boilerplate 的 style 標籤,並且必須放在 noscript 標籤之前。帶有 amp-boilerplate 的 style 標籤如下所示:
<style amp-boilerplate>
   body{
      -webkit-animation:
      -amp-start 8s steps(1,end) 0s 1 normal both;-moz-animation:
      -amp-start 8s steps(1,end) 0s 1 normal both;-ms-animation:
      -amp-start 8s steps(1,end) 0s 1 normal both;animation:
      -amp-start 8s steps(1,end) 0s 1 normal both
   }
   @-webkit-keyframes
   -amp-start{from{visibility:hidden}to{visibility:visible}}@-moz-keyframes
   -amp-start{from{visibility:hidden}to{visibility:visible}}@-ms-keyframes
   -amp-start{from{visibility:hidden}to{visibility:visible}}@-o-keyframes
   -amp-start{from{visibility:hidden}to{visibility:visible}}@keyframes
   -amp-start{from{visibility:hidden}to{visibility:visible}}
</style>
將上述 style 標籤新增到 test_amp.html 頁面。
完成後,在瀏覽器中測試頁面以檢視輸出和控制檯:
控制檯詳細資訊如下所示:
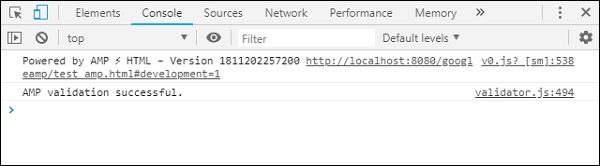
因此,我們最終解決了所有錯誤,現在 test_amp.html 頁面是一個有效的 AMP 頁面。
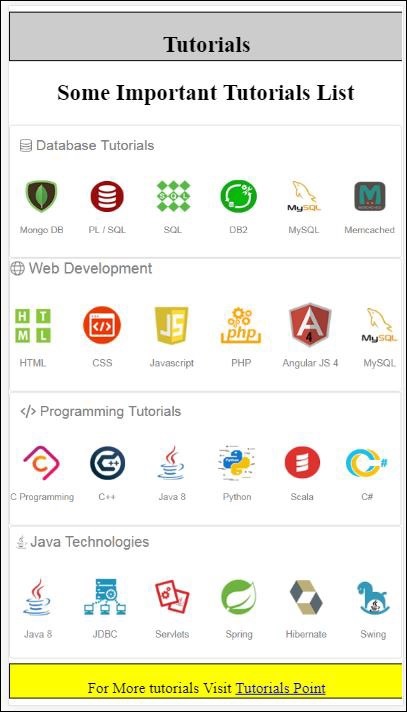
需要新增一些樣式,因為標題和頁尾被截斷了,我們可以在我們新增的自定義樣式中更新它。因此,我們從標題和頁尾中刪除了 width:100%。
以下是最終輸出:
最終 test_amp.html 檔案
<!DOCTYPE html>
<html amp>
   <head>
      <meta charset = "utf-8">
      <title>Tutorials</title>
      <link rel = "canonical" href=
      "http://example.ampproject.org/article-metadata.html">
      <script async src = "https://cdn.ampproject.org/v0.js">
      </script>
      <meta name = "viewport" content = "width = device-width,
      initial-scale = 1.0">

      <style amp-boilerplate>
         body{
            -webkit-animation:
            -amp-start 8s steps(1,end) 0s 1 normal both;-moz-animation:
            -amp-start 8s steps(1,end) 0s 1 normal both;-ms-animation:
            -amp-start 8s steps(1,end) 0s 1 normal both;animation:
            -amp-start 8s steps(1,end) 0s 1 normal both
         }
         @-webkit-keyframes
         -amp-start{from{visibility:hidden}to{visibility:visible}}@-moz-keyframes
         -amp-start{from{visibility:hidden}to{visibility:visible}}@-ms-keyframes
         -amp-start{from{visibility:hidden}to{visibility:visible}}@-o-keyframes
         -amp-start{from{visibility:hidden}to{visibility:visible}}@keyframes
         -amp-start{from{visibility:hidden}to{visibility:visible}}
      </style>
      <noscript>
         <style amp-boilerplate>
            body{
               -webkit-animation:none;
               -moz-animation:none;
               -ms-animation:none;
               animation:none}
         </style>
      </noscript>
      <style amp-custom>
         h1 {color: blue;text-align: center;}
         h2 {text-align: center;}
            amp-img {
               border: 1px solid #ddd;
               border-radius: 4px;
               padding: 5px;
            }
            article {
               text-align: center;
            }
            header{
               height: 50px;
               margin: 5px auto;
               border: 1px solid #000000;
               text-align: center;
               background-color: #ccc;
            }
            footer {
               height: 35px;
               margin: 5px auto;
               border: 1px solid #000000;
               text-align: center;
               background-color: yellow;
            }
      </style>
   </head>
   <body>
      <header role = "banner">
         <h2>Tutorials</h2>
      </header>
      <h2>Some Important Tutorials List</h2>
      <article>
         <section>
            <amp-img
               alt = "Beautiful Flower"
               src = "images/tut1.png"
               width = "500"
               height = "160"
               layout = "responsive">
            </amp-img>
         </section>
         <section>
            <amp-img
               alt = "Beautiful Flower"
               src = "images/tut2.png"
               width = "500"
               height = "160"
               layout = "responsive">
            </amp-img>
         </section>
         <section>
            <amp-img
               alt = "Beautiful Flower"
               src = "images/tut3.png"
               width = "500"
               height = "160"
               layout = "responsive">
            </amp-img>
         </section>
         <section>
            <amp-img
               alt = "Beautiful Flower"
               src = "images/tut4.png"
               width = "500"
               height = "160"
               layout = "responsive">
            </amp-img>
         </section>
      </article>
      <footer>
         <p>For More tutorials Visit <a href =
         "https://tutorialspoint.tw/">
            Tutorials Point</a>
         </p>
      </footer>
   </body>
</html>
因此,我們最終完成了將普通 HTML 檔案轉換為 AMP 的工作。