- Google AMP 教程
- Google AMP - 首頁
- Google AMP - 概覽
- Google AMP - 簡介
- Google AMP - 圖片
- Google AMP - 表單
- Google AMP - Iframes
- Google AMP - 影片
- Google AMP - 按鈕
- Google AMP - Timeago
- Google AMP - Mathml
- Google AMP - Fit Text
- Google AMP - 倒計時
- Google AMP - 日期選擇器
- Google AMP - 故事
- Google AMP - 選擇器
- Google AMP - 連結
- Google AMP - 字型
- Google AMP - 列表
- Google AMP - 使用者通知
- Google AMP - 下一頁
- Google AMP - 屬性
- 樣式和自定義 CSS
- Google AMP - 動態 CSS 類
- Google AMP - 操作和事件
- Google AMP - 動畫
- Google AMP - 資料繫結
- Google AMP - 佈局
- Google AMP - 廣告
- Google AMP - 分析
- Google AMP - 社交小部件
- Google AMP - 媒體
- HTML 頁面到 AMP 頁面
- Google AMP - 基本語法
- Google AMP - 驗證
- Google AMP - 快取
- Google AMP - 自定義 JavaScript
- Google AMP - CORS
- Google AMP 有用資源
- Google AMP 快速指南
- Google AMP - 有用資源
- Google AMP - 討論
Google AMP 快速指南
Google AMP - 概覽
Google Accelerated Mobile Pages (Google-AMP) 是 Google 的一個新的開源專案,專門用於使用 amp html 構建輕量級網頁。該專案的主要目標是確保 amp 程式碼在所有可能的裝置(如智慧手機和平板電腦等)上都能正常工作並快速載入。
什麼是 AMP?
加速移動頁面 (AMP) 是 Google 的一個開源專案,專門設計用於使網頁對移動裝置友好,方法是使其渲染內容更快、更流暢並在任何瀏覽器中響應。
Google amp 的官方網站是 - https://www.ampproject.org/

為什麼選擇 AMP?
任何使用者都希望網站能夠非常快地載入內容。但是,當頁面幾乎充斥著影像、影片、動畫、社交小部件時,情況可能並非如此,這使得頁面非常沉重,從而增加了載入時間。這種情況可能會導致長期使用者流失。
Google AMP 旨在解決此問題。AMP 有一種特殊的方式來處理影像、iframes、javascripts、廣告、影片、動畫、css、字型載入等。AMP 頁面的內容快取在 Google 端,因此每次使用者點選搜尋結果時,內容都會從快取中提供。快取版本也會及時更新,以便使用者始終獲得最新更新的頁面。
為什麼要選擇 AMP?
本節告訴您為什麼必須為您的網站選擇 AMP -
在 Google 搜尋中優先顯示
如今,當您在 Google 上搜索某些內容時,您會發現 Google 旋轉木馬顯示在頂部,其中包含頁面,然後是作為搜尋響應的頁面列表。顯示的新聞旋轉木馬都是有效的 AMP 網站。這意味著 Google 優先考慮 amp 頁面,並根據排名在新聞旋轉木馬中顯示它們。
以下是使用關鍵詞“最新印度新聞”在 Google 中進行搜尋的示例 -
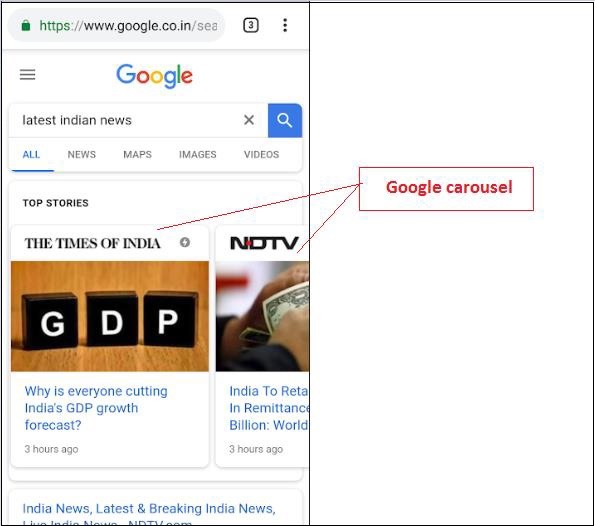
所有排名靠前的 AMP 頁面都顯示在 Google 旋轉木馬的開頭,如上圖所示。
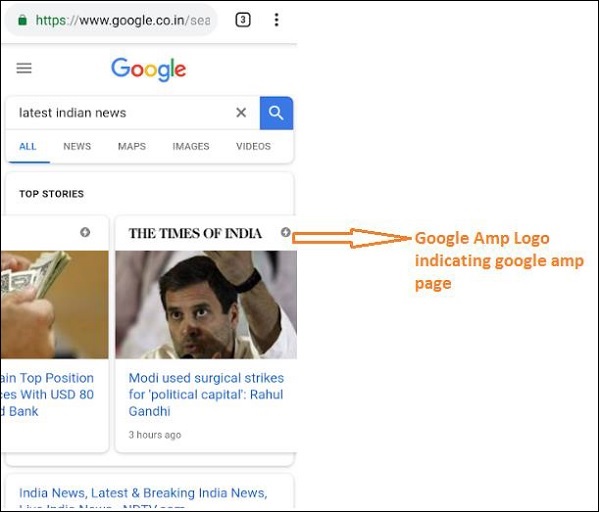
當用戶在 Google 搜尋中搜索某些內容時,Google AMP 頁面如下所示。請注意,AMP 頁面上有一個 Google AMP 徽標。
更快的載入時間
當您的頁面轉換為 AMP 後,與非 amp 頁面相比,載入時間將大大改善。更快的載入時間也是 Google 搜尋中頁面排名的重要因素。
無彈出視窗
使用 Google AMP 提供了愉快的網頁瀏覽體驗,因為使用者不會看到使用 Google AMP 設計的頁面的任何不需要的彈出視窗。
產生流量
當頁面的載入速度快時,它會自動增加觀看者數量,從而增加頁面流量。
AMP 如何工作?
用於構建網站的最重要的元件是 javascript、影像、影片、字型、css 等。AMP 頁面設計是在以獨特的方式處理所有這些因素的情況下完成的。在本節中,讓我們簡要討論 AMP 為使頁面速度更快而做了什麼。
非同步 JavaScript
Javascript 在頁面上起著重要作用,因為它有助於以動畫、DOM 更改等形式為頁面新增互動性。它還會降低頁面速度,並可能阻止頁面上其他內容的渲染。
AMP 如何處理 JavaScript?
AMP 非同步載入 JavaScript。AMP 頁面內嚴格不允許使用自定義 JavaScript。請注意,AMP 添加了許多元件,其中一些元件替換了現有的 html 標籤;例如 amp-img、amp-iframe、amp-video、amp-lightbox、amp-animations 等。
對於每個元件,都有一個要載入的 JavaScript 檔案,該檔案在 script 標籤中添加了 async 屬性。頁面上僅允許與 amp-元件相關的 JavaScript 檔案,並且不允許 AMP 頁面或第三方 javascript 檔案中的任何其他 JavaScript。由於 AMP 使用 Google AMP 快取,因此檔案是從快取中預載入的,從而使載入速度更快。
HTML 標籤的大小
必須為影像、iframe、影片標籤提供大小,以便 amp 頁面可以在不載入資源的情況下找到頁面上的空間。要載入的資源由 amp 頁面優先考慮。內容比要載入的資源具有更高的優先順序。
社交小部件/廣告
Amp 提供了名為 amp-facebook、amp-twitter、amp-ad、amp-sticky 的特殊元件來處理要在頁面上顯示的社交小部件。AMP-ad 元件用於在頁面上投放廣告。AMP 在處理元件方面非常小心,並根據需要優先載入內容。
CSS
AMP 頁面不允許使用外部 CSS。任何自定義 CSS 都可以利用 amp-custom 屬性在 style 標籤內新增。內聯 CSS 也允許。AMP 以各種可能的方式減少了 http 請求。
字型
AMP 頁面允許使用字型,並且字型載入的優先順序由 AMP 決定。
動畫
AMP 支援 amp-animation 元件並允許現代瀏覽器支援的過渡。
考慮到上面列出的所有要點,AMP 對為要提供的字型、影像、iframes、廣告等發出的 HTTP 請求非常小心。頁面摺疊上方的資源首先呈現,然後優先考慮頁面摺疊下方的資源。
其他要點
Google AMP 快取是另一個重要的因素,它有助於更快地呈現內容,因為內容是從快取中獲取的。
釋出者必須維護兩個網站 amp 和非 amp 頁面。例如,假設該網站的地址為 - https://www.mypage.com。然後,內部用於在桌面上提供非 amp 頁面的頁面將是https://www.mypage.com/news。對於裝置或 AMP,它將是https://www.mypage/com/news/amp/
Google 如何識別 AMP 和非 AMP 頁面?
現在,讓我們瞭解 Google 如何識別 AMP 和非 AMP 頁面。
當 Google 搜尋抓取頁面時,如果它碰巧在 html 或 <html amp> 或 <html ⚡> 中獲取 amp,它就知道這是一個 AMP 頁面。
此外,如果 Google 遇到非 amp 頁面,首先要了解 amp 頁面,必須在 amp 和非 amp 頁面的 html 頁面的 head 部分新增以下連結標籤。
非 amp 頁面的頁面 URL
<link rel = "amphtml" href = "https://www.mypage.com/news/amp/myfirstnews_amp.html">
這裡 rel = ”amphtml” 指定用於非 amp 頁面以指向 amp 版本,以便 Google 根據平臺顯示正確的版本。
amp 頁面的頁面 URL
<link rel = "canonical" href = "https://www.mypage.com/news/myfirstnews.html">
這裡 rel = ”canonical” 指定在 amp 頁面中指向 html 的標準版本,以便 Google 根據平臺顯示正確的版本。
如果您的網站只有一個 amp 頁面,您仍然不應該忘記新增 rel = ”canonical”,它將指向自身 -
<link rel = "canonical" href = "https://www.mypage.com/news/amp/myfirstnews_amp.html">
下圖顯示了指向 amp 頁面的 rel=”amphtml” 和指向標準 html 頁面的 rel = ”canonical” 的引用。

Google AMP 的功能
在本節中,讓我們討論 Google AMP 提供的重要功能 -
Amp 快取
Google Amp 快取是新增到 amp 的核心功能之一。它提供了一個基於代理的內容交付網路來提供純 amp 頁面。Amp 快取預設提供給所有有效的 amp 頁面。它有助於與非 amp 頁面相比更快地呈現頁面。目前有兩個 amp 快取提供商 Google AMP Cache 和 Cloudflare AMP Cache。當用戶點選並重定向到 amp 頁面時,內容將從 Google 快取中提供。
Amp 元件
Amp 有一個用於各種目的的大型元件列表。其中一些列在下面 -
amp-img - 用於在 amp 頁面上顯示影像。
amp-iframe - 用於顯示 iframe,其中包含要在頁面上顯示的外部內容。請注意,使用的 iframe 是沙盒化的,這意味著它需要許可權才能在 amp 頁面上顯示資料。因此,必須為沙盒屬性指定跨源詳細資訊。
amp-video - 用於在頁面上顯示影片。
amp-audio - 用於在頁面上顯示音訊。
amp-datepicker - 用於在頁面上顯示日期小部件。您無需使用任何第三方日期選擇器,因為 amp 中直接提供了相同的日期選擇器。
amp-story - 在頁面上顯示您的故事的媒介。
amp-selector − 是一個 AMP 元件,用於顯示選項選單,使用者可以在選項之間進行選擇。顯示的選項可以是文字、影像或任何其他 AMP 元件。
amp-list − 是一個 AMP 元件,用於呼叫 CORS JSON 端點,並將 JSON 檔案中的資料顯示在模板內。
廣告
廣告對於釋出者來說非常重要,因為他們的收入完全依賴於頁面上投放的廣告。AMP 不允許在頁面上新增任何外部 JavaScript,但引入了一個名為 amp-ad 的特殊 AMP 元件,用於處理頁面上的廣告投放。
釋出者希望在其頁面上投放的廣告網路需要支援 AMP 廣告。例如,要在頁面上投放雙擊廣告,雙擊需要支援使用 amp-ad 元件投放廣告。以下程式碼顯示了一個雙擊的 amp-ad 標籤。
<amp-ad width = "300"
   height = "200"
   type = "doubleclick"
   data-slot = "/4119129/ad-layout">
   <div placeholder>
      <b>Placeholder here!!!</b>
   </div>
</amp-ad>
AMP 還支援 amphtmlads,它們是由 AMP 元件和 HTML 開發的純 AMP 廣告。AMP 還支援 amp-sticky-ads,這是一種顯示在頁面底部的頁尾廣告。AMP 中廣告的詳細資訊將在 AMP 廣告章節中討論。
社交小部件
像 Facebook、Twitter、Instagram 這樣的社交小部件已變得非常重要,需要顯示在釋出者的頁面上,以便在社交媒體上分享頁面。AMP 透過開發 AMP 元件(如 amp-facebook、amp-twitter、amp-instagram、amp-pinterest 等)擴充套件了對所有重要社交媒體小部件的支援,以便在頁面上使用。
AMP 媒體
頁面上的另一個重要元件是媒體,用於顯示影片,並在影片之間投放中插廣告。AMP 提供了一種使用 amp-jwplayer、amp-youtube 等來實現此目的的方法。您無需載入任何額外的第三方檔案即可在頁面上顯示 jwplayer 和 youtube。
AMP 分析
AMP 分析是一個 AMP 元件,用於跟蹤給定頁面上的資料。可以記錄頁面上所有使用者互動並將其儲存下來,以分析資料,以便進一步改進或用於業務目的。
AMP 動畫
amp-animation 是一個 AMP 元件,用於定義要在其他 AMP 元件上使用的動畫。它支援動畫和過渡,可在現代瀏覽器中良好執行。您無需使用任何外部 CSS 庫來執行動畫,可以直接使用 amp-animation 元件。
AMP 佈局
AMP-Layout 是 Google-AMP 中的重要功能之一。AMP 佈局確保在頁面載入時正確呈現 AMP 元件,而不會出現任何閃爍或滾動問題。
Google AMP 確保在執行任何其他遠端資源(例如影像的 HTTP 請求、資料呼叫)之前完成頁面上的佈局渲染。可用於佈局的屬性包括所有 AMP 元件的寬度/高度、具有響應式、填充、固定等值的佈局屬性、資源載入時間過長或出現錯誤時顯示的佔位符屬性以及資源出現錯誤時顯示的回退屬性。
AMP 顯示佈局
AMP 支援許多用於在頁面上顯示內容的元件,而無需任何第三方庫或在頁面上進行任何繁重的 CSS 樣式。列表包括
手風琴 − amp-accordion 是一個 AMP 元件,用於以展開-摺疊格式顯示內容。使用者在移動裝置上檢視它變得很容易,他們可以根據自己的選擇從手風琴中選擇部分。
輪播 − amp-carousel 是一個 AMP 元件,用於在螢幕上顯示一組類似的內容,並使用箭頭在內容之間切換。
燈箱 − amp-lightbox 是一個 AMP 元件,它將佔據整個視口並像覆蓋層一樣顯示。
滑塊 − amp-image-slider 是一個 AMP 元件,用於透過在影像上垂直移動滑塊來比較兩張影像。
側邊欄 − AMP 側邊欄是一個 AMP 元件,用於顯示在點選按鈕時從視窗側面滑出的內容。
AMP 的優勢
AMP 頁面輕量級且載入速度更快
Google 在 Google 搜尋中優先考慮 AMP 頁面。AMP 頁面以輪播格式列在頁面頂部。為了獲得更高的排名,將您的頁面轉換為 AMP 是一個很好的優勢。
AMP 頁面對移動裝置友好,因為內容具有響應性,並且在所有瀏覽器中都能很好地調整,無需任何額外的樣式。
AMP 頁面的使用者滿意度有所提高,因為與非 AMP 頁面相比,頁面載入速度更快,從而節省了頻寬和手機電量。
AMP 的缺點
AMP 具有以下缺點:
釋出者必須為其頁面維護兩個版本:AMP 和非 AMP。
使用者必須付出額外的努力才能將非 AMP 頁面轉換為 AMP。由於 AMP 不支援自定義 JavaScript 或載入外部 JavaScript,因此必須使用 AMP 中可用的任何方法來實現相同的功能。
Google AMP - 簡介
Google 加速移動頁面(Google-AMP)是 Google 的一個新的開源專案,專門用於使用 AMP HTML 構建輕量級網頁。該專案的主要目標是確保 AMP 程式碼在所有可能的裝置(如智慧手機和平板電腦)上都能正常工作並快速載入。
AMP 只是標準 HTML 的擴充套件。一些 HTML 標籤已更改,並且 AMP 對其使用添加了限制。在本章中,我們將列出已更改的 HTML 標籤以及對它們新增的限制。處理載入外部資源(例如影像、CSS、JS、表單提交、影片、音訊等)的標籤已更改。
此外,AMP 還添加了許多新功能,例如 amp-date-picker、amp-facebook、amp-ad、amp-analytics、amp-ad、amp-lightbox 等,可以直接在 HTML 頁面中使用。其餘用於顯示的標籤則按原樣使用。
透過所有這些更改和新功能,AMP 有望在實際環境中使用時提供更快的載入速度和更好的頁面效能。
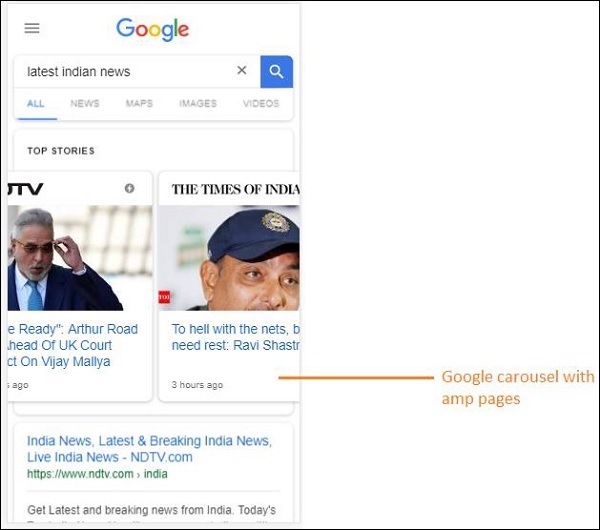
當您在手機上使用 Google 搜尋查詢任何內容時,在 Google 輪播中頂部顯示的內容大多是 AMP 頁面,如下所示:
當您點選 AMP 頁面時,您在位址列中獲得的 URL 如下所示:
https://www.google.co.in/amp/s/m.timesofindia.com/sports/cricket/india-in-australia/to-hell-with-the-nets-boys-need-rest-ravi-shastri/amp_articleshow/67022458.cms

URL 不是直接來自發布者,而是 Google 指向其在 Google 伺服器上的自身副本,這是一個快取版本,與非 AMP 頁面相比,它有助於更快地呈現內容。這僅在裝置上或 Google 模擬器模式下發生。
AMP 頁面示例
AMP 頁面的示例如下所示:
<!doctype html>
<html amp>
   <head>
      <meta charset = "utf-8">
      <title>Amp Sample Page</title>
      <link rel = "canonical" href = "./regular-html-version.html">
      <meta name = "viewport" content = "width = device-width,
         minimum-scale = 1,initial-scale = 1">
      <style amp-custom>
         h1 {color: red}
      </style>
      <script type = application/json>{
         "vars": {
            "uid": "23870",
            "domain": "dummyurl.com",
            "sections": "us",
            "authors": "Hello World"
         }
      }
      </script>
      <style amp-boilerplate>
         body{
            -webkit-animation:
            -amp-start 8s steps(1,end) 0s 1 normal both;-moz-animation:
            -amp-start 8s steps(1,end) 0s 1 normal both;-ms-animation:
            -amp-start 8s steps(1,end) 0s 1 normal both;animation:
            -amp-start 8s steps(1,end) 0s 1 normal both
         }
         @-webkit-keyframes
         -amp-start{from{visibility:hidden}to{visibility:visible}}@-moz-keyframes
         -amp-start{from{visibility:hidden}to{visibility:visible}}@-ms-keyframes
         -amp-start{from{visibility:hidden}to{visibility:visible}}@-o-keyframes
         -amp-start{from{visibility:hidden}to{visibility:visible}}@keyframes
         -amp-start{from{visibility:hidden}to{visibility:visible}}
      </style>
      <noscript>
         <style amp-boilerplate>
            body{
               -webkit-animation:none;
               -moz-animation:none;
               -ms-animation:none;
               animation:none}
         </style>
      </noscript>

      <script async src = "https://cdn.ampproject.org/v0.js"></script>
   </head>
   <body>
      <h1>Amp Sample Page</h1>
      <p>
         <amp-img src = "imgurl.jpg" width = "300" height = "300"
            layout = "responsive"></amp-img>
      </p>
      <amp-ad width = "300" height = "250" type = "doubleclick"
         data-slot = "/4119129/no-ad">
         <div fallback>
            <p style = "color:green;font-size:25px;">No ads to Serve!</p>
         </div>
      </amp-ad>
   </body>
</html>
AMP 頁面中的注意事項
讓我們瞭解一下程式設計師在 AMP 頁面中需要遵循的一些注意事項。
必填標籤
AMP 頁面中需要包含一些必填標籤,如下所示:
我們必須確保在 html 標籤中添加了 amp 或 ⚡,如下所示:
<html amp>
   OR
<html ⚡>
<head> 和 <body> 標籤應新增到 HTML 頁面中。
以下必填元標籤應新增到頁面的 head 部分;否則,AMP 驗證將失敗
<meta charset = "utf-8">
<meta name = "viewport" content = "width=device-width, minimum-scale = 1, initial-scale = 1">
在 head 標籤內新增 rel = "canonical" 的連結
<link rel = "canonical" href = "./regular-html-version.html">
帶有 amp-boilerplate 的 style 標籤:
<style amp-boilerplate>
   body{
      -webkit-animation:
      -amp-start 8s steps(1,end) 0s 1 normal both;-moz-animation:
      -amp-start 8s steps(1,end) 0s 1 normal both;-ms-animation:
      -amp-start 8s steps(1,end) 0s 1 normal both;animation:
      -amp-start 8s steps(1,end) 0s 1 normal both
   }
   @-webkit-keyframes
   -amp-start{from{visibility:hidden}to{visibility:visible}}@-moz-keyframes
   -amp-start{from{visibility:hidden}to{visibility:visible}}@-ms-keyframes
   -amp-start{from{visibility:hidden}to{visibility:visible}}@-o-keyframes
   -amp-start{from{visibility:hidden}to{visibility:visible}}@keyframes
   -amp-start{from{visibility:hidden}to{visibility:visible}}
</style>
帶有 amp-boilerplate 的 noscript 標籤:
<noscript>
   <style amp-boilerplate>
      body{
         -webkit-animation:none;
         -moz-animation:none;
         -ms-animation:none;
         animation:none
      }
   </style>
</noscript>
非常重要的是帶有 async 屬性的 amp 指令碼標籤,如下所示:
<script async src = "https://cdn.ampproject.org/v0.js"> </script>
如果您想向頁面新增自定義 CSS,請注意,我們不能在 AMP 頁面中呼叫外部樣式表。要新增自定義 CSS,所有 CSS 都必須在此處新增,如下所示:
<style amp-custom>
   //all your styles here
</style>
style 標籤應新增 amp-custom 屬性。
AMP 元件的指令碼
請注意,在 AMP 頁面中嚴格不允許使用帶有 src 和 type = ”text/javascript” 的指令碼標籤。僅允許在 head 部分新增帶有 async 屬性且與 AMP 元件相關的指令碼標籤。
本節列出了用於 AMP 元件的一些指令碼,如下所示:
amp-ad
<script async custom-element = "amp-ad"
   src = "https://cdn.ampproject.org/v0/amp-ad-0.1.js">
</script>
amp-iframe
<script async custom-element = "amp-iframe"
   src = "https://cdn.ampproject.org/v0/amp-iframe-0.1.js">
</script>
請注意,指令碼具有 async 和 custom-element 屬性,以及要載入的 AMP 元件的名稱。AMP 根據 async 和 custom-element 屬性驗證指令碼標籤,並且不允許載入任何其他指令碼。它確實接受type=application/json,我們在示例檔案中添加了該屬性,如下所示
<type = application/json>
{
   "vars": {
      "uid": "23870",
      "domain": "dummyurl.com",
      "sections": "us",
      "authors": "Hello World"
   }
}
</script>
如果需要,上述指令碼可以與其他 AMP 元件一起使用,例如 amp-analytics。
HTML 標籤
到目前為止,我們已經瞭解了 AMP 頁面中所需的必填標籤。現在我們將討論允許/不允許的 HTML 元素以及對它們的限制。
以下是允許/不允許的 HTML 標籤列表:
| 序號 | HTML 標籤和描述 |
|---|---|
| 1 | img 此標籤已替換為 amp-img。在 AMP 頁面中不允許使用直接的 img 標籤 |
| 2 | video 替換為 amp-video |
| 3 | audio 替換為 amp-audio |
| 4 | iframe 替換為 amp-iframe |
| 5 | object 不允許 |
| 6 | embed 不允許 |
| 7 | form 可以用作 <form>。我們需要新增指令碼才能在 AMP 頁面中使用表單。 示例: <script async custom-element = "amp-form" src = "https://cdn.ampproject.org/v0/amp-form-0.1.js"> </script> |
| 8 | 輸入元素 Allowed.<input[type = image]>, <input[type = button]>, <input[type = password]>, <input[type = file]> are not allowed |
| 9 | <fieldset> 允許 |
| 10 | <label> 允許 |
| 11 | P、div、header、footer、section 允許 |
| 12 | button 允許 |
| 13 | a <a> 標籤在滿足以下條件時允許使用:href 不得以 javascript 開頭。如果存在,target 屬性值必須為 _blank。 |
| 14 | svg 不允許 |
| 15 | meta 允許 |
| 16 | Link 允許。但不允許載入外部樣式表。 |
| 17 | style 允許。它需要具有 amp-boilerplate 或 amp-custom 屬性。 |
| 18 | base 不允許 |
| 19 | noscript 允許 |
註釋
不允許使用條件 HTML 註釋。例如:
<!--[if Chrome]> This browser is chrome (any version) <![endif]-->
HTML 事件
我們在 HTML 頁面中使用的事件(如 onclick、onmouseover)在 AMP 頁面中不允許使用。
我們可以按如下方式使用事件:
on = "eventName:elementId[.methodName[(arg1 = value, arg2 = value)]]"
以下是在 input 元素上使用的事件示例:
<input id = "txtname" placeholder = "Type here"
on = "inputthrottled:
AMP.setState({name: event.value})">
使用的事件是 input-throlled。
類
您不能在頁面中使用以-amp- 或 i-amp-為字首的類。此外,您可以根據需要使用類名。
ID
您不能為 HTML 元素使用以 -amp 或 i-amp- 為字首的 ID。此外,您可以根據需要為 HTML 元素使用 ID。
連結
AMP 頁面不允許在 href 中使用 JavaScript。
示例
<a href = "javascript:callfunc();">click me</a>
樣式表
AMP 頁面不允許使用外部樣式表。可以在內部新增頁面所需的樣式 -
<style amp-custom> //all your styles here </style>
style 標籤應新增 **amp-custom** 屬性。
@規則
樣式表中允許以下 @規則 -
@font-face、@keyframes、@media、@page、@supports。@import 不允許使用。未來會新增對它的支援。
@keyframes 允許在 *<style **amp-custom**>* 中使用。如果 @keyframes 太多,最好建立 *<style **amp-keyframes**>* 標籤並在 AMP 文件末尾呼叫它。
類名、ID、標籤名和屬性不應以 *-amp-* 和 i-amp- 為字首,因為它們在 AMP 程式碼中用於內部,如果在頁面執行時也定義了它們,可能會導致衝突。
**!important** 屬性在樣式中不允許使用,因為 AMP 需要在必要時控制元素大小。
自定義字型
AMP 頁面允許使用自定義字型的樣式表。
示例
<link rel = "stylesheet" href = "https://fonts.googleapis.com/css?family=Tangerine">
AMP 頁面可以使用來自以下來源的白名單字型。
Fonts.com - https://fast.fonts.net
Google Fonts - https://fonts.googleapis.com
Font Awesome - https://maxcdn.bootstrapcdn.com
Typekit - https://use.typekit.net/kitId.css(相應替換 kitId)
**注意** - AMP 頁面允許使用 @font-face 自定義字型。
示例
@font-face {
font-family: myFirstFont;
src: url(dummyfont.woff);
}
AMP 執行時
載入 AMP 核心檔案後,將確定 AMP 執行時環境 -
<script async src = "https://cdn.ampproject.org/v0.js"></script>
核心檔案負責載入外部資源,確定載入優先順序,並在將 #development=1 新增到 AMP URL 時幫助驗證 AMP 文件。
示例
https://:8080/googleamp/amppage.html#development=1
在瀏覽器中執行上述 URL 時,如果 AMP 驗證失敗,將列出錯誤,如果無錯誤,則顯示 AMP 驗證成功訊息。
AMP 元件
AMP 添加了許多 amp-元件。它們主要用於以有效的方式處理資源載入。它還包含用於處理動畫、顯示資料、顯示廣告、社交小部件等的元件。
AMP 中有兩種型別的元件。
- 內建
- 外部
**注意** - <amp-img> 是一個內建元件,如果添加了核心 AMP js 檔案,則可用。外部元件,如 <amp-ad>、<amp-facebook>、<amp-video> 等,需要新增與元件相關的相應 js 檔案。
常用屬性
幾乎所有可用的 AMP 元件都將提供諸如 width、height、layout、placeholder 和 fallback 等屬性。這些屬性對於任何 AMP 元件都非常重要,因為它決定了元件在 AMP 頁面中的顯示方式。
本教程後面章節將詳細討論所有列出的 AMP 功能。
請注意,本教程中的所有示例都針對裝置進行了測試,並使用了 Google 移動模擬器模式。現在讓我們詳細瞭解一下。
Google 移動模擬器
要使用 Google 移動模擬器,請開啟 Chrome 瀏覽器,右鍵單擊並開啟開發者控制檯,如下所示 -
我們可以看到 Chrome 的開發者工具,如上所示。點選您想在瀏覽器中測試的連結。注意頁面以桌面模式顯示。
要獲取上述頁面以測試裝置,請點選切換裝置工具欄,如下所示 -

您也可以使用快捷鍵 Ctrl+shift+M。這會將桌面模式更改為裝置模式,如下所示 -
可以檢視裝置列表,如下所示 -

您可以選擇要測試頁面的裝置。請注意,本教程中的所有頁面都如上所示在 Google 移動模擬器上進行了測試。Firefox 和最近的 Internet Explorer 瀏覽器也提供了相同的特性。
Google AMP - 圖片
在 Google AMP 頁面中使用的影像與在標準 html 頁面中使用的影像類似,但唯一的區別是標籤名稱的使用方式以及一些其他屬性。本章將詳細討論這些內容。
觀察以下語法 -
標準 HTML
<img src = ”example.jpg” width = ”300” height = ”250” alt = ”Example” ></img>
在 AMP 頁面中
<amp-img src = "example.jpg" alt = "Example" height = "300" width = "250" ><//amp-img>
請注意,標籤從 **img** 更改為 **amp-img**。
為什麼要使用 amp-img 而不是 img?
將 img 更改為 amp-img 的原因是為了更好地控制頁面佈局和載入影像的網路請求。Amp 為影像資源添加了延遲載入,並根據頁面上其他可用資源的優先順序進行載入。
示例
觀察以下程式碼以更好地理解 -
<!doctype html>
<html amp lang = "en">
<head>
<meta charset = "utf-8">
<script async src = "https://cdn.ampproject.org/v0.js"></script>
<title>Google AMP - Image</title>
<link rel = "canonical" href = "http://example.ampproject.org/articlemetadata.html">
<meta name = "viewport" content = "width = device-width,
minimum-scale = 1,initialscale = 1">
<style amp-boilerplate>
body{
-webkit-animation:
-amp-start 8s steps(1,end) 0s1 normal both;-moz-animation:
-amp-start 8s steps(1,end) 0s 1 normal both;-msanimation:
- amp-start 8s steps(1,end) 0s 1 normal both;animation:
-amp-start 8s steps(1,end) 0s 1 normal both
}
@-webkit-keyframes
-ampstart{from{visibility:hidden}to{visibility:visible}}@-moz-keyframes
-ampstart{from{visibility:hidden}to{visibility:visible}}@-ms-keyframes
-ampstart{from{visibility:hidden}to{visibility:visible}}@-o-keyframes
-ampstart{from{visibility:hidden}to{visibility:visible}}@keyframes
amp-start{from{visibility:hidden}to{visibility:visible}}
</style>
<noscript>
<style amp-boilerplate>
body{
-webkit-animation:none;
-moz-animation:none;
-msanimation:none;
animation:none
}
</style>
</noscript>
</head>
<body>
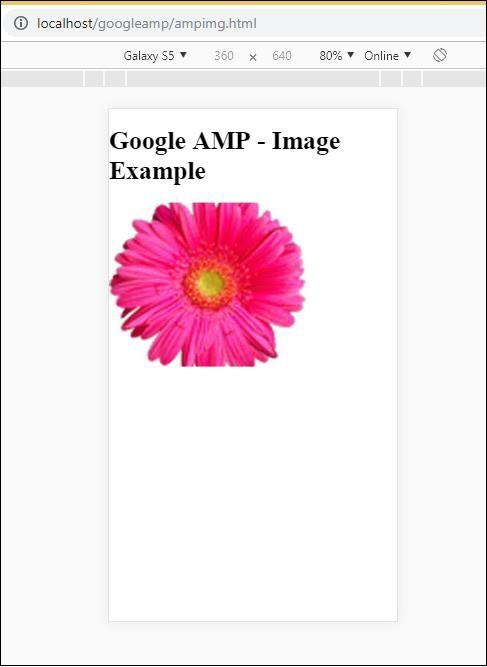
<h1>Google AMP - Image Example</h1>
<amp-img alt = "Beautiful Flower" src = "images/flower.jpg"
width = "246"
height = "205">
</amp-img>
</body>
</html>
輸出
執行上述程式碼後,您會發現結果如下所示 -
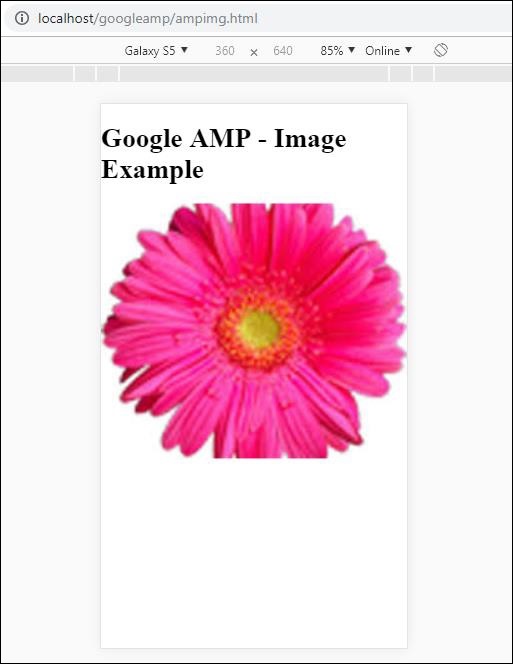
您還可以透過向 *amp-img* 標籤新增屬性 layout = ”responsive” 來使影像響應,如下所示
示例
觀察以下程式碼以更好地理解 -
<amp-img alt = "Beautiful Flower" src = "images/flower.jpg" width = "246" height = "205" layout = "responsive"> </amp-img>
輸出
執行上述程式碼後,您會發現結果如下所示 -
Google AMP - 表單
本章介紹如何在 Google AMP 中使用表單。
請注意,表單標籤與標準 HTML 中的相同。由於 AMP 對錶單的使用添加了特殊的限制,因此我們需要新增 amp-form JavaScript 檔案才能使用表單。
amp-form 指令碼
<script async custom-element = "amp-form" src = "https://cdn.ampproject.org/v0/ampform-0.1.js"></script>
要在 AMP 頁面中使用表單,我們需要在 .html 檔案中包含上述指令碼。amp-form JavaScript 檔案支援 **http** 和 **xmlhttprequest** 進行表單提交。使用 HTTP 請求將重新載入頁面,而使用 **xmlhttprequest** 則不會重新載入頁面,其行為類似於 ajax 請求。
AMP 中的表單標籤
For xmlhttprequest : <form method = "post" class = "p2" action-xhr = "submitform.php" target = "_top"> //Input fields here </form> For http : <form method = "post" class = "p2" action = "submitform.php" target = "_top"> //Input fields here </form>
Amp-form 提供特殊的屬性,即 *submit-error* 和 *submit-success*,用於在提交表單時處理錯誤和成功。
示例
amp-form 的示例如下所示 -
<!doctype html>
<html amp lang = "en">
<head>
<meta charset = "utf-8">
<script async src = "https://cdn.ampproject.org/v0.js"></script>
<title>Google AMP - Form</title>
<link rel = "canonical" href = "ampform.html">
<meta name = "viewport" conten t = "width = device-width,
minimum-scale = 1,initialscale = 1">
<style amp-boilerplate>
body{
-webkit-animation:
-amp-start 8s steps(1,end) 0s1 normal both;-moz-animation:
-amp-start 8s steps(1,end) 0s 1 normal both;-msanimation:
-amp-start 8s steps(1,end) 0s 1 normal both;animation:
-amp-start 8s steps(1,end) 0s 1 normal both
}
@-webkit-keyframes
-ampstart{from{visibility:hidden}to{visibility:visible}}@-moz-keyframes
-ampstart{from{visibility:hidden}to{visibility:visible}}@-ms-keyframes
-ampstart{from{visibility:hidden}to{visibility:visible}}@-o-keyframes
-ampstart{from{visibility:hidden}to{visibility:visible}}@keyframes
-ampstart{from{visibility:hidden}to{visibility:visible}}
</style>
<noscript>
<style amp-boilerplate>
body{
-webkit-animation:none;
-moz-animation:none;
-msanimation:none;
animation:none
}
</style>
</noscript>
<script async custom-element = "amp-form"
   src = "https://cdn.ampproject.org/v0/amp-form-0.1.js">
</script>
<script async custom-template = "amp-mustache"
src = "https://cdn.ampproject.org/v0/amp-mustache-0.2.js">
</script>
<style amp-custom>
form.amp-form-submit-success [submit-success],
form.amp-form-submit-error [submit-error]{
margin-top: 16px;
}
form.amp-form-submit-success [submit-success] {
color: white;
background-color:gray;
}
form.amp-form-submit-error [submit-error] {
color: red;
}
form.amp-form-submit-success.hide-inputs > input {
display: none;
}
</style>
</head>
<body>
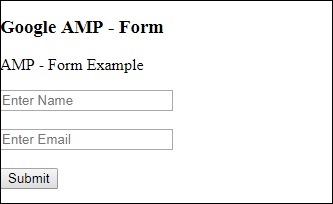
<h3>Google AMP - Form</h3>
<form method = "post"
class = "p2"
action-xhr = "submitform.php"
target = "_top">
<p>AMP - Form Example</p>
<div>
<input type = "text" name = "name" placeholder = "Enter
Name" required><br/><br/>
<input type = "email" name = "email"
placeholder = "Enter Email" required>
<br/>
<br/>
</div>
<input type = "submit" value = "Submit">
<div submit-success>
<template type = "amp-mustache">
Form Submitted! Thanks {{name}}.
</template>
</div>
<div submit-error>
<template type = "amp-mustache">
Error! {{name}}, please try again.
</template>
</div>
</form>
</body>
</html>
輸出
執行上述程式碼後,您會發現結果如下所示 -
現在,輸入詳細資訊並點選提交按鈕。顯示的輸出螢幕如下所示 -
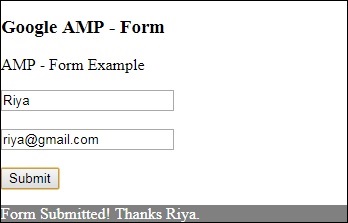
注意,我們使用了 amp-mustache 進行資料繫結。該表單使用 action-xhr 即 xmlhttprequest 提交表單。我們使用了 **submitform.php** 檔案,該檔案以 json 格式返回資料。
<form method = "post" class = "p2" action-xhr = "submitform.php" target = "_top"> </form>
submitform.php
<?php
if(!empty($_POST)){
$domain_url = (isset($_SERVER['HTTPS']) ? "https" : "http") . "://$_SERVER[HTTP_HOST]";
header("Content-type: application/json");
header("AMP-Access-Control-Allow-Source-Origin: " . $domain_url);
header("Access-Control-Expose-Headers: AMP-Access-Control-Allow-Source-Origin");
$myJSON = json_encode($_POST);
echo $myJSON;
}
?>
為了使表單使用 xmlhttprequest 工作,我們需要根據 CORS 規範新增標頭。新增到 submitform.php 的響應標頭的詳細資訊如下所示 -

為了使表單工作,我們需要新增諸如 **access-control-expose-headers**(值為 **AMP-Access-Control-Allow-Source-Origin**)和 **amp-access-controlallow-source-origin** - **https://:8080** 等標頭。
請注意,我們正在使用 php 檔案和 apache 伺服器。在 php 檔案中,我們添加了如下所示的必需標頭 -
<?php
if(!empty($_POST)){
$domain_url = (isset($_SERVER['HTTPS']) ? "https" : "http") . "://$_SERVER[HTTP_HOST]";
header("Content-type: application/json");
header("AMP-Access-Control-Allow-Source-Origin: " . $domain_url);
header("Access-Control-Expose-Headers: AMP-Access-Control-Allow-Source-Origin");
$myJSON = json_encode($_POST);
echo $myJSON;
}
?
?>
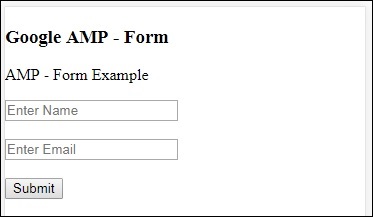
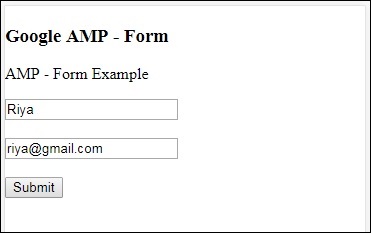
如果我們使用普通 HTTP 請求,頁面將重新載入,如下所示 -
對於 HTTP 請求,我們使用瞭如下表單 -
<form method = "GET" class = "p2" action = "submitform.php" target = "_top"> </form>
示例
觀察以下程式碼以更好地理解 -
<!doctype html>
<html amp lang = "en">
<head>
<meta charset = "utf-8">
<script async src = "https://cdn.ampproject.org/v0.js"></script>
<title>Google AMP - Form</title>
<link rel = "canonical" href = "ampform.html">
<meta name = "viewport" content = "width = device-width,minimum-scale = 1,initialscale = 1">
<style amp-boilerplate>
body{
-webkit-animation:
-amp-start 8s steps(1,end) 0s1 normal both;-moz-animation:
-amp-start 8s steps(1,end) 0s 1 normal both;-msanimation:
-amp-start 8s steps(1,end) 0s 1 normal both;animation:
-amp-start 8s steps(1,end) 0s 1 normal both
}
@-webkit-keyframes
-ampstart{from{visibility:hidden}to{visibility:visible}}@-moz-keyframes
-ampstart{from{visibility:hidden}to{visibility:visible}}@-ms-keyframes
-ampstart{from{visibility:hidden}to{visibility:visible}}@-o-keyframes
-ampstart{from{visibility:hidden}to{visibility:visible}}@keyframes
-ampstart{from{visibility:hidden}to{visibility:visible}}
</style>
<noscript>
<style amp-boilerplate>
body {
-webkit-animation:none;
-moz-animation:none;
-msanimation:none;
animation:none}
>/style>
</noscript>
<script async custom-element = "amp-form"
src = "https://cdn.ampproject.org/v0/amp-form-0.1.js">
</script>
<script async custom-template = "amp-mustache"
src = "https://cdn.ampproject.org/v0/amp-mustache-0.2.js">
</script>
<style amp-custom>
form.amp-form-submit-success [submit-success],
form.amp-form-submit-error [submit-error]{
margin-top: 16px;
}
form.amp-form-submit-success [submit-success] {
color: white;
background-color:gray;
}
form.amp-form-submit-error [submit-error] {
color: red;
}
form.amp-form-submit-success.hide-inputs >
input {
display: none;
}
</style>
</head>
<body>
<h3>Google AMP - Form</h3>
<form method = "GET" class = "p2" action = "submitform.php" target = "_top">
<p>AMP - Form Example</p>
<div>
<input type = "text" name = "name" placeholder = "Enter Name" required>
<br/>
<br/>
<input type = "email" name = "email" placeholder = "Enter Email" required>
<br/>
<br/>
<div>
<input type = "submit" value = "Submit">
<div submit-success>
<template type = "amp-mustache">
Form Submitted! Thanks {{name}}.
</template>
</div>
<div submit-error>
<template type = "amp-mustache">
Error! {{name}}, please try again.
</template>
</div>
</form>
</body>
</html>
輸出
執行上述程式碼後,您會發現結果如下所示 -

Google AMP - Iframes
Google **amp-iframe** 用於在頁面上顯示 iframe。amp-iframe 需要新增一些條件,因此我們不能在頁面上使用普通 iframe。本章將進一步討論此內容。
iframe 的條件
在 AMP 頁面中使用 iframe 時需要注意以下條件 -
iframe 上使用的 url 必須是 *https* 請求或 *data-URI* 或使用 *srcdoc* 屬性。
amp-iframe 預設會新增 sandbox 屬性。sandbox 屬性將設定為為空。sandbox 的空值表示 iframe 處於 **最大沙盒化** 狀態(對 iframe 的額外限制)。我們可以向 sandbox 新增值,我們將在下面的示例中進行討論。
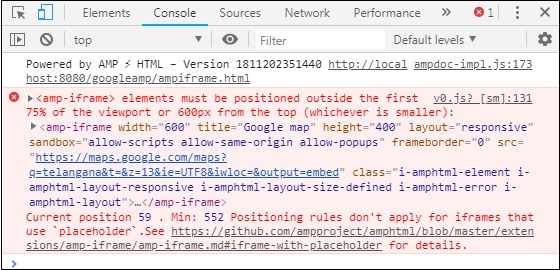
amp-iframe 不能顯示在頁面頂部,它應該距離頂部至少 600px 或在滾動到頂部時位於視口前 75% 以內。如果您必須在開頭顯示 iframe,則需要向 iframe 新增佔位符,我們將在本教程後面的示例中進行討論。
amp-iframe 必須與容器具有不同的來源。例如,如果您的主站點位於 www.xyz.com,則 iframe src 不能為 **www.xyz.com/urlname**。它可以採用其他形式,例如 .xyz.com、example.xyz.com 等。
要使用 iframe,我們需要新增以下指令碼 -
<script async custom-element = "amp-iframe" src = "https://cdn.ampproject.org/v0/amp-iframe-0.1.js"></script>
Amp-iframe 格式如下 -
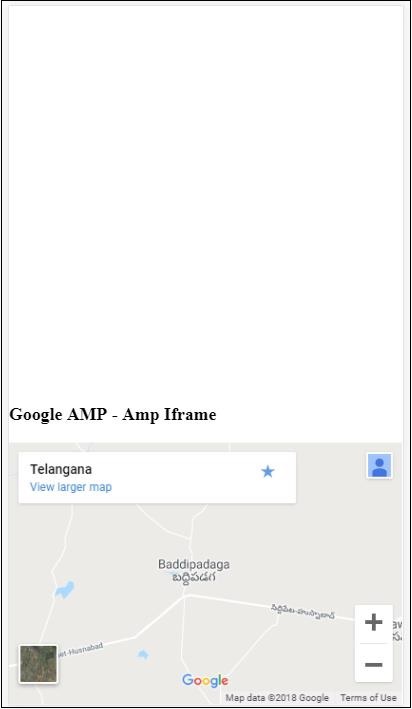
<amp-iframe width = "600" title = "Google map" height = "400" layout = "responsive" sandbox = "allow-scripts allow-same-origin allow-popups" frameborder = "0" src = "https://maps.google.com/maps?q=telangana&t=&z=13&ie=UTF8&iwloc=&output=embed"> </amp-iframe>
讓我們藉助一個工作示例來理解這一點,在該示例中,我們將使用 iframe 顯示 Google 地圖,如下所示。
示例
<!doctype html>
<html amp lang = "en">
<head>
<meta charset = "utf-8">
<script async src = "https://cdn.ampproject.org/v0.js"></script>
<title>Google AMP - Amp Iframe</title>
<link rel = "canonical" href = "http://example.ampproject.org/article-metadata.html">
<meta name = "viewport" content = "width = device-width,minimum-scale = 1,initial-scale = 1">
<style amp-boilerplate>
body{
-webkit-animation:-amp-start 8s steps(1,end) 0s
1 normal both;-moz-animation:
-amp-start 8s steps(1,end) 0s 1 normal both;-ms-animation:
-amp-start 8s steps(1,end) 0s 1 normal both;animation:
-amp-start 8s steps(1,end) 0s 1 normal both}
@-webkit-keyframes
-amp-start{from{visibility:hidden}to{visibility:visible}}@-moz-keyframes
-amp-start{from{visibility:hidden}to{visibility:visible}}@-ms-keyframes
-amp-start{from{visibility:hidden}to{visibility:visible}}@-o-keyframes
-amp-start{from{visibility:hidden}to{visibility:visible}}@keyframes
-amp-start{from{visibility:hidden}to{visibility:visible}}
</style><noscript>
<style amp-boilerplate>
body{-webkit-animation:none;-moz-animation:
none;-ms-animation:none;animation:none}
</style></noscript>
<script async custom-element = "amp-iframe"
src = "https://cdn.ampproject.org/v0/amp-iframe-0.1.js"
></script>
<style>
div {
height:850px;
text-align:center;
}
</style>
</head>
<body>
<h3>Google AMP - Amp Iframe</h3>
<div>
Google Maps in Iframe
</div>
<h3>Google AMP - Amp Iframe</h3>
<amp-iframe width = "600"
title = "Google map"
height = "400"
layout = "responsive"
sandbox = "allow-scripts allow-same-origin allow-popups"
frameborder = "0" src = "https://maps.google.com/maps?q=telangana&t=&z=13&ie=UTF8&iwloc=&output=embed">
</amp-iframe>
</body>
</html>
輸出
注意,我們將 iframe 放置在距離頂部 600px 以上的位置。它會顯示如下錯誤 -
在上面的示例中,我們使用瞭如下所示的值的 sandbox -
sandbox = "allow-scripts allow-same-origin allow-popups"
Sandbox 屬性充當對要載入到 iframe 中的內容的許可權。在這裡,我們允許載入來自 Google 地圖連結的所有指令碼。如果我們不提供 sandbox 屬性,則會顯示此錯誤,阻止內容載入到 iframe 中 -
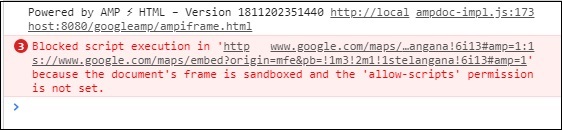
請注意,我們必須為 sandbox 提供正確的許可權。您可以在此處找到要賦予 sandbox 的所有許可權的詳細資訊 - https://mdn.club.tw/en-US/docs/Web/HTML/Element/iframe#attr-sandbox。
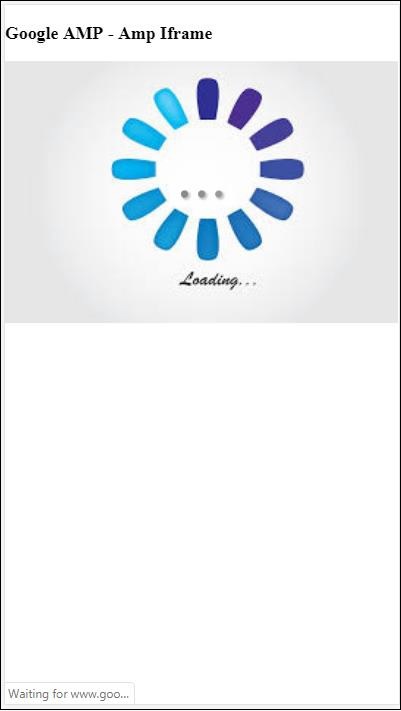
我們可以使用 amp-iframe 內部的 placeholder 屬性來消除 600px 以上的限制。
下面給出了一個工作示例 -
<!doctype html>
<html amp lang = "en">
<head>
<meta charset = "utf-8">
<script async src = "https://cdn.ampproject.org/v0.js"></script>
<title>Google AMP - Amp Iframe</title>
<link rel = "canonical" href = "http://example.ampproject.org/article-metadata.html">
<meta name = "viewport" content = "width = device-width, minimum-scale=1,initial-scale=1">
<style amp-boilerplate>
body{
-webkit-animation:-amp-start 8s steps(1,end) 0s
1 normal both;-moz-animation:
-amp-start 8s steps(1,end) 0s 1 normal both;-ms-animation:
-amp-start 8s steps(1,end) 0s 1 normal both;animation:
-amp-start 8s steps(1,end) 0s 1 normal both
}
@-webkit-keyframes
-amp-start{from{visibility:hidden}to{visibility:visible}}@-moz-keyframes
-amp-start{from{visibility:hidden}to{visibility:visible}}@-ms-keyframes
-amp-start{from{visibility:hidden}to{visibility:visible}}@-o-keyframes
-amp-start{from{visibility:hidden}to{visibility:visible}}@keyframes
-amp-start{from{visibility:hidden}to{visibility:visible}}
</style>
<noscript>
<style amp-boilerplate>
body{
-webkit-animation:none;
-moz-animation:none;
-ms-animation:none;
animation:none
}
</style>
</noscript>
<script async custom-element = "amp-iframe"
src = "https://cdn.ampproject.org/v0/amp-iframe-0.1.js">
</script>
<style>
div {
height:850px;
text-align:center;
}
</style>
</head>
<body>
<h3>Google AMP - Amp Iframe</h3>
<amp-iframe width = "600"
title = "Google map"
height = "400"
layout = "responsive"
sandbox = "allow-scripts allow-same-origin allow-popups"
frameborder = "0"
src = "https://maps.google.com/maps?q=telangana&t=&z=13&ie=UTF8&iwloc=&output=embed">
<amp-img layout = "fill" src = "images/loading.jpg" placeholder></amp-img>
</amp-iframe>
</body>
</html>
我們使用了 amp-img 作為佔位符,如下所示 -
<amp-iframe width = "600" title = "Google map" height = "400" layout = "responsive" sandbox = "allow-scripts allow-same-origin allow-popups" frameborder = "0" src = "https://maps.google.com/maps?q=telangana&t=&z=13&ie = UTF8&iwloc = &output = embed"> <amp-img layout = "fill" src = "images/loading.jpg" placeholder></amp-img> </amp-iframe>
在這種情況下,不考慮 600px 和 amp-iframe 在視口 75% 內的限制。在影像上顯示載入指示器(三個點),用作佔位符,這實際上是針對 amp-iframe src 的。一旦 iframe 內容載入完畢,影像將被刪除,並顯示 iframe 內容,如以下輸出所示 -
輸出

Google AMP - 影片
Amp-video 在 amp 中是一個標準的 html5 影片,用於播放直接影片嵌入。在本章中,讓我們瞭解如何使用 amp-video。
要使用 amp-video,我們需要新增以下指令碼 -
<script async custom-element = "amp-video" src = "https://cdn.ampproject.org/v0/amp-video-0.1.js"> </script>
Amp-video 具有 src 屬性,該屬性包含要載入的影片資源,該資源由 amp 在執行時延遲載入。此外,所有功能幾乎與 html5 video 標籤相同。
以下是要新增到 amp 影片的節點 -
**Source** - 您可以使用此標籤新增不同的媒體檔案以進行播放。
**Track** - 此標籤允許您為影片啟用字幕。
**Placeholder** - 此佔位符標籤將在影片開始播放之前顯示內容。
備用 − 當瀏覽器不支援 HTML5 影片時,將呼叫此標籤。
amp-video 標籤的格式
amp-video 標籤的格式如下所示:
<amp-video controls width = "640" height = "360"
layout = "responsive" poster = "images/videoposter.png">
<source src = "video/bunny.webm" type = "video/webm" />
<source src = "video/samplevideo.mp4" type = "video/mp4" />
<div fallback>
<p>This browser does not support the video element.</p>
</div>
</amp-video>
讓我們透過以下工作示例來了解 amp-video:
示例
<!doctype html>
<html amp lang = "en">
<head>
<meta charset = "utf-8">
<script async src = "https://cdn.ampproject.org/v0.js"></script>
<title>Google AMP - Amp Video</title>
<link rel = "canonical" href = "http://example.ampproject.org/article-metadata.html">
<meta name = "viewport" content = "width = device-width, minimum-scale = 1,initial-scale=1">
<style amp-boilerplate>
body {
-webkit-animation:
-amp-start 8s steps(1,end) 0s 1 normal both;-moz-animation:
-amp-start 8s steps(1,end) 0s 1 normal both;-ms-animation:
-amp-start 8s steps(1,end) 0s 1 normal both;animation:
-amp-start 8s steps(1,end) 0s 1 normal both}
@-webkit-keyframes
-amp-start{from{visibility:hidden}to{visibility:visible}}@-moz-keyframes
-amp-start{from{visibility:hidden}to{visibility:visible}}@-ms-keyframes
-amp-start{from{visibility:hidden}to{visibility:visible}}@-o-keyframes
-amp-start{from{visibility:hidden}to{visibility:visible}}@keyframes
-amp-start{from{visibility:hidden}to{visibility:visible}}
</style>
<noscript>
<style amp-boilerplate>
body {
-webkit-animation:none;
-moz-animation:none;
-ms-animation:none;
animation:none
}
</style>
</noscript>
<script async custom-element = "amp-video"
src = "https://cdn.ampproject.org/v0/amp-video-0.1.js">
</script>
</head>
<body>
<h3>Google AMP - Amp Video</h3>
<amp-video controls
width = "640"
height = "360"
layout = "responsive"
poster = "images/videoposter.png">
<source src = "video/bunny.webm" type = "video/webm" />
<source src = "video/samplevideo.mp4" type = "video/mp4" />
<div fallback>
<p>This browser does not support the video element.</p>
</div>
</amp-video>
</body>
</html>
輸出
上面給出的程式碼的輸出如下所示:

amp-video 可用的屬性
amp-video 可用的屬性在此表中列出:
| 序號 | 屬性和描述 |
|---|---|
| 1 | src 如果不存在<source>節點,則必須指定 src,並且它必須是 https:// URL。 |
| 2 | poster poster 接受 img URL,在影片開始播放之前顯示。 |
| 3 | autoplay 如果 amp-video 上存在此屬性,則如果瀏覽器支援,則將自動播放影片。影片將在靜音模式下播放,使用者需要點選影片才能取消靜音。 |
| 4 | controls 如果 amp-video 上存在此屬性,則將顯示與 html5 影片類似的影片控制元件。 |
| 5 | loop 如果 amp-video 上存在此屬性,則影片播放完成後將再次播放。 |
| 6 | crossorigin 如果播放影片的資源位於不同的來源,則此屬性將起作用。 |
| 7 | rotate-to-fullscreen 如果影片可見,則在使用者將裝置旋轉到橫向模式後,影片將全屏顯示。 |
自動播放 AMP 影片
如果需要自動播放影片,可以使用 autoplay 屬性。此功能將根據瀏覽器支援情況執行。請注意,自動播放時影片將處於靜音狀態。當用戶點選影片時,將取消靜音。
讓我們藉助以下工作示例來了解 autoplay 功能:
示例
<!doctype html>
<html amp lang = "en">
<head>
<meta charset = "utf-8">
<script async src = "https://cdn.ampproject.org/v0.js"></script>
<title>Google AMP - Amp Video</title>
<link rel = "canonical" href = "http://example.ampproject.org/article-metadata.html">
<meta name = "viewport" content = "width=device-width,minimum-scale = 1, initial-scale = 1">
<style amp-boilerplate>
body {
-webkit-animation:
-amp-start 8s steps(1,end) 0s 1 normal both;
-moz-animation:-amp-start 8s steps(1,end) 0s 1 normal both;-ms-animation:
-amp-start 8s steps(1,end) 0s 1 normal both;animation:
-amp-start 8s steps(1,end) 0s 1 normal both
}
@-webkit-keyframes
-amp-start{from{visibility:hidden}to{visibility:visible}}@-moz-keyframes
-amp-start{from{visibility:hidden}to{visibility:visible}}@-ms-keyframes
-amp-start{from{visibility:hidden}to{visibility:visible}}@-o-keyframes
-amp-start{from{visibility:hidden}to{visibility:visible}}@keyframes
-amp-start{from{visibility:hidden}to{visibility:visible}}
</style>
<noscript>
<style amp-boilerplate>
body{
-webkit-animation:none;
-moz-animation:none;
-ms-animation:none;
animation:none
}
</style>
</noscript>
<script async custom-element = "amp-video" src = "
https://cdn.ampproject.org/v0/amp-video-0.1.js">
</script>
</head>
<body>
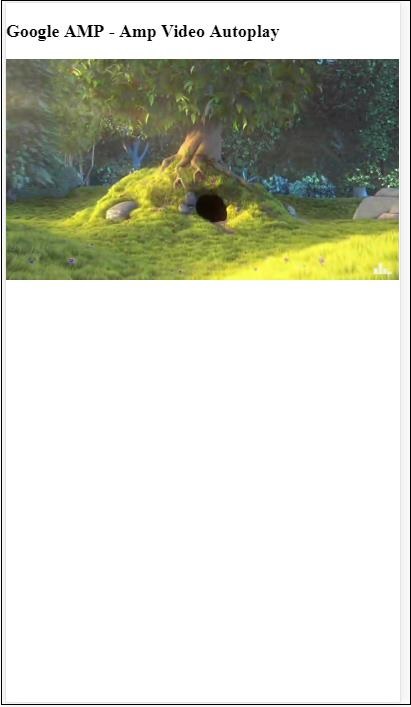
<h3>Google AMP - Amp Video Autoplay</h3>
<amp-video controls
width = "640"
height = "360"
layout = "responsive"
poster = "images/videoposter.png" autoplay>
<source src = "video/bunny.webm" type = "video/webm" />
<source src = "video/samplevideo.mp4" type = "video/mp4" />
<div fallback>
<p>This browser does not support the video element.</p>
</div>
</amp-video>
</body>
</html>
您可以透過新增 controls 屬性來啟用影片控制元件,如下面的程式碼所示:
<amp-video controls
width = "640"
height = "360"
layout = "responsive"
poster = "images/videoposter.png" autoplay>
<source src = "video/bunny.webm" type = "video/webm" />
<source src = "video/samplevideo.mp4" type = "video/mp4" />
<div fallback>
<p>This browser does not support the video element.</p>
</div>
</amp-video>
Google AMP - 按鈕
按鈕是 AMP 的另一個功能。請注意,AMP 中的按鈕沒有任何變化,它們的使用方式與標準的 HTML 按鈕標籤相同。AMP 頁面中按鈕的唯一區別是其事件的工作方式。
在本章中,我們將看到一些示例來展示按鈕的工作方式以及如何在 AMP 元件中使用它。
Lightbox 的示例程式碼
以下示例向我們展示瞭如何使用按鈕來顯示/隱藏 amp-lightbox,如下所示:
<!doctype html>
<html amp lang = "en">
<head>
<meta charset = "utf-8">
<script async src = "https://cdn.ampproject.org/v0.js"></script>
<title>Google AMP - Amp Lightbox</title>
<link rel = "canonical" href = "http://example.ampproject.org/article-metadata.html">
<meta name = "viewport" content ="width = device-width,minimum-scale = 1,initial-scale = 1">
<style amp-boilerplate>
body{
-webkit-animation:-amp-start 8s steps(1,end) 0s 1 normal both;-moz-animation:
-amp-start 8s steps(1,end) 0s 1 normal both;-ms-animation:
-amp-start 8s steps(1,end) 0s 1 normal both;animation:
-amp-start 8s steps(1,end) 0s 1 normal both
}
@-webkit-keyframes
-amp-start{from{visibility:hidden}to{visibility:visible}}@-moz-keyframes
-amp-start{from{visibility:hidden}to{visibility:visible}}@-ms-keyframes
-amp-start{from{visibility:hidden}to{visibility:visible}}@-o-keyframes
-amp-start{from{visibility:hidden}to{visibility:visible}}@keyframes
-amp-start{from{visibility:hidden}to{visibility:visible}}
</style>
<noscript>
<style amp-boilerplate>
body{
-webkit-animation:none;-moz-animation:none;-ms-an
imation:none;animation:none
}
</style>
</noscript>
<script async custom-element = "amp-lightbox"
src = "https://cdn.ampproject.org/v0/amp-lightbox-0.1.js">
</script>
<style amp-custom>
amp-img {
border: 1px solid #ddd;
border-radius: 4px;
padding: 5px;
}
button{
background-color:
#ACAD5C; color: white;
padding: 12px 20px;
border: none;
border-radius: 4px;
cursor: pointer;
float: left;
}
.lightbox {
background: rgba(211,211,211,0.8);
width: 100%;
height: 100%;
position: absolute;
display: flex;
align-items: center;
justify-content: center;
}
</style>
</head>
<body>
<h3>Google AMP - Amp Lightbox</h3>
<button on = "tap:my-lightbox">
Show LightBox
</button>
<amp-lightbox id = "my-lightbox" layout = "nodisplay">
<div class = "lightbox" on = "tap:my-lightbox.close" tabindex = "0">
<amp-img alt = "Beautiful Flower"
src = "images/flower.jpg"
width = "246"
height = "205">
</amp-img>
</div>
</amp-lightbox>
</body>
</html>
輸出


現在,您可以點選螢幕上的任何位置關閉 lightbox。
在上面的示例中,我們使用瞭如下所示的程式碼中的按鈕:
<button on = "tap:my-lightbox"> Show LightBox </button> Next, we have added action on the button using on attribute as shown: on = "tap:my-lightbox"
當您點選按鈕時,將執行操作。請注意,lightbox 的 id 已賦予它。當用戶點選按鈕時,將開啟 lightbox。同樣,您可以將按鈕與任何元件上的 on 操作一起使用來與其互動。
Google AMP - Timeago
Timeago 會透過將其與過去進行比較來提供時間戳詳細資訊,例如“x”小時前。在本章中,讓我們詳細討論此功能。
要在我們的工作中插入此功能,我們需要將以下指令碼新增到 .html 頁面中:
<script async custom-element = "amp-timeago" src = "https://cdn.ampproject.org/v0/amp-timeago-0.1.js"> </script>
amp-timeago 標籤如下所示:
<amp-timeago layout = "fixed" width = "160" height = "20" datetime = "2018-10-01T00:37:33.809Z" locale = "en">Monday 01 October 2018 00.37 </amp-timeago>
讓我們透過以下工作示例來了解這一點:
示例
<!doctype html>
<html amp lang = "en">
<head>
<meta charset = "utf-8">
<script async src = "https://cdn.ampproject.org/v0.js"></script>
<title>Google AMP - TimeAgo</title>
<link rel = "canonical" href = " http://example.ampproject.org/article-metadata.html">
<meta name = "viewport" content = "width = device-width,minimum-scale = 1,initial- scale = 1">
<style amp-boilerplate>
body{
-webkit-animation:-amp-start 8s steps(1,end)
0s 1 normal both;-moz-animation:
-amp-start 8s steps(1,end) 0s 1 normal both;-ms-animation:
-amp-start 8s steps(1,end) 0s 1 normal both;animation:
-amp-start 8s steps(1,end) 0s 1 normal both
}
@-webkit-keyframes
-amp-start{from{visibility:hidden}to{visibility:visible}}@-moz-keyframes
-amp-start{from{visibility:hidden}to{visibility:visible}}@-ms-keyframes
-amp-start{from{visibility:hidden}to{visibility:visible}}@-o-keyframes
-amp-start{from{visibility:hidden}to{visibility:visible}}@keyframes
-amp-start{from{visibility:hidden}to{visibility:visible}}
</style>
<noscript>
<style amp-boilerplate>
body{
-webkit-animation:none;-moz-animation:none;-ms
-animation:none;animation:none
}
</style>
</noscript>
<script async custom-element="amp-timeago"
src = "https://cdn.ampproject.org/v0/amp-timeago-0.1.js">
</script>
</head>
<body>
<h1>Google AMP - TimeAgo Example</h1>
<amp-timeago
layout = "fixed"
width = "160"
height = "20"
datetime = "2018-10-01T00:37:33.809Z"
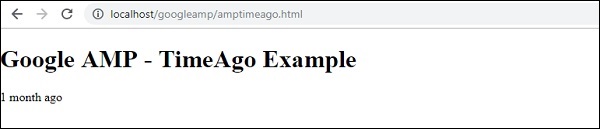
locale = "en">Monday 01 October 2018 00.37
</amp-timeago>
</body>
</html>
輸出
預設情況下,區域設定設定為 en。我們可以更改它並根據需要以區域設定顯示 timeago。可以在 timeago 標籤中使用的區域設定在下表中給出。
| 序號 | 區域設定和描述 |
|---|---|
| 1 | ar 阿拉伯語 |
| 2 | be 白俄羅斯語 |
| 3 | be 白俄羅斯語 |
| 4 | bg 保加利亞語 |
| 5 | ca 加泰羅尼亞語 |
| 6 | da 丹麥語 |
| 7 | de 德語 |
| 8 | el 希臘語 |
| 9 | en 英語 |
| 10 | enShort 英語 - 簡短 |
| 11 | es 西班牙語 |
| 12 | eu 巴斯克語 |
| 13 | fi 芬蘭語 |
| 14 | fr 法語 |
| 15 | he 希伯來語 |
| 16 | hu 匈牙利語 |
| 17 | inBG 孟加拉語 |
| 18 | inHI 印地語 |
| 19 | inID 馬來語 |
| 20 | it 義大利語 |
| 21 | ja 日語 |
| 22 | ko 韓語 |
| 23 | ml 馬拉雅拉姆語 |
| 24 | nbNO 挪威書面挪威語 |
| 25 | nl 荷蘭語 |
| 26 | nnNO 挪威新挪威語 |
| 27 | pl 波蘭語 |
| 28 | ptBR 葡萄牙語 |
| 29 | ro 羅馬尼亞語 |
| 30 | ru 俄語 |
| 31 | sv 瑞典語 |
| 32 | ta 泰米爾語 |
| 33 | th 泰語 |
| 34 | tr 土耳其語 |
| 35 | uk 烏克蘭語 |
| 36 | vi 越南語 |
| 37 | zhCN 中文 |
| 38 | zhTW 繁體中文 |
讓我們討論一些使用以下工作示例的區域設定:
示例
<!doctype html>
<html amp lang = "en">
<head>
<meta charset = "utf-8">
<script async src = "https://cdn.ampproject.org/v0.js"></script>
<title>Google AMP - TimeAgo Using Locale</title>
<link rel = "canonical" href = "http://example.ampproject.org/article-metadata.html">
<meta name = "viewport" content = "width = device-width,minimum-scale = 1, initial-scale = 1">
<style amp-boilerplate>
body{
-webkit-animation:
-amp-start 8s steps(1,end) 0s 1 normal both;-moz-animation:
-amp-start 8s steps(1,end) 0s 1 normal both;-ms-animation:
-amp-start 8s steps(1,end) 0s 1 normal both;animation:
-amp-start 8s steps(1,end) 0s 1 normal both
}
@-webkit-keyframes
-amp-start{from{visibility:hidden}to{visibility:visible}}@-moz-keyframes
-amp-start{from{visibility:hidden}to{visibility:visible}}@-ms-keyframes
-amp-start{from{visibility:hidden}to{visibility:visible}}@-o-keyframes
-amp-start{from{visibility:hidden}to{visibility:visible}}@keyframes
-amp-start{from{visibility:hidden}to{visibility:visible}}
</style>
<noscript>
<style amp-boilerplate>
body{
-webkit-animation:none;
-moz-animation:none;-ms
-animation:none;
animation:none
}
</style>
</noscript>
<script async custom-element = "amp-timeago"
src = "https://cdn.ampproject.org/v0/amp-timeago-0.1.js">
</script>
</head>
<body>
<h1>Google AMP - TimeAgo Example Using Locale</h1>
<h3>Locale : Russian</h3>
<amp-timeago layout = "fixed"
width = "160" height = "20"
datetime = "2018-10-01T00:37:33.809Z"
locale = "ru">
Monday 01 October 2018 00.37
</amp-timeago>
<h3>Locale : Korean</h3>
<amp-timeago
layout = "fixed"
width = "160"
height = "20"
datetime = "2018-10-01T00:37:33.809Z"
locale = "ko">
Monday 01 October 2018 00.37
</amp-timeago>
<h3>Locale : Hindi</h3>
<amp-timeago
layout = "fixed"
width = "160"
height = "20"
datetime = "2018-10-01T00:37:33.809Z"
locale = "inHI">
Monday 01 October 2018 00.37
</amp-timeago>
<h3>Locale : Spanish</h3>
<amp-timeago
layout = "fixed"
width = "160"
height = "20"
datetime = "2018-10-01T00:37:33.809Z"
locale = "es">
Monday 01 October 2018 00.37
</amp-timeago>
<h3>Locale : French</h3>
<amp-timeago
layout = "fixed"
width = "160"
height = "20"
datetime = "2018-10-01T00:37:33.809Z"
locale = "fr">
Monday 01 October 2018 00.3
</amp-timeago>
</body>
</html>
輸出
上面程式碼的輸出如下所示:

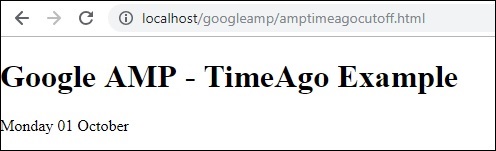
如果需要更改“X 時間前”顯示,我們可以將“cutoff”屬性與 timeago 一起使用。Cutoff 以秒為單位獲取值以去除 ago 顯示。
讓我們藉助以下工作示例來了解這一點:
示例
<!doctype html>
<html amp lang = "en">
<head>
<meta charset = "utf-8">
<script async src = "https://cdn.ampproject.org/v0.js"></script>
<title>Google AMP - TimeAgo</title>
<link rel = "canonical" href = "http://example.ampproject.org/article-metadata.html">
<meta name = "viewport" content = "width = device-width,minimum-scale=1, initial-scale=1">
<style amp-boilerplate>
body{
-webkit-animation:
-amp-start 8s steps(1,end) 0s 1 normal both;-moz-animation:
-amp-start 8s steps(1,end) 0s 1 normal both;-ms-animation:
-amp-start 8s steps(1,end) 0s 1 normal both;animation:
-amp-start 8s steps(1,end) 0s 1 normal both
}
@-webkit-keyframes
-amp-start{from{visibility:hidden}to{visibility:visible}}@-moz-keyframes
-amp-start{from{visibility:hidden}to{visibility:visible}}@-ms-keyframes
-amp-start{from{visibility:hidden}to{visibility:visible}}@-o-keyframes
-amp-start{from{visibility:hidden}to{visibility:visible}}@keyframes
-amp-start{from{visibility:hidden}to{visibility:visible}}
</style>
<noscript>
<style amp-boilerplate>
body{
-webkit-animation:none;
-moz-animation:none;
-ms-animation:none;
animation:none
}
</style>
</noscript>
<script async custom-element = "amp-timeago"
src = "https://cdn.ampproject.org/v0/amp-timeago-0.1.js">
</script>
</head>
<body>
<h1>Google AMP - TimeAgo Example</h1>
<amp-timeago
layout = "fixed"
width = "160"
height = "20"
datetime = "2018-10-01T00:37:33.809Z"
locale = "en"
cutoff = "300">
Monday 01 October 2018 00.37
</amp-timeago>
</body>
</html>
輸出
Google AMP - Mathml
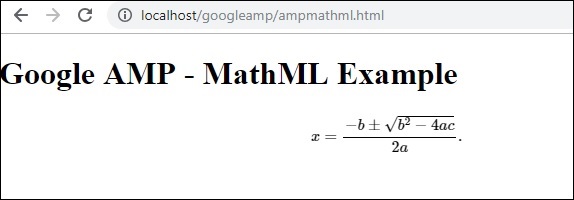
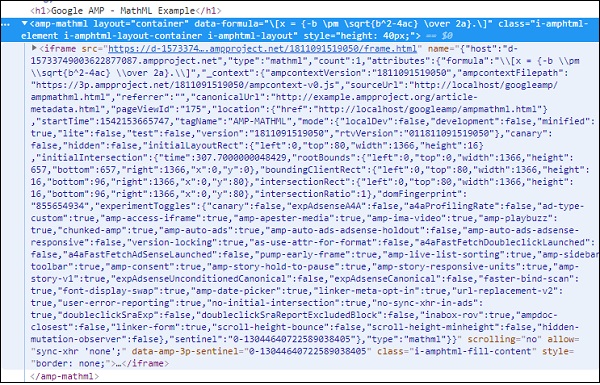
使用 MathML,我們可以顯示數學公式。在本章中,讓我們看一個工作示例,如何使用 MathML 並使用一些數學公式來顯示它。
要使用 MathML,我們需要包含以下 javascript 檔案:
<script async custom-element = "amp-mathml" src = "https://cdn.ampproject.org/v0/amp-mathml-0.1.js"> </script>
MathML AMP 標籤
MathML amp 標籤的格式如下所示:
<amp-mathml layout = "container"
data-formula = "\[x = {-b \pm \sqrt{b^2-4ac} \over 2a}.\]">
</amp-mathml>
請注意,data-formula 是必須的屬性,公式將賦予它。
示例
讓我們藉助一個示例更好地瞭解此標籤。
<!doctype html>
<html amp lang = "en">
<head>
<meta charset = "utf-8">
<script async src = "https://cdn.ampproject.org/v0.js"></script>
<title>Google AMP - MathML</title>
<link rel = "canonical" href = " http://example.ampproject.org/article-metadata.html">
<meta name = "viewport" content = "width = device-width,minimum-scale = 1,initial-scale = 1">
<style amp-boilerplate>
body{
-webkit-animation:
-amp-start 8s steps(1,end) 0s 1 normal both;-moz-animation:
-amp-start 8s steps(1,end) 0s 1 normal both;-ms-animation:
-amp-start 8s steps(1,end) 0s 1 normal both;animation:
-amp-start 8s steps(1,end) 0s 1 normal both
}
@-webkit-keyframes
-amp-start{from{visibility:hidden}to{visibility:visible}}@-moz-keyframes
-amp-start{from{visibility:hidden}to{visibility:visible}}@-ms-keyframes
-amp-start{from{visibility:hidden}to{visibility:visible}}@-o-keyframes
-amp-start{from{visibility:hidden}to{visibility:visible}}@keyframes
-amp-start{from{visibility:hidden}to{visibility:visible}}
</style>
<noscript>
<style amp-boilerplate>
body{
-webkit-animation:none;
-moz-animation:none;
-ms-animation:none;
animation:none
}
</style>
</noscript>
<script async custom-element = "amp-mathml"
src = "https://cdn.ampproject.org/v0/amp-mathml-0.1.js">
</script>
</head>
<body>
<h1>Google AMP - MathML Example</h1>
<amp-mathml layout = "container"
data-formula = "\[x = {-b \pm \sqrt{b^2-4ac} \over 2a}.\]">
</amp-mathml>
</body>
</html>
輸出
Amp-mathml 標籤在執行時將在 iframe 中呈現顯示,如下所示:
Google AMP - Fit Text
Amp 標籤amp-fit-text 將減小字型大小,如果空間不足以呈現顯示。本章將詳細討論此標籤。
要使 amp-fit-text 正常工作,我們需要新增以下指令碼:
<script async custom-element = "amp-fit-text" src = "https://cdn.ampproject.org/v0/amp-fit-text-0.1.js"> </script>
Amp Fit-Text 標籤
amp-fit text 標籤的格式如下所示:
<amp-fit-text width = "200" height = "200" layout = "responsive"> Text here </amp-fit-text>
示例
讓我們藉助一個示例更好地瞭解此標籤。
<!doctype html>
<html amp lang = "en">
<head>
<meta charset = "utf-8">
<script async src = "https://cdn.ampproject.org/v0.js"></script>
<title>Google AMP - Amp Fit-Text</title>
<link rel = "canonical" href = "http://example.ampproject.org/article-metadata.html">
<meta name = "viewport" content = "width = device-width,minimum-scale = 1, initial-scale = 1">
<style amp-boilerplate>
body{
-webkit-animation:-amp-start 8s steps(1,end)
0s 1 normal both;-moz-animation:
-amp-start 8s steps(1,end) 0s 1 normal both;-ms-animation:
-amp-start 8s steps(1,end) 0s 1 normal both;animation:
-amp-start 8s steps(1,end) 0s 1 normal both
}
@-webkit-keyframes
-amp-start{from{visibility:hidden}to{visibility:visible}}@-moz-keyframes
-amp-start{from{visibility:hidden}to{visibility:visible}}@-ms-keyframes
-amp-start{from{visibility:hidden}to{visibility:visible}}@-o-keyframes
-amp-start{from{visibility:hidden}to{visibility:visible}}@keyframes
-amp-start{from{visibility:hidden}to{visibility:visible}}
</style>
<noscript>
<style amp-boilerplate>
body{
-webkit-animation:none;-moz-animation:none;-ms
-animation:none;animation:none}
</style>
</noscript>
<script async custom-element = "amp-fit-text"
src = "https://cdn.ampproject.org/v0/amp-fit-text-0.1.js">
</script>
</head>
<body>
<h1>Google AMP - Amp Fit-Text</h1>
<div style = "width:150px;height:150px; ">
<amp-fit-text
width = "150"
height = "150"
layout = "responsive">
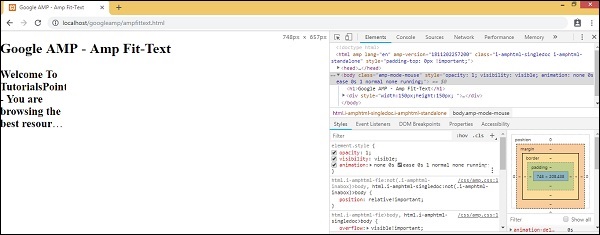
<b>Welcome To TutorialsPoint - You are browsing the best resource
for Online Education</b>
</amp-fit-text>
</div>
</body>
</html>
輸出
上面給出的程式碼的輸出如下所示:
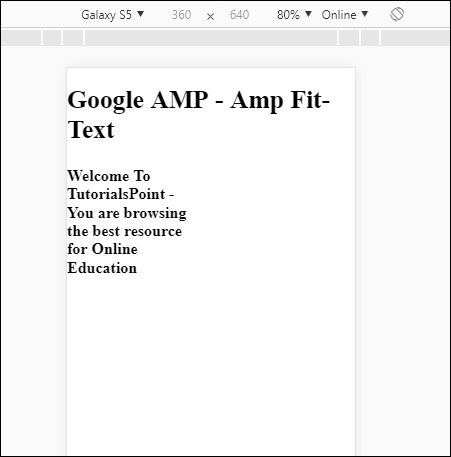
如果您使用 amp-fit-text 檢視顯示,則內容會嘗試根據可用空間進行調整。
Amp-fit-text 帶有兩個屬性max-font-size 和min-font-size。
當我們使用 max-font-size 並且沒有足夠的空間來呈現文字時,它將嘗試減小尺寸並在可用空間內進行調整。
如果我們指定 min-font-size 並且沒有足夠的空間,它將截斷文字並在隱藏文字的位置顯示點。
示例
讓我們看一個工作示例,在其中我們將為 amp-fit-text 指定 max-font-size 和 min-font-size。
<!doctype html>
<html amp lang = "en">
<head>
<meta charset = "utf-8">
<script async src = "https://cdn.ampproject.org/v0.js"></script>
<title>Google AMP - Amp Fit-Text</title>
<link rel = "canonical" href = " http://example.ampproject.org/article-metadata.html">
<meta name = "viewport" content = "width = device-width,minimum-scale = 1,initial-scale = 1">
<style amp-boilerplate>
body{
-webkit-animation:
-amp-start 8s steps(1,end) 0s 1 normal both;-moz-animation:
-amp-start 8s steps(1,end) 0s 1 normal both;-ms-animation:
-amp-start 8s steps(1,end) 0s 1 normal both;animation:
-amp-start 8s steps(1,end) 0s 1 normal both
}
@-webkit-keyframes
-amp-start{from{visibility:hidden}to{visibility:visible}}@-moz-keyframes
-amp-start{from{visibility:hidden}to{visibility:visible}}@-ms-keyframes
-amp-start{from{visibility:hidden}to{visibility:visible}}@-o-keyframes
-amp-start{from{visibility:hidden}to{visibility:visible}}@keyframes
-amp-start{from{visibility:hidden}to{visibility:visible}}
</style>
<noscript>
<style amp-boilerplate>
body{
-webkit-animation:none;
-moz-animation:none;
-ms-animation:none;
animation:none}
</style>
</noscript>
<script async custom-element = "amp-fit-text" src =
"https://cdn.ampproject.org/v0/amp-fit-text-0.1.js">
</script>
</head>
<body>
<h1>Google AMP - Amp Fit-Text</h1>
<div style = "width:150px;height:150px; ">
<amp-fit-text
width = "150"
height = "150"
layout = "responsive"
max-font-size = "30"
min-font-size = "25">
<b>Welcome To TutorialsPoint - You are
browsing the best resource for Online Education</b>
</amp-fit-text>
</div>
</body>
</html>
輸出

Google AMP - 倒計時
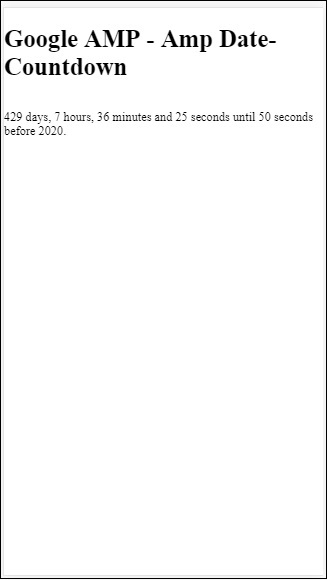
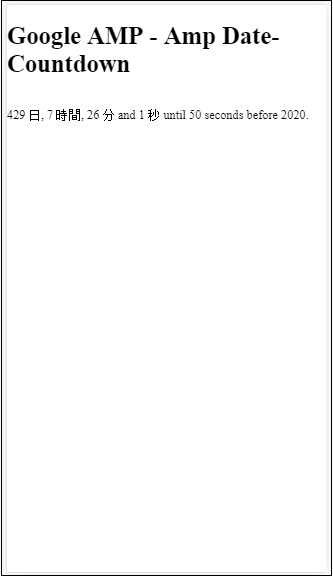
另一個名為 Amp Date countdown 的 amp 元件,用於顯示到給定日期(預設為Y2K38 (2038))的天數、小時、分鐘、秒。顯示可以根據您選擇的區域設定進行,預設情況下為 en(英語)。Amp-date-countdown 使用 amp-mustache 模板渲染資料。
在本章中,我們將看一些工作示例,以便更詳細地瞭解 amp-date-countdown。
要使用 amp-date-countdown,我們需要新增以下指令碼
用於 amp-date-countdown
<script async custom-element = "amp-date-countdown" src = "https://cdn.ampproject.org/v0/amp-date-countdown-0.1.js"> </script>
用於 amp-mustache
<script async custom-template = "amp-mustache" src = "https://cdn.ampproject.org/v0/amp-mustache-0.1.js"> </script>
Amp-date-countdown 標籤
amp-date-countdown 標籤如下所示:
<amp-date-countdown timestamp-seconds = "2100466648"
layout = "fixed-height"
height = "50">
<template type = "amp-mustache">
<p class = "p1">
{{d}} days, {{h}} hours, {{m}} minutes and {{s}} seconds until
<a href = "https://en.wikipedia.org/wiki/Year_2038_problem">
Y2K38
</a>.
</p>
</template>
</amp-date-countdown>
amp-date-countdown 的屬性
amp-date-countdown 的屬性在此表中列出:
| 序號 | 屬性和描述 |
|---|---|
| 1 | end-date 要倒計時到的 ISO 格式日期。例如,2025-08-01T00:00:00+08:00 |
| 2 | timestamp-ms 以毫秒為單位的 POSIX 時間戳值;假設為 UTC 時區。例如,timestamp-ms="1521880470000" |
| 3 | timestamp-seconds 以秒為單位的 POSIX 時間戳值;假設為 UTC 時區。例如,timestamp-seconds="1521880470" |
| 4 | timeleft-ms 剩餘的毫秒值,用於倒計時。例如,剩餘 50 小時 timeleft-ms="180,000,000" |
| 5 | offset-seconds(可選) 一個正數或負數,表示要新增到或從給定 end-date 中減去的秒數。例如,offset-seconds="60" 將 60 秒新增到 end-date |
| 6 | when-ended(可選) 指定計時器在達到 0 秒時是否停止。該值可以設定為 stop(預設值)以指示計時器在 0 秒時停止,並且不會超過最終日期或繼續以指示計時器在達到 0 秒後應繼續。 |
| 7 | locale(可選) 每個計時器單元的國際化語言字串。預設值為 en(英語)。支援的值列在下面。 |
格式
amp-date-countdown 用於顯示倒計時的格式在下表中給出:
| 序號 | 格式和描述 |
|---|---|
| 1 | d 將日期顯示為 0、1、2、3…無窮大 |
| 2 | dd 將日期顯示為 00、01、02、03…無窮大 |
| 3 | h 將小時顯示為 0、1、2、3…無窮大 |
| 4 | hh 將小時顯示為 00、01、02、03…無窮大 |
| 5 | m 將分鐘顯示為 0、1、2、3、4…無窮大 |
| 6 | mm 將分鐘顯示為 00、01、02、03…無窮大 |
| 7 | s 將秒顯示為 0、1、2、3…無窮大 |
| 8 | ss 將秒顯示為 00、01、02、03…無窮大 |
| 9 | days 根據區域設定顯示 day 或 days 字串 |
| 10 | hours 根據區域設定顯示 hour 或 hours 字串 |
| 11 | minutes 根據區域設定顯示 minute 或 minutes 字串 |
| 12 | seconds 根據區域設定顯示 second 或 seconds 字串 |
示例
<!doctype html>
<html amp lang = "en">
<head>
<meta charset = "utf-8">
<script async src = "https://cdn.ampproject.org/v0.js"></script>
<title>Google AMP - Amp Date-Countdown</title>
<link rel = "canonical" href = " http://example.ampproject.org/article-metadata.html">
<meta name = "viewport" content = "width = device-width,minimum-scale = 1,initial-scale = 1">
<style amp-boilerplate>
body{-webkit-animation:-amp-start 8s steps(1,end)
0s 1 normal both;-moz-animation:
-amp-start 8s steps(1,end) 0s 1 normal both;-ms-animation:
-amp-start 8s steps(1,end) 0s 1 normal both;animation:
-amp-start 8s steps(1,end) 0s 1 normal both
}
@-webkit-keyframes
-amp-start{from{visibility:hidden}to{visibility:visible}}@-moz-keyframes
-amp-start{from{visibility:hidden}to{visibility:visible}}@-ms-keyframes
-amp-start{from{visibility:hidden}to{visibility:visible}}@-o-keyframes
-amp-start{from{visibility:hidden}to{visibility:visible}}@keyframes
-amp-start{from{visibility:hidden}to{visibility:visible}}
</style>
<noscript>
<style amp-boilerplate>
body{-webkit-animation:none;-moz-animation:none;-ms
-animation:none;animation:none}
</style>
</noscript>
<script async custom-element = "amp-date-countdown"
src = "https://cdn.ampproject.org/v0/amp-date-countdown-0.1.js">
</script>
<script async custom-template="amp-mustache" src=
"https://cdn.ampproject.org/v0/amp-mustache-0.1.js">
</script>
</head>
<body>
<h1>Google AMP - Amp Date-Countdown</h1>
<amp-date-countdown
timestamp-seconds = "2145683234"
layout = "fixed-height"
height = "50">
<template type = "amp-mustache">
<p class = "p1">
{{d}} days, {{h}} hours, {{m}} minutes and
{{s}} seconds until
<a href = "https://en.wikipedia.org/wiki/Year_2038_problem">
Y2K38
</a>.
</p>
</template>
</amp-date-countdown>
</body>
</html>
輸出

示例
讓我們透過一個工作示例來了解 amp-countdown 屬性 offset-seconds:
<!doctype html>
<html amp lang = "en">
<head>
<meta charset = "utf-8">
<script async src = "https://cdn.ampproject.org/v0.js"></script>
<title>Google AMP - Amp Date-Countdown</title>
<link rel = "canonical" href = " http://example.ampproject.org/article-metadata.html">
<meta name = "viewport" content = "width = device-width,minimum-scale = 1,initial-scale = 1">
<style amp-boilerplate>
body{
-webkit-animation:-amp-start 8s steps(1,end)
0s 1 normal both;-moz-animation:
-amp-start 8s steps(1,end) 0s 1 normal both;-ms-animation:
-amp-start 8s steps(1,end) 0s 1 normal both;animation:
-amp-start 8s steps(1,end) 0s 1 normal both
}
@-webkit-keyframes
-amp-start{from{visibility:hidden}to{visibility:visible}}@-moz-keyframes
-amp-start{from{visibility:hidden}to{visibility:visible}}@-ms-keyframes
-amp-start{from{visibility:hidden}to{visibility:visible}}@-o-keyframes
-amp-start{from{visibility:hidden}to{visibility:visible}}@keyframes
-amp-start{from{visibility:hidden}to{visibility:visible}}
</style>
<noscript>
<style amp-boilerplate>
body{
-webkit-animation:none;-moz-animation:none;-ms
-animation:none;animation:none}
</style>
</noscript>
<script async custom-element = "amp-date-countdown"
src = "https://cdn.ampproject.org/v0/amp-date-countdown-0.1.js">
</script>
<script async custom-template = "amp-mustache"
src = "https://cdn.ampproject.org/v0/amp-mustache-0.1.js">
</script>
</head>
<body>
<h1>Google AMP - Amp Date-Countdown</h1>
<amp-date-countdown
end-date = "2020-01-19T08:14:08.000Z"
offset-seconds = "-50"
layout = "fixed-height"
height = "100">
<template type = "amp-mustache">
<p class = "p1">
{{d}} days, {{h}} hours, {{m}}
minutes and {{s}} seconds until 50
seconds before 2020.
</p>
</template>
</amp-date-countdown>
</body>
</html>
輸出
支援的區域設定列表
以下是 amp-date-countdown 支援的區域設定列表:
| 序號 | 名稱和區域設定 |
|---|---|
| 1 | en 英語 |
| 2 | es 西班牙語 |
| 3 | fr 法語 |
| 4 | de 德語 |
| 5 | id 印度尼西亞語 |
| 6 | it 義大利語 |
| 7 | ja 日語 |
| 8 | ko 韓語 |
| 9 | nl 荷蘭語 |
| 10 | pt 葡萄牙語 |
| 11 | ru 俄語 |
| 12 | th 泰語 |
| 13 | tr 土耳其語 |
| 14 | vi 越南語 |
| 15 | zh-cn 簡體中文 |
| 16 | zh-tw 繁體中文 |
現在,我們將嘗試一個示例,使用上面列出的其中一個區域設定顯示倒計時。
示例
<!doctype html>
<html amp lang = "en">
<head>
<meta charset = "utf-8">
<script async src = "https://cdn.ampproject.org/v0.js"></script>
<title>Google AMP - Amp Date-Countdown</title>
<link rel = "canonical" href = "http://example.ampproject.org/article-metadata.html">
<meta name="viewport" content="width = device-width, minimum-scale = 1,initial-scale = 1">
<style amp-boilerplate>
body{
-webkit-animation:
-amp-start 8s steps(1,end)0s 1 normal both;-moz-animation:
-amp-start 8s steps(1,end) 0s 1 normal both;-ms-animation:
-amp-start 8s steps(1,end) 0s 1 normal both;animation:
-amp-start 8s steps(1,end) 0s 1 normal both
}
@-webkit-keyframes
-amp-start{from{visibility:hidden}to{visibility:visible}}@-moz-keyframes
-amp-start{from{visibility:hidden}to{visibility:visible}}@-ms-keyframes
-amp-start{from{visibility:hidden}to{visibility:visible}}@-o-keyframes
-amp-start{from{visibility:hidden}to{visibility:visible}}@keyframes
-amp-start{from{visibility:hidden}to{visibility:visible}}
</style>
<noscript>
<style amp-boilerplate>
body{
-webkit-animation:none;
-moz-animation:none;
-ms-animation:none;
animation:none}
</style>
</noscript>
<script async custom-element = "amp-date-countdown"
src = "https://cdn.ampproject.org/v0/amp-date-countdown-0.1.js">
</script>
<script async custom-template = "amp-mustache"
src = "https://cdn.ampproject.org/v0/amp-mustache-0.1.js">
</script>
</head>
<body>
<h1>Google AMP - Amp Date-Countdown</h1>
<amp-date-countdown
locale = "ja"
end-date = "2020-01-19T08:14:08.000Z"
offset-seconds = "-50"
layout = "fixed-height"
height = "100">
<template type = "amp-mustache">
<p class = "p1">
{{d}} {{days}}, {{h}} {{hours}}, {{m}}
{{minutes}} and {{s}} {{seconds}} until
50 seconds before 2020.
</p>
</template>
</amp-date-countdown>
</body>
</html>
輸出
Google AMP - 日期選擇器
AMP Datepicker 是一個 amp 元件,它在頁面上顯示日曆,使用者可以在其中選擇日期。AMP datepicker 可以像靜態日曆一樣顯示,也可以根據輸入選擇顯示,即點選按鈕。
要使 amp-date-picker 正常工作,我們需要將以下指令碼新增到頁面中:
<script async custom-element = "amp-date-picker" src = "https://cdn.ampproject.org/v0/amp-date-picker-0.1.js"> </script>
Amp-date-picker 標籤
amp-date-picker 的標籤如下所示:
<amp-date-picker layout = "fixed-height" height = "360"></amp-date-picker>
支援的屬性
以下屬性受 amp-date-picker 支援:
| 序號 | 屬性和描述 |
|---|---|
| 1 | mode 可用的選項是 static 和 overlay。對於 static,日曆將在頁面上預設開啟。對於 Overlay,日曆將在互動時開啟。 |
| 2 | mode 可用的選項包括單選和範圍。使用單選,您可以在日曆上只選擇一個日期。使用範圍,您可以選擇多個日期,但必須是連續的範圍。 |
| 3 | 輸入選擇器 這可以是一個日期輸入的查詢選擇器。例如,對於id來說是#nameoftheid,對於類來說是.nameoftheclass。日期將更新到分配了id的標籤。 |
| 4 | 開始輸入選擇器 這可以是一個日期輸入的查詢選擇器。例如,對於id來說是#nameoftheid,對於類來說是.nameoftheclass。日期將更新到分配了id的標籤。 |
| 5 | 結束輸入選擇器 這可以是一個日期輸入的查詢選擇器。例如,對於id來說是#nameoftheid,對於類來說是.nameoftheclass。日期將更新到分配了id的標籤。 |
| 6 | 最小值 使用者可以選擇的最早日期。必須格式化為ISO 8601日期。如果不存在min屬性,則當前日期將是最小日期。 |
| 7 | 最大值 使用者可以選擇的最晚日期。必須格式化為ISO 8601日期。如果不存在max屬性,則日期選擇器將沒有最大日期。 |
| 8 | 月份格式 您需要顯示所選日期的月份格式。預設值為“MMMM YYYY”。 |
| 9 | 格式 您希望日期在輸入框或任何使用選擇器的html元素中顯示的格式。預設值為“YYYY-MM-DD”。 |
| 10 | 星期格式 顯示星期的格式。 |
| 11 | 語言環境 顯示日曆檢視的語言環境。預設值為en。 |
| 12 | 最少晚數 使用者在日期範圍內必須選擇的晚數。預設為“1”。值為“0”允許使用者為開始日期和結束日期選擇相同的日期。 |
| 13 | 月份數 在日曆檢視中一次顯示的月份數。預設為“1”。 |
| 14 | 一週的第一天 指定為一週的第一天(0-6)。預設值為“0”(星期日)。 |
| 15 | 日期大小 日曆視圖表格中日期單元格的px大小。預設為39。 |
主要屬性為型別和模式。對於模式,我們有靜態和覆蓋型別的日曆。對於型別,我們可以有單選和範圍選項。使用type = ”single”,我們只能從日曆中選擇一個日期,而對於type = ”range”,我們可以在一個範圍內選擇多個數據。
現在,讓我們透過一些工作示例來了解靜態和覆蓋型別日曆的amp-date-picker。
AMP靜態日期選擇器
對於靜態型別日期選擇器,我們需要指定mode=static,如下例所示。
示例
<!doctype html>
<html amp lang = "en">
<head>
<meta charset = "utf-8">
<script async src = "https://cdn.ampproject.org/v0.js"></script>
<title>Google AMP - Amp Date-Picker Static </title>
<link rel = "canonical" href = " http://example.ampproject.org/article-metadata.html">
<meta name = "viewport" content = "width = device-width, minimum-scale = 1,initial-scale = 1">
<style amp-boilerplate>
body{
-webkit-animation:
-amp-start 8s steps(1,end) 0s 1 normal both;-moz-animation:
-amp-start 8s steps(1,end) 0s 1 normal both;-ms-animation:
-amp-start 8s steps(1,end) 0s 1 normal both;animation:
-amp-start 8s steps(1,end) 0s 1 normal both
}
@-webkit-keyframes
-amp-start{from{visibility:hidden}to{visibility:visible}}@-moz-keyframes
-amp-start{from{visibility:hidden}to{visibility:visible}}@-ms-keyframes
-amp-start{from{visibility:hidden}to{visibility:visible}}@-o-keyframes
-amp-start{from{visibility:hidden}to{visibility:visible}}@keyframes
-amp-start{from{visibility:hidden}to{visibility:visible}}
</style>
<noscript>
<style amp-boilerplate>
body{-webkit-animation:
none;-moz-animation:none;-ms-animation:none;animation:none}
</style>
</noscript>
<script async custom-element = "amp-date-picker"
src = "https://cdn.ampproject.org/v0/amp-date-picker-0.1.js">
</script>
<script async custom-element = "amp-bind"
src = "https://cdn.ampproject.org/v0/amp-bind-0.1.js">
</script>
<script async custom-template = "amp-mustache"
src = "https://cdn.ampproject.org/v0/amp-mustache-0.1.js">
</script>
<style>
input[type = text]{
width: 50%;
padding: 12px;
border: 1px
solid #ccc;
border-radius: 4px;
resize: vertical;
}
label {
padding: 12px 12px 12px 0;display: inline-block;
}
.col-label {
float: left;width: 25%;margin-top: 6px;
}
.col-content {
float: left;width: 75%;margin-top: 6px;
}
.row:after {
content: "";display: table;clear: both;
}
.amp_example {
background-color: #f1f1f1;
padding: 0.01em 16px;
margin: 20px 0;
box-shadow: 0 2px 4px 0
rgba(0,0,0,0.16),0 2px 10px 0
rgba(0,0,0,0.12)!important;
}
h3{font-family: "Segoe UI",Arial,sans-serif;
font-weight: 400;margin: 10px 0;}
</style>
</head>
<body>
<div class = "amp_example">
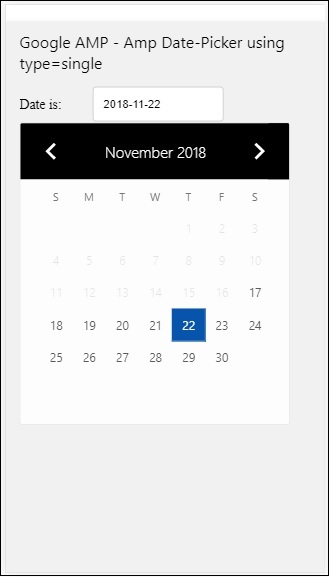
<h3>Google AMP - Amp Date-Picker using type = single</h3>
<amp-date-picker
id = "static-date"
type = "single"
mode = "static"
layout = "fixed-height"
height = "600"
format = "YYYY-MM-DD"
input-selector = "#date">
<div class = "row">
<div class = "col-label">
<label for = "start">
Date is:
</label>
</div>
<div class = "col-content">
<input type = "text" id = "date" name = "date"
placeholder = "Date Selected Is...">
</div>
</div>
</amp-date-picker>
<div>
</body>
</html>
請注意,在這個例子中,我們預設在螢幕上顯示日曆,即日期選擇器。
使用者選擇的日期將顯示在文字欄位中,如下面的演示螢幕所示。
輸出
如何從amp-date-picker中獲取所選日期?
如果您檢視上面的示例,有一個名為input-selector的屬性,它被賦予了文字欄位的id。當用戶選擇日期時,它將顯示在輸入欄位中。
<amp-date-picker
id = "static-date"
type = "single"
mode = "static"
layout = "fixed-height"
height = "600"
format = "YYYY-MM-DD"
input-selector = "#date"
<div class = "row">
<div class = "col-label">
<label for = "start">Date is:</label>
</div>
<div class = "col-content">
<input type = "text" id = "date" name = "date"
placeholder = "Date Selected Is...">
</div>
</div>
</amp-date-picker>
您還可以如下為input-selector屬性提供name屬性。
<amp-date-picker type = "single" mode = "static" layout = "container" input-selector = "[name = date]"> <input type = "text" id = "date" name = "date" placeholder = "Date Selected Is..."> </amp-date-picker>
如果未提供input-selector,則amp-date-picker會建立一個隱藏的輸入欄位,並使用amp-date-picker的id為其命名為date或${id}-date。
我們將討論更多使用日期選擇器提供的不同屬性的示例。在上面,我們可以選擇單個日期,因為我們提到type=”single”並將模式設定為靜態。我們還可以透過將型別設定為type=”range”來選擇日期範圍。
示例
<!doctype html>
<html amp lang = "en">
<head>
<meta charset = "utf-8">
<script async src = "https://cdn.ampproject.org/v0.js"></script>
<title>Google AMP - Amp Date-Picker Static </title>
<link rel = "canonical" href = "http://example.ampproject.org/article-metadata.html">
<meta name = "viewport" content = "width = device-width, minimum-scale = 1,initial-scale = 1">
<style amp-boilerplate>
body{-webkit-animation:
-amp-start 8s steps(1,end) 0s 1 normal both;-moz-animation:
-amp-start 8s steps(1,end) 0s 1 normal both;-ms-animation:
-amp-start 8s steps(1,end) 0s 1 normal both;animation:
-amp-start 8s steps(1,end) 0s 1 normal both
}
@-webkit-keyframes
-amp-start{from{visibility:hidden}to{visibility:visible}}@-moz-keyframes
-amp-start{from{visibility:hidden}to{visibility:visible}}@-ms-keyframes
-amp-start{from{visibility:hidden}to{visibility:visible}}@-o-keyframes
-amp-start{from{visibility:hidden}to{visibility:visible}}@keyframes
-amp-start{from{visibility:hidden}to{visibility:visible}}
</style>
<noscript>
<style amp-boilerplate>
body{
-webkit-animation:
none;-moz-animation:none;-ms-animation:none;animation:none}
</style>
</noscript>
<script async custom-element = "amp-date-picker"
src = "https://cdn.ampproject.org/v0/amp-date-picker-0.1.js">
</script>
<script async custom-element = "amp-bind"
src = "https://cdn.ampproject.org/v0/amp-bind-0.1.js">
</script>
<script async custom-template = "amp-mustache"
src = "https://cdn.ampproject.org/v0/amp-mustache-0.1.js">
</script>
<style>
input[type = text]{
width: 50%;
padding: 12px;
border: 1px solid #ccc;
border-radius: 4px;
resize: vertical;
}
label {padding: 12px 12px 12px 0;display: inline-block;}
.col-label {float: left;width: 25%;margin-top: 6px;}
.col-content {float: left;width: 75%;margin-top: 6px;}
.row:after {content: "";display: table;clear: both;}
.amp_example {
background-color: #f1f1f1;
padding: 0.01em 16px;
margin: 20px 0;
box-shadow: 0 2px 4px 0
rgba(0,0,0,0.16),0 2px 10px 0
rgba(0,0,0,0.12)!important;
}
h3{
font-family: "Segoe UI",Arial,sans-serif;
font-weight: 400;margin: 10px 0;
}
</style>
</head>
<body>
<div class = "amp_example">
<h3>Google AMP - Amp Date-Picker Static Multi Select Dates using type = range</h3>
<amp-date-picker
id = "static-date"
type = "range"
mode = "static"
layout = "fixed-height"
height = "600"
start-input-selector = "#start"
end-input-selector = "#end"
format = "YYYY-MM-DD"
input-selector = "#static-date-input">
<div class = "row">
<div class = "col-label">
<label for = "start">Start Date:</label>
</div>
<div class = "col-content">
<input type = "text" id = "start"
name = "start" placeholder = "Start Date">
</div>
</div>
<div class = "row">
<div class = "col-label">
<label for = "end">End Date:</label>
</div>
<div class = "col-content">
<input type = "text" id = "end"
name = "end" placeholder = "End Date">
</div>
</div>
</amp-date-picker>
</div>
</body>
</html>
輸出
上面程式碼的輸出如下所示。

如何使用type= ”range”從amp-date-picker中獲取開始日期和結束日期?
為了獲取開始日期和結束日期,我們使用了amp-date-picker屬性start-input-selector和end-input-selector。
語法細節如下所示。
<amp-date-picker id = "static-date" type = "range" mode = "static" layout = "fixed-height" height = "600" start-input-selector = "#start" end-input-selector="#end" format = "YYYY-MM-DD" input-selector = "#static-date-input"> <input type = "text" id = "start" name = "start" placeholder="Start Date"> <input type = "text" id = "end" name = "end" placeholder = "End Date"> </amp-date-picker>
兩個選擇器都有輸入欄位id,我們希望開始日期和結束日期顯示在那裡。您也可以像這裡討論的那樣提供輸入欄位的名稱。
AMP覆蓋日期選擇器
對於覆蓋模式日期選擇器,日曆將作為對輸入欄位的響應顯示。我們可以使用覆蓋模式和type=” single”以及type=”range”,就像我們在靜態日期選擇器中看到的那樣。
現在讓我們看看一個為覆蓋型別日期選擇器選擇日期範圍的工作示例。
示例
<!doctype html>
<html amp lang = "en">
<head>
<meta charset = "utf-8">
<script async src = "https://cdn.ampproject.org/v0.js"></script>
<itle>Google AMP - Amp Date-Picker Static</title>
<link rel = "canonical" href = "http://example.ampproject.org/article-metadata.html">
<meta name = "viewport" content = "width = device-width,minimum-scale = 1,initial-scale = 1">
<style amp-boilerplate>
body{
-webkit-animation:
-amp-start 8s steps(1,end) 0s 1 normal both;-moz-animation:
-amp-start 8s steps(1,end) 0s 1 normal both;-ms-animation:
-amp-start 8s steps(1,end) 0s 1 normal both;animation:
-amp-start 8s steps(1,end) 0s 1 normal both
}
@-webkit-keyframes
-amp-start{from{visibility:hidden}to{visibility:visible}}@-moz-keyframes
-amp-start{from{visibility:hidden}to{visibility:visible}}@-ms-keyframes
-amp-start{from{visibility:hidden}to{visibility:visible}}@-o-keyframes
-amp-start{from{visibility:hidden}to{visibility:visible}}@keyframes
-amp-start{from{visibility:hidden}to{visibility:visible}}
</style>
<noscript>
<style amp-boilerplate>
body{
-webkit-animation:
none;-moz-animation:none;-ms-animation:none;animation:none}
</style>
</noscript>
<script async custom-element = "amp-date-picker"
src = "https://cdn.ampproject.org/v0/amp-date-picker-0.1.js">
</script>
<script async custom-element = "amp-bind"
src = "https://cdn.ampproject.org/v0/amp-bind-0.1.js">
</script>
<script async custom-template = "amp-mustache"
src = "https://cdn.ampproject.org/v0/amp-mustache-0.1.js">
</script>
<style>
input[type=text]{
width: 50%;
padding: 12px;border:
1px solid #ccc;
border-radius: 4px;resize: vertical;
}
label {
padding: 12px 12px 12px 0;
display: inline-block;
font-family: "Segoe UI",Arial,sans-serif;
font-weight: 400;
}
.col-label {float: left;width: 25%;margin-top: 6px;}
.col-content {float: left;width: 75%;margin-top: 6px;}
.row:after {content: "";display: table;clear: both;}
.amp_example {
background-color: #f1f1f1;
padding: 0.01em 16px;
margin: 20px 0;
box-shadow: 0 2px 4px 0
rgba(0,0,0,0.16),0 2px 10px 0
rgba(0,0,0,0.12)!important;
}
h3{font-family: "Segoe UI",Arial,sans-serif;font-weight: 400;margin: 10px 0;}
button { background-color: #ACAD5C;
color: white;
padding: 12px 20px;
border: none;
border-radius: 4px;
cursor: pointer;
float: right;
}
</style>
</head>
<body>
<div class = "amp_example">
<h3>Google AMP - Amp Date-Picker Overlay Multi Select Dates using type = rangelt;/h3>
<amp-date-picker id = "overlay-date"
type = "range"
mode = "overlay"
start-input-selector = "#start"
end-input-selector = "#end"
format = "YYYY-MM-DD"
open-after-select
input-selector = "#start">
<div class = "row">
<div class = "col-label">
<label for = "start">Start Date:lt;/label>
</div>
<div class = "col-content">
<input type = "text" id = "start"
name = "start" placeholder = "Start Date">
</div>
</div>
<div class = "row">
<div class = "col-label">
<label for = "end">End Date:lt;/label>
</div>
<div class = "col-content">
<input type = "text" id="end" name = "end"
placeholder = "End Date">
</div>
</div>
<div class = "row">
<div class = "col-label">
</div>
<div class = "col-content">
<button class = "ampstart-btn caps" on = "tap:overlay-date.clear">
Clear
</button>
</div>
</div>
</amp-date-picker>
</div>
</body>
</html>
輸出
上面程式碼的輸出如下所示。
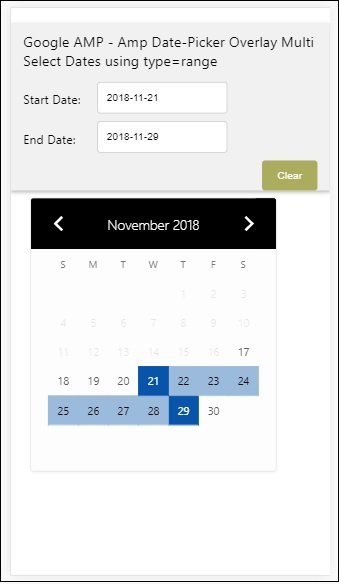
我們已經看到了如何獲取開始日期和結束日期。請注意,我們在這裡使用了另一個屬性open-after-select。此屬性將在選擇後保持覆蓋層開啟。如果您單擊日期選擇器外部,它將關閉。還有一個名為clear的按鈕。單擊clear按鈕,所選日期將被清除。執行此操作的語法如下所示。
<button class = "ampstart-btn caps" on = "tap:overlay-date.clear"> Clear </button>
要新增事件,我們必須使用on屬性。本教程的事件章節將詳細討論事件。我們使用了tag行為,併為其提供了日期選擇器的id和clear事件,該事件負責清除所選的日期範圍。
接下來,讓我們看看如何使用amp-date-picker作為燈箱。
AMP燈箱日期選擇器
日期選擇器可以在模態視窗內使用。我們也可以使用燈箱日期選擇器來實現相同的功能。讓我們透過一個工作示例來了解這一點。
要在燈箱內使用日期選擇器,我們需要新增燈箱指令碼,如下所示。
<script async custom-element = "amp-lightbox" src = "https://cdn.ampproject.org/v0/amp-lightbox-0.1.js"> </script>
示例
<!doctype html>
<html amp lang = "en">
<head>
<meta charset = "utf-8">
<script async src = "https://cdn.ampproject.org/v0.js"></script>
<title>Google AMP - Amp Date-Picker Static </title>
<link rel = "canonical" href = "http://example.ampproject.org/article-metadata.html">
<meta name = "viewport" content = "width=device-width,minimum-scale = 1,initial-scale = 1">
<style amp-boilerplate>
body{
-webkit-animation:
-amp-start 8s steps(1,end) 0s 1 normal both;-moz-animation:
-amp-start 8s steps(1,end) 0s 1 normal both;-ms-animation:
-amp-start 8s steps(1,end) 0s 1 normal both;animation:
-amp-start 8s steps(1,end) 0s 1 normal both
}
@-webkit-keyframes
-amp-start{from{visibility:hidden}to{visibility:visible}}@-moz-keyframes
-amp-start{from{visibility:hidden}to{visibility:visible}}@-ms-keyframes
-amp-start{from{visibility:hidden}to{visibility:visible}}@-o-keyframes
-amp-start{from{visibility:hidden}to{visibility:visible}}@keyframes
-amp-start{from{visibility:hidden}to{visibility:visible}}
</style>
<noscript>
<style amp-boilerplate>
body{
-webkit-animation:none;
-moz-animation:none;
-ms-animation:none;
animation:none}
</style>
</noscript>
<script async custom-element = "amp-date-picker"
src = "https://cdn.ampproject.org/v0/amp-date-picker-0.1.js">
</script>
<script async custom-element = "amp-bind" src = "
https://cdn.ampproject.org/v0/amp-bind-0.1.js">
<script>
<script async custom-template = "amp-mustache"
src = "https://cdn.ampproject.org/v0/amp-mustache-0.1.js">
</script>
<script async custom-element = "amp-lightbox"
src = "https://cdn.ampproject.org/v0/amp-lightbox-0.1.js">
</script>
<style>
input[type=text]{
width: 50%;
padding: 12px;
border: 1px solid #ccc;
border-radius: 4px;
resize: vertical;
}
label {
padding: 12px 12px 12px 0;
display: inline-block;
font-family: "Segoe UI",Arial,sans-serif;
font-weight: 400;
}
.col-label {
float: left;width: 25%;
margin-top: 6px;
}
.col-content {
float: left;
width: 75%;
margin-top: 6px;
}
.row:after {
content: "";
display: table;clear: both;
}
.amp_example {
background-color: #f1f1f1;
padding: 0.01em 16px;
margin: 20px 0;
box-shadow: 0 2px 4px 0 rgba(0,0,0,0.16),0 2px 10px 0rgba(0,0,0,0.12)!important;
}
h3{font-family: "Segoe UI",Arial,sans-serif;
font-weight: 400;
margin: 10px 0;
}
button {
background-color: #ACAD5C;
color: white;
padding: 12px 20px;
border: none;
border-radius: 4px;
cursor: pointer;
float: right;
}
.lightbox {background-color: rgba(100, 100, 100, 0.5);}
</style>
</head>
<body>
<div class = "amp_example">
<h3>Google AMP - Amp Date-Picker Overlay Multi Select Dates using type = range</h3>
<div class = "row">
<div class = "col-label">
<label for = "start">Start Date:</label>
<div>
<div class = "col-content">
<input type = "text" id = "start" name =
"start" placeholder = "Start Date" on = "tap:lightbox.open">
</div>
</div>
<div class = "row">
<div class = "col-label">
<label for = "end">End Date:</label>
</div>
<div class = "col-content">
<input type = "text" id = "end" name =
"end" placeholder = "End Date" on = "tap:lightbox.open">
</div>
</div>
<div class = "row">
<div class = "col-label"></div>
<div class = "col-content">
<button class = "ampstart-btn caps" on =
"tap:overlay-date.clear">Clear</button>
</div>
</div>
<amp-lightbox id = "lightbox" layout = "nodisplay" class = "lightbox">
<amp-date-picker id = "overlay-date"
type = "range"
layout = "fill"
start-input-selector = "#start"
end-input-selector = "#end"
format = "YYYY-MM-DD"
on = "activate: lightbox.open;deactivate: lightbox.close">
</amp-date-picker>
</amp-lightbox>
</div>
</body>
</html>
輸出
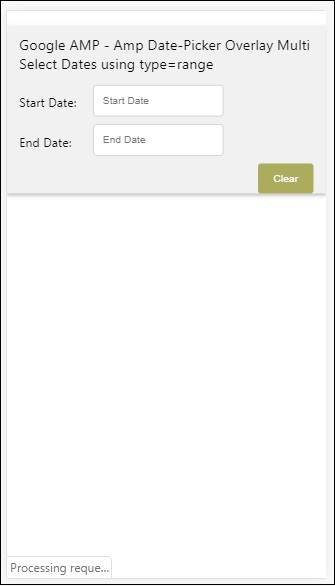
當用戶單擊輸入欄位時,日期選擇器將在燈箱內開啟,如下所示。

要執行此操作,需要在輸入欄位上新增一個事件,如下所示。
<input type = "text" id = "start" name = "start" placeholder = "Start Date" on = "tap:lightbox.open"> <input type = "text" id = "end" name = "end" placeholder = "End Date" on = "tap:lightbox.open">
請注意,“on”是事件,它呼叫tap − lightbox.open以開啟燈箱。
這裡的lightbox是賦予amp-lightbox的id,如以下所示。amp-date-picker在amp-lightbox內呼叫,並在點選輸入欄位時啟用。
<amp-lightbox id = "lightbox" layout = "nodisplay" class = "lightbox">
<amp-date-picker id = "overlay-date"
type = "range"
layout = "fill"
start-input-selector = "#start"
end-input-selector = "#end"
format = "YYYY-MM-DD"
on = "activate: lightbox.open;deactivate: lightbox.close">
</amp-date-picker>
</amp-lightbox>
Google AMP - 故事
Amp-story是一個amp元件,用於顯示內容,使使用者參與故事。例如,使用一系列影像講述品牌故事。
要使用amp-story,我們需要包含如下所示的指令碼。
<script async custom-element = "amp-story" src = "https://cdn.ampproject.org/v0/amp-story-1.0.js"> </script>
在本章中,讓我們瞭解什麼是amp-story以及它是如何工作的。假設我們有一個圖片庫,並希望在頁面上顯示它。在amp頁面中,我們可以使用amp-story元件使它看起來更漂亮、更具互動性。
amp-story標籤的格式如下所示。
<amp-story standalone> ---> Main story Tag
<amp-story-page id = "page-1"> ---> Pages inside the story e.g page1
<amp-story-grid-layer template = "fill"> -->
Layers for the page1.You can have more than one layer.
//Add html elements here or amp components
</amp-story-grid-layer>
<amp-story-grid-layer template = "fill"> -->
Layers for the page1.You can have more than one layer.
//Add html elements here or amp components
</amp-story-grid-layer>
...
</amp-story-page>
<amp-story-page id = "page-2"> ---> Pages inside the story e.g page2
<amp-story-grid-layer template = "fill"> -->
Layers for the page2.You can have more than one layer.
//Add html elements here or amp components
</amp-story-grid-layer>
...
</amp-story-page>
...
</amp-story>
為amp-story添加了一些額外的屬性,如下所示。
<amp-story standalone title = "My Story" publisher = "The AMP Team" publisher-logo-src = "publisherlogo image here" poster-portrait-src = "poster portrait here" poster-square-src = "poster square image here" poster-landscape-src = "poster landscape image here">
此功能使使用amp進行故事講述具有很強的互動性。
以下程式碼顯示了一個amp-story的工作示例。桌面和移動模式下的輸出也顯示出來了。
示例
<!doctype html>
<html amp lang = "en">
<head>
<meta charset = "utf-8">
<script async src = "https://cdn.ampproject.org/v0.js"></script>
<script async custom-element = "amp-story" src = "https://cdn.ampproject.org/v0/amp-story-1.0.js"></script>
<title>Google AMP - Story</title>
<meta name = "viewport" content = "width = device-width,minimum-scale = 1,initial-scale=1">
<link rel = "canonical" href = "/stories/introduction/amp_story_hello_world/">
<style amp-boilerplate>
body{
-webkit-animation:
-amp-start 8s steps(1,end) 0s 1 normal both;-moz-animation:
-amp-start 8s steps(1,end) 0s 1 normal both;-ms-animation:
-amp-start 8s steps(1,end) 0s 1 normal both;animation:
-amp-start 8s steps(1,end) 0s 1 normal both
}
@-webkit-keyframes
-amp-start{from{visibility:hidden}to{visibility:visible}}@-moz-keyframes
-amp-start{from{visibility:hidden}to{visibility:visible}}@-ms-keyframes
-amp-start{from{visibility:hidden}to{visibility:visible}}@-o-keyframes
-amp-start{from{visibility:hidden}to{visibility:visible}}@keyframes
-amp-start{from{visibility:hidden}to{visibility:visible}}
</style>
<noscript>
<style amp-boilerplate>
body{
-webkit-animation:
none;-moz-animation:none;
-ms-animation:none;
animation:none}
</style>
</noscript>
<style amp-custom>
amp-story {
font-family: Roboto, Helvetica, Arial, sans-serif;
}
amp-story-page * {
color: white;
text-align: center;
}
</style>
</head>
<body>
<amp-story standalone title = "Stories in AMP - Hello World" publisher = "AMP Project">
<amp-story-page id = "page-1">
<amp-story-grid-layer template = "fill">
<amp-img src = "images/christmas1.jpg"
width = "300" height = "250"
layout = "responsive">
</amp-img>
</amp-story-grid-layer>
<amp-story-grid-layer template = "vertical">
<h1>Hello World</h1>
<p>This is an AMP Story.</p>
</amp-story-grid-layer>
</amp-story-page>
<amp-story-page id = "page-2">
<amp-story-grid-layer template = "fill">
<amp-img src = "images/christmas5.jpg"
width = "300" height = "250"
layout = "responsive">
</amp-img>
</amp-story-grid-layer>
<amp-story-grid-layer template = "vertical">
<h1>Hello World</h1>
<p>This is an AMP Story.</p>
</amp-story-grid-layer>
</amp-story-page>
<amp-story-page id = "page-3">
<amp-story-grid-layer template = "fill">
<amp-img src = "images/christmas3.jpg"
width = "300" height = "250"
layout = "responsive">
</amp-img>
</amp-story-grid-layer>
<amp-story-grid-layer template = "vertical">
<h1>Hello World</h1>
<p>This is an AMP Story.</p>
</amp-story-grid-layer>
</amp-story-page>
<amp-story-page id = "page-4">
<amp-story-grid-layer template = "fill">
<amp-img src = "images/christmas4.jpg"
width = "300" height="250"
layout = "responsive">
</amp-img>
</amp-story-grid-layer>
<amp-story-grid-layer template = "vertical">
<h1>Hello World</h1>
<p>This is an AMP Story.</p>
</amp-story-grid-layer>
</amp-story-page>
<amp-story-bookend src = "ampstory.json" layout = "nodisplay">
</amp-story-bookend>
</amp-story>
<body>
</html>
ampstory.json
{
"bookendVersion": "v1.0",
"shareProviders": [
"email",
"twitter",
"tumblr",
{
"provider": "facebook",
"app_id": "254325784911610"
}
],
"components": [
{
"type": "heading",
"text": "Introduction"
},
{
"type": "small",
"title": "Next Story is on Car Brands",
"url": "ampcarbrand.html",
"image": "images/audi.jpg"
}
]
}
桌面輸出


這就是故事部分的顯示方式。您還可以新增影片或任何其他amp元件,使故事更具互動性。
一旦到達故事的結尾,它將顯示amp-bookend中提供的內容,如下所示。
<amp-story-bookend src = "ampstory.json" layout = "nodisplay"> </amp-story-bookend>
我們向amp-bookend提供了一個ampstory.json檔案。json檔案包含下一個故事預覽的詳細資訊,如下所示。當用戶單擊右側顯示的三個點時,將顯示以下螢幕。

它提供了一個重播按鈕,該按鈕將重新載入故事。您可以單擊汽車的圖片,它將顯示汽車品牌的 story。
移動模式下的輸出如下所示。


Google AMP - 選擇器
Amp-selector是一個amp元件,它顯示選項選單,使用者可以在選項之間進行選擇。顯示的選項可以是文字、影像或任何其他amp元件。在本章中,讓我們詳細討論一下。
要使用amp-selector,我們需要包含以下javascript檔案。
<script async custom-element = "amp-selector" src = "https://cdn.ampproject.org/v0/amp-selector-0.1.js"> </script>
amp-selector格式
以下程式碼顯示了amp-selector格式的示例。
<amp-selector layout = "container">
<amp-img src = "images/christmas1.jpg"
width = "60"
height = "40"
option = "1">
<amp-img src = "images/christmas2.jpg"
width = "60"
height = "40"
option = "2">
</amp-img>
<amp-img src = "images/christmas3.jpg"
width = "60"
height = "40"
option = "3">
</amp-img>
<amp-img src = "images/christmas4.jpg"
width = "60"
height = "40"
option = "4">
</amp-img>
</amp-selector>
您可以在amp-selector內使用標準html標籤或amp元件。內容像選單一樣顯示在螢幕上,使用者可以在它們之間進行選擇。顯示的選單可以是單選或多選。
讓我們透過以下給出的單選和多選示例來了解這一點。
Amp Selector單選
以下程式碼是amp-selector單選的示例。
<!doctype html>
<html amp lang = "en">
<head>
<meta charset = "utf-8">
<script async src = "https://cdn.ampproject.org/v0.js"></script>
<title>Google AMP - Amp Selector</title>
<link rel = "canonical" href = "http://example.ampproject.org/article-metadata.html">
<meta name="viewport" content="width=device-width,minimum-scale = 1,initial-scale = 1">
<style amp-boilerplate>
body{-
webkit-animation:-amp-start 8s steps(1,end) 0s 1 normal both;-moz-animation:
-amp-start 8s steps(1,end) 0s 1 normal both;-ms-animation:
-amp-start 8s steps(1,end) 0s 1 normal both;animation:
-amp-start 8s steps(1,end) 0s 1 normal both
}
@-webkit-keyframes
-amp-start{from{visibility:hidden}to{visibility:visible}}@-moz-keyframes
-amp-start{from{visibility:hidden}to{visibility:visible}}@-ms-keyframes
-amp-start{from{visibility:hidden}to{visibility:visible}}@-o-keyframes
-amp-start{from{visibility:hidden}to{visibility:visible}}@keyframes
-amp-start{from{visibility:hidden}to{visibility:visible}}
</style>
<noscript>
<style amp-boilerplate>
body{
-webkit-animation:none;-moz-animation:none;
-ms-animation:none;animation:none}
</style>
</noscript>
<script async custom-element="amp-selector"
src = "https://cdn.ampproject.org/v0/amp-selector-0.1.js">
</script>
<style amp-custom>
amp-selector:not([disabled])
amp-img[option][selected]:not([disabled]) {
outline-color: #b6A848;
outline-width: 2px;
}
</style>
</head>
<body>
<h3>Google AMP - Amp Selector</h3>
<amp-selector layout = "container">
<amp-img src = "images/christmas1.jpg"
width = "60"
height = "40"
option="1">
</amp-img>
<amp-img src="images/christmas2.jpg"
widt h = 60"
height = "40"
option = "2">
</amp-img>
<amp-img src = "images/christmas3.jpg"
width = "60"
height = "40"
option = "3">
</amp-img>
<amp-img src = "images/christmas4.jpg"
width = "60"
height = "40"
option = "4">
</amp-img>
</amp-selector>
</body>
</html>
輸出
上面給定程式碼的輸出如下所示。

請注意,在上面的示例中,我們使用了amp-selector並在其中使用了影像來顯示選項。它是一個單選選擇器,因此您可以選擇任何一個影像,如輸出所示。
Amp Selector多選
在這個例子中,讓我們使用多個屬性顯示帶有影像的amp-selector,我們可以從選擇器中選擇多個選項。
示例
<!doctype html>
<html amp lang = "en">
<head>
<meta charset = "utf-8 ">
<script async src = "https://cdn.ampproject.org/v0.js"></script>
<title>Google AMP - Amp Selector</title>
<link rel = "canonical" href = "http://example.ampproject.org/article-metadata.html">
<meta name = "viewport" content = "width = device-width,minimum-scale = 1,initial-scale =1">
<style amp-boilerplate>
body{-webkit-animation:
-amp-start 8s steps(1,end) 0s 1 normal both;-moz-animation:
-amp-start 8s steps(1,end) 0s 1 normal both;-ms-animation:
-amp-start 8s steps(1,end) 0s 1 normal both;animation:
-amp-start 8s steps(1,end) 0s 1 normal both}
@-webkit-keyframes
-amp-start{from{visibility:hidden}to{visibility:visible}}@-moz-keyframes
-amp-start{from{visibility:hidden}to{visibility:visible}}@-ms-keyframes
-amp-start{from{visibility:hidden}to{visibility:visible}}@-o-keyframes
-amp-start{from{visibility:hidden}to{visibility:visible}}@keyframes
-amp-start{from{visibility:hidden}to{visibility:visible}}
</style>
<noscript>
<style amp-boilerplate>
body{
-webkit-animation:none;-moz-animation:none;
-ms-animation:none;animation:none
}
</style>
</noscript>
<script async custom-element = "amp-selector"
src = "https://cdn.ampproject.org/v0/amp-selector-0.1.js">
</script>
<style amp-custom>
amp-selector:not([disabled])
amp-img[option][selected]:not([disabled]) {
outline-color: blue;
outline-width: 2px;
}
</style>
</head>
<body>
<h3>Google AMP - Amp Selector</h3>
<amp-selector layout = "container" multiple>
<amp-img src = "images/christmas1.jpg"
width = "60"
height ="40"
option = "1">
</amp-img>
<amp-img src="images/christmas2.jpg"
width = "60"
height = "40"
option = "2">
</amp-img>
<amp-img src ="images/christmas3.jpg"
width = "60"
height = "40"
option = "3">
</amp-img>
<amp-img src = "images/christmas4.jpg"
width = "60"
height = "40"
option = "4">
</amp-img>
</amp-selector>
</body>
</html>
輸出
上面程式碼的輸出如下所示。

我們還可以使用amp-selector顯示單選按鈕,如以下給出的程式碼所示。
示例
<!doctype html>
<html amp lang = "en">
<head>
<meta charset = "utf-8">
<script async src = "https://cdn.ampproject.org/v0.js"></script>
<title>Google AMP - Amp Selector</title>
<link rel = "canonical" href = "http://example.ampproject.org/article-metadata.html">
<meta name = "viewport" content ="width = device-width,minimum-scale = 1,initial-scale = 1">
<style amp-boilerplate>
body{
-webkit-animation:
-amp-start 8s steps(1,end) 0s 1 normal both;-moz-animation:
-amp-start 8s steps(1,end) 0s 1 normal both;-ms-animation:
-amp-start 8s steps(1,end) 0s 1 normal both;animation:
-amp-start 8s steps(1,end) 0s 1 normal both
}
@-webkit-keyframes
-amp-start{from{visibility:hidden}to{visibility:visible}}@-moz-keyframes
-amp-start{from{visibility:hidden}to{visibility:visible}}@-ms-keyframes
-amp-start{from{visibility:hidden}to{visibility:visible}}@-o-keyframes
-amp-start{from{visibility:hidden}to{visibility:visible}}@keyframes
-amp-start{from{visibility:hidden}to{visibility:visible}}
</style>
<noscript>
<style amp-boilerplate>
body{
-webkit-animation:none;
-moz-animation:none;
-ms-animation:none;
animation:none}
</style>
</noscript>
<script async custom-element = "amp-selector"
src = "https://cdn.ampproject.org/v0/amp-selector-0.1.js">
</script>
<style amp-custom>
.radio-menu {
list-style: none;
}
.radio-menu [option][selected] {
outline: none;
}
.radio-menu [option] {
display: flex;
align-items: center;
}
.radio-menu [option]:before {
transition: background 0.25s ease-in-out;
content: "";
display: inline-block;
width: 24px;
height: 24px;
margin: 8px;
border-radius: 100%;
border: solid 1px black;
}
.radio-menu [option = red][selected]:before {
text-align: center;
content: "✓";
color: white;
background: red;
}
.radio-menu [option = green][selected]:before {
text-align: center;
content: "✓";
color: white;
background: green;
}
.radio-menu [option = blue][selected]:before {
text-align: center;
content: "✓";
color: white;
background: blue;
}
</style>
</head>
<body>
<h3>Google AMP - Amp Selector</h3>
<amp-selector class = "radio-menu" layout = "container" name = "my-selector">
<div option = "red">Red</div>
<div option = "green">Green</div>
<div option = "blue">Blue</div>
</amp-selector>
</body>
</html>
輸出
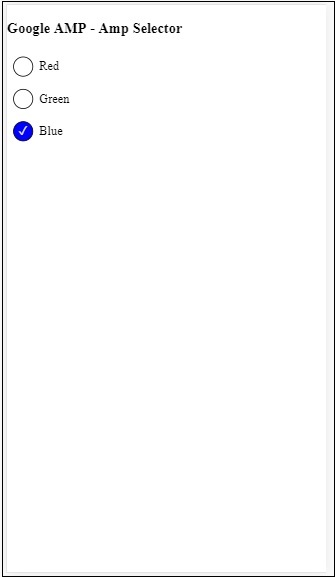
Google AMP - 連結
amp中的Link標籤用於告訴Google搜尋引擎可用的amp和非amp頁面。在本章中,讓我們詳細討論與Link標籤相關的方面以及Google如何確定amp頁面和非amp頁面。
AMP頁面發現
假設您有一個名為www.mypage.com的網站。新聞文章連結到頁面:www.mypage.com/news/myfirstnews.html。
當用戶在Google搜尋引擎中搜索並且碰巧獲得了非amp頁面時,為了也獲得amp頁面的引用,我們需要使用link標籤指定amp url,如下所示。
示例
非 amp 頁面的頁面 URL
<link rel = "amphtml" href = "https://www.mypage.com/news/amp/myfirstnews_amp.html">
這裡rel= ”amphtml”是在非amp頁面中指定的,用於指向amp版本,以便Google根據平臺顯示正確的版本。
amp 頁面的頁面 URL
<link rel = "canonical" href = "https://www.mypage.com/news/myfirstnews.html">
這裡rel=”canonical”是在amp頁面中指定的,用於指向html的標準版本,以便Google根據平臺顯示正確的版本。
如果您的網站只有一個頁面,即amp頁面,您仍然不應忘記新增rel=”canonical”,它將指向自身。
<link rel = "canonical" href = "https://www.mypage.com/news/amp/myfirstnews_amp.html">
下圖顯示了指向amp頁面的rel=”amphtml”和指向標準html頁面的rel=”canonical”的引用。
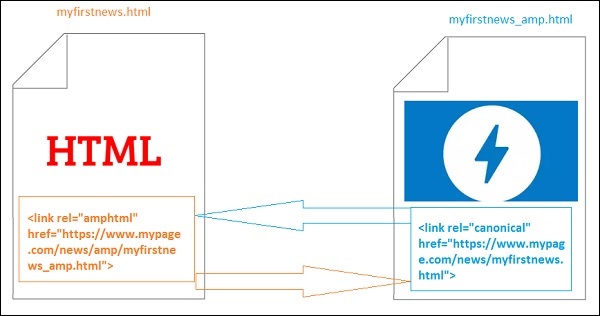
使用Link載入字型
字型可以透過link外部載入,如下所示。
<link rel = "stylesheet" href = "https://fonts.googleapis.com/css?family=Roboto">
請注意,只允許白名單來源。我們可以獲取字型的白名單來源列表如下所示。
Fonts.com - https://fast.fonts.net
Google Fonts - https://fonts.googleapis.com
Font Awesome - https://maxcdn.bootstrapcdn.com
Typekit - https://use.typekit.net/kitId.css(相應替換 kitId)
一個使用rel=”canonical”和rel=”stylesheet”的工作示例如下所示。
示例
<!doctype html>
<html amp>
<head>
<meta charset ="utf-8">
<title>Amp Sample Page</title>
<link rel = "canonical" href = "amppage.html">
<meta name = "viewport" content = "width = device-width,minimum-scale=1,initial-scale = 1">
<style amp-custom>
h1 {color: red}
</style>
<style amp-boilerplate>
body{
-webkit-animation:
-amp-start 8s steps(1,end) 0s 1 normal both;-moz-animation:
-amp-start 8s steps(1,end) 0s 1 normal both;-ms-animation:
-amp-start 8s steps(1,end) 0s 1 normal both;animation:
-amp-start 8s steps(1,end) 0s 1 normal both
}
@-webkit-keyframes
-amp-start{from{visibility:hidden}to{visibility:visible}}@-moz-keyframes
-amp-start{from{visibility:hidden}to{visibility:visible}}@-ms-keyframes
-amp-start{from{visibility:hidden}to{visibility:visible}}@-o-keyframes
-amp-start{from{visibility:hidden}to{visibility:visible}}@keyframes
-amp-start{from{visibility:hidden}to{visibility:visible}}
</style>
<noscript>
<style amp-boilerplate>
body{
-webkit-animation:none;
-moz-animation:none;
-ms-animation:none;
animation:none
}
</style>
</noscript>
<script async src = "https://cdn.ampproject.org/v0.js"></script>
<link rel = "stylesheet" href = "https://fonts.googleapis.com/css?family=Roboto">
</head>
<body>
<h1>Amp Sample Page</h1>
<p>
<amp-img src = "images/christmas1.jpg"
width = "300" height = "250"
layout = "responsive">
</amp-img>
</p>
<p style = "font-family: 'Roboto'; font-size:25px;">
Welcome to Amp Page
</p>
</body>
</html>
輸出
上面程式碼的輸出如下所示。
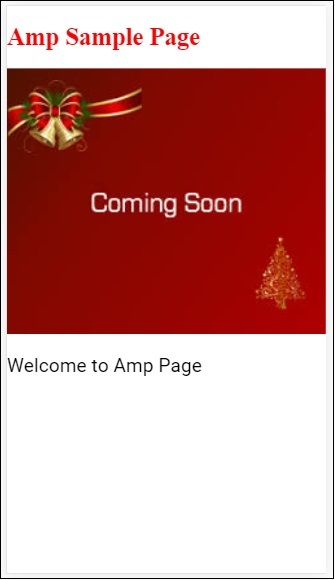
Google AMP - 字型
Amp font是amp中的一個amp元件,它主要幫助觸發和監控amp頁面的自定義字型。本章詳細討論了amp-font。
要使用amp-font,我們需要新增以下javascript檔案。
<script async custom-element = "amp-font" src = "https://cdn.ampproject.org/v0/amp-font-0.1.js"> </script>
amp-font 元件用於控制字型載入所需的時間。它有一個 timeout 屬性,用於指定超時時間(以毫秒為單位)。預設值為 3000 毫秒。該元件允許根據所需的字型是否載入或是否出現錯誤狀態,從 document.documentElement 或 document.body 中新增/刪除類。
amp-font 標籤的格式如下所示:
<amp-font layout = "nodisplay" font-family = "Roboto Italic" timeout = "2000" on-error-remove-class = "robotoitalic-loading" on-error-add-class = "robotoitalic-missing" on-load-remove-class = "robotoitalic-loading" on-load-add-class = "robotoitalic-loaded"> </amp-font>
以下是一個如何在 amp 頁面中使用 amp-font 的示例:
示例
<!doctype html>
<html amp lang = "en">
<head>
<meta charset = "utf-8">
<script async src = "https://cdn.ampproject.org/v0.js"></script>
<title>Google AMP - Amp Font</title>
<link rel = "canonical" href = "http://example.ampproject.org/article-metadata.html">
<meta name = "viewport" content = "width = device-width,minimum-scale = 1,initial-scale = 1">
<style amp-boilerplate>
body{
-webkit-animation:
-amp-start 8s steps(1,end) 0s 1 normal both;-moz-animation:
-amp-start 8s steps(1,end) 0s 1 normal both;-ms-animation:
-amp-start 8s steps(1,end) 0s 1 normal both;animation:
-amp-start 8s steps(1,end) 0s 1 normal both
}
@-webkit-keyframes
-amp-start{from{visibility:hidden}to{visibility:visible}}@-moz-keyframes
-amp-start{from{visibility:hidden}to{visibility:visible}}@-ms-keyframes
-amp-start{from{visibility:hidden}to{visibility:visible}}@-o-keyframes
-amp-start{from{visibility:hidden}to{visibility:visible}}@keyframes
-amp-start{from{visibility:hidden}to{visibility:visible}}
</style>
<noscript>
<style amp-boilerplate>
body{
-webkit-animation:none;
-moz-animation:none;
-ms-animation:none;
animation:none}
</style>
</noscript>
<cript async custom-element = "amp-font"
src = "https://cdn.ampproject.org/v0/amp-font-0.1.js"
></script>
<style amp-custom>
@font-face {
font-family: 'This font is not available';
font-style: normal;
font-weight: 300;
src: url(fonts/MissingFont.ttf) format('truetype');
}
.font-missing {
color:red;
font-size:25px;
}
</style>
</head>
<body>
<h1>Google AMP - Amp Font</h1>
<amp-font
layout = "nodisplay"
font-family = "Font Does Not exist"
timeout = "2000"
on-error-remove-class = "font-missing"
on-error-add-class = "font-error"
on-load-remove-class = "font-missing"
on-load-add-class = "font-loaded">
</amp-font>
<p class = "font-missing">
Example of amp-font component to show how
attributes on-error-remove-class,
on-error-add-class, on-load-remove-class
and on-load-add-class works when the font
file to be loaded does not exist.
</p>
</body>
</html>
輸出
上面示例程式碼的輸出結果如下所示:
以下是一個字型檔案載入成功時 amp-font 的示例:
示例
<!doctype html>
<html amp lang = "en">
<head>
<meta charset = "utf-8">
<script async src = "https://cdn.ampproject.org/v0.js"></script>
<title>Google AMP - Amp Font</title>
<link rel = "canonical" href = "http://example.ampproject.org/article-metadata.html">
<meta name = "viewport" content = "width = device-width,minimum-scale = 1,initial-scale = 1">
<style amp-boilerplate>
body{
-webkit-animation:
-amp-start 8s steps(1,end) 0s 1 normal both;-moz-animation:
-amp-start 8s steps(1,end) 0s 1 normal both;-ms-animation:
-amp-start 8s steps(1,end) 0s 1 normal both;animation:
-amp-start 8s steps(1,end) 0s 1 normal both
}
@-webkit-keyframes
-amp-start{from{visibility:hidden}to{visibility:visible}}@-moz-keyframes
-amp-start{from{visibility:hidden}to{visibility:visible}}@-ms-keyframes
-amp-start{from{visibility:hidden}to{visibility:visible}}@-o-keyframes
-amp-start{from{visibility:hidden}to{visibility:visible}}@keyframes
-amp-start{from{visibility:hidden}to{visibility:visible}}
</style>
<noscript>
<style amp-boilerplate>
body{
-webkit-animation:none;
-moz-animation:none;
-ms-animation:none;
animation:none}
</style>
</noscript>
<script async custom-element = "amp-font"
src = "https://cdn.ampproject.org/v0/amp-font-0.1.js">
</script>
<style amp-custom>
@font-face {
font-family: 'This font is not available';
font-style: normal;
font-weight: 300;
src: url(fonts/MissingFont.ttf)
format('truetype');
}
@font-face {
font-family: 'Roboto Italic';
font-style: normal;
font-weight: 300;
src:url(fonts/Roboto-Italic.ttf) format('truetype');
}
.font-missing {
color:red;
font-size:25px;
}
.robotoitalic-loading {
color: green;
}
.robotoitalic-loaded {
font-size:25px;
color: blue;
}
.robotoitalic-missing {
color: red;
}
.robotoitalic {
font-family: 'Roboto Italic';
}
</style>
</head>
<body>
<h1>Google AMP - Amp Font</h1>
<amp-font
layout = "nodisplay"
font-family = "Font Does Not exist"
timeout = "2000"
on-error-remove-class = "font-missing"
on-error-add-class = "font-error"
on-load-remove-class = "font-missing"
on-load-add-class = "font-loaded">
</amp-font>
<p class="font-missing">
Example of amp-font component to show
how attributes on-error-remove-class,
on-error-add-class, on-load-remove-class
and on-load-add-class works when the
font file to be loaded does not exist.
</p>
<amp-font
layout = "nodisplay"
font-family = "Roboto Italic"
timeout = "2000"
on-error-remove-class = "robotoitalic-
loading"
on-error-add-class = "robotoitalic-missing"
on-load-remove-class = "robotoitalic-loading"
on-load-add-class = "robotoitalic-loaded">
</amp-font>
<p class = "robotoitalic">
Example of amp-font component to show how
attributes on-error-remove-class,
on-error-add-class, on-load-remove-class
and on-load-add-class works when the font
file exists and loads fine.
</p>
</body>
</html>
輸出
上面示例程式碼的輸出結果如下所示:
以上示例演示瞭如何使用字型屬性,例如 **font-family、timeout、on-error-remove-class、on-error-add-class、on-load-remove-class、on-load-add-class**。這些類決定了字型載入是否成功或出現錯誤。
Google AMP - 列表
amp-list 是一個 amp 元件,它呼叫一個 CORS json 端點,並在模板內以 json 檔案的形式顯示資料。讓我們透過一些示例來理解這一點。
要使用 amp-list,我們需要包含以下指令碼:
<script async custom-element = "amp-list" src = "https://cdn.ampproject.org/v0/amp-list-0.1.js"> </script>
這是 amp-list 標籤的格式:
<amp-list width = "auto" height = "100"
layout = "fixed-height" src = "amplist.json" class = "m1">
<template type = "amp-mustache">
<div class = "images_for_display">
<amp-img width = "150"
height = "100"
alt = "{{title}}"
src = "{{url}}">
</amp-img>
</div>
</template>
</amp-list>
amp-list 使用的 src 是一個 json 檔案,其中包含要列出的詳細資訊。我們可以在 amp-list 內部使用普通的 html 標籤或 amp 元件來顯示來自 json 檔案的資料。模板型別 amp-mustache 用於將資料繫結到要顯示的內容。
讓我們透過以下工作示例來了解這一點:
示例
<!doctype html>
<html amp lang = "en">
<head>
<meta charset = "utf-8">
<script async src = "https://cdn.ampproject.org/v0.js"></script>
<title>Google AMP - Amp List</title>
<link rel = "canonical" href = "http://example.ampproject.org/article-metadata.html">
<meta name = "viewport" content = "width = device-width,minimum-scale = 1,initial-scale = 1">
<style amp-boilerplate>
body{-webkit-animation:
-amp-start 8s steps(1,end) 0s 1 normal both;-moz-animation:
-amp-start 8s steps(1,end) 0s 1 normal both;-ms-animation:
-amp-start 8s steps(1,end) 0s 1 normal both;animation:
-amp-start 8s steps(1,end) 0s 1 normal both
}
@-webkit-keyframes
-amp-start{from{visibility:hidden}to{visibility:visible}}@-moz-keyframes
-amp-start{from{visibility:hidden}to{visibility:visible}}@-ms-keyframes
-amp-start{from{visibility:hidden}to{visibility:visible}}@-o-keyframes
-amp-start{from{visibility:hidden}to{visibility:visible}}@keyframes
-amp-start{from{visibility:hidden}to{visibility:visible}}
</style>
<noscript>
<style amp-boilerplate>
body{
-webkit-animation:none;-moz-animation:none;
-ms-animation:none;animation:none}
</style>
</noscript>
<script async custom-element = "amp-list"
src = "https://cdn.ampproject.org/v0/amp-list-0.1.js">
</script>
<script async custom-template = "amp-mustache"
src ="https://cdn.ampproject.org/v0/amp-mustache-0.2.js">
</script>
<style amp-custom>
amp-img {
border: 1px solid #ddd;
border-radius: 4px;
padding: 5px;
}
</style>
</head>
<body>
<h3>Google AMP - Amp List</h3>
<amp-list width = "auto" height = "100"
layout = "fixed-height" src = "amplist.json" class = "m1">
<template type = "amp-mustache">
<div class = "images_for_display">
<amp-img width = "150"
height = "100"
alt = "{{title}}"
src = "{{url}}">
</amp-img>
</div>
</template>
</amp-list>
</body>
</html>
輸出
上面示例程式碼的輸出結果如下所示:

上面示例程式碼中使用的 json 檔案如下所示:
{
"items": [
{
"title": "Christmas Image 1",
"url": "images/christmas1.jpg"
},
{
"title": "Christmas Image 2",
"url": "images/christmas2.jpg"
},
{
"title": "Christmas Image 3",
"url": "images/christmas3.jpg"
},
{
"title": "Christmas Image 4",
"url": "images/christmas4.jpg"
}
]
}
我們可以使用 amp-list 上的事件來重新整理列表,如下面的程式碼所示:
示例
<!doctype html>
<html amp lang = "en">
<head>
<meta charset = "utf-8">
<script async src = "https://cdn.ampproject.org/v0.js"></script>
<title>Google AMP - Amp List</title>
<link rel = "canonical" href = "http://example.ampproject.org/article-metadata.html">
<meta name = "viewport" content = "width = device-width,minimum-scale = 1,initial-scale = 1">
<style amp-boilerplate>
body{
-webkit-animation:
-amp-start 8s steps(1,end) 0s 1 normal both;-moz-animation:
-amp-start 8s steps(1,end) 0s 1 normal both;-ms-animation:
-amp-start 8s steps(1,end) 0s 1 normal both;animation:
-amp-start 8s steps(1,end) 0s 1 normal both
}
@-webkit-keyframes
-amp-start{from{visibility:hidden}to{visibility:visible}}@-moz-keyframes
-amp-start{from{visibility:hidden}to{visibility:visible}}@-ms-keyframes
-amp-start{from{visibility:hidden}to{visibility:visible}}@-o-keyframes
-amp-start{from{visibility:hidden}to{visibility:visible}}@keyframes
-amp-start{from{visibility:hidden}to{visibility:visible}}
</style>
<noscript>
<style amp-boilerplate>
body{
-webkit-animation:none;
-moz-animation:none;
-ms-animation:none;
animation:none}
</style>
</noscript>
<script async custom-element = "amp-list"
src = "https://cdn.ampproject.org/v0/amp-list-0.1.js">
</script>
<script async custom-template = "amp-mustache"
src = "https://cdn.ampproject.org/v0/amp-mustache-0.2.js">
</script>
<style amp-custom>
amp-img {
border: 1px solid #ddd;
border-radius: 4px;
padding: 5px;
}
button{
background-color: #ACAD5C;
color: white;
padding: 12px 20px;
border: none;
border-radius: 4px;
cursor: pointer;
float: right;
}
</style>
</head>
<body>
<h3>Google AMP - Amp List</h3>
<button on = "tap:amplist.refresh">Refresh Images</button>
<amp-list id = "amplist" width = "auto" height = "100"
layout = "fixed-height" src = "amplist.json" class = "m1">
<template type = "amp-mustache">
<div class = "images_for_display">
<amp-img width = "150"
height = "100"
alt = "{{title}}"
src = "{{url}}"></amp-img>
</div>
</template>
</amp-list>
</body>
</html>
輸出
上面示例程式碼的輸出結果如下所示:
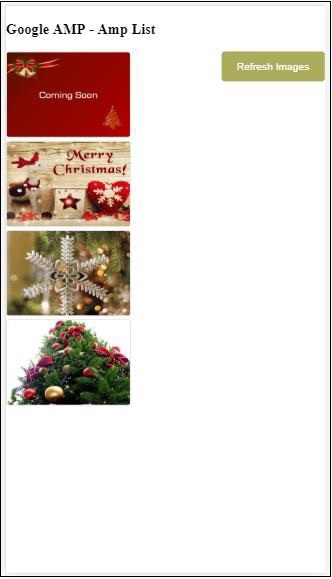
添加了一個按鈕,點選該按鈕時,將使用 on 事件呼叫重新整理操作,如下所示:
<button on = "tap:amplist.refresh"> Refresh Images </button> //amplist is the id used for amp-list
點選按鈕後,將再次呼叫 json 檔案並載入其內容。如果已經載入了影像,則將被快取。
Google AMP - 使用者通知
Google amp-user-notification 用於向用戶顯示可關閉的對話方塊訊息。我們可以用它來通知使用者頁面上的 cookie。
要使用 amp-user-notification,我們需要在頁面上新增以下指令碼:
<script async custom-element = "amp-user-notification" src = "https://cdn.ampproject.org/v0/amp-user-notification-0.1.js"> </script>
amp-user-notification 標籤格式:
<amp-user-notification id = "my-notification" layout = "nodisplay">
<div>Example of amp-user-notification.
<button on = "tap:my-notification.dismiss">I accept
</button>
</div>
</amp-user-notification>
讓我們透過一個示例來了解 amp-user-notification:
示例
<!doctype html>
<html amp lang = "en">
<head>
<meta charset = "utf-8">
<script async src = "https://cdn.ampproject.org/v0.js"></script>
<title>Google AMP - Amp Selector</title>
<link rel = "canonical" href = " http://example.ampproject.org/article-metadata.html">
<meta name = "viewport" content = "width = device-width,minimum-scale = 1,initial-scale = 1">
<style amp-boilerplate>
body{
-webkit-animation:
-amp-start 8s steps(1,end) 0s 1 normal both;-moz-animation:
-amp-start 8s steps(1,end) 0s 1 normal both;-ms-animation:
-amp-start 8s steps(1,end) 0s 1 normal both;animation:
-amp-start 8s steps(1,end) 0s 1 normal both
}
@-webkit-keyframes
-amp-start{from{visibility:hidden}to{visibility:visible}}@-moz-keyframes
-amp-start{from{visibility:hidden}to{visibility:visible}}@-ms-keyframes
-amp-start{from{visibility:hidden}to{visibility:visible}}@-o-keyframes
-amp-start{from{visibility:hidden}to{visibility:visible}}@keyframes
-amp-start{from{visibility:hidden}to{visibility:visible}}
</style>
<noscript>
<style amp-boilerplate>
body{
-webkit-animation:none;
-moz-animation:none;
-ms-animation:none
animation:none
}
</style>
</noscript>
<script async custom-element = "amp-user-notification"
src = "https://cdn.ampproject.org/v0/amp-user-notification-0.1.js">
</script>
<style amp-custom>
div {
font-size: 15px;
background-color : #ccc;
padding: 10px 10px;
border-radius: 2px;
}
button{
background-color: #ACAD5C;
color: white;
cursor: pointer;
float: right;
}
</style>
</head>
<body>
<h3>Google AMP - Amp User Notification</h3>
<amp-user-notification
id = "my-notification"
layout = "nodisplay">
<div>Example of amp-user-notification.
<button on = "tap:my-notification.dismiss">I accept
</button>
</div>
</amp-user-notification>
</body>
</html>
輸出
上面示例程式碼的輸出結果如下所示:
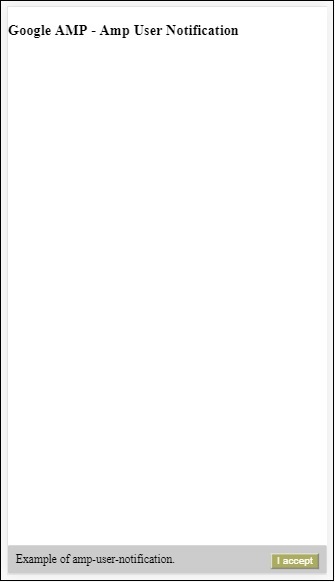
使用者點選按鈕後,通知將被關閉。關閉後,即使重新整理頁面,通知也不會再次顯示。
使用者通知的資料儲存在瀏覽器 localStorage 中。如果清除 localStorage 並重新整理頁面,您將能夠再次看到通知。您可以在瀏覽器控制檯中使用 **localStorage.clear()** 來嘗試此操作。
使用 **dismiss** 操作,可以透過在按鈕上使用操作來關閉通知,如下所示
<button on = "tap:my-notification.dismiss"> I accept </button>
當用戶點選按鈕時,通知將被關閉。
Google AMP - 下一頁
amp-next-page 是一個 amp 元件,當用戶到達文件末尾時,可以動態載入更多頁面。本章將詳細介紹此概念。
要使用 amp-next-page 元件,我們需要新增以下指令碼:
<script async custom-element = "amp-next-page" src = "https://cdn.ampproject.org/v0/amp-next-page-0.1.js"> </script>
此外,amp-next-page 尚未完全釋出,因此要使測試頁面正常工作,請新增以下 meta 標籤:
<meta name = "amp-experiments-opt-in" content = "amp-next-page">
要動態載入頁面,我們需要將 page-urls 提供給型別為“application/json”的 script 標籤,如下所示:
<amp-next-page>
<script type = "application/json">
{
"pages": [
{
"title": "Page 2",
"image": "images/christmas1.jpg",
"ampUrl": "ampnextpage1.html"
},
{
"title": "Page 3",
"image": "images/christmas1.jpg",
"ampUrl": "ampnextpage2.html"
}
]
}
</script>
</amp-next-page>
在上面的標籤中,我們嘗試載入 2 個頁面 **ampnextpage1.html** 和 **ampnextpage2.html**。
現在,讓我們看看最終輸出。所有需要載入的頁面都必須新增到 pages 陣列中,幷包含標題、影像和 ampUrl。
示例
<!doctype html>
<html amp>
<head>
<meta charset = "utf-8">
<title>Google Amp - Next Page</title>
<link rel = "canonical" href = "ampnextpage.html">
<meta name = "amp-experiments-opt-in" content = "amp-next-page">
<meta name = "viewport" content ="width = device-width,
minimum-scale = 1,initial-scale = 1">
<style amp-boilerplate>
body {
-webkit-animation:
-amp-start 8s steps(1,end) 0s 1 normal both;-moz-animation:
-amp-start 8s steps(1,end) 0s 1 normal both;-ms-animation:
-amp-start 8s steps(1,end) 0s 1 normal both;animation:
-amp-start 8s steps(1,end) 0s 1 normal both
}
@-webkit-keyframes
-amp-start{from{visibility:hidden}to{visibility:visible}}@-moz-keyframes
-amp-start{from{visibility:hidden}to{visibility:visible}}@-ms-keyframes
-amp-start{from{visibility:hidden}to{visibility:visible}}@-o-keyframes
-amp-start{from{visibility:hidden}to{visibility:visible}}@keyframes
-amp-start{from{visibility:hidden}to{visibility:visible}}
</style>
<noscript>
<style amp-boilerplate>
body{
-webkit-animation:none;
-moz-animation:none;
-ms-animation:none;
animation:none
}
</style>
</noscript>
<script async src="https://cdn.ampproject.org/v0.js">
</script>
<script async custom-element = "amp-next-page"
src = "https://cdn.ampproject.org/v0/amp-next-page-0.1.js">
</script>
</head>
<body>
<h1>Google Amp - Next Page</h1>
<h1>Page 1</h1>
<p>Start of page 1</p>
<p>This content is loaded from page 1</p>
<p>This content is loaded from page 1</p>
<p>This content is loaded from page 1</p>
<p>This content is loaded from page 1</p>
<p>This content is loaded from page 1</p>
<p>This content is loaded from page 1</p>
<p>This content is loaded from page 1</p>
<p>This content is loaded from page 1</p>
<p>This content is loaded from page 1</p>
<p>This content is loaded from page 1</p>
<p>This content is loaded from page 1</p>
<p>This content is loaded from page 1</p>
<p>This content is loaded from page 1</p>
<p>This content is loaded from page 1</p>
<p>This content is loaded from page 1</p>
<p>This content is loaded from page 1</p>
<p>This content is loaded from page 1</p>
<p>This content is loaded from page 1</p>
<p>This content is loaded from page 1</p>
<p>This content is loaded from page 1</p>
<p>This content is loaded from page 1</p>
<p>This content is loaded from page 1</p>
<p>End of page 1</p>
<amp-next-page>
<script type = "application/json">
{
"pages": [
{
"title": "Page 2",
"image": "images/christmas1.jpg",
"ampUrl": "ampnextpage1.html"
},
{
"title": "Page 3",
"image": "images/christmas1.jpg",
"ampUrl": "ampnextpage2.html"
}
]
}
</script>
</amp-next-page>
</body>
</html>
輸出
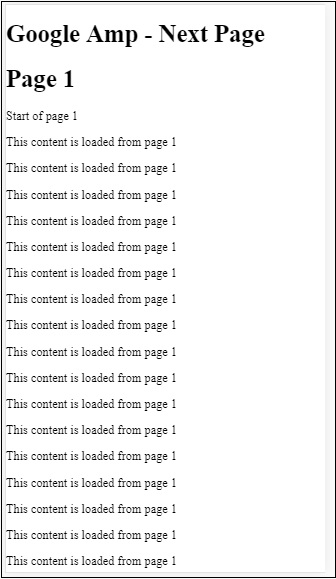
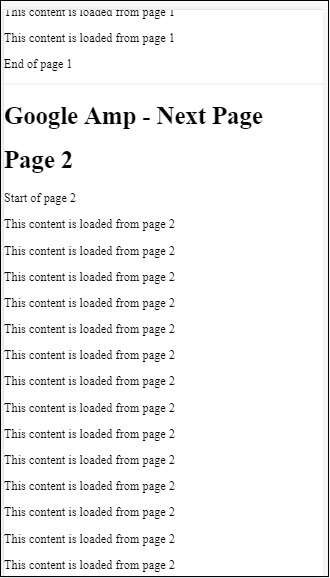
您可以注意到,當您滾動時,將顯示要載入的下一頁,並且位址列中的 page-url 也已更改。
Google AMP - 屬性
本章將討論 amp 元件使用的所有常用屬性。
常用屬性列表如下:
- fallback
- heights
- layout
- media
- noloading
- on
- placeholder
- sizes
- width 和 height
fallback 屬性
fallback 屬性主要用於瀏覽器不支援使用的元素或檔案加載出現問題或使用的檔案出現錯誤時。
例如,您正在使用 amp-video,並且媒體檔案在瀏覽器上出現問題,在這種情況下,我們可以指定 fallback 屬性並顯示一條訊息,指示媒體檔案無法播放或不受瀏覽器支援,而不是在頁面上顯示錯誤訊息。
在 amp-video 上使用 Fallback
<amp-video controls
width = "640"
height = "360"
layout = "responsive"
poster = "images/videoposter.png">
<source src = "video/bunny.webm" type = "video/webm" />
<source src = "video/samplevideo.mp4" type = "video/mp4" />
<div fallback>
<p>This browser does not support the video element.</p>
</div>
</amp-video>
讓我們透過一個示例來了解 fallback 的工作原理:
示例
<!doctype html>
<html amp lang = "en">
<head>
<meta charset = "utf-8">
<script async src = "https://cdn.ampproject.org/v0.js"></script>
<title>Google AMP - Amp Video</title>
<link rel = "canonical" href = " http://example.ampproject.org/article-metadata.html">
<meta name = "viewport" content = "width = device-width,minimum-scale = 1,initial-scale = 1">
<style amp-boilerplate>
body{
-webkit-animation:
-amp-start 8s steps(1,end) 0s 1 normal both;-moz-animation:
-amp-start 8s steps(1,end) 0s 1 normal both;-ms-animation:
-amp-start 8s steps(1,end) 0s 1 normal both;animation:
-amp-start 8s steps(1,end) 0s 1 normal both
}
@-webkit-keyframes
-amp-start{from{visibility:hidden}to{visibility:visible}}@-moz-keyframes
-amp-start{from{visibility:hidden}to{visibility:visible}}@-ms-keyframes
-amp-start{from{visibility:hidden}to{visibility:visible}}@-o-keyframes
-amp-start{from{visibility:hidden}to{visibility:visible}}@keyframes
-amp-start{from{visibility:hidden}to{visibility:visible}}
</style>
<noscript>
<style amp-boilerplate>
body{
-webkit-animation:none;-moz-animation:none;
-ms-animation:none;animation:none
}
</style>
</noscript>
<script async custom-element = "amp-video"
src = "https://cdn.ampproject.org/v0/amp-video-0.1.js">
</script>
</head>
<body>
<h3>Google AMP - Amp Video</h3>
<amp-video controls
width = "640"
height = "360"
layout = "responsive"
poster = "images/videoposter.png">
<source src = "video/bunny.webm"type="video/webm" />
<source src = "video/samplevideo.mp4"type = "video/mp4" />
<div fallback>
<p>This browser does not support the video element.</p>
</div>
</amp-video>
</body>
</html>
輸出
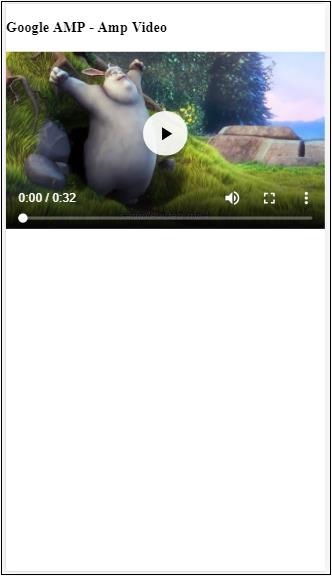
Heights 屬性
此屬性基本上支援響應式佈局。您可以將媒體表達式用於 heights 屬性,它適用於元素的高度。它還接受百分比值,因此高度是根據給定的百分比寬度計算的。
示例
<!doctype html>
<html amp lang = "en">
<head>
<meta charset = "utf-8">
<script async src = "https://cdn.ampproject.org/v0.js"></script>
<title>Google AMP - heights attribute</title>
<link rel = "canonical" href = "http://example.ampproject.org/article-metadata.html">
<meta name = "viewport" content = "width=device-width,minimum-scale = 1,initial-scale = 1">
<style amp-boilerplate>
body{
-webkit-animation:
-amp-start 8s steps(1,end) 0s 1 normal both;-moz-animation:
-amp-start 8s steps(1,end) 0s 1 normal both;-ms-animation:
-amp-start 8s steps(1,end) 0s 1 normal both;animation:
-amp-start 8s steps(1,end) 0s 1 normal both
}
@-webkit-keyframes
-amp-start{from{visibility:hidden}to{visibility:visible}}@-moz-keyframes
-amp-start{from{visibility:hidden}to{visibility:visible}}@-ms-keyframes
-amp-start{from{visibility:hidden}to{visibility:visible}}@-o-keyframes
-amp-start{from{visibility:hidden}to{visibility:visible}}@keyframes
-amp-start{from{visibility:hidden}to{visibility:visible}}
</style>
<noscript>
<style amp-boilerplate>
body{
-webkit-animation:none;-moz-animation:none;
-ms-animation:none;animation:none
}
</style>
</noscript>
<style amp-custom>
amp-img {
border: 1px solid black;
border-radius: 4px;
padding: 5px;
}
h1{font-family: "Segoe UI",Arial,sans-serif;font-weight: 400;margin: 10px 0;}
</style>
</head>
<body>
<h1>Google AMP - heights attribute</h1>
<amp-img src = "images/christmas1.jpg"
width = "320" height = "256"
heights = "(min-width:500px) 200px, 80%">
</amp-img>
</body>
</html>
輸出

layout 屬性
AMP-Layout 是 Google-amp 中提供的重要的功能之一。Amp Layout 確保在頁面載入時正確呈現 amp 元件,而不會導致任何閃爍或滾動問題。它還在執行任何其他遠端資源(如影像的 http 請求、資料呼叫)之前檢查頁面渲染。
amp 支援的佈局列表如下:
- 未設定
- Container
- fill
- fixed
- fixed-height
- flex-item
- intrinsic
- nodisplay
- Responsive
您將在本教程的 **Google AMP - 佈局** 章節中詳細瞭解這一點。
讓我們透過以下示例來了解 layout="responsive" 的工作原理:
示例
<!doctype html>
<html amp lang = "en">
<head>
<meta charset = "utf-8">
<script async src = "https://cdn.ampproject.org/v0.js"></script>
<title>Google AMP - Image>/title>
<link rel = "canonical" href = " http://example.ampproject.org/article-metadata.html">
<meta name = "viewport" content = "width = device-width,minimum-scale = 1,initial-scale = 1">
<style amp-boilerplate>
body {
-webkit-animation:
-amp-start 8s steps(1,end) 0s 1 normal both;-moz-animation:
-amp-start 8s steps(1,end) 0s 1 normal both;-ms-animation:
-amp-start 8s steps(1,end) 0s 1 normal both;animation:
-amp-start 8s steps(1,end) 0s 1 normal both
}
@-webkit-keyframes
-amp-start{from{visibility:hidden}to{visibility:visible}}@-moz-keyframes
-amp-start{from{visibility:hidden}to{visibility:visible}}@-ms-keyframes
-amp-start{from{visibility:hidden}to{visibility:visible}}@-o-keyframes
-amp-start{from{visibility:hidden}to{visibility:visible}}@keyframes
-amp-start{from{visibility:hidden}to{visibility:visible}}
</style>
<noscript>
<style amp-boilerplate>
body {
-webkit-animation:none;-moz-animation:none;
-ms-animation:none;animation:none
}
</style>
</noscript>
<style amp-custom>
amp-img {
border: 1px solid black;
border-radius: 4px;
padding: 5px;
}
displayitem {
display: inline-block;
width: 200px;
height:200px;
margin: 5px;
}
h1{font-family: "Segoe
UI",Arial,sans-serif;font-weight: 400;margin: 10px 0;}
</style>
</head>
<body>
<h1>Google AMP - Layout = responsive Image Example>/h1>
<div class = "displayitem">
<amp-img alt = "Beautiful Flower"
src = "images/flower.jpg"
width = "246"
height = "205"
layout = "responsive">
</amp-img>
</div>
</body>
</html>
輸出
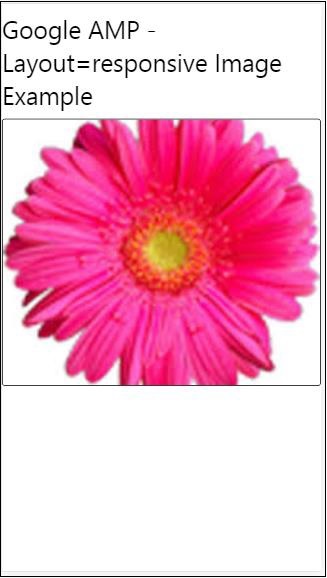
Media 屬性
此屬性可以在大多數 amp 元件上使用。它接受一個媒體查詢,如果該值與元件不匹配,則不會呈現該元件。
讓我們透過一個示例來了解 media 屬性的工作原理:
示例
<!doctype html>
<html amp lang = "en">
<head>
<meta charset = "utf-8">
<script async src = "https://cdn.ampproject.org/v0.js"></script>
<title>Google AMP - Image</title>
<link rel = "canonical" href = " http://example.ampproject.org/article-metadata.html">
<meta name = "viewport" content = "width = device-width,minimum-scale = 1,initial-scale = 1">
<style amp-boilerplate>
body{
-webkit-animation:
-amp-start 8s steps(1,end) 0s 1 normal both;-moz-animation:
-amp-start 8s steps(1,end) 0s 1 normal both;-ms-animation:
-amp-start 8s steps(1,end) 0s 1 normal both;animation:
-amp-start 8s steps(1,end) 0s 1 normal both
}
@-webkit-keyframes
-amp-start{from{visibility:hidden}to{visibility:visible}}@-moz-keyframes
-amp-start{from{visibility:hidden}to{visibility:visible}}@-ms-keyframes
-amp-start{from{visibility:hidden}to{visibility:visible}}@-o-keyframes
-amp-start{from{visibility:hidden}to{visibility:visible}}@keyframes
-amp-start{from{visibility:hidden}to{visibility:visible}}
</style>
<noscript>
<style amp-boilerplate>
body {
-webkit-animation:none;-moz-animation:none;
-ms-animation:none;animation:none
}
</style>
</noscript>
<style amp-custom>
amp-img {
border: 1px solid black;
border-radius: 4px;
padding: 5px;
}
h1{font-family: "Segoe
UI",Arial,sans-serif;font-weight: 400;margin: 10px 0;}
</style>
</head>
<body>
<h1>Google AMP - Media Attribute</h1>
<div class = "displayitem">
<amp-img
media = "(min-width: 600px)"
src = "images/christmas1.jpg"
width = "466"
height = "355"
layout = "responsive">
</amp-img>
</div>
</body>
</html>
我們已在 <amp-img> 標籤上使用了 media 屬性,如下所示:
<amp-img media = "(min-width: 600px)" src = "images/christmas1.jpg" width = "466" height = "355" layout = "responsive"> </amp-img>
請注意,如果螢幕寬度小於 600 畫素,則不會顯示影像。我們將使用 Google 模擬器移動模式來測試示例。
智慧手機上的輸出
我們在裝置上進行了檢查,影像不可見,因為裝置的寬度小於 600 畫素。如果我們在平板電腦上進行檢查,我們將獲得如下所示的輸出:
IPAD 上的輸出

Noloading 屬性
像 <amp-img>、<amp-video>、<amp-facebook> 這樣的 amp 元件在實際內容載入並顯示給使用者之前會顯示載入指示器。
要停止顯示載入指示器,我們可以使用 noloading 屬性,如下所示:
<amp-img src = "images/christmas1.jpg" noloading height = "300" width = "250" layout = "responsive"> </amp-img>
On 屬性
on 屬性用於元素的事件處理和 amp 元件上的操作。使用 on 屬性的語法如下:
語法:
on = "eventName:elementId[.methodName[(arg1 = value, arg2 = value)]]"
傳遞給 **on** 屬性的詳細資訊如下:
**eventName** - 它接受 amp 元件可用的事件名稱。例如,對於表單,我們可以使用 submit-success、submit-error 事件名稱。
**elementId** - 它接受需要在其中呼叫事件的元素的 ID。它可以是我們要了解其成功或錯誤的表單的 ID。
**methodName** - 它接受在事件發生時要呼叫的方法的名稱。
**arg=value** - 它接受以 key=value 形式傳遞給方法的引數。
也可以將多個事件傳遞給 On 屬性,如下所示:
on = "submit-success:lightbox;submit-error:lightbox1"
**注意** - 如果有多個事件,則將它們傳遞給 on 屬性,並使用分號 (;) 分隔。
Actions 屬性
Actions 主要與 on 屬性一起使用,語法如下:
on = "tab:elementid.hide;"
我們可以傳遞多個 actions,如下所示:
on = "tab:elementid.open;tab:elementid.hide;”
**Elementid** 是要執行操作的元素的 ID。
Amp 有一些全域性定義的事件和操作,可以在任何 amp 元件上使用,它們是 **tap 事件**,操作是 **hide、show** 和 **togglevisibility**。
**注意** - 如果要在任何 html 或 amp 元件上隱藏/顯示或使用 togglevisibility,可以使用 **on="tap:elementid.[hide/show/togglevisibility]"**
Placeholder 屬性
Placeholder 屬性可以在任何 html 元素(例如 input 元素)上使用,也可以在 amp 元件上使用。Placeholder 是頁面上首先顯示的內容,內容載入完成後,Placeholder 將被移除並變為不可見。
input 元素上的 Placeholder
<input type = "text" id = "date" name = "date" placeholder = "Start Date">
amp 元件上的 Placeholder
<amp-anim src = "images/loreal.gif" width = "300" height = "250" layout = "responsive"> <amp-img placeholder src = "images/flower.jpg" layout = "fill"> </amp-img> </amp-anim>
Sizes 屬性
這與 heights 屬性的使用方式相同。該值是一個表示式,如下所示:
<amp-img src = "amp.png" width = "400" height = "300" layout = "responsive" sizes = "(min-width: 250px) 250px, 100vw"> </amp-img>
Width 和 Height 屬性
它們幾乎用於所有 html 元素和 amp 元件。width 和 height 用於指定 amp 元素在頁面上佔據的空間。
示例
<amp-img src = "amp.png" width = "400" height = "300" layout = "responsive"> </amp-img>
Google AMP - 樣式和自定義 CSS
Amp 在經過仔細考慮後,才會在螢幕上呈現頁面。載入的頁面將包含影像、影片、iframe 等,這些都是需要執行的 http 請求。因此,http 請求會被延遲,以便顯示頁面上的內容,併為要載入的影像、影片、iframe 建立必要的空間。
Amp 具有佔位符、回退、srcset 和佈局屬性等功能,可以使頁面具有響應能力,並確保頁面上的內容不會被打亂。在本節中,讓我們詳細討論所有這些內容。
Amp 樣式標籤
Amp 有一個帶有 **amp-custom** 屬性的樣式標籤,如下所示:
<style amp-custom>
button{
background-color: #ACAD5C;
color: white;
padding: 12px 20px;
border: none;
border-radius: 4px;
cursor: pointer;
float: left;
}
amp-img {
border: 1px solid black;
border-radius: 4px;
padding: 5px;
}
p {
padding: 1rem;
font-size:25px;
}
largeText {
font-size:30px;
background-color:red;
}
</style>
它主要用於編寫頁面所需的自定義 css。請不要忘記新增 **amp-custom** 屬性;否則,它將無法透過 amp 驗證,如下所示:

Amp 還支援 html 元素的內聯 css,如下所示:
<div style = "color:green;margin-left:30px;"> Welcome to TutorialsPoint</p>
外部樣式表標籤
Amp 不支援外部樣式表,並且在進行 amp 驗證時將驗證失敗。
示例
<!doctype html>
<html amp lang = "en">
<head>
<meta charset = "utf-8">
<script async src = "https://cdn.ampproject.org/v0.js"></script>
<title>Google AMP - Dynamic Css Classes</title>
<link rel = "canonical" href = "
http://example.ampproject.org/article-metadata.html">
<meta name = "viewport" content = "width = device-width,minimum-scale = 1,initial-scale = 1">
<style amp-boilerplate>
body {
-webkit-animation:
-amp-start 8s steps(1,end) 0s 1 normal both;-moz-animation:
-amp-start 8s steps(1,end) 0s 1 normal both;-ms-animation:
-amp-start 8s steps(1,end) 0s 1 normal both;animation:
-amp-start 8s steps(1,end) 0s 1 normal both
}
@-webkit-keyframes
-amp-start{from{visibility:hidden}to{visibility:visible}}@-moz-keyframes
-amp-start{from{visibility:hidden}to{visibility:visible}}@-ms-keyframes
-amp-start{from{visibility:hidden}to{visibility:visible}}@-o-keyframes
-amp-start{from{visibility:hidden}to{visibility:visible}}@keyframes
-amp-start{from{visibility:hidden}to{visibility:visible}}
</style>
<noscript>
<style amp-boilerplate>
body {
-webkit-animation:none;
-moz-animation:none;
-ms-animation:none;
animation:none
}
</style>
</noscript>
<script async custom-element = "amp-bind" src = "
https://cdn.ampproject.org/v0/amp-bind-0.1.js">
</script>
<script async custom-element = "amp-dynamic-css-classes"
src = "https://cdn.ampproject.org/v0/amp-dynamic-css-classes-0.1.js">
</script>
<link rel = "stylesheet"
href = "https://cdnjs.cloudflare.com/ajax/libs/materialize/0.9 8.0/css/materialize.min.css">
<style amp-custom>
p {
padding: 1rem;
font-size:25px;
}
</style>
</head>
<body>
<h3>Google AMP - Dynamic Css Classes</h3>
<div style = "color:green;margin-left:30px;">
Welcome to TutorialsPoint</p>
</body>
</html>
當使用AMP 驗證器進行驗證時,我們得到以下錯誤。
為了使頁面中的元素自適應顯示,amp 元素需要指定元素在頁面上佔據的寬度和高度。新增 layout = “responsive” 將使元素在頁面上保持縱橫比自適應。
layout 屬性的詳細資訊在章節Google AMP – 佈局中詳細討論。
Google AMP - 動態 CSS 類
amp-dynamic-css-classes 會向 body 標籤新增動態類。在本節中,讓我們學習此標籤的詳細資訊。
要使用 amp-dynamic-css-classes,我們需要新增以下指令碼:
<script asynccustom-element="amp-dynamic-css-classes" src = "https://cdn.ampproject.org/v0/amp-dynamic-css-classes-0.1.js"> </script>
有兩種重要的類由 amp-dynamic-css-classes 處理:
- amp-referrer-*
- amp-viewer
讓我們詳細討論每一個。
amp-referrer-*
這些類根據使用者的訪問來源設定。這意味著如果使用者來自 Google,則會設定與 Google 相關的 referrer 類。Twitter 和 Pinterest 也適用相同規則。
這些類根據引薦來源的型別提供。
例如,如果使用者從 Google 搜尋引擎點選 AMP 頁面,則會新增以下類:
- amp-referrer-www-google-com
- amp-referrer-google-com
- amp-referrer-com
類似地,Twitter、Pinterest、LinkedIn 等都有相應的類。
amp-viewer
AMP Viewer 基本上會更改 AMP URL 以從 Google 快取獲取詳細資訊。如果您在 Google 搜尋中搜索某些內容,顯示的輪播圖將包含所有 AMP 頁面。
當您點選它們時,它們會被重定向到以 Google URL 作為字首的 URL。當用戶在 AMP Viewer 中檢視頁面並使用動態類時,將設定 amp-viewer 類。

當您點選 AMP 頁面時,您在位址列中獲取的 URL 如下所示:
https://www.google.co.in/amp/s/m.timesofindia.com/sports/cricket/india-in-australia/to-hell-with-the-nets-boys-need-rest-ravi-shastri/amp_articleshow/67022458.cms

示例
<!doctype html>
<html amp lang = "en">
<head>
<meta charset = "utf-8">
<script async src = "https://cdn.ampproject.org/v0.js"></script>
<title>Google AMP - Dynamic Css Classes</title>
<link rel = "canonical" href = "http://example.ampproject.org/article-metadata.html">
<meta name = "viewport" content = "width = device-width,minimum-scale = 1,initial-scale = 1">
<style amp-boilerplate>
body{
-webkit-animation:
-amp-start 8s steps(1,end) 0s 1 normal both;-moz-animation:
-amp-start 8s steps(1,end) 0s 1 normal both;-ms-animation:
-amp-start 8s steps(1,end) 0s 1 normal both;animation:
-amp-start 8s steps(1,end) 0s 1 normal both
}
@-webkit-keyframes
-amp-start{from{visibility:hidden}to{visibility:visible}}@-moz-keyframes
-amp-start{from{visibility:hidden}to{visibility:visible}}@-ms-keyframes
-amp-start{from{visibility:hidden}to{visibility:visible}}@-o-keyframes
-amp-start{from{visibility:hidden}to{visibility:visible}}@keyframes
-amp-start{from{visibility:hidden}to{visibility:visible}}
</style>
<noscript>
<style amp-boilerplate>
body {
-webkit-animation:none;-moz-animation:none;
-ms-animation:none;animation:none
}
</style>
</noscript>
<script async custom-element = "amp-bind"
src = "https://cdn.ampproject.org/v0/amp-bind-0.1.js">
</script>
<script async custom-element = "amp-dynamic-css-classes"
src = "https://cdn.ampproject.org/v0/amp-dynamic-css-classes-0.1.js">
</script>
<link rel = "stylesheet" href = "https://cdnjs.cloudflare.com/ajax/libs/materialize/0.98.0/css/materialize.min.css">
<style amp-custom>
body:not(.amp-referrer-pinterest-com) .if-pinterest,
body:not(.amp-referrer-ampbyexample-com) .if-ampbyexample,
body:not(.amp-referrer-google-com) .if-google,
body:not(.amp-referrer-twitter-com) .if-twitter,
body:not(.amp-referrer-linkedin-com) .if-linkedin,
body:not(.amp-referrer-localhost) .if-localhost {
display: none;
}
body:not(.amp-viewer) .if-viewer,
body.amp-viewer .if-not-viewer {
display: none;
}
p {
padding: 1rem;
font-size:25px;
}
</style>
</head>
<body>
<h3>Google AMP - Dynamic Css Classes</h3>
<div>
<p class = "if-pinterest">You were referred here or embedded by Pinterest!</p>
<p class = "if-twitter">You were referred here or embedded by Twitter!</p>
<p class = "if-google">You were referred here or embedded by Google!</p>
<p class = "if-ampbyexample">You came here directly! Cool :)</p>
< class = "if-localhost">You came here directly! Cool :)</p>
</div>
<div>
<p class = "if-not-viewer">Hey! You are not coming from amp viewer</p>
<p class = "if-viewer">Hey! From amp viewer.</p>
<div>
</body>
</html>
輸出
Google AMP - 操作和事件
要在 amp-component 上使用操作或事件,我們可以使用 on 屬性。在本節中,讓我們詳細討論它們。
事件
使用事件的語法如下所示:
on = "eventName:elementId[.methodName[(arg1 = value, arg2 = value)]]"
傳遞給on屬性的詳細資訊如下所示:
**eventName** - 它接受 amp 元件可用的事件名稱。例如,對於表單,我們可以使用 submit-success、submit-error 事件名稱。
**elementId** - 它接受需要在其中呼叫事件的元素的 ID。它可以是我們要了解其成功或錯誤的表單的 ID。
**methodName** - 它接受在事件發生時要呼叫的方法的名稱。
**arg=value** - 它接受以 key=value 形式傳遞給方法的引數。
也可以將多個事件傳遞給 on 屬性,方法如下:
on = "submit-success:lightbox;submit-error:lightbox1"
如果有多個事件,則將它們傳遞給 on 屬性,並用分號 (;) 分隔。
操作
操作基本上與 on 屬性一起使用,語法如下所示:
on = "tab:elementid.hide;"
我們可以傳遞多個 actions,如下所示:
on = "tab:elementid.open;tab:elementid.hide;”
**Elementid** 是要執行操作的元素的 ID。
AMP 有一些全域性定義的事件和操作,可以在任何 amp-component 上使用,它們是tap 事件,操作是hide、show和togglevisibility。
如果要隱藏/顯示或在任何 html 或 amp 元件上使用 togglevisibility,可以使用on=”tap:elementid.[hide/show/togglevisibility]”
讓我們看一些事件和操作的工作示例。
在輸入元素上
讓我們藉助一個工作示例更好地理解這一點:
示例
<!doctype html>
<html amp lang = "en">
<head>
<meta charset = "utf-8">
<script async src = "https://cdn.ampproject.org/v0.js"></script>
<title>Google AMP - Amp Bind</title>
<link rel = "canonical" href = "http://example.ampproject.org/article-metadata.html">
<meta name = "viewport" content = "width = device-width,minimum-scale = 1,initial-scale = 1">
<style amp-boilerplate>
body{
-webkit-animation:
-amp-start 8s steps(1,end) 0s 1 normal both;-moz-animation:
-amp-start 8s steps(1,end) 0s 1 normal both;-ms-animation:
-amp-start 8s steps(1,end) 0s 1 normal both;animation:
-amp-start 8s steps(1,end) 0s 1 normal both
}
@-webkit-keyframes
-amp-start{from{visibility:hidden}to{visibility:visible}}@-moz-keyframes
-amp-start{from{visibility:hidden}to{visibility:visible}}@-ms-keyframes
-amp-start{from{visibility:hidden}to{visibility:visible}}@-o-keyframes
-amp-start{from{visibility:hidden}to{visibility:visible}}@keyframes
-amp-start{from{visibility:hidden}to{visibility:visible}}
</style>
<noscript>
<style amp-boilerplate>
body {
-webkit-animation:none;
-moz-animation:none;
-ms-animation:none;
animation:none
}
</style>
</noscript>
<script async custom-element = "amp-bind" src = "
https://cdn.ampproject.org/v0/amp-bind-0.1.js">
</script>
<script async custom-element = "amp-lightbox" src = "
https://cdn.ampproject.org/v0/amp-lightbox-0.1.js">
</script>
<style amp-custom>
button{
background-color: #ACAD5C;
color: white;
padding: 12px 20px;
border: none;
border-radius: 4px;
cursor: pointer;
float: left;}
.lightbox {
background: rgba(211,211,211,0.8);
width: 100%;
height: 100%;
position: absolute;
display: flex;
align-items: center;
justify-content: center;
}
#txtname{
width: 100%;
padding: 12px 20px;
margin: 8px 0;
display: inline-block;
border: 1px solid #ccc;
border-radius: 4px;
box-sizing: border-box;
}
div {
font-size:25px;
}
</style>
</head>
<body>
<h3>Google AMP - Amp Bind</h3>
<button on = "tap:AMP.setState({displaylightbox: true})">
Click Here
</button>
<br/>
<br/>
<h3>AMP - Input Element</h3>
<input id = "txtname" placeholder = "Type here" on =
"input-throttled:AMP.setState({name: event.value})">
<div [text] = "name"></div>
</body>
</html>
輸出

請注意,在上面的示例中,我們正在輸入欄位上使用事件,如下所示:
<input id = "txtname" placeholder = "Type here"
on = "input-throttled:AMP.setState({name: event.value})">
使用的事件是input-throlled。
我們也可以使用 change,如下所示:
<input id = "txtname" placeholder = "Type here" on =
"change:AMP.setState({name: event.value})">
一旦使用者離開輸入框,就會顯示輸出。我們可以在輸入型別(如單選按鈕、複選框等)以及 select 元素上使用 change 事件。
<input id = "txtname" placeholder = "Type here" on =
"input-debounced:AMP.setState({name: event.value})">
事件input-debounced與change事件相同,但輸出在使用者鍵入 300 毫秒後顯示。
示例
<!doctype html>
<html amp lang = "en">
<head>
<meta charset = "utf-8">
<script async src = "https://cdn.ampproject.org/v0.js"></script>
<title>Google AMP - Amp Bind</title>
<link rel = "canonical" href = " http://example.ampproject.org/article-metadata.html">
<meta name = "viewport" content = "width = device-width,minimum-scale = 1,initial-scale = 1">
<style amp-boilerplate>
body{
-webkit-animation:
-amp-start 8s steps(1,end) 0s 1 normal both;-moz-animation:
-amp-start 8s steps(1,end) 0s 1 normal both;-ms-animation:
-amp-start 8s steps(1,end) 0s 1 normal both;animation:
-amp-start 8s steps(1,end) 0s 1 normal both
}
@-webkit-keyframes
-amp-start{from{visibility:hidden}to{visibility:visible}}@-moz-keyframes
-amp-start{from{visibility:hidden}to{visibility:visible}}@-ms-keyframes
-amp-start{from{visibility:hidden}to{visibility:visible}}@-o-keyframes
-amp-start{from{visibility:hidden}to{visibility:visible}}@keyframes
-amp-start{from{visibility:hidden}to{visibility:visible}}
</style>
<noscript>
<style amp-boilerplate>
body{
-webkit-animation:none;
-moz-animation:none;
-ms-animation:none;
animation:none}
</style>
</noscript>
<script async custom-element = "amp-bind"
src = "https://cdn.ampproject.org/v0/amp-bind-0.1.js">
</script>
<script async custom-element = "amp-lightbox"
src = "https://cdn.ampproject.org/v0/amp-lightbox-0.1.js">
</script>
<style amp-custom>
button{
background-color: #ACAD5C;
color: white;
padding: 12px 20px;
border: none;
border-radius: 4px;
cursor: pointer;
float: left;
}
.lightbox {
background: rgba(211,211,211,0.8);
width: 100%;
height: 100%;
position: absolute;
display: flex;
align-items: center;
justify-content: center;
}
#txtname{
width: 100%;
padding: 12px 20px;
margin: 8px 0;
display: inline-block;
border: 1px solid #ccc;
border-radius: 4px;
box-sizing: border-box;
}
div {
font-size:25px;
}
</style>
</head>
<body>
<h3>Google AMP - Amp Bind</h3>
<button on = "tap:AMP.setState({displaylightbox: true})">
Click Here
</button>
<br/>
<br/>
<h3>AMP - Input Element</h3>
<input id = "txtname" placeholder = "Type here" on =
"input-debounced:AMP.setState({name: event.value})">
<div [text] = "name"></div>
</body>
</html>
輸出

在 AMP Lightbox 上
在本節中,我們將測試 lightbox 上的以下事件:
- lightboxOpen
- lightboxClose
示例
<!doctype html>
<html amp lang = "en">
<head>
<meta charset = "utf-8">
<script async src = "https://cdn.ampproject.org/v0.js"></script>
<title>Google AMP - Amp Lightbox</title>
<link rel = "canonical" href = " http://example.ampproject.org/article-metadata.html">
<meta name = "viewport" content = "width = device-width,minimum-scale = 1,initial-scale = 1">
<style amp-boilerplate>
body{
-webkit-animation:
-amp-start 8s steps(1,end) 0s 1 normal both;-moz-animation:
-amp-start 8s steps(1,end) 0s 1 normal both;-ms-animation:
-amp-start 8s steps(1,end) 0s 1 normal both;animation:
-amp-start 8s steps(1,end) 0s 1 normal both
}
@-webkit-keyframes
-amp-start{from{visibility:hidden}to{visibility:visible}}@-moz-keyframes
-amp-start{from{visibility:hidden}to{visibility:visible}}@-ms-keyframes
-amp-start{from{visibility:hidden}to{visibility:visible}}@-o-keyframes
-amp-start{from{visibility:hidden}to{visibility:visible}}@keyframes
-amp-start{from{visibility:hidden}to{visibility:visible}}
</style>
<noscript>
<style amp-boilerplate>
body{
-webkit-animation:none;
-moz-animation:none;
-ms-animation:none;
animation:none}
</style>
</noscript>
<script async custom-element = "amp-bind"
src = "https://cdn.ampproject.org/v0/amp-bind-0.1.js">
</script>
<script async custom-element = "amp-lightbox"
src = "https://cdn.ampproject.org/v0/amp-lightbox-0.1.js">
</script>
<style amp-custom>
amp-img {
border: 1px solid #ddd;
border-radius: 4px;
padding: 5px;
}
button {
background-color: #ACAD5C;
color: white;
padding: 12px 20px;
border: none;
border-radius: 4px;
cursor: pointer;
float: left;
}
.lightbox {
background: rgba(211,211,211,0.8);
width: 100%;
height: 100%;
position: absolute;
display: flex;
align-items: center;
justify-content: center;
}
p{font-size:30px;}
</style>
</head>
<body>
<h3>Google AMP - Amp Lightbox</h3>
<p [text] = "'Lightbox is ' + lightboxstatus + '.'">
Lightbox Event Testing
</p>
<button on = "tap:my-lightbox.open">
Show LightBox
</button>
<amp-lightbox id = "my-lightbox" layout = "nodisplay"
close-button on = "lightboxOpen:AMP.setState({lightboxstatus:'opened'});
lightboxClose:AMP.setState({lightboxstatus:'closed'});">
<div class = "lightbox">
<amp-img alt = "Beautiful Flower" src = "images/loreal.gif"
width = "246"
height = "205">
</amp-img>
</div>
</amp-lightbox>
</body>
</html>
輸出
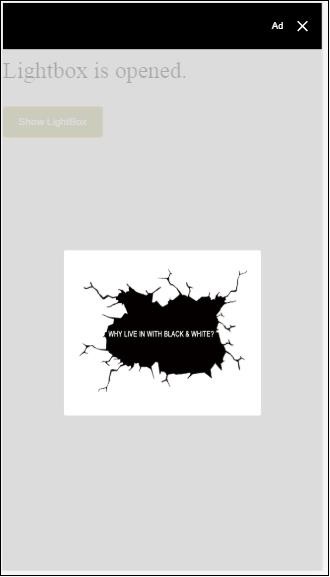
以下程式碼顯示瞭如何在 lightbox 上實現 open 和 close 事件:
<p [text]="'Lightbox is ' + lightboxstatus + '.'">Lightbox Event Testing</p>
<button on = "tap:my-lightbox.open">Show LightBox</button>
<amp-lightbox id = "my-lightbox" layout = "nodisplay"
close-button on = "lightboxOpen:AMP.setState({lightboxstatus:'opened'});
lightboxClose:AMP.setState({lightboxstatus:'closed'});">
<div class = "lightbox">
<amp-img alt = "Beautiful Flower" src = "images/loreal.gif"
width = "246"
height = "205">
</amp-img>
</div>
</amp-lightbox>
AMP -Selector 上的事件
amp-selector 上可用的事件是select。
示例
<!doctype html>
<html amp lang = "en">
<head>
<meta charset = "utf-8">
<script async src = "https://cdn.ampproject.org/v0.js"></script>
<title>Google AMP - Amp Selector</title>
<link rel = "canonical" href = "http://example.ampproject.org/article-metadata.html">
<meta name = "viewport" content = "width = device-width,minimum-scale = 1,initial-scale = 1">
<style amp-boilerplate>
body{
-webkit-animation:
-amp-start 8s steps(1,end) 0s 1 normal both;-moz-animation:
-amp-start 8s steps(1,end) 0s 1 normal both;-ms-animation:
-amp-start 8s steps(1,end) 0s 1 normal both;animation:
-amp-start 8s steps(1,end) 0s 1 normal both
}
@-webkit-keyframes
-amp-start{from{visibility:hidden}to{visibility:visible}}@-moz-keyframes
-amp-start{from{visibility:hidden}to{visibility:visible}}@-ms-keyframes
-amp-start{from{visibility:hidden}to{visibility:visible}}@-o-keyframes
-amp-start{from{visibility:hidden}to{visibility:visible}}@keyframes
-amp-start{from{visibility:hidden}to{visibility:visible}}
</style>
<noscript>
<style amp-boilerplate>
body {
-webkit-animation:none;
-moz-animation:none;
-ms-animation:none;
animation:none
}
</style>
</noscript>
<script async custom-element = "amp-bind"
src = "https://cdn.ampproject.org/v0/amp-bind-0.1.js">
</script>
<script async custom-element = "amp-selector"
src = "https://cdn.ampproject.org/v0/amp-selector-0.1.js">
</script>
<style amp-custom>
.radio-menu {
list-style: none;
}
.radio-menu [option][selected] {
outline: none;
}
.radio-menu [option] {
display: flex;
align-items: center;
}
.radio-menu [option]:before {
transition: background 0.25s ease-in-out;
content: "";
display: inline-block;
width: 24px;
height: 24px;
margin: 8px;
border-radius: 100%;
border: solid 1px black;
}
.radio-menu [option = red][selected]:before {
text-align: center;
content: "✓";
color: white;
background: red;
}
.radio-menu [option = green][selected]:before {
text-align: center;
content: "✓";
color: white;
background: green;
}
.radio-menu [option = blue][selected]:before {
text-align: center;
content: "✓";
color: white;
background: blue;
}
p{font-size:30px;}
</style>
</head>
<body>
<h3>Google AMP - Amp Selector</h3>
<p [text] = "'Color selected is ' + ampselectorstatus + '.'">
Amp Selector Event Testing
<p>
<amp-selector
class = "radio-menu"
layout = "container"
name = "my-selector"
on = "select:AMP.setState({ampselectorstatus:event.selectedOptions})">
<div option = "red">
Red
</div>
<div option = "green">
Green
</div>
<div option = "blue">
Blue
</div>
</amp-selector>
</body>
</html>
輸出

select 事件的使用方法如下所示:
<p [text]="'Color selected is ' + ampselectorstatus + '.'">
Amp Selector Event Testing
</p>
<amp-selector
class = "radio-menu"
layout ="container"
name =" my-selector"
on = "select:AMP.setState({ampselectorstatus:event.selectedOptions})">
<div option = "red">
Red
</div>
<div option = "green">
Green
</div>
<div option = "blue">
Blue
</div>
</amp-selector>
AMP-Sidebar 上的事件
可用的事件是sidebarOpen和sidebarClose。
示例
<!doctype html>
<html amp lang = "en">
<head>
<meta charset = "utf-8">
<script async src = "https://cdn.ampproject.org/v0.js"></script>
<title>Google AMP - Amp Sidebar</title>
<link rel = "canonical" href = "http://example.ampproject.org/article-metadata.html">
<meta name = "viewport" content = "width = device-width,minimum-scale = 1,initial-scale = 1">
<style amp-boilerplate>
body{
-webkit-animation:
-amp-start 8s steps(1,end) 0s 1 normal both;-moz-animation:
-amp-start 8s steps(1,end) 0s 1 normal both;-ms-animation:
-amp-start 8s steps(1,end) 0s 1 normal both;animation:
-amp-start 8s steps(1,end) 0s 1 normal both
}
@-webkit-keyframes
-amp-start{from{visibility:hidden}to{visibility:visible}}@-moz-keyframes
-amp-start{from{visibility:hidden}to{visibility:visible}}@-ms-keyframes
-amp-start{from{visibility:hidden}to{visibility:visible}}@-o-keyframes
-amp-start{from{visibility:hidden}to{visibility:visible}}@keyframes
-amp-start{from{visibility:hidden}to{visibility:visible}}
</style>
<noscript>
<style amp-boilerplate>
body{
-webkit-animation:none;
-moz-animation:none;
-ms-animation:none;
animation:none
}
</style>
</noscript>
<script async custom-element = "amp-bind"
src = "https://cdn.ampproject.org/v0/amp-bind-0.1.js">
</script>
<script async custom-element = "amp-sidebar"
src = "https://cdn.ampproject.org/v0/amp-sidebar-0.1.js">
</script>
<style amp-custom>
amp-img {
border: 1px solid #ddd;
border-radius: 4px;
padding: 5px;
}
button{
background-color: #ACAD5C;
color: white;
padding: 12px 20px;
border: none;
border-radius: 4px;
cursor: pointer;
float: left;
}
.amp-sidebar-toolbar-target-shown {
display: none;
}
p{font-size:30px;}
</style>
</head>
<body>
<h3>Google AMP - Amp Sidebar</h3>
<p [text] = "'Sidebar is ' + ampsidebarstatus + '.'">
Amp Sidebar Event Testing
</p>
<button on = "tap:sidebar1">
Show Sidebar
</button>
<amp-sidebar
id = "sidebar1"
layout = "nodisplay"
side = "right"
on = "sidebarOpen:AMP.setState({ampsidebarstatus: 'Opened'});
sidebarClose:AMP.setState({ampsidebarstatus: 'Closed'})">
<ul>
<li>Nav item 1</li>
<li>
<a href = "#idTwo" on = "tap:idTwo.scrollTo">Nav item 2</a>
</li>
<li>Nav item 3</li>
<li>
<a href = "#idFour" on="tap:idFour.scrollTo">Nav item 4</a>
</li>
<li>Nav item 5</li>
<li>Nav item 6</li>
</ul>
</amp-sidebar>
<div id = "target-element">
</div>
</body>
</html>
輸出

這些事件的使用方法如下所示:
<p [text] = "'Sidebar is ' + ampsidebarstatus + '.'">
Amp Sidebar Event Testing
</p>
<button on = "tap:sidebar1">
Show Sidebar
</button>
<amp-sidebar
id = "sidebar1"
layout = "nodisplay"
side = "right"
on = "sidebarOpen:AMP.setState({ampsidebarstatus: 'Opened'});
sidebarClose:AMP.setState({ampsidebarstatus: 'Closed'})">
<ul>
<li>Nav item 1</li>
<li>
<a href = "#idTwo" on = "tap:idTwo.scrollTo">Nav item 2</a>
</li>
<li>Nav item 3</li>
<li>
<a href = "#idFour" on = "tap:idFour.scrollTo">Nav item 4</a>
</li>
<li>Nav item 5</li>
<li>Nav item 6</li>
</ul>
</amp-sidebar>
Google AMP - 動畫
Amp-animation 是一個 AMP 元件,它定義要用於其他 AMP 元件的動畫。本章詳細討論了它們。
要使用 amp-animation,我們需要新增以下指令碼:
<script async custom-element = "amp-animation" src = "https://cdn.ampproject.org/v0/amp-animation-0.1.js"> </script>
動畫的詳細資訊定義在 JSON 結構中。
amp-animation的基本結構如下所示:
<amp-animation layout = "nodisplay">
<script type = "application/json">
{
// Timing properties
...
"animations": [
{
// animation 1
},
...
{
// animation n
}
]
}
</script>
</amp-animation>
animation元件包含以下內容:選擇器、變數、時間屬性、關鍵幀等。
{
"selector": "#target-id",
// Variables
// Timing properties
// Subtargets
...
"keyframes": []
}
選擇器
在這裡,我們需要提供將使用動畫的元素的類或 ID。
變數
它們是在關鍵幀內部定義要使用的值。變數使用var()定義。
示例
{
"--delay": "0.5s",
"animations": [
{
"selector": "#target1",
"delay": "var(--delay)",
"--x": "150px",
"--y" : "200px",
"keyframes": {
"transform": "translate(var(--x), var(--y, 0px)"
}
}
]
}
這裡delay、x 和y是變數,變數的值在所示示例中定義。
時間屬性
在這裡,您可以為動畫定義持續時間和延遲。以下是支援的時間屬性:
| 屬性 | 值 | 描述 |
|---|---|---|
| duration | 時間屬性。值必須以毫秒為單位。 | 用於動畫的持續時間。 |
| delay | 時間屬性。值必須以毫秒為單位。 | 動畫開始執行之前的延遲 |
| endDelay | 時間屬性。值必須以毫秒或秒為單位。 | 給定的延遲,在動畫完成時應用。 |
| iterations | 值必須為數字。 | 動畫需要重複的次數。 |
| iterationStart | 值必須為數字。 | 效果開始動畫的時間偏移量。 |
| easing | 值為字串 | 這用於為動畫獲取緩動效果。緩動的一些示例包括 linear、ease、ease-in、ease-out、ease-in-out 等 |
| direction | 值為字串 | "normal"、"reverse"、"alternate" 或 "alternate-reverse" 之一。 |
| fill | 值為字串 | 值可以是 "none"、"forwards"、"backwards"、"both"、"auto"。 |
關鍵幀
關鍵幀可以透過多種方式定義,例如物件形式或陣列形式。請考慮以下示例。
示例
"keyframes": {"transform": "translate(100px,200px)"}
示例
{
"keyframes": {
"opacity": [1, 0],
"transform": ["scale(1)", "scale(2)"]
}
}
示例
{
"keyframes": [
{"opacity": 1, "transform": "scale(1)"},
{"opacity": 0, "transform": "scale(2)"}
]
}
示例
{
"keyframes": [
{"easing": "ease-out", "opacity": 1, "transform": "scale(1)"},
{"opacity": 0, "transform": "scale(2)"}
]
}
使用 CSS 的關鍵幀
<style amp-custom>
div {
width: 100px;
height: 100px;
background-color: red;
position: relative;
margin: 0 auto;
transform:scale(3);
}
@keyframes example { 0% {transform:scale(3)}
75% {transform:scale(2)}
100% {transform:scale(1)}
}
</style>
<amp-animation layout = "nodisplay">
<script type = "application/json">
{
"duration": "4s",
"keyframes": "example"
}
</script>
</amp-animation>
關鍵幀內部可以使用一些 CSS 屬性。支援的屬性稱為白名單屬性。以下是關鍵幀內部可以使用白名單屬性:
- opacity
- transform
- visibility
- 'offsetDistance'
注意 - 使用除白名單屬性之外的任何其他屬性都會在控制檯中丟擲錯誤。
現在讓我們透過一個簡單的示例來了解,該示例將在動畫應用於影像時旋轉影像。在此示例中,我們使用 amp-animation 旋轉影像。
示例
<!doctype html>
<html amp lang = "en">
<head>
<meta charset = "utf-8">
<script async src = "https://cdn.ampproject.org/v0.js"></script>
<title>Google AMP - Amp Video</title>
<link rel = "canonical" href = "http://example.ampproject.org/article-metadata.html">
<meta name = "viewport" content = "width = device-width, minimum-scale = 1,initial-scale = 1">
<style amp-boilerplate>
body{
-webkit-animation:
-amp-start 8s steps(1,end) 0s 1 normal both;-moz-animation:
-amp-start 8s steps(1,end) 0s 1 normal both;-ms
-amp-start 8s steps(1,end) 0s 1 normal both;animation:
-amp-start 8s steps(1,end) 0s 1 normal both
}
@-webkit-keyframes
-amp-start{from{visibility:hidden}to{visibility:visible}}@-moz-keyframes
-amp-start{from{visibility:hidden}to{visibility:visible}}@-ms-keyframes
-amp-start{from{visibility:hidden}to{visibility:visible}}@-o-keyframes
-amp-start{from{visibility:hidden}to{visibility:visible}}@keyframes
-amp-start{from{visibility:hidden}to{visibility:visible}}
</style>
<noscript>
<style amp-boilerplate>
body{
-webkit-animation:none;
-moz-animation:none;
-ms-animation:none;
animation:none
}
</style>
</noscript>
<script async custom-element = "amp-animation"
src =" https://cdn.ampproject.org/v0/amp-animation-0.1.js">
</script>
<style amp-custom>
amp-img {
border: 1px solid black;
border-radius: 4px;
padding: 5px;
}
</style>
</head>
<body>
<h3>Google AMP - Amp Animation Example</h3>
<amp-animation id = "anim1" layout = "nodisplay" trigger = "visibility">
<script type = "application/json">
{
"duration": "1s",
"fill": "both",
"direction": "alternate",
"animations": [
{
"selector": "#image1",
"easing": "cubic-bezier(0,0,.21,1)",
"keyframes": {
"transform": "rotate(20deg)"
}
}
]
}
</script>
</amp-animation>
<br/>
<br/>
<amp-img
id = "image1"
src = "images/christmas1.jpg"
width = 300
height = 250
layout = "responsive">
</amp-img>
<br/>
</body>
</html>
輸出

上面使用的 amp-animation 詳細資訊在下面顯示的程式碼中給出:
<amp-animation id = "anim1" layout = "nodisplay" trigger = "visibility">
<script type = "application/json">
{
"duration": "1s",
"fill": "both",
"direction": "alternate",
"animations": [
{
"selector": "#image1",
"easing": "cubic-bezier(0,0,.21,1)",
"keyframes": {
"transform": "rotate(20deg)"
}
}
]
}
</script>
</amp-animation>
這裡的選擇器是應用旋轉動畫的影像的 ID:
<amp-img id = "image1" src = "images/christmas1.jpg" width = 300 height = 250 layout = "responsive"> </amp-img>
使用 CSS 中的關鍵幀的示例
示例
<!doctype html>
<html amp lang = "en">
<head>
<meta charset = "utf-8">
<script async src = "https://cdn.ampproject.org/v0.js"></script>
<title>Google AMP - Amp Video</title>
<link rel = "canonical" href = "http://example.ampproject.org/article-metadata.html">
<meta name = "viewport" content = "width = device-width,minimum-scale = 1,initial-scale = 1">
<style amp-boilerplate>
body{
-webkit-animation:
-amp-start 8s steps(1,end) 0s 1 normal both;-moz-animation:
-amp-start 8s steps(1,end) 0s 1 normal both;-ms-animation:
-amp-start 8s steps(1,end) 0s 1 normal both;animation:
-amp-start 8s steps(1,end) 0s 1 normal both
}
@-webkit-keyframes
-amp-start{from{visibility:hidden}to{visibility:visible}}@-moz-keyframes
-amp-start{from{visibility:hidden}to{visibility:visible}}@-ms-keyframes
-amp-start{from{visibility:hidden}to{visibility:visible}}@-o-keyframes
-amp-start{from{visibility:hidden}to{visibility:visible}}@keyframes
-amp-start{from{visibility:hidden}to{visibility:visible}}
</style>
<noscript>
<style amp-boilerplate>
body{
-webkit-animation:none;
-moz-animation:none;
-ms-animation:none;
animation:none
}
</style>
</noscript>
<script async custom-element = "amp-animation"
src = "https://cdn.ampproject.org/v0/amp-animation-0.1.js">
</script>
<style amp-custom>
div {
width: 100px;
height: 100px;
background-color: red;
position: relative;
margin: 0 auto;
transform:scale(3);
}
@keyframes example {
0% {transform:scale(3)}
75% {transform:scale(2)}
100% {transform:scale(1)}
}
</style>
</head>
<body>
<h3>Google AMP - Amp Animation Example</h3>
<amp-animation id = "anim1" layout = "nodisplay" trigger = "visibility">
<script type = "application/json">
{
"duration": "3s",
"fill": "both",
"direction": "alternate",
"animations": [{
"selector": "#image1",
"easing": "cubic-bezier(0,0,.21,1)",
"keyframes":"example"
}]
}
</script>
</amp-animation>
<br/>
<br/>
<div id = "image1"></div>
<br/>
</body>
</html>
輸出
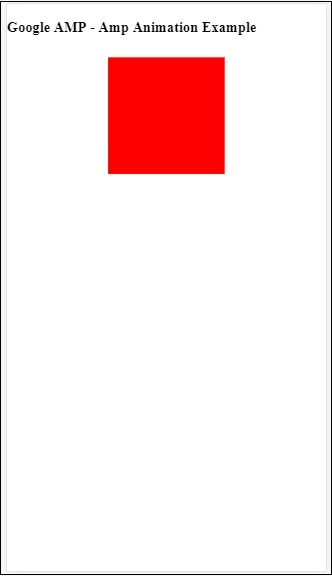
動畫觸發器
使用 trigger = ”visibility”,預設情況下會應用動畫。為了在事件上啟動動畫,我們必須刪除 trigger = ”visibility” 並新增事件以啟動動畫,如下面的示例所示:
示例
<!doctype html>
<html amp lang = "en">
<head>
<meta charset = "utf-8">
<script async src = "https://cdn.ampproject.org/v0.js"></script>
<title>Google AMP - Amp Video</title>
<link rel = "canonical" href = "http://example.ampproject.org/article-metadata.html">
<meta name = "viewport" content = "width = device-width,
minimum-scale = 1,initial-scale = 1">
<style amp-boilerplate>
body{
-webkit-animation:
-amp-start 8s steps(1,end) 0s 1 normal both;-moz-animation:
-amp-start 8s steps(1,end) 0s 1 normal both;-ms-animation:
-amp-start 8s steps(1,end) 0s 1 normal both;animation:
-amp-start 8s steps(1,end) 0s 1 normal both
}
@-webkit-keyframes
-amp-start{from{visibility:hidden}to{visibility:visible}}@-moz-keyframes
-amp-start{from{visibility:hidden}to{visibility:visible}}@-ms-keyframes
-amp-start{from{visibility:hidden}to{visibility:visible}}@-o-keyframes
-amp-start{from{visibility:hidden}to{visibility:visible}}@keyframes
-amp-start{from{visibility:hidden}to{visibility:visible}}
</style>
<noscript>
<style amp-boilerplate>
body{
-webkit-animation:none;
-moz-animation:none;
-ms-animation:none;
animation:none}
</style>
</noscript>
<script async custom-element = "amp-animation"
src = "https://cdn.ampproject.org/v0/amp-animation-0.1.js">
</script>
<style amp-custom>
div {
width: 100px;
height: 100px;
background-color: red;
position: relative;
margin: 0 auto;
transform:scale(2);
}
@keyframes example {
0% {transform:scale(2)}
75% {transform:scale(1)}
100% {transform:scale(0.5)}
}
button{
background-color: #ACAD5C;
color: white;
padding: 12px 20px;
border: none;
border-radius: 4px;
cursor: pointer;
float: left;
}
</style>
</head>
<body>
<h3>Google AMP - Amp Animation Example</h3>
<amp-animation id = "anim1" layout = "nodisplay">
<script type = "application/json">
{
"duration": "3s",
"fill": "both",
"direction": "alternate",
"animations": [{
"selector": "#image1",
"easing": "cubic-bezier(0,0,.21,1)",
"keyframes":"example"
}]
}
</script>
</amp-animation>
<button on = "tap:anim1.start">Start</button>
<br/>
<br/>
<div id = "image1"></div>
</body>
</html>
請注意,當點選開始按鈕時,動畫將開始。
輸出
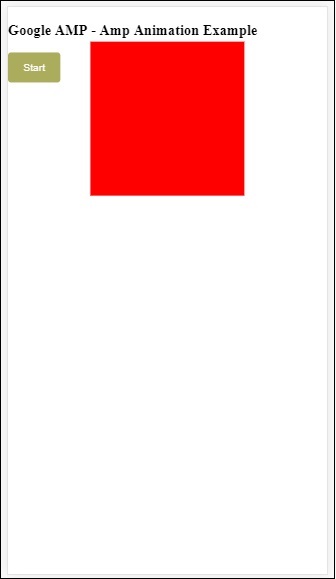
我們在 On 上使用了名為start的操作來啟動動畫。類似地,還支援其他操作,如下所示:
- start
- pause
- restart
- resume
- togglePause
- seekTo
- reverse
- finish
- cancel
讓我們看一個可以使用該操作的工作示例。
示例
<!doctype html>
<html amp lang = "en">
<head>
<meta charset = "utf-8">
<script async src = "https://cdn.ampproject.org/v0.js"></script>
<title>Google AMP - Amp Video</title>
<link rel = "canonical" href = "http://example.ampproject.org/article-metadata.html">
<meta name = "viewport" content = "width=device-width,minimum-scale = 1,initial-scale = 1">
<style amp-boilerplate>
body{
-webkit-animation:
-amp-start 8s steps(1,end) 0s 1 normal both;-moz-animation:
-amp-start 8s steps(1,end) 0s 1 normal both;-ms-animation:
-amp-start 8s steps(1,end) 0s 1 normal both;animation:
-amp-start 8s steps(1,end) 0s 1 normal both
}
@-webkit-keyframes
-amp-start{from{visibility:hidden}to{visibility:visible}}@-moz-keyframes
-amp-start{from{visibility:hidden}to{visibility:visible}}@-ms-keyframes
-amp-start{from{visibility:hidden}to{visibility:visible}}@-o-keyframes
-amp-start{from{visibility:hidden}to{visibility:visible}}@keyframes
-amp-start{from{visibility:hidden}to{visibility:visible}}
</style>
<noscript>
<style amp-boilerplate>
body{
-webkit-animation:none;
-moz-animation:none;
-ms-animation:none;
animation:none}
</style>
</noscript>
<script async custom-element = "amp-animation"
src = "https://cdn.ampproject.org/v0/amp-animation-0.1.js">
</script>
<style amp-custom>
#image1 {
width: 100px;
height: 100px;
background-color: red;
position: relative;
margin: 0 auto;
transform:scale(2);
}
@keyframes example {
0% {transform:scale(2)}
75% {transform:scale(1)}
100% {transform:scale(0.5)}
}
button1{
background-color: #ACAD5C;
color: white;
padding: 12px 20px;
border: none;
border-radius: 4px;
cursor: pointer;
float: left;
}
</style>
</head>
<body>
<h3>Google AMP - Amp Animation Example</h3>
<amp-animation id = "anim1" layout = "nodisplay">
<script type = "application/json">
{
"duration": "3s",
"fill": "both",
"direction": "alternate",
"animations": [{
"selector": "#image1",
"easing": "cubic-bezier(0,0,.21,1)",
"keyframes":"example"
}]
}
</script>
</amp-animation>
<button on = "tap:anim1.start">Start</button>
<button on = "tap:anim1.pause">Pause</button>
<button on = "tap:anim1.resume">Resume</button>
<button on = "tap:anim1.reverse">Reverse</button>
<button on = "tap:anim1.cancel">cancel</button>
<button on = "tap:anim1.finish">finish</button>
<button on = "tap:anim1.togglePause">togglePause</button>
<button on = "tap:anim1.seekTo(percent = 1.00)">seekTo(100%)</button>
<br/>
<br/>
<br/>
<br/>
<div id="image1"></div>
</body>
</html>
輸出
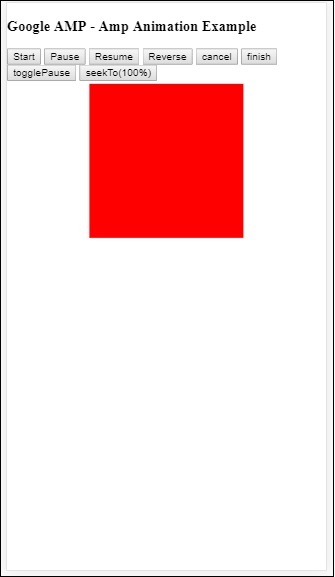
Google AMP - 資料繫結
Amp-bind 有助於透過資料繫結和類似 JS 的表示式,根據操作向 amp-components 和 html 標籤新增互動性。本章詳細討論了資料繫結。
要使用 amp-bind,我們需要將以下指令碼新增到我們的頁面:
<script async custom-element = "amp-bind" src = "https://cdn.ampproject.org/v0/amp-bind-0.1.js"> </script>
讓我們藉助一個工作示例來充分理解這一點,如下所示:
示例
<!doctype html>
<html amp lang = "en">
<head>
<meta charset = "utf-8">
<script async src = "https://cdn.ampproject.org/v0.js"></script>
<title>Google AMP - Amp Bind</title>
<link rel = "canonical" href =
"http://example.ampproject.org/article-metadata.html">
<meta name = "viewport" content = "width = device-width,
minimum-scale = 1,initial-scale = 1">
<style amp-boilerplate>
body{
-webkit-animation:
-amp-start 8s steps(1,end) 0s 1 normal both;-moz-animation:
-amp-start 8s steps(1,end) 0s 1 normal both;-ms-animation:
-amp-start 8s steps(1,end) 0s 1 normal both;animation:
-amp-start 8s steps(1,end) 0s 1 normal both
}
@-webkit-keyframes
-amp-start{from{visibility:hidden}to{visibility:visible}}@-moz-keyframes
-amp-start{from{visibility:hidden}to{visibility:visible}}@-ms-keyframes
-amp-start{from{visibility:hidden}to{visibility:visible}}@-o-keyframes
-amp-start{from{visibility:hidden}to{visibility:visible}}@keyframes
-amp-start{from{visibility:hidden}to{visibility:visible}}
</style>
<noscript>
<style amp-boilerplate>
body{
-webkit-animation:none;
-moz-animation:none;
-ms-animation:none;
animation:none
}
</style>
</noscript>
<script async custom-element = "amp-bind"
src = "https://cdn.ampproject.org/v0/amp-bind-0.1.js"></script>
<style amp-custom>
button{
background-color: #ACAD5C;
color: white;
padding: 12px 20px;
border: none;
border-radius: 4px;
}
</style>
</head>
<body>
<h3>Google AMP - Amp Bind</h3>
<p [text] = "'Hello ' + world + '.'">
Click on the button to change the text
</p>
<button on = "tap:AMP.setState({world: 'This is amp-bind example'})">
Click Here
</button>
</body>
</html>
輸出

單擊按鈕檢視文字更改,如下所示:
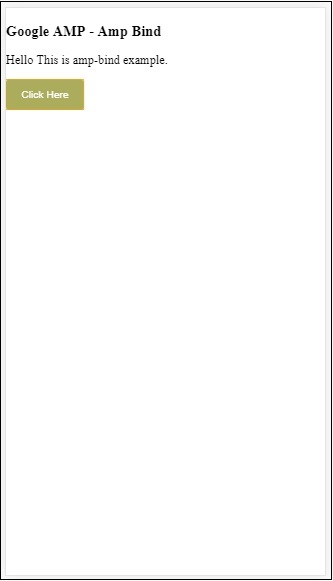
因此,在上面顯示的示例中,我們使用了 amp-bind 來更改單擊按鈕時的文字。
Amp-bind 有三個元件:
狀態 - 最初狀態為空。單擊按鈕後,狀態會發生更改。例如,
<button on = "tap:AMP.setState({world: 'This is amp-bind example'})">
Click Here
</button>
AMP.setState 方法用於更改狀態。變數world被分配值This is amp-bind example。變數world在 html 標籤內使用:
<p [text] = "'Hello ' + world + '.'"> Click on the button to change the text </p>
單擊按鈕後,world 會被分配一個新值:This is amp-bind example。
我們也可以使用 amp-state 進行繫結,如下所示:
<amp-state id = "myState">
<script type = "application/json">
{
"foo": "bar"
}
</script>
</amp-state>
表示式將在繫結期間分配bmyState.foo。
表示式 - amp-bind 工作的表示式如下所示:
'Hello ' + world
world被稱為狀態變數。
繫結 - 繫結應用於表單 [屬性] 中的特殊屬性。例如:
<p [text] = "'Hello ' + world + '.'"> Click on the button to change the text </p>
在上面的示例中,[text]具有用於繫結p標籤的表示式。
我們可以使用以下屬性進行繫結:
- [text]
- [class]
- [hidden]
- [width]
- [height]
繫結也可以在 amp-components 上進行,並且僅允許特定的屬性。以下列表顯示了此類元件和屬性:
| 序號 | AMP 元件 | 屬性和描述 |
|---|---|---|
| 1 | <amp-carousel type=slides> | [slide]*
使用此繫結行為更改幻燈片 |
| 2 | <amp-date-picker> | [min]
min -> 設定最早可選擇日期 [max]max -> 設定最晚可選擇日期 |
| 3 | <amp-iframe> | [src]
更改 iframe 的 src |
| 4 | <amp-img> | [alt] [attribution] [src] [srcset]
我們可以更改 alt、attribution、src 和 srcset。如果更改了 src,請更改 srcset,因為它用於快取 |
| 5 | <amp-lightbox> | [open]*
您可以透過繫結到open來顯示/隱藏 lightbox |
| 6 | <amp-list> | [src]
如果表示式是字串,則從字串 URL 獲取並呈現 JSON。如果表示式是物件或陣列,則呈現表示式資料。 |
| 7 | <amp-selector> | [selected]* [disabled]
更改當前選定的子元素(由其 option 屬性值標識)。支援逗號分隔的值列表以進行多選 |
使用 AMP-State 進行繫結
我們可以使用 amp-state 定義所有我們希望在 html 元素或 amp-component 上使用的資料。
amp-state 內部使用的資料必須採用 JSON 格式,如下所示:
<amp-state id = "myCarsList">
<script type = "application/json">
{
"currentcar" : "bmw",
"audi": {
"imageUrl": "images/audi.jpg"
},
"bmw": {
"imageUrl": "images/bmw.jpg"
}
}
</script>
</amp-state>
因此,我們使用汽車名稱和用於汽車的影像定義了鍵值對。
文字和 AMP-Image 上的 AMP-Bind
下面顯示了一個使用 amp-state 和 amp-bind 的工作示例:
<!doctype html>
<html amp lang = "en">
<head>
<meta charset = "utf-8">
<script async src = "https://cdn.ampproject.org/v0.js"></script>
<title>Google AMP - Amp Bind</title>
<link rel = "canonical" href =
"http://example.ampproject.org/article-metadata.html">
<meta name = "viewport" content = "width = device-width,
minimum-scale = 1,initial-scale = 1">
<style amp-boilerplate>
body{
-webkit-animation:
-amp-start 8s steps(1,end) 0s 1 normal both;-moz-animation:
-amp-start 8s steps(1,end) 0s 1 normal both;-ms-animation:
-amp-start 8s steps(1,end) 0s 1 normal both;animation:
-amp-start 8s steps(1,end) 0s 1 normal both
}
@-webkit-keyframes
-amp-start{from{visibility:hidden}to{visibility:visible}}@-moz-keyframes
-amp-start{from{visibility:hidden}to{visibility:visible}}@-ms-keyframes
-amp-start{from{visibility:hidden}to{visibility:visible}}@-o-keyframes
-amp-start{from{visibility:hidden}to{visibility:visible}}@keyframes
-amp-start{from{visibility:hidden}to{visibility:visible}
}
</style>
<noscript>
<style amp-boilerplate>
body{
-webkit-animation:none;
-moz-animation:none;
-ms-animation:none;
animation:none
}
</style>
</noscript>
<script async custom-element = "amp-bind" src =
"https://cdn.ampproject.org/v0/amp-bind-0.1.js"></script>
<style amp-custom>
button{
background-color: #ACAD5C;
color: white;
padding: 12px 20px;
border: none;
border-radius: 4px;
cursor: pointer;
float: left;
}
</style>
</head>
<body>
<h3>Google AMP - Amp Bind</h3>
<amp-state id = "myCarsList">
<script type = "application/json">
{
"currentcar" : "bmw",
"audi": {
"imageUrl": "images/audi.jpg",
"style": "greenBackground"
},
"bmw": {
"imageUrl": "images/bmw.jpg",
"style": "redBackground"
}
}
</script>
</amp-state>
<amp-img
width = "300"
height = "200"
src = "images/bmw.jpg"
[src] = "myCarsList[currentcar].imageUrl">
</amp-img>
<p [text] = "'This is a ' + currentcar + '.'">
This is a BMW.
</p>
<br/>
<button on = "tap:AMP.setState({currentcar: 'audi'})">
Change Car
</button>
</body>
</html>
輸出
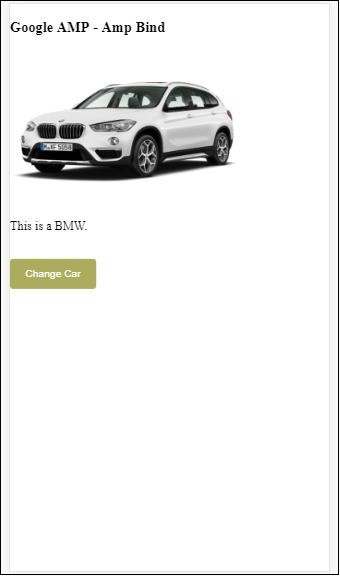
點選按鈕檢視汽車影像變化以及下面的文字。
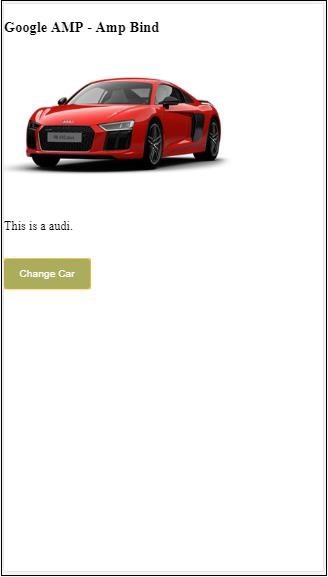
在影片和 iframe 上使用 amp-bind
現在我們將看到一個工作示例,它將更改 amp-iframe 和 amp-video 的 src。
<!doctype html>
<html amp lang = "en">
<head>
<meta charset = "utf-8">
<script async src = "https://cdn.ampproject.org/v0.js"></script>
<title>Google AMP - Amp Bind</title>
<link rel = "canonical" href =
"http://example.ampproject.org/article-metadata.html">
<meta name = "viewport" content = "width = device-width,
minimum-scale = 1,initial-scale = 1">
<style amp-boilerplate>
body{
-webkit-animation:
-amp-start 8s steps(1,end) 0s 1 normal both;-moz-animation:
-amp-start 8s steps(1,end) 0s 1 normal both;-ms-animation:
-amp-start 8s steps(1,end) 0s 1 normal both;animation:
-amp-start 8s steps(1,end) 0s 1 normal both
}
@-webkit-keyframes
-amp-start{from{visibility:hidden}to{visibility:visible}}@-moz-keyframes
-amp-start{from{visibility:hidden}to{visibility:visible}}@-ms-keyframes
-amp-start{from{visibility:hidden}to{visibility:visible}}@-o-keyframes
-amp-start{from{visibility:hidden}to{visibility:visible}}@keyframes
-amp-start{from{visibility:hidden}to{visibility:visible}}
</style>
<noscript>
<style amp-boilerplate>
body{
-webkit-animation:none;
-moz-animation:none;
-ms-animation:none;
animation:none
}
</style>
</noscript>
<script async custom-element = "amp-bind" src =
"https://cdn.ampproject.org/v0/amp-bind-0.1.js"></script>
<script async custom-element = "amp-video" src =
"https://cdn.ampproject.org/v0/amp-video-0.1.js"></script>
<script async custom-element = "amp-iframe" src =
"https://cdn.ampproject.org/v0/amp-iframe-0.1.js"></script>
<style amp-custom>
button{
background-color: #ACAD5C;
color: white;
padding: 12px 20px;
border: none;
border-radius: 4px;
cursor: pointer;
float: left;
}
</style>
</head>
<body>
<h3>Google AMP - Amp Bind</h3>
<button on = "tap:AMP.setState({currentlist: 'list1'})">
Click Here
</button>
<br/>
<br/>
<amp-state id = "myList">
<script type = "application/json">
{
"currentlist" : "",
"list1": {
"url": "video/m.mp4",
"style": "greenBackground",
"iframeurl":"https://maps.google.com/maps?q=hyderabad&t=&z=13&ie=UTF8&iwloc=&output=embed"
}
}
</script>
</amp-state>
<h3>AMP - IFRAME</h3>
<amp-iframe
width = "600"
title = "Google map"
height = "400"
layout = "responsive"
sandbox = "allow-scripts allow-same-origin allow-popups"
frameborder = "0"
src = "https://maps.google.com/maps?q=telangana&t=&z=13&ie=UTF8&iwloc=&output=embed"
[src] = "myList[currentlist].iframeurl">
<amp-img
layout = "fill"
src = "images/loading.jpg"
placeholder
>
/amp-img>
</amp-iframe>
<h3>AMP - VIDEO</h3>
<amp-video
id = "amp-video"
src = "video/samplevideo.mp4"
layout="responsive"
[src] = "myList[currentlist].url"
width = "300"
height = "170" autoplay controls>
</amp-video>
</body>
</html>
請注意,這裡我們使用了 amp-state 與 iframesrc 和 video src。
<amp-state id = "myList">
<script type = "application/json">
{
"currentlist" : "",
"list1": {
"url": "video/m.mp4",
"style": "greenBackground",
"iframeurl":"
https://maps.google.com/maps?q=hyderabad&t=&z=13&ie=UTF8&iwloc=&output=embed"
}
}
</script>
</amp-state>
currentlist 設定為空,點選按鈕後,將其設定為 list1。currentlist 變數用於 iframe 和影片的 src,如下所示:
<amp-iframe width="600"
title = "Google map"
height = "400"
layout = "responsive"
sandbox = "allow-scripts allow-same-origin allow-popups"
frameborder = "0" src = "https://maps.google.com/maps?q=telangana&t=&z=13&ie=UTF8&iwloc=&output=embed"
[src] = "myList[currentlist].iframeurl">
<amp-img layout = "fill" src = "images/loading.jpg" placeholder>
</amp-img>
</amp-iframe>
<amp-video id = "amp-video" src = "video/samplevideo.mp4"
layout = "responsive" [src] = "myList[currentlist].url" width = "300"
height = "170" autoplay controls>
</amp-video>
輸出

點選按鈕檢視影片和 iframe src 的變化。
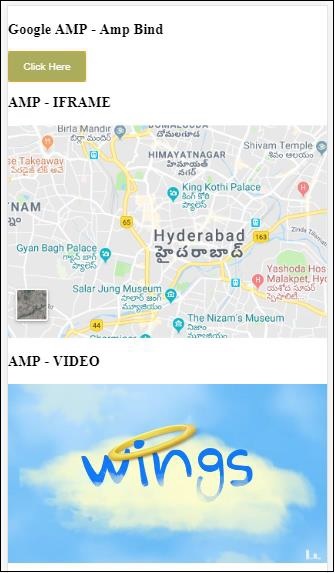
amp-bind 與 amp-lightbox 結合使用
現在,讓我們看看繫結和 amp-lightbox 結合使用時的工作原理。
示例
<!doctype html>
<html amp lang = "en">
<head>
<meta charset = "utf-8">
<script async src="https://cdn.ampproject.org/v0.js"></script>
<title>Google AMP - Amp Bind</title>
<link rel = "canonical" href =
"http://example.ampproject.org/article-metadata.html">
<meta name = "viewport" content = "width = device-width,
minimum-scale = 1,initial-scale = 1">
<style amp-boilerplate>
body{
-webkit-animation:
-amp-start 8s steps(1,end) 0s 1 normal both;-moz-animation:
-amp-start 8s steps(1,end) 0s 1 normal both;-ms-animation:
-amp-start 8s steps(1,end) 0s 1 normal both;animation:
-amp-start 8s steps(1,end) 0s 1 normal both
}
@-webkit-keyframes
-amp-start{from{visibility:hidden}to{visibility:visible}}@-moz-keyframes
-amp-start{from{visibility:hidden}to{visibility:visible}}@-ms-keyframes
-amp-start{from{visibility:hidden}to{visibility:visible}}@-o-keyframes
-amp-start{from{visibility:hidden}to{visibility:visible}}@keyframes
-amp-start{from{visibility:hidden}to{visibility:visible}}
</style>
<noscript>
<style amp-boilerplate>
body{
-webkit-animation:none;
-moz-animation:none;
-ms-animation:none;
animation:none
}
</style>
</noscript>
<script async custom-element = "amp-bind" src =
"https://cdn.ampproject.org/v0/amp-bind-0.1.js"></script>
<script async custom-element = "amp-lightbox" src =
"https://cdn.ampproject.org/v0/amp-lightbox-0.1.js"></script>
<style amp-custom>
button{
background-color: #ACAD5C;
color: white;
padding: 12px 20px;
border: none;
border-radius: 4px;
cursor: pointer;
float: left;
}
.lightbox {
background: rgba(211,211,211,0.8);
width: 100%;
height: 100%;
position: absolute;
display: flex;
align-items: center;
justify-content: center;
}
</style>
</head>
<body>
<h3>Google AMP - Amp Bind</h3>
<button on = "tap:AMP.setState({displaylightbox: true})">
Click Here
</button>
<br/>
<br/>
<h3>AMP - Lightbox</h3>
<amp-lightbox
id = "my-lightbox"
[open] = "displaylightbox"
layout = "nodisplay"
close-button>
<div class = "lightbox" on = "tap:AMP.setState({displaylightbox: false})">
<amp-img alt = "Beautiful Flower"
src = "images/loreal.gif"
width = "246"
height = "205">
</amp-img>
</div>
</amp-lightbox>
</body>
</html>
要在 amp-lightbox 上使用繫結,我們已在 amp-lightbox 上使用了 [open],如下所示:
<amp-lightbox id = "my-lightbox" [open] = "displaylightbox"
layout = "nodisplay" close-button>
<div class = "lightbox" on="tap:AMP.setState({displaylightbox: false})">
<amp-img alt = "Beautiful Flower"
src = "images/loreal.gif"
width = "246"
height = "205">
</amp-img>
</div>
</amp-lightbox>
[open] = “displaylightbox” 是一個變數狀態,它在點選按鈕和點選 lightbox div 時會更改為 true/false。
<button on = "tap:AMP.setState({displaylightbox: true})">
Click Here
</button>
<div class = "lightbox" on = "tap:AMP.setState({displaylightbox: false})">
<amp-img alt = "Beautiful Flower"
src = "images/loreal.gif"
width = "246"
height = "205">
</amp-img>
</div>
輸出

將 amp 繫結到輸入元素
讓我們透過一個工作示例來了解 amp 繫結到輸入元素的工作原理,如下所示:
<!doctype html>
<html amp lang = "en">
<head>
<meta charset = "utf-8">
<script async src = "https://cdn.ampproject.org/v0.js"></script>
<title>Google AMP - Amp Bind</title>
<link rel = "canonical" href=
"http://example.ampproject.org/article-metadata.html">
<meta name = "viewport" content = "width = device-width,
minimum-scale = 1,initial-scale = 1">
<style amp-boilerplate>
body{
-webkit-animation:
-amp-start 8s steps(1,end) 0s 1 normal both;-moz-animation:
-amp-start 8s steps(1,end) 0s 1 normal both;-ms-animation:
-amp-start 8s steps(1,end) 0s 1 normal both;animation:
-amp-start 8s steps(1,end) 0s 1 normal both
}
@-webkit-keyframes
-amp-start{from{visibility:hidden}to{visibility:visible}}@-moz-keyframes
-amp-start{from{visibility:hidden}to{visibility:visible}}@-ms-keyframes
-amp-start{from{visibility:hidden}to{visibility:visible}}@-o-keyframes
-amp-start{from{visibility:hidden}to{visibility:visible}}@keyframes
-amp-start{from{visibility:hidden}to{visibility:visible}}
</style>
<noscript>
<style amp-boilerplate>
body{
-webkit-animation:none;
-moz-animation:none;
-ms-animation:none;
animation:none
}
</style>
<noscript>
<script async custom-element = "amp-bind"
src = "https://cdn.ampproject.org/v0/amp-bind-0.1.js">
<script>
<script async custom-element = "amp-lightbox"
src = "https://cdn.ampproject.org/v0/amp-lightbox-0.1.js">
</script>
<style amp-custom>
button{
background-color: #ACAD5C;
color: white;
padding: 12px 20px;
border: none;
border-radius: 4px;
cursor: pointer;
float: left;
}
.lightbox {
background: rgba(211,211,211,0.8);
width: 100%;
height: 100%;
position: absolute;
display: flex;
align-items: center;
justify-content: center;
}
#txtname{
width: 100%;
padding: 12px 20px;
margin: 8px 0;
display: inline-block;
border: 1px solid #ccc;
border-radius: 4px;
box-sizing: border-box;
}
div {
font-size:25px;
}
</style>
</head>
<body>
<h3>Google AMP - Amp Bind</h3>
<button on = "tap:AMP.setState({displaylightbox: true})">
Click Here
</button>
<br/>
<br/>
<h3>
AMP - Input Element
<h3>
<input id = "txtname" placeholder = "Type here"
on = "input-throttled:AMP.setState({name: event.value})">
<div [text] = "name">
</div>
</body>
</html>
輸出
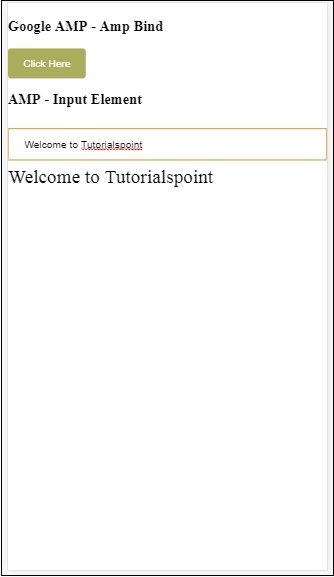
在文字框中輸入的資料將在底部顯示。這可以透過在輸入事件上更改狀態變數name來實現,如下所示:
<input id = "txtname" placeholder = "Type here" on =
"input-throttled:AMP.setState({name: event.value})">
<div [text] = "name">
</div>
Google AMP - 佈局
AMP-Layout 是 Google-amp 中提供的重要的功能之一。Amp Layout 確保在頁面載入時正確渲染 amp 元件,而不會導致任何閃爍或滾動問題。Google AMP 確保在執行任何其他遠端資源(如影像的 http 請求、資料呼叫)之前完成頁面上的佈局渲染。
佈局屬性列表如下所示。
width 和 height
layout
sizes
heights
media
placeholder
fallback
noloading
我們將在本章中詳細介紹layout屬性。其餘屬性將在本教程的Google AMP – 屬性章節中詳細討論。
Layout 屬性
我們可以在 amp 元件上使用 layout 屬性,它將決定元件如何在頁面內渲染。下面列出了 amp 支援的佈局列表:
未設定
Container
fill
fixed
fixed-height
flex-item
intrinsic
nodisplay
Responsive
對於每種佈局,我們將看到一個工作示例,該示例將展示 layout 屬性如何以不同的方式渲染 amp 元件。在我們的示例中,我們將使用amp-img元件。
未指定示例
<!doctype html>
<html amp lang = "en">
<head>
<meta charset = "utf-8">
<script async src="https://cdn.ampproject.org/v0.js"></script>
<title>Google AMP - Image</title>
<link rel = "canonical" href =
"http://example.ampproject.org/article-metadata.html">
<meta name = "viewport" content = "width = device-width,
minimum-scale = 1,initial-scale = 1">
<style amp-boilerplate>
body{
-webkit-animation:
-amp-start 8s steps(1,end) 0s 1 normal both;-moz-animation:
-amp-start 8s steps(1,end) 0s 1 normal both;-ms-animation:
-amp-start 8s steps(1,end) 0s 1 normal both;animation:
-amp-start 8s steps(1,end) 0s 1 normal both
}
@-webkit-keyframes
-amp-start{from{visibility:hidden}to{visibility:visible}}@-moz-keyframes
-amp-start{from{visibility:hidden}to{visibility:visible}}@-ms-keyframes
-amp-start{from{visibility:hidden}to{visibility:visible}}@-o-keyframes
-amp-start{from{visibility:hidden}to{visibility:visible}}@keyframes
-amp-start{from{visibility:hidden}to{visibility:visible}}
</style>
<noscript>
<style amp-boilerplate>
body{
-webkit-animation:none;
-moz-animation:none;
-ms-animation:none;
animation:none
}
</style>
</noscript>
<style amp-custom>
amp-img {
border: 1px solid black;
border-radius: 4px;
padding: 5px;
}
</style>
</head>
<body>
<h1>Google AMP - Image Example</h1>
<amp-img
alt = "Beautiful
Flower"src = "images/flower.jpg"
width = "246"
height = "205">
</amp-img>
</body>
</html>
輸出

Container 示例
Layout=”container” 通常用於父元素,子元素採用定義的大小。
<!doctype html>
<html amp lang = "en">
<head>
<meta charset = "utf-8">
<script async src = "https://cdn.ampproject.org/v0.js"></script>
<title>Google AMP - Image</title>
<link rel = "canonical" href =
"http://example.ampproject.org/article-metadata.html">
<meta name = "viewport" content = "width = device-width,
minimum-scale = 1,initial-scale = 1">
<style amp-boilerplate>
body{
-webkit-animation:
-amp-start 8s steps(1,end) 0s 1 normal both;-moz-animation:
-amp-start 8s steps(1,end) 0s 1 normal both;-ms-animation:
-amp-start 8s steps(1,end) 0s 1 normal both;animation:
-amp-start 8s steps(1,end) 0s 1 normal both
}@-webkit-keyframes
-amp-start{from{visibility:hidden}to{visibility:visible}}@-moz-keyframes
-amp-start{from{visibility:hidden}to{visibility:visible}}@-ms-keyframes
-amp-start{from{visibility:hidden}to{visibility:visible}}@-o-keyframes
-amp-start{from{visibility:hidden}to{visibility:visible}}@keyframes
-amp-start{from{visibility:hidden}to{visibility:visible}}
</style>
<noscript>
<style amp-boilerplate>
body{
-webkit-animation:none;
-moz-animation:none;
-ms-animation:none;
animation:none
}
</style>
</noscript>
<style amp-custom>
amp-img {
border: 1px solid black;
border-radius: 4px;
padding: 5px;
}
h1{
font-family: "Segoe UI",Arial,sans-serif;
font-weight: 400;margin: 10px 0;
}
</style>
</head>
<body>
<h1>Google AMP - Layout = container Image Example</h1>
<amp-accordion layout = "container">
<amp-img alt = "Beautiful Flower"
src = "images/flower.jpg"
width = "246"
height = "205">
</amp-img>
</amp-accordion>
</body>
</html>
輸出
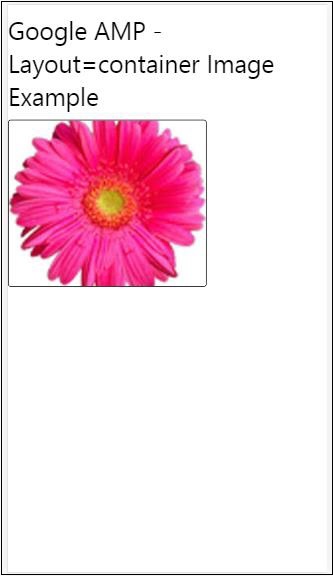
Fill 示例
Layout= ”fill” 採用父元素的寬度和高度。
<!doctype html>
<html amp lang = "en">
<head>
<meta charset = "utf-8">
<script async src = "https://cdn.ampproject.org/v0.js"></script>
<title>
Google AMP - Image
<title>
<link rel = "canonical" href =
"http://example.ampproject.org/article-metadata.html">
<meta name = "viewport" content = "width = device-width,
minimum-scale = 1,initial-scale = 1">
<style amp-boilerplate>
body{
-webkit-animation:
-amp-start 8s steps(1,end) 0s 1 normal both;-moz-animation:
-amp-start 8s steps(1,end) 0s 1 normal both;-ms-animation:
-amp-start 8s steps(1,end) 0s 1 normal both;animation:
-amp-start 8s steps(1,end) 0s 1 normal both
}
@-webkit-keyframes
-amp-start{from{visibility:hidden}to{visibility:visible}}@-moz-keyframes
-amp-start{from{visibility:hidden}to{visibility:visible}}@-ms-keyframes
-amp-start{from{visibility:hidden}to{visibility:visible}}@-o-keyframes
-amp-start{from{visibility:hidden}to{visibility:visible}}@keyframes
-amp-start{from{visibility:hidden}to{visibility:visible}}
</style>
<noscript>
<style amp-boilerplate>
body{
-webkit-animation:none;
-moz-animation:none;
-ms-animation:none;
animation:none
}
</style>
</noscript>
<style amp-custom>
amp-img {
border: 1px solid black;
border-radius: 4px;
padding: 5px;
}
h1{font-family: "Segoe UI",Arial,sans-serif;
font-weight: 400;margin: 10px 0;}
</style>
</head>
<body>
<h1>Google AMP - Layout = fill Image Example</h1>
<div style = "position:relative;width:100px;height:100px;">
<amp-img alt = "Beautiful Flower"
src = "images/flower.jpg"
width = "246"
height = "205"
layout = "fill">
</amp-img>
</div>
</body>
</html>
輸出

Fixed 和 fixed-height 示例
在瞭解 fixed 和 fixed-height 的用法之前,請注意以下兩點:
layout=”fixed”需要指定寬度和高度,amp 元件將顯示在其中。
layout=”fixed-height”需要為元件指定高度。它將確保高度不變。使用 fixed-height 時,不得指定寬度,或者可以設定為 auto。
<!doctype html>
<html amp lang = "en">
<head>
<meta charset = "utf-8">
<script async src = "https://cdn.ampproject.org/v0.js"></script>
<title>Google AMP - Image</title>
<link rel = "canonical" href =
"http://example.ampproject.org/article-metadata.html">
<meta name = "viewport" content = "width = device-width,
minimum-scale = 1,initial-scale = 1">
<style amp-boilerplate>
body{
-webkit-animation:
-amp-start 8s steps(1,end) 0s 1 normal both;-moz-animation:
-amp-start 8s steps(1,end) 0s 1 normal both;-ms-animation:
-amp-start 8s steps(1,end) 0s 1 normal both;animation:
-amp-start 8s steps(1,end) 0s 1 normal both
}
@-webkit-keyframes
-amp-start{from{visibility:hidden}to{visibility:visible}}@-moz-keyframes
-amp-start{from{visibility:hidden}to{visibility:visible}}@-ms-keyframes
-amp-start{from{visibility:hidden}to{visibility:visible}}@-o-keyframes
-amp-start{from{visibility:hidden}to{visibility:visible}}@keyframes
-amp-start{from{visibility:hidden}to{visibility:visible}}
</style>
<noscript>
<style amp-boilerplate>
body{
-webkit-animation:none;
-moz-animation:none;
-ms-animation:none;
animation:none
}
</style>
</noscript>
<style amp-custom>
amp-img {
border: 1px solid black;
border-radius: 4px;
padding: 5px;
}
div{
display: inline-block;
width: 200px;
height:200px;
margin: 5px;
}
h1{font-family: "Segoe UI",Arial,sans-serif;
font-weight: 400;margin: 10px 0;}
</style>
</head>
<body>
<h1>Google AMP - Layout = fixed and
Layout = fixed-height Image Example
</h1>
<div>
<amp-img alt = "Beautiful Flower"
src = "images/flower.jpg"
width = "246"
height = "205"
layout = "fixed">
</amp-img>
</div>
<div>
<amp-img alt = "Beautiful Flower"
src = "images/flower.jpg"
height = "205"
layout = "fixed-height">
</amp-img>
</div>
</body>
</html>
輸出

Flex-item 和 intrinsic
<!doctype html>
<html amp lang = "en">
<head>
<meta charset = "utf-8">
<script async src ="https://cdn.ampproject.org/v0.js"></script>
<title>Google AMP - Image</title>
<link rel = "canonical" href ="
http://example.ampproject.org/article-metadata.html">
<meta name = "viewport" content = "width = device-width,
minimum-scale = 1,initial-scale = 1">
<style amp-boilerplate>
body{
-webkit-animation:
-amp-start 8s steps(1,end) 0s 1 normal both;-moz-animation:
-amp-start 8s steps(1,end) 0s 1 normal both;-ms-animation:
-amp-start 8s steps(1,end) 0s 1 normal both;animation:
-amp-start 8s steps(1,end) 0s 1 normal both
}
@-webkit-keyframes
-amp-start{from{visibility:hidden}to{visibility:visible}}@-moz-keyframes
-amp-start{from{visibility:hidden}to{visibility:visible}}@-ms-keyframes
-amp-start{from{visibility:hidden}to{visibility:visible}}@-o-keyframes
-amp-start{from{visibility:hidden}to{visibility:visible}}@keyframes
-amp-start{from{visibility:hidden}to{visibility:visible
<style>
<noscript>
<style amp-boilerplate>
body{
-webkit-animation:none;
-moz-animation:none;
-ms-animation:none;
animation:none
}
</style>
</noscript>
<style amp-custom>
amp-img {
border: 1px solid black;
border-radius: 4px;
padding: 5px;
}
displayitem {
display: inline-block;
width: 200px;
height:200px;
margin: 5px;
}
h1{font-family: "Segoe UI",Arial,sans-serif;
font-weight: 400;margin: 10px 0;}
</style>
</head>
<body>
<h1>Google AMP - Layout = flex-item and
Layout = intrinsic Image Example
</h1>
<div class = "displayitem">
<amp-img alt = "Beautiful Flower"
src = "images/flower.jpg"
layout = "flex-item">
</amp-img>
</div>
<div class = "displayitem">
<amp-img alt = "Beautiful Flower"
src = "images/flower.jpg"
width = "246"
height = "205"
layout = "intrinsic">
</amp-img>
</div>
</body>
</html>
輸出
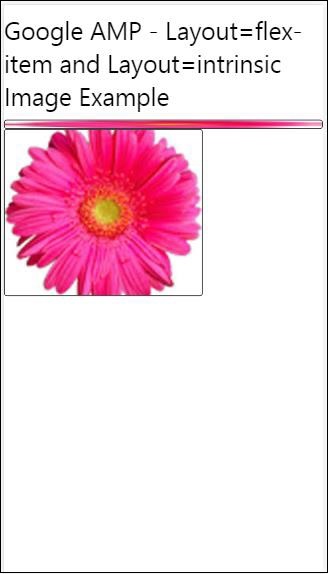
nodisplay 和 responsive
具有 layout = nodisplay 的 amp 元件不會佔用頁面上的任何空間,就像 display:none 一樣。無需為此類佈局新增任何寬度和高度屬性。
具有 layout = responsive 的 amp 元件將佔用可用空間或頁面的寬度,並且高度會調整大小以保持元素的縱橫比。
<!doctype html>
<html amp lang = "en">
<head>
<meta charset = "utf-8">
<script async src = "https://cdn.ampproject.org/v0.js">
</script>
<title>Google AMP - Image</title>
<link rel = "canonical" href =
"http://example.ampproject.org/article-metadata.html">
<meta name = "viewport" content="width=device-width,
minimum-scale = 1,initial-scale = 1">
<style amp-boilerplate>
body{
-webkit-animation:
-amp-start 8s steps(1,end) 0s 1 normal both;-moz-animation:
-amp-start 8s steps(1,end) 0s 1 normal both;-ms-animation:
-amp-start 8s steps(1,end) 0s 1 normal both;animation:
-amp-start 8s steps(1,end) 0s 1 normal both}
@-webkit-keyframes
-amp-start{from{visibility:hidden}to{visibility:visible}}@-moz-keyframes
-amp-start{from{visibility:hidden}to{visibility:visible}}@-ms-keyframes
-amp-start{from{visibility:hidden}to{visibility:visible}}@-o-keyframes
-amp-start{from{visibility:hidden}to{visibility:visible}}@keyframes
-amp-start{from{visibility:hidden}to{visibility:visible}}
</style>
<noscript>
<style amp-boilerplate>
body{
-webkit-animation:none;
-moz-animation:none;
-ms-animation:none;
animation:none}
</style>
</noscript>
<style amp-custom>
amp-img {
border: 1px solid black;
border-radius: 4px;
padding: 5px;
}
displayitem {
display: inline-block;
width: 200px;
height:200px;
margin: 5px;
}
h1{font-family: "Segoe UI",Arial,sans-serif;
font-weight: 400;margin: 10px 0;}
</style>
</head>
<body>
<h1>Google AMP - Layout=no-display and
Layout = responsive Image Example</h1>
<div class = "displayitem">
<amp-img alt = "Beautiful Flower"
src = "images/flower.jpg"
layout = "no-display">
</amp-img>
</div>
<div class = "displayitem">
<amp-img alt = "Beautiful Flower"
src = "images/flower.jpg"
width = "246"
height = "205"
layout = "responsive">
</amp-img>
</div>
</body>
</html>
輸出
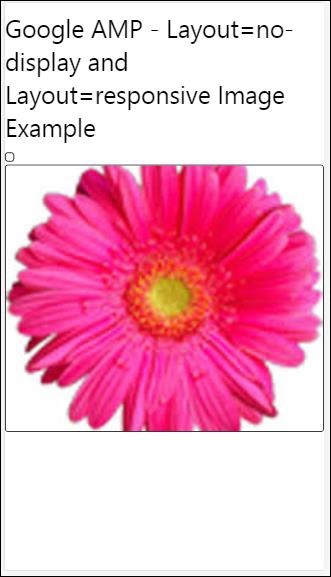
Google AMP 支援的佈局列表如下
手風琴
輪播
燈箱
滑塊
側邊欄
Amp- 手風琴
Amp-accordion 是一個 amp 元件,用於以展開-摺疊的格式顯示內容。使用者在移動裝置上檢視它變得很容易,他們可以在其中根據自己的選擇從手風琴中選擇部分。
要使用 amp-accordion,您需要新增以下指令碼:
<script async custom-element = "amp-accordion" src = "https://cdn.ampproject.org/v0/amp-accordion-0.1.js"> </script>
Amp-accordion 標籤
<amp-accordion>
<section class = "seca">
<h3>Content 1</h3>
<div>
<p>Content 1 is opened for amp-accordion</p>
<p>Content 1 is opened for amp-accordion</p>
<p>Content 1 is opened for amp-accordion</p>
<p>Content 1 is opened for amp-accordion</p>
<p>Content 1 is opened for amp-accordion</p>
<p>Content 1 is opened for amp-accordion</p>
</div>
</section>
…
</amp-accordion>
讓我們看一個 amp-accordion 的工作示例。
<!doctype html>
<html amp lang = "en">
<head>
<meta charset = "utf-8">
<script async src = "https://cdn.ampproject.org/v0.js">
</script>
<title>Google AMP - Amp Accordion </title>
<link rel = "canonical" href=
"http://example.ampproject.org/article-metadata.html">
<meta name = "viewport" content = "width = device-width,
minimum-scale = 1,initial-scale = 1">
<style amp-boilerplate>
body{
-webkit-animation:
-amp-start 8s steps(1,end) 0s 1 normal both;-moz-animation:
-amp-start 8s steps(1,end) 0s 1 normal both;-ms-animation:
-amp-start 8s steps(1,end) 0s 1 normal both;animation:
-amp-start 8s steps(1,end) 0s 1 normal both
}
@-webkit-keyframes
-amp-start{from{visibility:hidden}to{visibility:visible}}@-moz-keyframes
-amp-start{from{visibility:hidden}to{visibility:visible}}@-ms-keyframes
-amp-start{from{visibility:hidden}to{visibility:visible}}@-o-keyframes
-amp-start{from{visibility:hidden}to{visibility:visible}}@keyframes
-amp-start{from{visibility:hidden}to{visibility:visible}}
</style>
<noscript>
<style amp-boilerplate>
body{
-webkit-animation:none;
-moz-animation:none;
-ms-animation:none;
animation:none}
</style>
</noscript>
<script async custom-element = "amp-accordion" src =
"https://cdn.ampproject.org/v0/amp-accordion-0.1.js">
</script>
<style>
input[type = text]{
width: 50%;
padding: 12px;
border: 1px solid #ccc;
border-radius: 4px;
resize: vertical;
}
label {
padding: 12px 12px 12px 0;
display: inline-block;
font-family: "Segoe UI",Arial,sans-serif;
font-weight: 400;
}
.col-label {
float: left;
width: 25%;
margin-top: 6px;
}
.col-content {
float: left;
width: 75%;
margin-top: 6px;
}
.row:after {
content: "";
display: table;
clear: both;
}
.amp_example {
background-color: #f1f1f1;
padding: 0.01em 16px;
margin: 20px 0;
box-shadow: 0 2px 4px 0
rgba(0,0,0,0.16),0 2px 10px 0
rgba(0,0,0,0.12)!important;
}
h3{
font-family: "Segoe UI",Arial,sans-serif;
font-weight: 400;margin: 10px 0;
}
input[type=submit] {
background-color: #ACAD5C;
color: white;
padding: 12px 20px;
border: none;
border-radius: 4px;
cursor: pointer;
float: right;
}
.lightbox {background-color: rgba(100, 100, 100, 0.5);}
.seca {background-color:#fff;}
</style>
</head>
<body>
<div class = "amp_example">
<h3>Google AMP - Amp Accordion</h3>
<amp-accordion>
<section class = "seca">
<h3>Content 1</h3>
<div>
<p>Content 1 is opened for amp-accordion</p>
<p>Content 1 is opened for amp-accordion</p>
<p>Content 1 is opened for amp-accordion</p>
<p>Content 1 is opened for amp-accordion</p>
<p>Content 1 is opened for amp-accordion</p>
<p>Content 1 is opened for amp-accordion</p>
</div>
</section>
<section expanded class = "seca">
<h3>Content 2</h3>
<div>
<p>Content 2 is opened for amp-accordion</p>
<p>Content 2 is opened for amp-accordion</p>
<p>Content 2 is opened for amp-accordion</p>
<p>Content 2 is opened for amp-accordion</p>
<p>Content 2 is opened for amp-accordion</p>
</div>
</section>
<section class="seca">
<h3>Content 3</h3>
<div>
<p>Content 3 is opened for amp-accordion</p>
<p>Content 3 is opened for amp-accordion</p>
<p>Content 3 is opened for amp-accordion</p>
<p>Content 3 is opened for amp-accordion</p>
<p>Content 3 is opened for amp-accordion</p>
</div>
</section>
</amp-accordion>
</div>
</body>
</html>
輸出

Amp-accordion 內部包含多個部分。每個部分可以有兩個子元素,超過兩個子元素將在瀏覽器控制檯中顯示錯誤。您可以在部分中新增一個容器,並在其中包含多個元素。
預設情況下,我們使用 expanded 屬性將一個部分保持在展開模式。
自動摺疊手風琴
對於自動摺疊,我們正在 amp-accordion 上使用屬性expand-single-section,如示例所示。使用者開啟的部分將保持展開狀態,其餘部分將使用expand-single-section屬性關閉。
<!doctype html>
<html amp lang = "en">
<head>
<meta charset = "utf-8">
<script async src = "https://cdn.ampproject.org/v0.js">
</script>
<title>Google AMP - Amp Accordion </title>
<link rel = "canonical" href=
"http://example.ampproject.org/article-metadata.html">
<meta name = "viewport" content = "width = device-width,
minimum-scale = 1,initial-scale = 1">
<style amp-boilerplate>
body{
-webkit-animation:
-amp-start 8s steps(1,end) 0s 1 normal both;-moz-animation:
-amp-start 8s steps(1,end) 0s 1 normal both;-ms-animation:
-amp-start 8s steps(1,end) 0s 1 normal both;animation:
-amp-start 8s steps(1,end) 0s 1 normal both
}
@-webkit-keyframes
-amp-start{from{visibility:hidden}to{visibility:visible}}@-moz-keyframes
-amp-start{from{visibility:hidden}to{visibility:visible}}@-ms-keyframes
-amp-start{from{visibility:hidden}to{visibility:visible}}@-o-keyframes
-amp-start{from{visibility:hidden}to{visibility:visible}}@keyframes
-amp-start{from{visibility:hidden}to{visibility:visible}}
</style>
<noscript>
<style amp-boilerplate>
body{
-webkit-animation:none;
-moz-animation:none;
-ms-animation:none;
animation:none}
</style>
</noscript>
<script async custom-element = "amp-accordion" src =
"https://cdn.ampproject.org/v0/amp-accordion-0.1.js">
</script>
<style>
input[type = text]{
width: 50%;
padding: 12px;
border: 1px solid #ccc;
border-radius: 4px;
resize: vertical;
}
label {
padding: 12px 12px 12px 0;
display: inline-block;
font-family: "Segoe UI",Arial,sans-serif;
font-weight: 400;
}
.col-label {
float: left;
width: 25%;
margin-top: 6px;
}
.col-content {
float: left;
width: 75%;
margin-top: 6px;
}
.row:after {
content: "";
display: table;
clear: both;
}
.amp_example {
background-color: #f1f1f1;
padding: 0.01em 16px;
margin: 20px 0;
box-shadow: 0 2px 4px 0
rgba(0,0,0,0.16),0 2px 10px 0
rgba(0,0,0,0.12)!important;
}
h3{
font-family: "Segoe UI",Arial,sans-serif;
font-weight: 400;
margin: 10px 0;
}
input[type=submit] {
background-color: #ACAD5C;
color: white;
padding: 12px 20px;
border: none;
border-radius: 4px;
cursor: pointer;
float: right;}
.lightbox {background-color: rgba(100, 100, 100, 0.5);}
.seca {background-color:#fff;}
</style>
<head>
<body>
<div class = "amp_example">
<h3>Google AMP - Amp Accordion</h3>
<amp-accordion expand-single-section>
<section class = "seca">
<h3>Content 1</h3>
<div>
<p>Content 1 is opened for amp-accordion</p>
<p>Content 1 is opened for amp-accordion</p>
<p>Content 1 is opened for amp-accordion</p>
<p>Content 1 is opened for amp-accordion</p>
<p>Content 1 is opened for amp-accordion</p>
<p>Content 1 is opened for amp-accordion</p>
</div>
</section>
<section class = "seca">
<h3>Content 2</h3>
<div>
<p>Content 2 is opened for amp-accordion</p>
<p>Content 2 is opened for amp-accordion</p>
<p>Content 2 is opened for amp-accordion</p>
<p>Content 2 is opened for amp-accordion</p>
<;p>Content 2 is opened for amp-accordion</p>
</div>
</section>
<section class = "seca">
<h3>Content 3</h3>
<div>
<p>Content 3 is opened for amp-accordion</p>
<p>Content 3 is opened for amp-accordion</p>
<p>Content 3 is opened for amp-accordion</p>
<p>Content 3 is opened for amp-accordion</p>
<p>Content 3 is opened for amp-accordion</p>
</div>
</section>
</amp-accordion>
</div>
</body>
</html>
輸出

手風琴動畫
使用animate屬性,我們可以為手風琴的展開-摺疊新增動畫。請檢視下面的示例:
<!doctype html>
<html amp lang = "en">
<head>
<meta charset = "utf-8">
<script async src = "https://cdn.ampproject.org/v0.js">
</script>
<title>Google AMP - Amp Accordion </title>
<link rel = "canonical" href = "http://example.ampproject.org/article-metadata.html>
<meta name = "viewport" content = "width = device-width,minimum-scale = 1,initial-scale = 1">
<style amp-boilerplate>
body{
-webkit-animation:
-amp-start 8s steps(1,end) 0s 1 normal both;-moz-animation:
-amp-start 8s steps(1,end) 0s 1 normal both;-ms-animation:
-amp-start 8s steps(1,end) 0s 1 normal both;animation:
-amp-start 8s steps(1,end) 0s 1 normal both
}
@-webkit-keyframes
-amp-start{from{visibility:hidden}to{visibility:visible}}@-moz-keyframes
-amp-start{from{visibility:hidden}to{visibility:visible}}@-ms-keyframes
-amp-start{from{visibility:hidden}to{visibility:visible}}@-o-keyframes
-amp-start{from{visibility:hidden}to{visibility:visible}}@keyframes
-amp-start{from{visibility:hidden}to{visibility:visible}}
</style>
<noscript>
<style amp-boilerplate>
body{
-webkit-animation:none;
-moz-animation:none;
-ms-animation:none;animation:none
}
</style>
</noscript>
<script async custom-element = "amp-accordion" src =
"https://cdn.ampproject.org/v0/amp-accordion-0.1.js">
</script>
<style>
input[type = text]{
width: 50%;
padding: 12px;
border: 1px solid #ccc;
border-radius: 4px;
resize: vertical;
}
label {
padding: 12px 12px 12px 0;
display: inline-block;
font-family: "Segoe UI",Arial,sans-serif;
font-weight: 400;
}
.col-label {
float: left;
width: 25%;
margin-top: 6px;
}
.col-content {
float: left;
width: 75%;
margin-top: 6px;
}
.row:after {
content: "";
display: table;
clear: both;
}
.amp_example {
background-color: #f1f1f1;
padding: 0.01em 16px;
margin: 20px 0;
box-shadow: 0 2px 4px 0 rgba(0,0,0,0.16),
0 2px 10px 0 rgba(0,0,0,0.12)!important;
}
h3{
font-family: "Segoe UI",Arial,sans-serif;
font-weight: 400;margin: 10px 0;
}
input[type=submit] {
background-color: #ACAD5C;
color: white;
padding: 12px 20px;
border: none;
border-radius: 4px;
cursor: pointer;
float: right;
}
.lightbox {background-color: rgba(100, 100, 100, 0.5);}
.seca {background-color:#fff;}
</style>
</head>
<body>
<div class = "amp_example">
<h3>Google AMP - Amp Accordion</h3>
<amp-accordion animate expand-single-section>
<section class = "seca">
<h3>Content 1</h3>
<div>
<p>Content 1 is opened for amp-accordion</p>
<p>Content 1 is opened for amp-accordion</p>
<p>Content 1 is opened for amp-accordion</p>
<p>Content 1 is opened for amp-accordion</p>
<p>Content 1 is opened for amp-accordion</p>
<p>Content 1 is opened for amp-accordion</p>
</div>
</section>
<section class = "seca">
<h3>Content 2</h3>
<div>
<p>Content 2 is opened for amp-accordion</p>
<p>Content 2 is opened for amp-accordion</p>
<p>Content 2 is opened for amp-accordion</p>
<p>Content 2 is opened for amp-accordion</p>
<p>Content 2 is opened for amp-accordion</p>
</div>
</section>
<section class="seca">
<h3>Content 3</h3>
<div>
<p>Content 3 is opened for amp-accordion</p>
<p>Content 3 is opened for amp-accordion</p>
<p>Content 3 is opened for amp-accordion</p>
<p>Content 3 is opened for amp-accordion</p>
<p>Content 3 is opened for amp-accordion</p>
</div>
</section>
</amp-accordion>
</div>
</body>
</html>
輸出
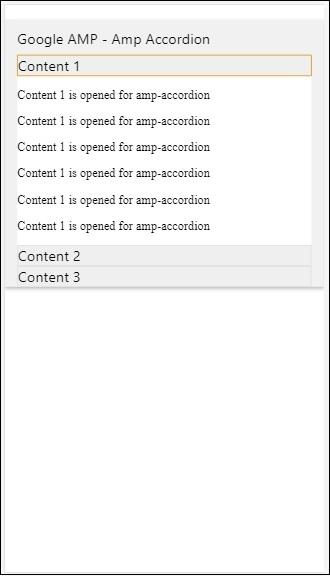
AMP 輪播
Amp-carousel 是一個 amp 元件,用於在螢幕上顯示一組類似的內容,並使用箭頭在內容之間切換。
要使用 amp-carousel,我們需要新增以下指令碼:
<script async custom-element = "amp-carousel" src = "https://cdn.ampproject.org/v0/amp-carousel-0.1.js"></script>
Amp-carousel 標籤
amp-carousel 標籤如下所示:
<amp-carousel height="300" layout="fixed-height" type="carousel">
<amp-img src="images/christmas1.jpg" width="400" height="300" alt="a sample image"></amp-img>
….
</amp-carousel>
amp-carousel 可用的屬性
amp-carousel 可用的屬性列在下表中:
| 序號 | 屬性和描述 |
|---|---|
| 1 | type
我們可以將輪播專案顯示為輪播和幻燈片 |
| 2 | height
輪播的高度(以畫素為單位) |
| 3 | controls(可選)
它在螢幕上顯示左右箭頭。在裝置上幾秒鐘後消失。可以使用 Css 使箭頭始終可見。 |
| 4 | data-next-button-aria-label(可選)
用於設定下一個輪播的標籤。 |
| 5 | data-prev-button-aria-label(可選)
用於設定上一個輪播的標籤。 |
| 6 | autoplay(可選)
用於在 5000 毫秒後顯示下一張幻燈片。它可以使用 amp-carousel 上的 delay 屬性(毫秒數)覆蓋。它將向輪播新增迴圈屬性,幻燈片到達末尾後將再次播放。僅用於 type=slides,並且 autoplay 至少需要 2 張幻燈片才能工作。 |
現在,讓我們透過示例來了解如何以不同的方式顯示輪播。
Amp 輪播型別為 carousel
使用 carousel 型別,專案可以水平滾動。
示例
<!doctype html>
<html amp lang = "en">
<head>
<meta charset = "utf-8">
<title>amp-carousel</title>
<script async src = "https://cdn.ampproject.org/v0.js">
</script>
<!-- ## Setup -->
<!-- Import the carousel component in the header. -->
<script async custom-element = "amp-carousel" src =
"https://cdn.ampproject.org/v0/amp-carousel-0.1.js">
</script>
<link rel = "canonical" href="
https://ampbyexample.com/components/amp-carousel/">
<meta name = "viewport" content = "width = device-width,
minimum-scale = 1,initial-scale = 1">
<style amp-boilerplate>
body{
-webkit-animation:
-amp-start 8s steps(1,end) 0s 1 normal both;-moz-animation:
-amp-start 8s steps(1,end) 0s 1 normal both;-ms-animation:
-amp-start 8s steps(1,end) 0s 1 normal both;animation:
-amp-start 8s steps(1,end) 0s 1 normal both
}
@-webkit-keyframes
-amp-start{from{visibility:hidden}to{visibility:visible}}@-moz-keyframes
-amp-start{from{visibility:hidden}to{visibility:visible}}@-ms-keyframes
-amp-start{from{visibility:hidden}to{visibility:visible}}@-o-keyframes
-amp-start{from{visibility:hidden}to{visibility:visible}}@keyframes
-amp-start{from{visibility:hidden}to{visibility:visible}}
</style>
<noscript>
<style amp-boilerplate>
body{
-webkit-animation:none;
-moz-animation:none;
-ms-animation:none;
animation:none
}
</style>
</noscript>
<style amp-custom>
h3{
font-family: "Segoe UI",Arial,sans-serif;
font-weight: 400;
margin: 10px 0;
}
</style>
</head>
<body>
<h3>Google Amp-Carousel</h3>
<amp-carousel height = "300" layout = "fixed-height" type = "carousel">
<amp-img
src = "images/christmas1.jpg"
width = "400"
height = "300"
alt = "a sample image">
</amp-img>
<amp-img src = "images/christmas2.jpg"
width = "400"
height = "300"
alt = "another sample image">
</amp-img>
<amp-img
src = "images/christmas3.jpg"
width = "400"
height = "300"
alt = "and another sample image">
</amp-img>
</amp-carousel>
</body>
</html>
輸出

Amp 輪播型別為 slides
Amp 輪播type = ”slides”一次顯示一個專案。您可以使用 fill、fixed、fixed-height、flex-item、nodisplay 和 responsive 作為佈局。
示例
<!doctype html>
<html amp lang = "en">
<head>
<meta charset = "utf-8">
<title>amp-carousel</title>
<script async src = "https://cdn.ampproject.org/v0.js">
</script>
<!-- ## Setup -->
<!-- Import the carousel component in the header. -->
<script async custom-element = "amp-carousel" src =
"https://cdn.ampproject.org/v0/amp-carousel-0.1.js">
</script>
<link rel = "canonical" href=
"https://ampbyexample.com/components/amp-carousel/">
<meta name = "viewport" content = "width = device-width,
minimum-scale = 1,initial-scale = 1">
<style amp-boilerplate>
body{
-webkit-animation:
-amp-start 8s steps(1,end) 0s 1 normal both;-moz-animation:
-amp-start 8s steps(1,end) 0s 1 normal both;-ms-animation:
-amp-start 8s steps(1,end) 0s 1 normal both;animation:
-amp-start 8s steps(1,end) 0s 1 normal both
}
@-webkit-keyframes
-amp-start{from{visibility:hidden}to{visibility:visible}}@-moz-keyframes
-amp-start{from{visibility:hidden}to{visibility:visible}}@-ms-keyframes
-amp-start{from{visibility:hidden}to{visibility:visible}}@-o-keyframes
-amp-start{from{visibility:hidden}to{visibility:visible}}@keyframes
-amp-start{from{visibility:hidden}to{visibility:visible}}
</style>
<noscript>
<style amp-boilerplate>
body{
-webkit-animation:none;
-moz-animation:none;
-ms-animation:none;
animation:none}
</style>
</noscript>
<style amp-custom>
h3{
font-family: "Segoe UI",Arial,sans-serif;
font-weight: 400;margin: 10px 0;}
</style>
</head>
<body>
<h3>Google Amp-Carousel</h3>
<amp-carousel
width = "400"
height = "300"
layout = "responsive"
type = "slides">
<amp-img
src = "images/christmas1.jpg"
width = "400"
height = "300"
layout = "responsive"
alt = "a sample image">
</amp-img>
<amp-img
src = "images/christmas2.jpg"
width = "400"
height = "300"
layout = "responsive"
alt="another sample image">
</amp-img>
<amp-img
src = "images/christmas3.jpg"
width = "400"
height = "300"
layout = "responsive"
alt = "and another sample image">
</amp-img>
</amp-carousel>
</body>
</html>
輸出

使用 autoplay 的 Amp 輪播
在下面給出的示例中,我們添加了 autoplay 屬性,延遲時間為 2000 毫秒(2 秒)。這將在延遲 2 秒後更改幻燈片。預設情況下,延遲時間為 5000 毫秒(5 秒)。
示例
<!doctype html>
<html amp lang = "en">
<head>
<meta charset = "utf-8">
<title>amp-carousel</title>
<script async src = "https://cdn.ampproject.org/v0.js">
</script>
<!-- ## Setup -->
<!-- Import the carousel component in the header. -->
<script async custom-element = "amp-carousel" src =
"https://cdn.ampproject.org/v0/amp-carousel-0.1.js">
</script>
<link rel = "canonical" href =
"https://ampbyexample.com/components/amp-carousel/">
<meta name = "viewport" content = "width = device-width,
minimum-scale = 1,initial-scale = 1">
<style amp-boilerplate>
body{
-webkit-animation:
-amp-start 8s steps(1,end) 0s 1 normal both;-moz-animation:
-amp-start 8s steps(1,end) 0s 1 normal both;-ms-animation:
-amp-start 8s steps(1,end) 0s 1 normal both;animation:
-amp-start 8s steps(1,end) 0s 1 normal both
}
@-webkit-keyframes
-amp-start{from{visibility:hidden}to{visibility:visible}}@-moz-keyframes
-amp-start{from{visibility:hidden}to{visibility:visible}}@-ms-keyframes
-amp-start{from{visibility:hidden}to{visibility:visible}}@-o-keyframes
-amp-start{from{visibility:hidden}to{visibility:visible}}@keyframes
-amp-start{from{visibility:hidden}to{visibility:visible}}
</style>
<noscript>
<style amp-boilerplate>
body{
-webkit-animation:none;
-moz-animation:none;
-ms-animation:none;
animation:none}
</style>
</noscript>
<style amp-custom>
h3{
font-family: "Segoe UI",Arial,sans-serif;
font-weight: 400;
margin: 10px 0;
}
</style>
</head>
<body>
<h3>Google Amp-Carousel</h3>
<amp-carousel
width = "400"
height = "300"
layout = "responsive"
type = "slides"
autoplay delay = "2000">
<amp-img
src = "images/christmas1.jpg"
width = "400"
height = "300"
layout = "responsive"
alt = "a sample image">
</amp-img>
<amp-img
src = "images/christmas2.jpg"
width = "400"
height = "300"
layout = "responsive"
alt = "another sample image">
</amp-img>
<amp-img
src = "images/christmas3.jpg"
width = "400"
height = "300"
layout = "responsive"
alt = "and another sample image">
</amp-img>
</amp-carousel>
</body>
</html>
輸出
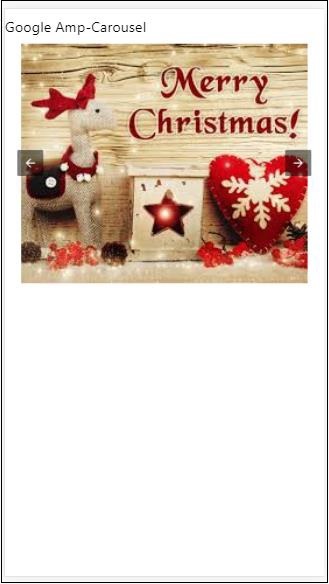
AMP 燈箱
Amp-lightbox 是一個 amp 元件,它將佔用整個視口並像疊加層一樣顯示。
要使用 amp-lightbox,請新增以下指令碼:
<script async custom-element = "amp-lightbox" src = "https://cdn.ampproject.org/v0/amp-lightbox-0.1.js"> </script>
amp-lightbox 可用的屬性
amp-lightbox 的屬性列表如下所示:
| 序號 | 屬性和描述 |
|---|---|
| 1 | animate-in(可選)
在這裡,您可以指定開啟燈箱的動畫樣式。預設情況下為 淡入 。支援的樣式值為淡入、從底部飛入和從頂部飛入 |
| 2 | close-button(在 AMPHTML 廣告中需要)
當用於 amphtmlads 時,我們可以為燈箱指定關閉按鈕。 |
| 3 | id(必需)
燈箱的唯一識別符號 |
| 4 | layout(必需)
layout 的值為 nodisplay |
| 5 | Scrollable(可選)
使用 amp-lightbox 上的此屬性,可以滾動燈箱的內容,超出燈箱的高度。 |
燈箱示例
<!doctype html>
<html amp lang = "en">
<head>
<meta charset = "utf-8">
<script async src = "https://cdn.ampproject.org/v0.js">
</script>
<title>Google AMP - Amp Lightbox</title>
<link rel = "canonical" href =
"http://example.ampproject.org/article-metadata.html">
<meta name = "viewport" content = "width = device-width,
minimum-scale = 1,initial-scale = 1">
<style amp-boilerplate>
body{
-webkit-animation:
-amp-start 8s steps(1,end) 0s 1 normal both;-moz-animation:
-amp-start 8s steps(1,end) 0s 1 normal both;-ms-animation:
-amp-start 8s steps(1,end) 0s 1 normal both;animation:
-amp-start 8s steps(1,end) 0s 1 normal both
}
@-webkit-keyframes
-amp-start{from{visibility:hidden}to{visibility:visible}}@-moz-keyframes
-amp-start{from{visibility:hidden}to{visibility:visible}}@-ms-keyframes
-amp-start{from{visibility:hidden}to{visibility:visible}}@-o-keyframes
-amp-start{from{visibility:hidden}to{visibility:visible}}@keyframes
-amp-start{from{visibility:hidden}to{visibility:visible}}
</style>
<noscript>
<style amp-boilerplate>
body{
-webkit-animation:none;
-moz-animation:none;
-ms-animation:none;
animation:none}
</style>
</noscript>
<script async custom-element = "amp-lightbox" src =
"https://cdn.ampproject.org/v0/amp-lightbox-0.1.js">
</script>
<style amp-custom>
amp-img {
border: 1px solid #ddd;
border-radius: 4px;
padding: 5px;
}
button{
background-color: #ACAD5C;
color: white;
padding: 12px 20px;
border: none;
border-radius: 4px;
cursor: pointer;
float: left;
}
.lightbox {
background: rgba(211,211,211,0.8);
width: 100%;
height: 100%;
position: absolute;
display: flex;
align-items: center;
justify-content: center;
}
</style>
</head>
<body>
<h3>Google AMP - Amp Lightbox</h3>
<button on = "tap:my-lightbox">
Show LightBox
</button>
<amp-lightbox id = "my-lightbox" layout = "nodisplay">
<div class = "lightbox" on="tap:my-lightbox.close" tabindex = "0">
<amp-img
alt = "Beautiful Flower"
src = "images/flower.jpg"
width = "246"
height = "205">
</amp-img>
</div>
</amp-lightbox>
</body>
</html>
輸出

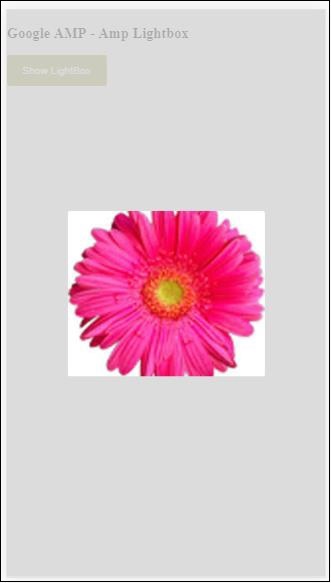
點選螢幕上的任意位置關閉燈箱。
您可以向燈箱新增關閉按鈕,這在顯示疊加型別廣告時非常有用。請觀察以下示例:
示例
<!doctype html>
<html amp lang = "en">
<head>
<meta charset = "utf-8">
<script async src = "https://cdn.ampproject.org/v0.js">
</script>
<title>Google AMP - Amp Lightbox</title>
<link rel = "canonical" href =
"http://example.ampproject.org/article-metadata.html">
<meta name = "viewport" content = "width = device-width,
minimum-scale = 1,initial-scale = 1">
<style amp-boilerplate>
body{
-webkit-animation:
-amp-start 8s steps(1,end) 0s 1 normal both;-moz-animation:
-amp-start 8s steps(1,end) 0s 1 normal both;-ms-animation:
-amp-start 8s steps(1,end) 0s 1 normal both;animation:
-amp-start 8s steps(1,end) 0s 1 normal both
}
@-webkit-keyframes
-amp-start{from{visibility:hidden}to{visibility:visible}}@-moz-keyframes
-amp-start{from{visibility:hidden}to{visibility:visible}}@-ms-keyframes
-amp-start{from{visibility:hidden}to{visibility:visible}}@-o-keyframes
-amp-start{from{visibility:hidden}to{visibility:visible}}@keyframes
-amp-start{from{visibility:hidden}to{visibility:visible}}
</style>
<noscript>
<style amp-boilerplate>
body{
-webkit-animation:none;
-moz-animation:none;
-ms-animation:none;
animation:none}
</style>
</noscript>
<script async custom-element = "amp-lightbox" src =
"https://cdn.ampproject.org/v0/amp-lightbox-0.1.js">
</script>
<style amp-custom>
amp-img {
border: 1px solid #ddd;
border-radius: 4px;
padding: 5px;
}
button{
background-color: #ACAD5C;
color: white;
padding: 12px 20px;
border: none;
border-radius: 4px;
cursor: pointer;
float: left;
}
.lightbox {
background: rgba(211,211,211,0.8);
width: 100%;
height: 100%;
position: absolute;
display: flex;
align-items: center;
justify-content: center;
}
</style>
</head>
<body>
<h3>Google AMP - Amp Lightbox</h3>
<button on = "tap:my-lightbox">
Show LightBox
</button>
<amp-lightbox id = "my-lightbox" layout = "nodisplay" close-button>
<div class = "lightbox" on = "tap:my-lightbox.close">
<amp-img
alt = "Beautiful Flower"
src = "images/flower.jpg"
width = "246"
height = "205">
</amp-img>
</div>
</amp-lightbox>
</body>
</html>
輸出

Amp 側邊欄
Amp 側邊欄是 amp 元件,用於顯示內容,這些內容在點選按鈕時從視窗的兩側滑出。
要使用 amp-sidebar,我們需要新增以下指令碼:
<script async custom-element = "amp-sidebar" src = " https://cdn.ampproject.org/v0/amp-sidebar-0.1.js"> </script>
Amp-sidebar 標籤
<amp-sidebar id = "sidebar" layout = "nodisplay" side = "right"> <span on = "tap:sidebar.close">X</span> Html content here.. </amp-sidebar>
amp-sidebar 上可用的屬性列表如下所示:
| 序號 | 屬性和描述 |
|---|---|
| 1 | side
此屬性將在指定的方向開啟側邊欄。例如 left/right |
| 2 | layout
Nodisplay 將用於側邊欄佈局 |
| 3 | open
開啟側邊欄時新增此屬性。 |
| 4 | data-close-button-aria-label
用於設定關閉按鈕的標籤。 |
我們將使用上述屬性與側邊欄一起工作。請觀察下面顯示的示例:
示例
<!doctype html>
<html amp lang = "en">
<head>
<meta charset = "utf-8">
<script async src = "https://cdn.ampproject.org/v0.js">
</script>
<title>Google AMP - Amp Sidebar</title>
<link rel = "canonical" href="
http://example.ampproject.org/article-metadata.html">
<meta name = "viewport" content = "width = device-width,
minimum-scale = 1,initial-scale = 1">
<style amp-boilerplate>
body{
-webkit-animation:
-amp-start 8s steps(1,end) 0s 1 normal both;-moz-animation:
-amp-start 8s steps(1,end) 0s 1 normal both;-ms-animation:
-amp-start 8s steps(1,end) 0s 1 normal both;animation:
-amp-start 8s steps(1,end) 0s 1 normal both
}
@-webkit-keyframes
-amp-start{from{visibility:hidden}to{visibility:visible}}@-moz-keyframes
-amp-start{from{visibility:hidden}to{visibility:visible}}@-ms-keyframes
-amp-start{from{visibility:hidden}to{visibility:visible}}@-o-keyframes
-amp-start{from{visibility:hidden}to{visibility:visible}}@keyframes
-amp-start{from{visibility:hidden}to{visibility:visible}}
</style>
<noscript>
<style amp-boilerplate>
body{
-webkit-animation:none;
-moz-animation:none;
-ms-animation:none;
animation:none}
</style>
</noscript>
<script async custom-element = "amp-sidebar" src =
"https://cdn.ampproject.org/v0/amp-sidebar-0.1.js">
</script>
<style amp-custom>
amp-img {
border: 1px solid #ddd;
border-radius: 4px;
padding: 5px;
}
button{
background-color: #ACAD5C;
color: white;
padding: 12px 20px;
border: none;
border-radius: 4px;
cursor: pointer;
float: left;
}
</style>
</head>
<body>
<h3>Google AMP - Amp Sidebar</h3>
<button on = "tap:sidebar">
Show Sidebar
</button>
<amp-sidebar id = "sidebar" layout = "nodisplay" side = "right">
<span on = "tap:sidebar.close">X</span>
<ul>
<li><a href = "/">About</a></li>
<li><a href = "/">Services</a></li>
<li><a href = "/">Contact US</a></li>
</ul>
</amp-sidebar>
</body>
</html>
輸出
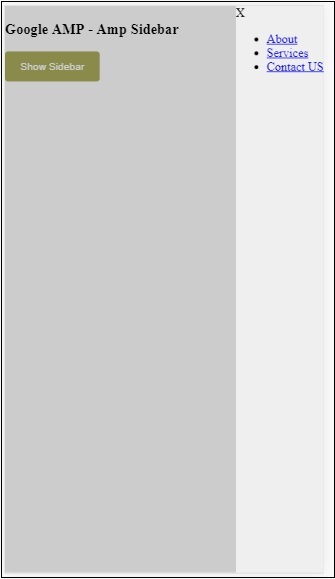
我們使用side屬性在右側開啟側邊欄。您可以使用 left 值作為side屬性在左側開啟它。layout屬性必須為nodisplay。Open屬性在側邊欄開啟時存在。
data-close-button-aria-label
屬性用於新增關閉按鈕。它是可選的,不是必須使用的。Amp 圖片滑塊
Amp-image-slider 是一個 amp 元件,用於透過在影像上垂直移動滑塊來比較兩張影像。
要使用 amp-img-slider,請新增以下指令碼:
<script async custom-element = "amp-image-slider" src = " https://cdn.ampproject.org/v0/amp-image-slider-0.1.js"> </script>
Amp-img-slider 標籤
<amp-image-slider width = "300" height = "200" layout = "responsive"> <amp-img src = "images/christmas1.jpg" layout = "fill"> </amp-img> <amp-img src = "images/christmas2.jpg" layout = "fill"> </amp-img> </amp-image-slider>
此處顯示了一個 amp-img-slider 的示例。在這裡,我們在 amp-img-slider 內部添加了 2 張影像,其中第一張影像充當滑塊,您可以在第二張影像的頂部滑動它。
示例
<!doctype html>
<html amp lang = "en">
<head>
<meta charset = "utf-8">
<script async src = "https://cdn.ampproject.org/v0.js">
</script>
<title>Google AMP - Amp Image Slider</title>
<link rel = "canonical" href =
"http://example.ampproject.org/article-metadata.html">
<meta name = "viewport" content = "width = device-width,
minimum-scale = 1,initial-scale = 1">
<style amp-boilerplate>
body{
-webkit-animation:
-amp-start 8s steps(1,end) 0s 1 normal both;-moz-animation:
-amp-start 8s steps(1,end) 0s 1 normal both;-ms-animation:
-amp-start 8s steps(1,end) 0s 1 normal both;animation:
-amp-start 8s steps(1,end) 0s 1 normal both
}
@-webkit-keyframes
-amp-start{from{visibility:hidden}to{visibility:visible}}@-moz-keyframes
-amp-start{from{visibility:hidden}to{visibility:visible}}@-ms-keyframes
-amp-start{from{visibility:hidden}to{visibility:visible}}@-o-keyframes
-amp-start{from{visibility:hidden}to{visibility:visible}}@keyframes
-amp-start{from{visibility:hidden}to{visibility:visible}}
</style>
<noscript>
<style amp-boilerplate>
body{
-webkit-animation:none;
-moz-animation:none;
-ms-animation:none;
animation:none}
</style>
</noscript>
<script async custom-element = "amp-image-slider" src =
"https://cdn.ampproject.org/v0/amp-image-slider-0.1.js">
</script>
<style amp-custom>
amp-img {
border: 1px solid #ddd;
border-radius: 4px;
padding: 5px;
}
</style>
</head>
<body>
<h3>Google AMP - Amp Image Slider</h3>
<amp-image-slider
width = "300"
height = "200"
layout = "responsive">
<amp-img
src = "images/christmas1.jpg"
layout = "fill">
</amp-img>
<amp-img
src = "images/christmas2.jpg"
layout = "fill">
</amp-img>
</amp-image-slider>
</body>
</html>
輸出
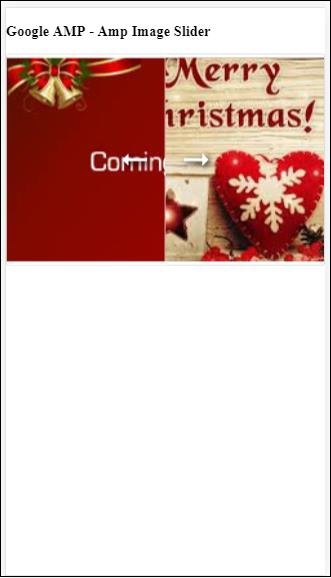
Amp-image-slider 有一個名為 seekTo 的操作,您可以使用它來更改影像,如下面的示例所示:
示例
<!doctype html>
<html amp lang = "en">
<head>
<meta charset = "utf-8">
<script async src = "https://cdn.ampproject.org/v0.js">
</script>
<title>Google AMP - Amp Image Slider</title>
<link rel = "canonical" href ="
http://example.ampproject.org/article-metadata.html">
<meta name = "viewport" content = "width = device-width,
minimum-scale = 1,initial-scale = 1">
<style amp-boilerplate>
body{
-webkit-animation:
-amp-start 8s steps(1,end) 0s 1 normal both;-moz-animation:
-amp-start 8s steps(1,end) 0s 1 normal both;-ms-animation:
-amp-start 8s steps(1,end) 0s 1 normal both;animation:
-amp-start 8s steps(1,end) 0s 1 normal both
}
@-webkit-keyframes
-amp-start{from{visibility:hidden}to{visibility:visible}}@-moz-keyframes
-amp-start{from{visibility:hidden}to{visibility:visible}}@-ms-keyframes
-amp-start{from{visibility:hidden}to{visibility:visible}}@-o-keyframes
-amp-start{from{visibility:hidden}to{visibility:visible}}@keyframes
-amp-start{from{visibility:hidden}to{visibility:visible}}
</style>
<noscript>
<style amp-boilerplate>
body{
-webkit-animation:none;
-moz-animation:none;
-ms-animation:none;
animation:none}
</style>
</noscript>
<script async custom-element = "amp-image-slider" src =
"https://cdn.ampproject.org/v0/amp-image-slider-0.1.js">
</script>
<style amp-custom>
amp-img {
border: 1px solid #ddd;
border-radius: 4px;
padding: 5px;
}
button{
background-color: #ACAD5C;
color: white;
padding: 12px 20px;
border: none;
border-radius: 4px;
cursor: pointer;
float: left;
}
.amp-sidebar-toolbar-target-shown {
display: none;
}
</style>
</head>
<body>
<h3>Google AMP - Amp Image Slider</h3>
<amp-image-slider
width = "300"
id="slider1"
height = "200"
layout = "responsive">
<amp-img src = "images/christmas1.jpg" layout = "fill">
</amp-img>
<amp-img src = "images/christmas2.jpg" layout = "fill">
</amp-img>
</amp-image-slider>
<button on = "tap:slider1.seekTo(percent = 1)">
Image 1
</button>
<button on = "tap:slider1.seekTo(percent = 0)">
Image 2
</button>
</body>
</html>
輸出

您可以透過點選按鈕更改影像。
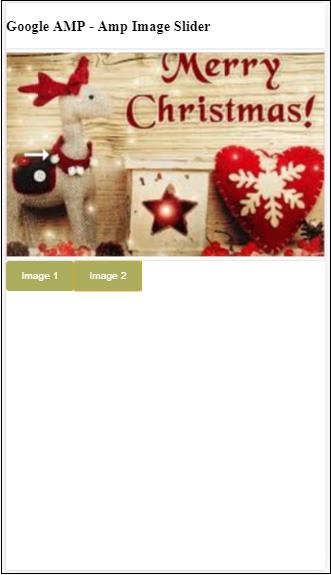
<button on = "tap:slider1.seekTo(percent = 1)">Image 1</button> <button on = "tap:slider1.seekTo(percent = 0)">Image 2</button> </div>
Google AMP - 廣告
廣告對於釋出者頁面起著重要作用,因為它們是釋出者收入的來源。對於 amp 頁面,情況略有不同。它們不允許新增第三方 javascript 檔案。為了在頁面上顯示廣告,有一個名為 amp-ad 的 amp 元件,它有助於在頁面上顯示廣告。大多數提供廣告的廣告網路都與 amp-ad 標籤相容。
廣告工作原理的詳細資訊如下所示:
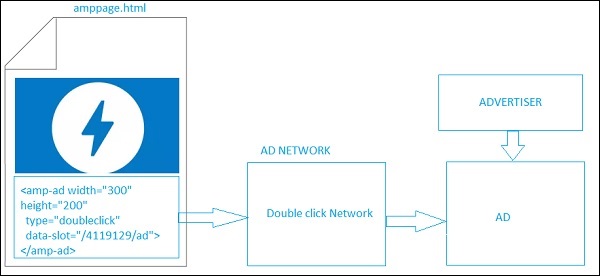
要在釋出者頁面上顯示廣告,我們需要新增<amp-ad>,它將充當在頁面上投放廣告的佔位符。<amp-ad> 將呼叫為 type 指定的廣告網路。
廣告網路將在內部呼叫要顯示在頁面上的廣告,該廣告由廣告客戶提供,通常是 html 或 amphtml 廣告。
要使其工作,我們需要首先將指令碼新增到頁面中。
<script async custom-element = "amp-ad" src = " https://cdn.ampproject.org/v0/amp-ad-0.1.js"> </script>
doubleclick 的 amp-ad 標籤如下所示:
<amp-ad width = "300"
height = "200"
type = "doubleclick"
data-slot = "/4119129/ad">
<div placeholder>
<b>Placeholder here!!!</b>
</div>
</amp-ad>
許多廣告網路支援 amp-ad。請注意,在我們的示例中,我們將介紹doubleclick amp-ad 標籤。廣告網路名稱必須在type屬性中指定。
示例
<!doctype html>
<html amp lang = "en">
<head>
<meta charset = "utf-8">
<script async src = "https://cdn.ampproject.org/v0.js">
</script>
<title>Google AMP - AD</title>
<link rel = "canonical" href=
"http://example.ampproject.org/article-metadata.html">
<meta name = "viewport" content = "width = device-width,
minimum-scale = 1,initial-scale = 1">
<style amp-boilerplate>
body{
-webkit-animation:
-amp-start 8s steps(1,end) 0s 1 normal both;-moz-animation:
-amp-start 8s steps(1,end) 0s 1 normal both;-ms-animation:
-amp-start 8s steps(1,end) 0s 1 normal both;animation:
-amp-start 8s steps(1,end) 0s 1 normal both
}
@-webkit-keyframes
-amp-start{from{visibility:hidden}to{visibility:visible}}@-moz-keyframes
-amp-start{from{visibility:hidden}to{visibility:visible}}@-ms-keyframes
-amp-start{from{visibility:hidden}to{visibility:visible}}@-o-keyframes
-amp-start{from{visibility:hidden}to{visibility:visible}}@keyframes
-amp-start{from{visibility:hidden}to{visibility:visible}}
</style>
<noscript>
<style amp-boilerplate>
body{
-webkit-animation:none;
-moz-animation:none;
-ms-animation:none;
animation:none}
</style>
</noscript>
<script async custom-element = "amp-ad" src =
"https://cdn.ampproject.org/v0/amp-ad-0.1.js">
</script>
<style amp-custom>
div {
text-align:center;
}
</style>
</head>
<body>
<h3>Google AMP - AD</h3>
<h3>300x250 - Banner AD</h3>
<p>This is a example of adnetwork doubleclick banner ad</p>
<p>This is a example of adnetwork doubleclick banner ad</p>
<p>This is a example of adnetwork doubleclick banner ad</p>
<p>This is a example of adnetwork doubleclick banner ad</p>
<p>This is a example of adnetwork doubleclick banner ad</p>
<p>This is a example of adnetwork doubleclick banner ad</p>
<div>
<amp-ad
data-slot = /30497360/amp_by_example/AMP_Banner_300x250
height = 250
layout = fixed
style = width:300px;height:250px;
type = doubleclick
width = 300>
</amp-ad>
</div>
<p>This is a example of adnetwork doubleclick banner ad</p>
<p>This is a example of adnetwork doubleclick banner ad</p>
<p>This is a example of adnetwork doubleclick banner ad</p>
<p>This is a example of adnetwork doubleclick banner ad</p>
<p>This is a example of adnetwork doubleclick banner ad</p>
<p>This is a example of adnetwork doubleclick banner ad</p>
<p>This is a example of adnetwork doubleclick banner ad</p>
<p>This is a example of adnetwork doubleclick banner ad</p>
<p>This is a example of adnetwork doubleclick banner ad</p>
</body>
</html>
輸出
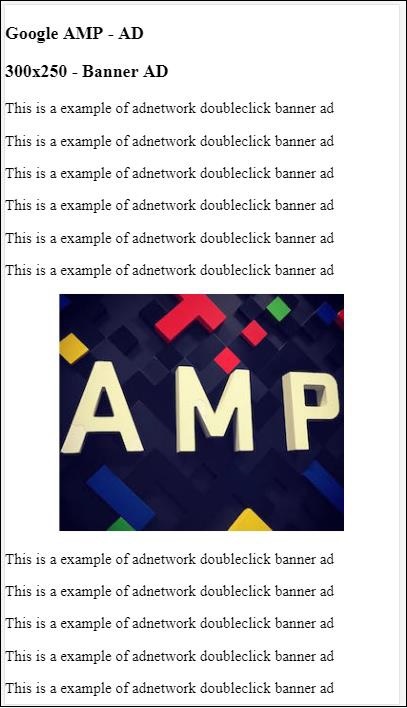
讓我們看一下 amp-ad 上的一些重要屬性,如以下表格所示:
| 序號 | 屬性和描述 |
|---|---|
| 1 | type
廣告網路的名稱 |
| 2 | width
廣告的寬度 |
| 3 | height
廣告的高度 |
| 4 | placeholder
用作子元素的佔位符,並在廣告仍在載入時顯示給使用者。請注意,此屬性必須由廣告網路端支援。 |
| 5 | data-*
要傳遞給廣告網路的資料屬性。例如,doubleclick 廣告網路需要 data-slot=/30497360/amp_by_example/AMP_Banner_300x250 在頁面上渲染廣告。 每個廣告網路都會指定資料引數。 我們還可以使用 data-override-width 和 data-override-height 覆蓋使用的寬度和高度。 |
| 6 | fallback
Fallback 用作 amp-ad 的子元素,並在沒有廣告投放時顯示。 |
讓我們透過一個使用placeholder的工作示例來了解這一點,該示例在沒有廣告投放時執行。
示例
<!doctype html>
<html amp lang = "en">
<head>
<meta charset = "utf-8">
<script async src = "https://cdn.ampproject.org/v0.js">
</script>
<title>Google AMP - AD</title>
<link rel = "canonical" href =
"http://example.ampproject.org/article-metadata.html">
<meta name = "viewport" content="width = device-width,
minimum-scale = 1,initial-scale = 1">
<style amp-boilerplate>
body{
-webkit-animation:
-amp-start 8s steps(1,end) 0s 1 normal both;-moz-animation:
-amp-start 8s steps(1,end) 0s 1 normal both;-ms-animation:
-amp-start 8s steps(1,end) 0s 1 normal both;animation:
-amp-start 8s steps(1,end) 0s 1 normal both
}
@-webkit-keyframes
-amp-start{from{visibility:hidden}to{visibility:visible}}@-moz-keyframes
-amp-start{from{visibility:hidden}to{visibility:visible}}@-ms-keyframes
-amp-start{from{visibility:hidden}to{visibility:visible}}@-o-keyframes
-amp-start{from{visibility:hidden}to{visibility:visible}}@keyframes
-amp-start{from{visibility:hidden}to{visibility:visible}}
</style>
<noscript>
<style amp-boilerplate>
body{
-webkit-animation:none;
-moz-animation:none;
-ms-animation:none;
animation:none}
</style>
</noscript>
<script async custom-element = "amp-ad" src =
"https://cdn.ampproject.org/v0/amp-ad-0.1.js">
</script>
<style amp-custom>
div {
text-align:center;
}
</style>
</head>
<body>
<h3>Google AMP - AD</h3>
<h3>300x250 - Banner AD</h3>
<p>This is a example of adnetwork doubleclick banner ad</p>
<p>This is a example of adnetwork doubleclick banner ad</p>
<p>This is a example of adnetwork doubleclick banner ad</p>
<p>This is a example of adnetwork doubleclick banner ad</p>
<p>This is a example of adnetwork doubleclick banner ad</p>
<p>This is a example of adnetwork doubleclick banner ad</p>
<div>
<amp-ad
data-slot = /30497360/amp_by_example/AMP_Banner_300x250
height = 250
layout = fixed
style = width:300px;height:250px;
type = doubleclick
width = 300>
<div placeholder>
<b>Placeholder Example : Ad is loading!!!</b>
</div>
</amp-ad>
</div>
<p>This is a example of adnetwork doubleclick banner ad</p>
<p>This is a example of adnetwork doubleclick banner ad</p>
<p>This is a example of adnetwork doubleclick banner ad</p>
<p>This is a example of adnetwork doubleclick banner ad<p>
<p>This is a example of adnetwork doubleclick banner ad</p>
<p>This is a example of adnetwork doubleclick banner ad</p>
</body>
</html>
輸出

我們可以使用 fallback 屬性,它是 amp-ad 的子元素,在沒有廣告投放時顯示。
示例
<!doctype html>
<html amp lang = "en">
<head>
<meta charset = "utf-8">
<script async src = "https://cdn.ampproject.org/v0.js">
</script>
<title>Google AMP - AD</title>
<link rel = "canonical" href =
"http://example.ampproject.org/article-metadata.html">
<meta name = "viewport" content = "width = device-width,
minimum-scale = 1,initial-scale = 1">
<style amp-boilerplate>
body{
-webkit-animation:
-amp-start 8s steps(1,end) 0s 1 normal both;-moz-animation:
-amp-start 8s steps(1,end) 0s 1 normal both;-ms-animation:
-amp-start 8s steps(1,end) 0s 1 normal both;animation:
-amp-start 8s steps(1,end) 0s 1 normal both
}
@-webkit-keyframes
-amp-start{from{visibility:hidden}to{visibility:visible}}@-moz-keyframes
-amp-start{from{visibility:hidden}to{visibility:visible}}@-ms-keyframes
-amp-start{from{visibility:hidden}to{visibility:visible}}@-o-keyframes
-amp-start{from{visibility:hidden}to{visibility:visible}}@keyframes
-amp-start{from{visibility:hidden}to{visibility:visible}}
</style>
<noscript>
<style amp-boilerplate>
body{
-webkit-animation:none;
-moz-animation:none;
-ms-animation:none;
animation:none}
</style>
</noscript>
<script async custom-element = "amp-ad" src =
"https://cdn.ampproject.org/v0/amp-ad-0.1.js">
</script>
<style amp-custom>
div, p{
text-align:center;
}
amp-ad {
border : solid 1px black;
}
</style>
</head>
<body>
<h3>Google AMP - AD</h3>
<h3>300x250 - Banner AD</h3>
<p>This is a example of adnetwork doubleclick banner ad</p>
<p>This is a example of adnetwork doubleclick banner ad</p>
<p>This is a example of adnetwork doubleclick banner ad</p>
<p>This is a example of adnetwork doubleclick banner ad</p>
<p>This is a example of adnetwork doubleclick banner ad</p>
<p>This is a example of adnetwork doubleclick banner ad</p>
<div>
<amp-ad
width = "300"
height = "250"
type = "doubleclick"
data-slot = "/4119129/no-ad">
<div fallback>
<p style = "color:green;font-size:25px;">No ads to Serve!</p>
</div>
</amp-ad>
</div>
<p>This is a example of adnetwork doubleclick banner ad</p>
<p>This is a example of adnetwork doubleclick banner ad</p>
<p>This is a example of adnetwork doubleclick banner ad</p>
<p>This is a example of adnetwork doubleclick banner ad</p>
<p>This is a example of adnetwork doubleclick banner ad</p>
<p>This is a example of adnetwork doubleclick banner ad</p>
</body>
</html>
輸出

如果廣告在視口中,則 fallback 屬性將顯示 fallback 元素中的訊息。
如果廣告元件在視口下方,並且沒有廣告,則 amp-ad 將摺疊空間,並且不會顯示 fallback 訊息。
廣告單元僅在沒有廣告且位於視口下方時才會摺疊,這樣使用者在閱讀內容時就不會被打擾,因為摺疊可能會導致內容發生偏移。
支援的廣告網路列表如下:https://www.ampproject.org/docs/ads/ads_vendors
在本章中,我們將討論 amp 中以下與廣告相關的標籤:
Google AMP - 事件跟蹤畫素
Google AMP - 粘性廣告
Google AMP - AMPHTML 廣告
事件跟蹤畫素
Amp 提供了 amp-pixel,它基本上用於觸發畫素以統計頁面瀏覽量。Amp-pixel 類似於 img 標籤,我們需要提供要觸發的畫素 url,使用者可以在除錯時在瀏覽器的網路選項卡中看到觸發的 url。畫素不會顯示在頁面上。
要使用 amp-pixel,我們無需新增任何額外的指令碼,因為其功能在核心 amp 指令碼中可用。
amp-pixel 標籤如下所示:
<amp-pixel src = "https://urlhere" layout = "nodisplay"> </amp-pixel>
讓我們透過一個工作示例來了解 amp-pixel 的工作原理:
示例
<!doctype html>
<html amp lang = "en">
<head>
<meta charset = "utf-8">
<script async src = "https://cdn.ampproject.org/v0.js">
</script>
<title>Google AMP - Tracking Pixel</title>
<link rel = "canonical" href =
"http://example.ampproject.org/article-metadata.html">
<meta name = "viewport" content = "width = device-width,
minimum-scale = 1,initial-scale = 1">
<style amp-boilerplate>
body{
-webkit-animation:
-amp-start 8s steps(1,end) 0s 1 normal both;-moz-animation:
-amp-start 8s steps(1,end) 0s 1 normal both;-ms-animation:
-amp-start 8s steps(1,end) 0s 1 normal both;animation:
-amp-start 8s steps(1,end) 0s 1 normal both
}
@-webkit-keyframes
-amp-start{from{visibility:hidden}to{visibility:visible}}@-moz-keyframes
-amp-start{from{visibility:hidden}to{visibility:visible}}@-ms-keyframes
-amp-start{from{visibility:hidden}to{visibility:visible}}@-o-keyframes
-amp-start{from{visibility:hidden}to{visibility:visible}}@keyframes
-amp-start{from{visibility:hidden}to{visibility:visible}}
</style>
<noscript>
<style amp-boilerplate>
body{
-webkit-animation:none;
-moz-animation:none;
-ms-animation:none;
animation:none}
</style>
</noscript>
</head>
<body>
<h3>Google AMP - Tracking Pixel</h3>
<amp-pixel src = "https://www.trackerurlhere.com/tracker/foo"
layout = "nodisplay">
</amp-pixel>
</body>
</html>
輸出
您將在瀏覽器網路選項卡中看到 url 觸發。這裡我們使用了虛擬畫素來展示 amp-pixel 的工作原理。在實際環境中,您應該看到針對觸發的畫素跟蹤的資料。因為每次在網頁上觸發畫素時,伺服器端都會統計其上的資料。稍後可以從業務角度分析資料。
粘性廣告
粘性廣告是一種顯示廣告的格式。廣告將貼上在頁面底部,它將呼叫amp-ad元件作為子元件。這基本上就像我們在頁面上經常看到的頁尾廣告。
要使用 amp-sticky-ad,我們需要新增以下指令碼:
<script async custom-element = "amp-sticky-ad" src = " https://cdn.ampproject.org/v0/amp-sticky-ad-1.0.js"> </script>
與 amp-sticky-ad 相關的條件如下:
您只能在頁面上使用一個 amp-sticky-ad。
amp-ad 必須是 amp-sticky-ad 的直接子元素。例如:
<amp-sticky-ad> <amp-ad></amp-ad> </amp-sticky-ad>
粘性廣告元件將始終位於頁面底部。
粘性廣告將佔據容器的全部寬度,並使用 amp-ad 的寬度和高度填充空間。
粘性廣告的高度為 100px。如果 amp-ad 的高度小於 100px,則粘性廣告將採用 amp-ad 的高度。如果 amp-ad 的高度大於 100px,則高度將保持為 100px,溢位內容隱藏。無法將粘性廣告的高度更改為超過 100px。
可以更改粘性廣告的背景顏色。但不允許透明背景。
當用戶滾動併到達頁面底部時,廣告將顯示在頁面末尾,以便不會隱藏底部內容。
在橫向模式下,粘性廣告將居中對齊。
如果沒有廣告要投放,粘性廣告的容器將摺疊且不可見。
讓我們看看如下所示的 amp-sticky-ad 在頁面上的工作示例:
示例
<!doctype html>
<html amp lang = "en">
<head>
<meta charset = "utf-8">
<script async src = "https://cdn.ampproject.org/v0.js">
</script>
<title>Google AMP - AD</title>
<link rel = "canonical" href =
"http://example.ampproject.org/article-metadata.html">
<meta name = "viewport" content = "width = device-width,
minimum-scale = 1,initial-scale = 1">
<style amp-boilerplate>
body{
-webkit-animation:
-amp-start 8s steps(1,end) 0s 1 normal both;-moz-animation:
-amp-start 8s steps(1,end) 0s 1 normal both;-ms-animation:
-amp-start 8s steps(1,end) 0s 1 normal both;animation:
-amp-start 8s steps(1,end) 0s 1 normal both
}
@-webkit-keyframes
-amp-start{from{visibility:hidden}to{visibility:visible}}@-moz-keyframes
-amp-start{from{visibility:hidden}to{visibility:visible}}@-ms-keyframes
-amp-start{from{visibility:hidden}to{visibility:visible}}@-o-keyframes
-amp-start{from{visibility:hidden}to{visibility:visible}}@keyframes
-amp-start{from{visibility:hidden}to{visibility:visible}}
</style>
<noscript>
<style amp-boilerplate>
body{
-webkit-animation:none;
-moz-animation:none;
-ms-animation:none;
animation:none}
</style>
</noscript>
<script async custom-element = "amp-sticky-ad" src =
"https://cdn.ampproject.org/v0/amp-sticky-ad-1.0.js">
</script>
<style amp-custom>
div, p{
text-align:center;
}
amp-ad {
border : solid 1px black;
}
</style>
</head>
<body>
<h3>Google AMP - Sticky AD</h3>
<p>This is a example of adnetwork doubleclick banner ad</p>
<p>This is a example of adnetwork doubleclick banner ad</p>
<p>This is a example of adnetwork doubleclick banner ad</p>
<p>This is a example of adnetwork doubleclick banner ad</p>
<p>This is a example of adnetwork doubleclick banner ad</p>
<p>This is a example of adnetwork doubleclick banner ad</p>
<div>
<amp-sticky-ad layout = "nodisplay">
<amp-ad
width = "320"
height = "50"
type = "doubleclick"
data-slot = "/35096353/amptesting/formats/sticky">
</amp-ad>
</amp-sticky-ad>
</div>
<p>This is a example of adnetwork doubleclick banner ad</p>
<p>This is a example of adnetwork doubleclick banner ad</p>
<p>This is a example of adnetwork doubleclick banner ad</p>
<p>This is a example of adnetwork doubleclick banner ad</p>
<p>This is a example of adnetwork doubleclick banner ad</p>
<p>This is a example of adnetwork doubleclick banner ad</p>
<p>This is a example of adnetwork doubleclick banner ad</p>
<p>This is a example of adnetwork doubleclick banner ad</p>
<p>This is a example of adnetwork doubleclick banner ad</p>
<p>This is a example of adnetwork doubleclick banner ad</p>
<p>This is a example of adnetwork doubleclick banner ad</p>
<p>This is a example of adnetwork doubleclick banner ad</p>
<p>This is a example of adnetwork doubleclick banner ad</p>
<p>This is a example of adnetwork doubleclick banner ad</p>
<p>This is a example of adnetwork doubleclick banner ad</p>
<p>This is a example of adnetwork doubleclick banner ad</p>
<p>This is a example of adnetwork doubleclick banner ad</p>
<p>This is a example of adnetwork doubleclick banner ad</p>
<p>This is a example of adnetwork doubleclick banner ad</p>
<p>This is a example of adnetwork doubleclick banner ad</p>
<p>This is a example of adnetwork doubleclick banner ad</p>
<p>This is a example of adnetwork doubleclick banner ad</p>
<p>This is a example of adnetwork doubleclick banner ad</p>
<p>This is a example of adnetwork doubleclick banner ad</p>
<p>This is a example of adnetwork doubleclick banner ad</p>
<p>This is a example of adnetwork doubleclick banner ad</p>
<p>This is a example of adnetwork doubleclick banner ad</p>
<p>This is a example of adnetwork doubleclick banner ad</p>
<p>This is a example of adnetwork doubleclick banner ad</p>
<p>This is a example of adnetwork doubleclick banner ad</p>
<p>This is a example of adnetwork doubleclick banner ad</p>
<p>This is a example of adnetwork doubleclick banner ad</p>
<p>This is a example of adnetwork doubleclick banner ad</p>
<p>This is a example of adnetwork doubleclick banner ad</p>
<p>This is a example of adnetwork doubleclick banner ad</p>
<p>This is a example of adnetwork doubleclick banner ad</p>
<p>This is a example of adnetwork doubleclick banner ad</p>
<p>This is a example of adnetwork doubleclick banner ad</p>
<p>This is a example of adnetwork doubleclick banner ad</p>
<p>This is a example of adnetwork doubleclick banner ad</p>
<p>This is a example of adnetwork doubleclick banner ad</p>
<p>This is a example of adnetwork doubleclick banner ad</p>
<p>This is a example of adnetwork doubleclick banner ad</p>
<p>This is a example of adnetwork doubleclick banner ad</p>
<p>This is a example of adnetwork doubleclick banner ad</p>
<p>This is a example of adnetwork doubleclick banner ad</p>
<p>This is a example of adnetwork doubleclick banner ad</p>
<p>This is a example of adnetwork doubleclick banner ad</p>
<p>This is a example of adnetwork doubleclick banner ad</p>
<p>This is a example of adnetwork doubleclick banner ad</p>
<p>This is a example of adnetwork doubleclick banner ad</p>
<p>This is a example of adnetwork doubleclick banner ad</p>
<p>This is a example of adnetwork doubleclick banner ad</p>
<h2>END OF PAGE IS VISIBLE AND CONTENT IS NOT COVERED</h2>
</body>
</html>
輸出

當用戶滾動到頁面末尾時,它看起來是這樣的:
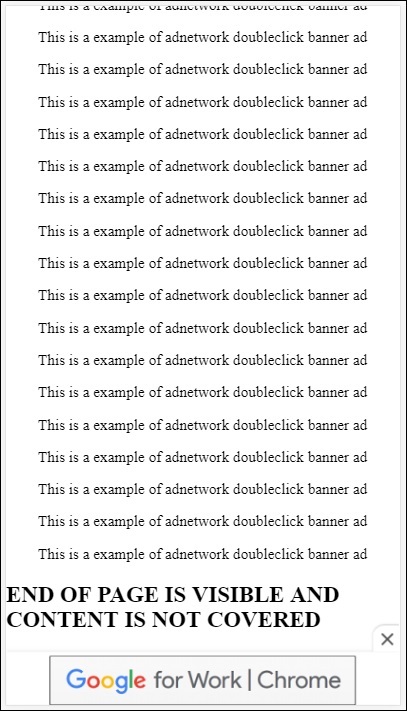
當您到達頁面末尾時,廣告不會與內容重疊。提供了關閉按鈕,允許使用者關閉廣告。
如果您想更改與關閉按鈕相關的任何內容,例如影像或寬度等,可以使用樣式元件中的.amp-sticky-ad-close-button來完成。
更改關閉按鈕背景顏色的示例
<!doctype html>
<html amp lang = "en">
<head>
<meta charset = "utf-8">
<script async src = "https://cdn.ampproject.org/v0.js">
</script>
<title>Google AMP - AD</title>
<link rel = "canonical" href =
"http://example.ampproject.org/article-metadata.html">
<meta name = "viewport" content = "width = device-width,
minimum-scale = 1,initial-scale = 1">
<style amp-boilerplate>
body{
-webkit-animation:
-amp-start 8s steps(1,end) 0s 1 normal both;-moz-animation:
-amp-start 8s steps(1,end) 0s 1 normal both;-ms-animation:
-amp-start 8s steps(1,end) 0s 1 normal both;animation:
-amp-start 8s steps(1,end) 0s 1 normal both
}
@-webkit-keyframes
-amp-start{from{visibility:hidden}to{visibility:visible}}@-moz-keyframes
-amp-start{from{visibility:hidden}to{visibility:visible}}@-ms-keyframes
-amp-start{from{visibility:hidden}to{visibility:visible}}@-o-keyframes
-amp-start{from{visibility:hidden}to{visibility:visible}}@keyframes
-amp-start{from{visibility:hidden}to{visibility:visible}}
</style>
<noscript>
<style amp-boilerplate>
body{
-webkit-animation:none;
-moz-animation:none;
-ms-animation:none;
animation:none}
</style>
</noscript>
<script async custom-element = "amp-sticky-ad"
src = "https://cdn.ampproject.org/v0/amp-sticky-ad-1.0.js">
</script>
<style amp-custom>
div, p{
text-align:center;
}
amp-ad {
border : solid 1px black;
}
.amp-sticky-ad-close-button {
background-color: red;
}
</style>
</head>
<body>
<h3>Google AMP - Sticky AD</h3>
<p>This is a example of adnetwork doubleclick banner ad</p>
<p>This is a example of adnetwork doubleclick banner ad</p>
<p>This is a example of adnetwork doubleclick banner ad</p>
<p>This is a example of adnetwork doubleclick banner ad</p>
<p>This is a example of adnetwork doubleclick banner ad</p>
<p>This is a example of adnetwork doubleclick banner ad</p>
<div>
<amp-sticky-ad layout = "nodisplay">
<amp-ad
width = "320"
height = "50"
type = "doubleclick"
data-slot = "/35096353/amptesting/formats/sticky">
</amp-ad>
</amp-sticky-ad>
</div>
<p>This is a example of adnetwork doubleclick banner ad</p>
<p>This is a example of adnetwork doubleclick banner ad</p>
<p>This is a example of adnetwork doubleclick banner ad</p>
<p>This is a example of adnetwork doubleclick banner ad</p>
<p>This is a example of adnetwork doubleclick banner ad</p>
<p>This is a example of adnetwork doubleclick banner ad</p>
<p>This is a example of adnetwork doubleclick banner ad</p>
<p>This is a example of adnetwork doubleclick banner ad</p>
<p>This is a example of adnetwork doubleclick banner ad</p>
<p>This is a example of adnetwork doubleclick banner ad</p>
<p>This is a example of adnetwork doubleclick banner ad</p>
<p>This is a example of adnetwork doubleclick banner ad</p>
<p>This is a example of adnetwork doubleclick banner ad</p>
<p>This is a example of adnetwork doubleclick banner ad</p>
<p>This is a example of adnetwork doubleclick banner ad</p>
<p>This is a example of adnetwork doubleclick banner ad</p>
<p>This is a example of adnetwork doubleclick banner ad</p>
<p>This is a example of adnetwork doubleclick banner ad</p>
<p>This is a example of adnetwork doubleclick banner ad</p>
<p>This is a example of adnetwork doubleclick banner ad</p>
<p>This is a example of adnetwork doubleclick banner ad</p>
<p>This is a example of adnetwork doubleclick banner ad</p>
<p>This is a example of adnetwork doubleclick banner ad</p>
<p>This is a example of adnetwork doubleclick banner ad</p>
<p>This is a example of adnetwork doubleclick banner ad</p>
<p>This is a example of adnetwork doubleclick banner ad</p>
<p>This is a example of adnetwork doubleclick banner ad</p>
<p>This is a example of adnetwork doubleclick banner ad</p>
<p>This is a example of adnetwork doubleclick banner ad</p>
<p>This is a example of adnetwork doubleclick banner ad</p>
<p>This is a example of adnetwork doubleclick banner ad</p>
<p>This is a example of adnetwork doubleclick banner ad</p>
<p>This is a example of adnetwork doubleclick banner ad</p>
<p>This is a example of adnetwork doubleclick banner ad</p>
<p>This is a example of adnetwork doubleclick banner ad</p>
<p>This is a example of adnetwork doubleclick banner ad</p>
<p>This is a example of adnetwork doubleclick banner ad</p>
<p>This is a example of adnetwork doubleclick banner ad</p>
<p>This is a example of adnetwork doubleclick banner ad</p>
<p>This is a example of adnetwork doubleclick banner ad</p>
<p>This is a example of adnetwork doubleclick banner ad</p>
<p>This is a example of adnetwork doubleclick banner ad</p>
<p>This is a example of adnetwork doubleclick banner ad</p>
<p>This is a example of adnetwork doubleclick banner ad</p>
<p>This is a example of adnetwork doubleclick banner ad</p>
<p>This is a example of adnetwork doubleclick banner ad</p>
<p>This is a example of adnetwork doubleclick banner ad</p>
<p>This is a example of adnetwork doubleclick banner ad</p>
<p>This is a example of adnetwork doubleclick banner ad</p>
<p>This is a example of adnetwork doubleclick banner ad</p>
<p>This is a example of adnetwork doubleclick banner ad</p>
<p>This is a example of adnetwork doubleclick banner ad</p>
<p>This is a example of adnetwork doubleclick banner ad</p>
<h2>END OF PAGE IS VISIBLE AND CONTENT IS NOT COVERED</h2>
</body>
</html>
輸出

釋出者頁面上 amp 粘性廣告的示例

AMPHTML 廣告
我們已經看到了<amp-ad>,它用於載入廣告。使用<amp-ad>載入的廣告內容可以使用非 amp 樣式載入廣告。如果<amp-ad>載入的廣告使用 amp 規範載入廣告,則稱為 amphtml 廣告。AmpHTML 廣告比非 amp 廣告更快,因為它們遵循 amp 規範。
使用可用的 amp 元件(如燈箱和輪播),我們可以形成多種型別的 amphtml 廣告格式,這有助於顯示廣告。
目前,以下廣告投放服務支援 amphtml 廣告:
DoubleClick for Publishers
TripleLift
Dianomi
Adzerk
Google AdSense
amphtml 廣告將從<amp-ad>元件中投放,如下所示:
示例
<!doctype html>
<html amp lang = "en">
<head>
<meta charset = "utf-8">
<script async src = "https://cdn.ampproject.org/v0.js">
</script>
<title>Google AMP - Amp HTMLAds</title>
<link rel = "canonical" href=
"http://example.ampproject.org/article-metadata.html">
<meta name = "viewport" content = "width=device-width,
minimum-scale = 1,initial-scale = 1">
<style amp-boilerplate>
body{
-webkit-animation:
-amp-start 8s steps(1,end) 0s 1 normal both;-moz-animation:
-amp-start 8s steps(1,end) 0s 1 normal both;-ms-animation:
-amp-start 8s steps(1,end) 0s 1 normal both;animation:
-amp-start 8s steps(1,end) 0s 1 normal both
}
@-webkit-keyframes
-amp-start{from{visibility:hidden}to{visibility:visible}}@-moz-keyframes
-amp-start{from{visibility:hidden}to{visibility:visible}}@-ms-keyframes
-amp-start{from{visibility:hidden}to{visibility:visible}}@-o-keyframes
-amp-start{from{visibility:hidden}to{visibility:visible}}@keyframes
-amp-start{from{visibility:hidden}to{visibility:visible}}
</style>
<noscript>
<style amp-boilerplate>
body{
-webkit-animation:none;
-moz-animation:none;
-ms-animation:none;
animation:none}
</style>
</noscript>
<script async custom-element = "amp-ad" src =
"https://cdn.ampproject.org/v0/amp-ad-0.1.js">
</script>
<style amp-custom>
.ad-container {
background: #FFFFFF;
margin: 0;
padding: 0px;
text-align:center;
}
.article-body{
font-family: avenir, Helvetica, arial, serif, sans-serif !important;
font-weight: 400;
text-align:center;
}
.adv {
text-align:center;
}
</style>
</head>
<body>
<div>
<p>Amphtml ads are faster in comparison to the non
amp ones as they follow the amp specification.</p>
<p>Amphtml ads work fine in amp pages as well as non amp pages</p>
<div class = "ad-container">
<div>Advertising</div>
<amp-ad layout = "fixed"
width = "300"
height = "250"
type = "fake"
id = "i-amphtml-demo-fake"
src = "ampimg.html">
</amp-ad>
</div>
<p>Amphtml ads are faster in comparison to the non amp
ones as they follow the amp specification.</p>
<p>Amphtml ads work fine in amp pages as well as non amp pages</p>
</div>
</body>
</html>
我們呼叫 amp-ad 來顯示廣告。amp-ad 中使用的 src 是另一個 amp 頁面。我們使用了 type="fake" 和 id="i-amphtml-demo-fake"。amp-ad 標籤中使用的 amp 頁面詳細資訊或 ampimg.html 如下所示:
ampimg.html
<!doctype html>
<html amp lang = "en">
<head>
<meta charset = "utf-8">
<script async src = "https://cdn.ampproject.org/v0.js">
</script>
<title>Google AMP - Image</title>
<link rel = "canonical" href =
"http://example.ampproject.org/article-metadata.html">
<meta name = "viewport" content="width = device-width,
minimum-scale = 1,initial-scale = 1">
<style amp-boilerplate>
body{
-webkit-animation:
-amp-start 8s steps(1,end) 0s 1 normal both;-moz-animation:
-amp-start 8s steps(1,end) 0s 1 normal both;-ms-animation:
-amp-start 8s steps(1,end) 0s 1 normal both;animation:
-amp-start 8s steps(1,end) 0s 1 normal both
}
@-webkit-keyframes
-amp-start{from{visibility:hidden}to{visibility:visible}}@-moz-keyframes
-amp-start{from{visibility:hidden}to{visibility:visible}}@-ms-keyframes
-amp-start{from{visibility:hidden}to{visibility:visible}}@-o-keyframes
-amp-start{from{visibility:hidden}to{visibility:visible}}@keyframes
-amp-start{from{visibility:hidden}to{visibility:visible}}
</style>
<noscript>
<style amp-boilerplate>
body{
-webkit-animation:none;
-moz-animation:none;
-ms-animation:none;
animation:none}
</style>
</noscript>
<style amp-custom>
amp-img {
border: 1px solid black;
border-radius: 4px;
padding: 5px;
}
</style>
</head>
<body>
<amp-img alt = "Beautiful Flower"
src = "images/bannerad.png"
width = "246"
height = "205">
</amp-img>
</body>
</html>
輸出

我們在 amp-ad 內顯示 amp 頁面。類似地,我們可以使用 amp-video、amp-carousel 在 amp 頁面中顯示廣告。列出的廣告伺服器支援呼叫正確的 amp 頁面以在 amphtml 廣告下投放廣告。
Google AMP - 分析
Amp 分析是一個 amp 元件,用於跟蹤頁面上的資料。可以記錄頁面上所有使用者互動並儲存以分析資料,以便進一步改進或用於業務目的。
要使用 amp-analytics 元件,我們需要在 head 部分新增以下指令碼:
<script async custom-element = "amp-analytics" src = "https://cdn.ampproject.org/v0/amp-analytics-0.1.js"> </script>
要記錄 amp-analytics 中使用的事件,我們可以使用第三方供應商,也可以擁有內部跟蹤系統。
使用 GoogleAnalytics 供應商的 amp-analytics 示例:
<amp-analytics type = googleanalytics>
<script type = application/json>{
"requests": {
"pageview": "${eventId}"
},
"vars": {
"account": "UA-44450152-1"
},
"triggers": {
"trackPageview" : {
"on": "visible",
"request": "pageview",
"vars": {
"eventId": "pageview"
}
}
}
}
</script>
</amp-analytics>
使用 comscore 供應商的 amp-analytics 示例
<amp-analytics type = comscore>
<script type = application/json>
{"vars": {"c2":"7922264"}}
</script>
</amp-analytics>
使用 chartbeat 供應商的 amp-analytics 示例
<amp-analytics type = chartbeat>
<script type = application/json>{
"vars": {
"uid": "230",
"domain": "dummyurl.com",
"sections": "us",
"authors": "Hello World"
}
}</script>
</amp-analytics>
供應商的詳細列表在此處提供。
以下是如何使用內部分析供應商的工作示例:
示例
<!doctype html>
<html amp>
<head>
<meta charset = "utf-8">
<title>amp-analytics</title>
<script async src = "https://cdn.ampproject.org/v0.js">
</script>
<script async custom-element = "amp-analytics"
src = "https://cdn.ampproject.org/v0/amp-analytics-0.1.js">
</script>
<link rel = "canonical" href = "ampanalytics.html">
<meta name = "viewport" content = "width = device-width,
minimum-scale = 1,initial-scale = 1">
<style amp-boilerplate>
body{
-webkit-animation:
-amp-start 8s steps(1,end) 0s 1 normal both;-moz-animation:
-amp-start 8s steps(1,end) 0s 1 normal both;-ms-animation:
-amp-start 8s steps(1,end) 0s 1 normal both;animation:
-amp-start 8s steps(1,end) 0s 1 normal both}
@-webkit-keyframes
-amp-start{from{visibility:hidden}to{visibility:visible}}@-moz-keyframes
-amp-start{from{visibility:hidden}to{visibility:visible}}@-ms-keyframes
-amp-start{from{visibility:hidden}to{visibility:visible}}@-o-keyframes
-amp-start{from{visibility:hidden}to{visibility:visible}}@keyframes
-amp-start{from{visibility:hidden}to{visibility:visible}}
</style>
<noscript>
<style amp-boilerplate>
body{
-webkit-animation:none;
-moz-animation:none;
-ms-animation:none;
animation:none}
</style>
</noscript>
</head>
<body>
<h1>Google Amp - Analytics</h1>
<amp-analytics>
<script type = "application/json">
{
"requests": {
"event": "https://:8080/googleamp/tracking.php?
user=test&account=localhost&event=${eventId}"
},
"triggers": {
"trackPageview": {
"on": "visible",
"request": "event",
"vars": {
"eventId": "pageview"
}
}
}
}
</script>
</amp-analytics>
</body>
</html>
當在瀏覽器中訪問頁面時,將觸發頁面瀏覽量的跟蹤器。可以在 Google 網路選項卡中看到,如下所示。

您還可以當頁面上的特定元素可見時觸發 amp-analytics 事件。以下為此提供的示例:
示例
<!doctype html>
<html amp>
<head>
<meta charset = "utf-8">
<title>amp-analytics</title>
<script async src = "https://cdn.ampproject.org/v0.js">
</script>
<script async custom-element = "amp-analytics"
src = "https://cdn.ampproject.org/v0/amp-analytics-0.1.js">
</script>
<link rel = "canonical" href = "ampanalytics.html">
<meta name = "viewport" content = "width = device-width,
minimum-scale = 1,initial-scale = 1">
<style amp-boilerplate>
body{
-webkit-animation:
-amp-start 8s steps(1,end) 0s 1 normal both;-moz-animation:
-amp-start 8s steps(1,end) 0s 1 normal both;-ms-animation:
-amp-start 8s steps(1,end) 0s 1 normal both;animation:
-amp-start 8s steps(1,end) 0s 1 normal both
}
@-webkit-keyframes
-amp-start{from{visibility:hidden}to{visibility:visible}}@-moz-keyframes
-amp-start{from{visibility:hidden}to{visibility:visible}}@-ms-keyframes
-amp-start{from{visibility:hidden}to{visibility:visible}}@-o-keyframes
-amp-start{from{visibility:hidden}to{visibility:visible}}@keyframes
-amp-start{from{visibility:hidden}to{visibility:visible}}
</style>
<noscript>
<style amp-boilerplate>
body{
-webkit-animation:none;
-moz-animation:none;
-ms-animation:none;
animation:none}
</style>
</noscript>
<script async custom-element = "amp-video"
src = "https://cdn.ampproject.org/v0/amp-video-0.1.js">
</script>
</head>
<body>
<h1>Google Amp - Analytics</h1>
<amp-video controls
id = "videoplayer"
width = "640"
height = "360"
layout = "responsive"
poster = "images/videoposter.png"
autoplay>
<source src = "video/bunny.webm" type = "video/webm" />
<source src = "video/samplevideo.mp4" type = "video/mp4" />
<div fallback>
<p>This browser does not support the video element.</p>
</div>
</amp-video>
<amp-analytics>
<script type = "application/json">
{
"requests": {
"event": "https://:8080/googleamp/tracking.php?
user=test&account=localhost&event=${eventId}"
},
"triggers": {
"trackPageview": {
"on": "visible",
"request": "event",
"visibilitySpec": {
"selector": "#videoplayer",
"visiblePercentageMin": 20,
"totalTimeMin": 2000,
"continuousTimeMin": 200
},
"vars": {
"eventId": "video"
}
}
}
}
</script>
</amp-analytics>
</body>
</html>
輸出
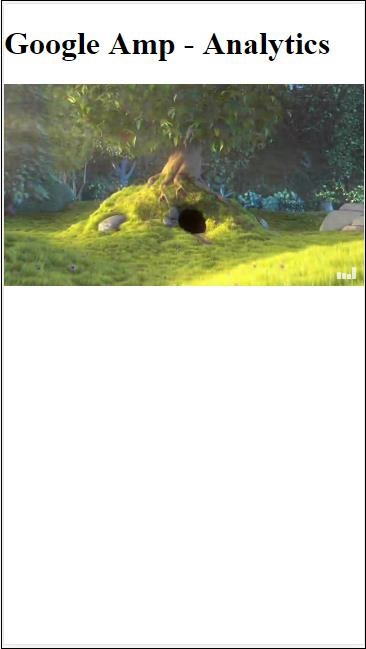
Amp-analytics 元件需要將 json 物件傳遞給指令碼標籤。json 的格式如下:
{
"requests": {
request-name: request-value,
...
},
"vars": {
var-name: var-value,
...
},
"extraUrlParams": {
extraurlparam-name: extraurlparam-value,
...
},
"triggers": {
trigger-name: trigger-object,
...
},
"transport": {
"beacon": *boolean*,
"xhrpost": *boolean*,
"image": *boolean*,
}
}
上面指定的所有物件都不必傳遞給 amp-analytics。如果您使用第三方供應商,則供應商將有其自己的格式,使用者需要以這種方式傳遞資料。
讓我們詳細瞭解每個物件:
請求
請求物件具有一個 url,用於在滿足條件時觸發。以下為請求物件的示例:
"requests": {
"request-name": "https://:8080/googleamp/tracking.php?
user=test&account=localhost&event=${eventId}"
},
請求名稱將在觸發器物件中指定,並且必須為其使用相同的名稱。
變數
要用於請求物件的所有變數都在 vars 物件中指定。
"requests": {
"event": "https://:8080/googleamp/tracking.php?
user=test&account=localhost&event=${eventId}"
},
"vars": {
"eventId": "video"
}
額外 URL 引數
要作為查詢字串附加到請求 url 的任何其他引數都可以在此物件中定義。請觀察以下示例
"requests": {
"event": "https://:8080/googleamp/tracking.php?
user=test&account=localhost&event=${eventId}&x=1&y=2&z=3"
},
"vars": {
"eventId": "video"
},
"extraUrlParams": {
"x": "1",
"y": "2",
"z": "3"
}
觸發器
此物件將指示何時必須觸發請求 url。觸發器物件中可用的鍵值對如下所示:
on - 您應該提及要監聽的事件。on 的可用值為 render-start、ini-load、click、scroll、timer、visible、hidden、user-error、access-* 和 video-*
request - 這是請求的名稱。這必須與請求物件中的請求名稱匹配。
vars - 這是定義要用於觸發器物件或用於覆蓋定義的 vars 鍵值的物件。
selector - 這顯示了設定觸發器的元素的詳細資訊。
scrollSpec - 這將包含滾動觸發器的詳細資訊。
timerSpec - 這將包含要給定的時間詳細資訊。
videoSpec - 這將包含要為影片呼叫的詳細資訊。
以下是一個示例,其中我們添加了 amp-video。當影片元素在頁面上可用、在頁面上至少可見 20%、影片至少播放 2 秒且連續在視野中 200 毫秒時,Amp-analytics 將觸發跟蹤器。當滿足所有這些條件時,跟蹤器才會被觸發。詳細資訊如下所示:
要新增有關元素可見性和其他條件(例如元素必須至少可見 20%、影片應播放 2 秒)的條件,所有這些條件都必須在visibilitySpec中指定,如下所示:
<amp-analytics>
<script type = "application/json">
{
"requests": {
"event": "https://:8080/googleamp/tracking.php?
user=test&account=localhost&event=${eventId}"
},
"triggers": {
"trackPageview": {
"on": "visible",
"request": "event",
"visibilitySpec": {
"selector": "#videoplayer",
"visiblePercentageMin": 20,
"totalTimeMin": 2000,
"continuousTimeMin": 200
},
"vars": {
"eventId": "video"
}
}
}
}
</script>
</amp-analytics>
videoSpec 允許您定義基於其想要觸發跟蹤器觸發的條件。條件列出如下:
waitFor
此屬性用於可見性觸發器,在觸發之前等待特定情況。waitFor 的可用選項為none、ini-load和render-start。預設情況下,waitFor 的值為 ini-load。
reportWhen
此屬性用於可見性觸發器,在觸發之前等待特定情況。支援的值為 documentExit。您不能在visibilitySpec中同時使用reportWhen和repeat屬性。
continuousTimeMin 和 continuousTimeMax
此屬性指示可見性跟蹤器要觸發它,需要元素連續位於視口中,介於continuousTimeMin和continuousTimeMax之間。如果未指定 continousTimeMin,則預設設定為 0。值為毫秒。
totalTimeMin 和 totalTimeMin
此屬性指示可見性跟蹤器要觸發它,需要元素在視口中總時間位於totalTimeMin和totalTimeMin之間。如果未指定 totalTimeMin,則預設為 0。值為毫秒。
visiblePercentageMin 和 visiblePercentageMax
此屬性指示可見性跟蹤器要觸發它,需要元素在視口中可見,介於分配給 visiblePercetageMin 和 visiblePercentageMax 的百分比之間。visiblePercentageMin的預設值為 0,visibilePercentageMax的預設值為 100。如果兩者都為 0,則元素不可見時將觸發可見性觸發器;如果兩者都為 100,則元素完全可見時將觸發可見性觸發器。
Repeat
如果設定為 true,則每次滿足 visibilitySpec 條件時都會觸發觸發器。預設情況下,repeat 的值為 false。它不能與 reportWhen 屬性一起使用。
以下為點選觸發器的示例:
<!doctype html>
<html amp>
<head>
<meta charset = "utf-8">
<title>amp-analytics</title>
<script async src = "https://cdn.ampproject.org/v0.js">
</script>
<script async custom-element = "amp-analytics"
src="https://cdn.ampproject.org/v0/amp-analytics-0.1.js">
</script>
<link rel = "canonical" href = "ampanalytics.html">
<meta name = "viewport" content = "width = device-width,
minimum-scale = 1,initial-scale = 1">
<style amp-boilerplate>
body{
-webkit-animation:
-amp-start 8s steps(1,end) 0s 1 normal both;-moz-animation:
-amp-start 8s steps(1,end) 0s 1 normal both;-ms-animation:
-amp-start 8s steps(1,end) 0s 1 normal both;animation:
-amp-start 8s steps(1,end) 0s 1 normal both
}
@-webkit-keyframes
-amp-start{from{visibility:hidden}to{visibility:visible}}@-moz-keyframes
-amp-start{from{visibility:hidden}to{visibility:visible}}@-ms-keyframes
-amp-start{from{visibility:hidden}to{visibility:visible}}@-o-keyframes
-amp-start{from{visibility:hidden}to{visibility:visible}}@keyframes
-amp-start{from{visibility:hidden}to{visibility:visible}}
</style>
<noscript>
<style amp-boilerplate>
body{
-webkit-animation:none;
-moz-animation:none;
-ms-animation:none;
animation:none}
</style>
</noscript>
<script async custom-element = "amp-video"
src = "https://cdn.ampproject.org/v0/amp-video-0.1.js">
</script>
<style amp-custom>
a {
color: blue;
}
</style>
</head>
<body>
<h1>Google Amp - Analytics</h1>
<a>Click Here</a>
<amp-analytics>
<script type = "application/json">
{
"requests": {
"event": "https://:8080/googleamp/tracking.php?
user=test&account=localhost&event=${eventId}"
},
"triggers": {
"trackAnchorClicks": {
"on": "click",
"selector": "a",
"request": "event",
"vars": {
"eventId": "clickonlink"
}
}
}
}
</script>
</amp-analytics>
</body>
</html>
輸出

單擊連結後,將觸發事件,如下所示:

Google AMP - 社交小部件
Amp 提供了在頁面上顯示社交小部件的支援,而無需載入任何外部庫。在本章中,我們將討論此處列出的一些流行的社交小部件:
Google AMP - Facebook
Google AMP - Twitter
Google AMP - Pinterest
Google Amp - Facebook
使用 amp-facebook 元件,我們可以連線到 Facebook 並顯示 amp 頁面中的帖子、影片、評論。
要使用 amp-facebook,我們需要將以下指令碼新增到頁面:
<script async custom-element = "amp-facebook" src = "https://cdn.ampproject.org/v0/amp-facebook-0.1.js"> </script>
Amp-facebook 標籤格式
<amp-facebook width = "552" height = "310" layout = "responsive" data-href = "https://#/tutorialspointindia/ posts/1784197988358159"> </amp-facebook>
以下為 amp-facebook 的工作示例:
示例:顯示來自 Facebook 的帖子
<!doctype html>
<html amp lang = "en">
<head>
<meta charset = "utf-8">
<script async src = "https://cdn.ampproject.org/v0.js">
</script>
<title>Google AMP - Amp Facebook</title>
<link rel = "canonical" href =
"http://example.ampproject.org/article-metadata.html">
<meta name = "viewport" content = "width = device-width,
minimum-scale = 1,initial-scale = 1">
<style amp-boilerplate>
body{
-webkit-animation:
-amp-start 8s steps(1,end) 0s 1 normal both;-moz-animation:
-amp-start 8s steps(1,end) 0s 1 normal both;-ms-animation:
-amp-start 8s steps(1,end) 0s 1 normal both;animation:
-amp-start 8s steps(1,end) 0s 1 normal both
}
@-webkit-keyframes
-amp-start{from{visibility:hidden}to{visibility:visible}}@-moz-keyframes
-amp-start{from{visibility:hidden}to{visibility:visible}}@-ms-keyframes
-amp-start{from{visibility:hidden}to{visibility:visible}}@-o-keyframes
-amp-start{from{visibility:hidden}to{visibility:visible}}@keyframes
-amp-start{from{visibility:hidden}to{visibility:visible}}
</style>
<noscript>
<style amp-boilerplate>
body{
-webkit-animation:none;
-moz-animation:none;
-ms-animation:none;
animation:none}
</style>
</noscript>
<script async custom-element = "amp-facebook"
src = "https://cdn.ampproject.org/v0/amp-facebook-0.1.js">
</script>
</head>
<body>
<h3>Google AMP - Amp Facebook</h3>
<h2>Learn Python webscrapping</h2>
<amp-facebook
width = "552"
height = "310"
layout = "responsive"
data-href = "https://#/tutorialspointindia/posts/1784197988358159">
</amp-facebook>
</body>
</html>
輸出
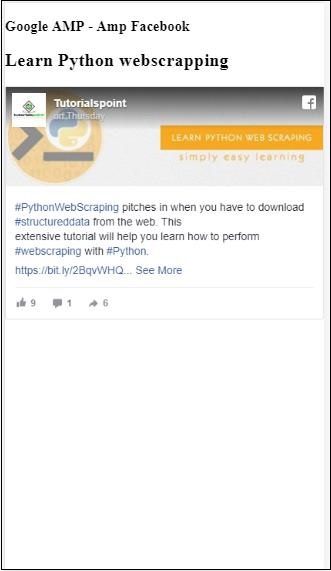
示例:顯示來自 Facebook 的影片
<!doctype html>
<html amp lang = "en">
<head>
<meta charset = "utf-8">
<script async src = "https://cdn.ampproject.org/v0.js">
</script>
<title>Google AMP - Amp Facebook>/title>
<link rel = "canonical" href =
"http://example.ampproject.org/article-metadata.html">
<meta name = "viewport" content = "width = device-width,
minimum-scale = 1,initial-scale = 1">
<style amp-boilerplate>
body{
-webkit-animation:
-amp-start 8s steps(1,end) 0s 1 normal both;-moz-animation:
-amp-start 8s steps(1,end) 0s 1 normal both;-ms-animation:
-amp-start 8s steps(1,end) 0s 1 normal both;animation:
-amp-start 8s steps(1,end) 0s 1 normal both
}
@-webkit-keyframes
-amp-start{from{visibility:hidden}to{visibility:visible}}@-moz-keyframes
-amp-start{from{visibility:hidden}to{visibility:visible}}@-ms-keyframes
-amp-start{from{visibility:hidden}to{visibility:visible}}@-o-keyframes
-amp-start{from{visibility:hidden}to{visibility:visible}}@keyframes
-amp-start{from{visibility:hidden}to{visibility:visible}}
</style>
<noscript>
<style amp-boilerplate>
body{
-webkit-animation:none;
-moz-animation:none;
-ms-animation:none;
animation:none}
</style>
</noscript>
<script async custom-element = "amp-facebook"
src = "https://cdn.ampproject.org/v0/amp-facebook-0.1.js">
</script>
</head>
<body>
<h3<Google AMP - Amp Facebook Video</h3>
<h2<Learn Python</h2>
<amp-facebook
width = "476"
height = "316"
layout = "responsive"
data-embed-as = "video"
data-href = "https://#/thetutorialkings/videos/701545820223256">
</amp-facebook>
</body>
</html>
輸出
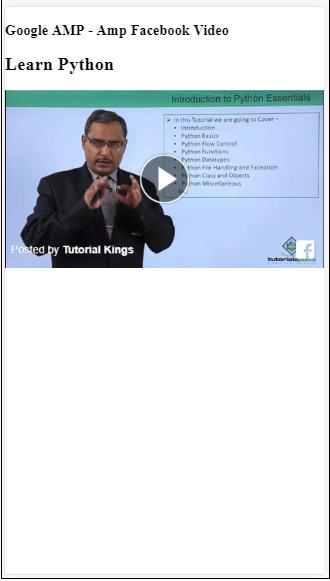
示例:顯示 Facebook 帖子的評論
<!doctype html>
<html amp lang = "en">
<head>
<meta charset = "utf-8">
<script async src = "https://cdn.ampproject.org/v0.js">
</script>
<title>Google AMP - Amp Facebook</title>
<link rel = "canonical" href =
"http://example.ampproject.org/article-metadata.html">
<meta name = "viewport" content = "width = device-width,
minimum-scale = 1,initial-scale = 1">
<style amp-boilerplate>
body{
-webkit-animation:
-amp-start 8s steps(1,end) 0s 1 normal both;-moz-animation:
-amp-start 8s steps(1,end) 0s 1 normal both;-ms-animation:
-amp-start 8s steps(1,end) 0s 1 normal both;animation:
-amp-start 8s steps(1,end) 0s 1 normal both
}
@-webkit-keyframes
-amp-start{from{visibility:hidden}to{visibility:visible}}@-moz-keyframes
-amp-start{from{visibility:hidden}to{visibility:visible}}@-ms-keyframes
-amp-start{from{visibility:hidden}to{visibility:visible}}@-o-keyframes
-amp-start{from{visibility:hidden}to{visibility:visible}}@keyframes
-amp-start{from{visibility:hidden}to{visibility:visible}}
</style>
<noscript>
<style amp-boilerplate>
body{
-webkit-animation:none;
-moz-animation:none;
-ms-animation:none;
animation:none}
</style>
</noscript>
<script async custom-element = "amp-facebook"
src = "https://cdn.ampproject.org/v0/amp-facebook-0.1.js">
</script>
</head>
<body>
<h3>Google AMP - Amp Facebook comment for post</h3>
<h2>Learn Microprocessor</h2>
<amp-facebook
width = "552"
height = "500"
layout = "responsive"
data-embed-type = "comment"
data-href = "https://#/tutorialspointindia/posts/1744145745696717?
comment_id=1744179789026646&include_parent=false">
</amp-facebook>
</body>
</html>
輸出

amp-facebook 上可用的屬性為
data-href(必填) - 您需要在此處指定 Facebook url。
data-embed-as− 可選值包括 post、video 和 comment。預設值為 post。
data-locale(必填)− 用於顯示本地化語言的內容,您可以根據需要進行更改。
data-include-comment-parent− 可接受 true 或 false 值。預設值為 false。當您使用 data-embed-as 選項設定為 comment 時,如果您需要顯示評論的父回覆,可以將此選項設定為 true。
到目前為止,我們已經瞭解瞭如何在 AMP 頁面中新增帖子/影片和評論。如果需要新增 Facebook 頁面,AMP 提供了一個名為 amp-facebook-page 的元件。
AMP Facebook 頁面外掛
Amp-facebook-page 元件可以提供我們想要的 Facebook 頁面詳細資訊。要使用 amp-facebook-page,我們需要新增以下指令碼:
<script async custom-element = "amp-facebook-page" src = " https://cdn.ampproject.org/v0/amp-facebook-page-0.1.js"> </script>
這裡展示了一個使用 amp-facebook-page 的工作示例:
示例
<!doctype html>
<html amp lang = "en">
<head>
<meta charset = "utf-8">
<script async src = "https://cdn.ampproject.org/v0.js">
</script>
<title>Google AMP - Amp Facebook</title>
<link rel = "canonical" href =
"http://example.ampproject.org/article-metadata.html">
<meta name = "viewport" content = "width = device-width,
minimum-scale = 1,initial-scale = 1">
<style amp-boilerplate>
body{
-webkit-animation:
-amp-start 8s steps(1,end) 0s 1 normal both;-moz-animation:
-amp-start 8s steps(1,end) 0s 1 normal both;-ms-animation:
-amp-start 8s steps(1,end) 0s 1 normal both;animation:
-amp-start 8s steps(1,end) 0s 1 normal both
}
@-webkit-keyframes
-amp-start{from{visibility:hidden}to{visibility:visible}}@-moz-keyframes
-amp-start{from{visibility:hidden}to{visibility:visible}}@-ms-keyframes
-amp-start{from{visibility:hidden}to{visibility:visible}}@-o-keyframes
-amp-start{from{visibility:hidden}to{visibility:visible}}@keyframes
-amp-start{from{visibility:hidden}to{visibility:visible}}
</style>
<noscript>
<style amp-boilerplate>
body{
-webkit-animation:none;
-moz-animation:none;
-ms-animation:none;
animation:none}
</style>
</noscript>
<script async custom-element = "amp-facebook-page"
src = "https://cdn.ampproject.org/v0/amp-facebook-page-0.1.js">
</script>
</head>
<body>
<h3>Google AMP - Amp Facebook Page</h3>
<h3>Welcome to Tutorialspoint Facebook Page</h3>
<amp-facebook-page
width = "340"
height = "130"
layout = "responsive"
data-href = "https://#/tutorialspointindia/">
</amp-facebook-page>
</body>
</html>
輸出

AMP Facebook 點贊
要嵌入 Facebook 頁面點贊按鈕外掛,我們可以使用 amp-facebook-like 元件。要使用 amp-facebook-like,我們需要新增以下指令碼:
"<script async custom-element = "amp-facebook-like" src = "https://cdn.ampproject.org/v0/amp-facebook-like-0.1.js"> </script>
示例
<!doctype html>
<html amp lang = "en">
<head>
<meta charset = "utf-8">
<script async src = "https://cdn.ampproject.org/v0.js">
</script>
<title>Google AMP - Amp Facebook</title>
<link rel = "canonical"
href = "http://example.ampproject.org/article-metadata.html">
<meta name = "viewport" content = "width = device-width,
minimum-scale = 1,initial-scale = 1">
<style amp-boilerplate>
body{
-webkit-animation:
-amp-start 8s steps(1,end) 0s 1 normal both;-moz-animation:
-amp-start 8s steps(1,end) 0s 1 normal both;-ms-animation:
-amp-start 8s steps(1,end) 0s 1 normal both;animation:
-amp-start 8s steps(1,end) 0s 1 normal both
}
@-webkit-keyframes
-amp-start{from{visibility:hidden}to{visibility:visible}}@-moz-keyframes
-amp-start{from{visibility:hidden}to{visibility:visible}}@-ms-keyframes
-amp-start{from{visibility:hidden}to{visibility:visible}}@-o-keyframes
-amp-start{from{visibility:hidden}to{visibility:visible}}@keyframes
-amp-start{from{visibility:hidden}to{visibility:visible}}
</style>
<noscript>
<style amp-boilerplate>
body{
-webkit-animation:none;
-moz-animation:none;
-ms-animation:none;
animation:none}
</style>
</noscript>
<script async custom-element = "amp-facebook-like"
src = "https://cdn.ampproject.org/v0/amp-facebook-like-0.1.js">
</script>
<style amp-custom>
amp-facebook-like {
margin: 1rem
}
</style>
</head>
<body>
<h3>Google AMP - Amp Facebook Likes</h3>
<h3>Welcome to Tutorialspoint Facebook Likes</h3>
<amp-facebook-like
width = "110"
height = "20"
layout = "fixed"
data-layout = "button_count"
data-href = "https://#/tutorialspointindia">
</amp-facebook-like>
</body>
</html>
輸出
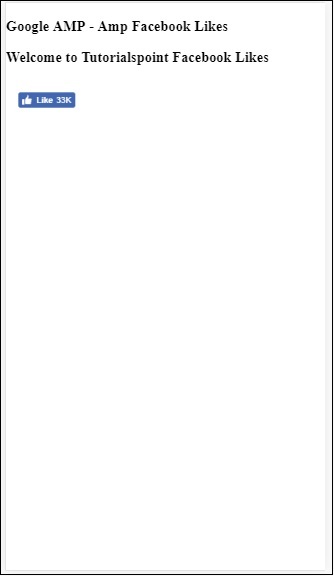
AMP Facebook 評論外掛
Amp-facebook-comments 元件將顯示指定頁面的評論。
要使用 amp-facebook-comments,我們需要新增以下指令碼:
<script async custom-element = "amp-facebook-comments" src = "https://cdn.ampproject.org/v0/amp-facebook-comments-0.1.js"> </script>
示例
<!doctype html>
<html amp lang = "en">
<head>
<meta charset = "utf-8">
<script async src = "https://cdn.ampproject.org/v0.js">
</script>
<title>Google AMP - Amp Facebook</title>
<link rel = "canonical" href =
"http://example.ampproject.org/article-metadata.html">
<meta name = "viewport" content = "width = device-width,
minimum-scale = 1,initial-scale = 1">
<style amp-boilerplate>
body{
-webkit-animation:
-amp-start 8s steps(1,end) 0s 1 normal both;-moz-animation:
-amp-start 8s steps(1,end) 0s 1 normal both;-ms-animation:
-amp-start 8s steps(1,end) 0s 1 normal both;animation:
-amp-start 8s steps(1,end) 0s 1 normal both
}
@-webkit-keyframes
-amp-start{from{visibility:hidden}to{visibility:visible}}@-moz-keyframes
-amp-start{from{visibility:hidden}to{visibility:visible}}@-ms-keyframes
-amp-start{from{visibility:hidden}to{visibility:visible}}@-o-keyframes
-amp-start{from{visibility:hidden}to{visibility:visible}}@keyframes
-amp-start{from{visibility:hidden}to{visibility:visible}}
</style>
<noscript>
<style amp-boilerplate>
body{
-webkit-animation:none;
-moz-animation:none;
-ms-animation:none;
animation:none}
</style>
</noscript>
<script async custom-element = "amp-facebook-comments"
src = "https://cdn.ampproject.org/v0/amp-facebook-comments-0.1.js">
</script>
<style amp-custom>
amp-facebook-like {
margin: 1rem
}
</style>
</head>
<body>
<h3>Google AMP - Amp Facebook Likes</h3>
<amp-facebook-comments
width = 486
height = 657
layout = "responsive"
data-numposts = "2"
data-href = "https://developers.facebook.com/docs/plugins/comments">
</amp-facebook-comments>
</body>
</html>
輸出

屬性 data-numposts 用於決定螢幕上顯示的評論數量。如果您想要獲取所有評論,可以移除此屬性。
Google AMP - Pinterest
AMP 透過 amp-pinterest 元件提供 Pinterest 小部件。我們可以使用此元件來顯示 Pinterest 小部件、Pinterest 儲存按鈕和 Pinterest 關注按鈕。
要開始使用 amp-pinterest,我們需要新增以下指令碼:
<script async custom-element="amp-pinterest" src="https://cdn.ampproject.org/v0/amp-pinterest-0.1.js"> </script>
Amp-pinterest 標籤
<amp-pinterest width = 300 height = 450 data-do = "embedPin" data-url = "https://in.pinterest.com/pin/856739529089490354/"> </amp-pinterest>
Pinterest 小部件
示例
要顯示 Pinterest 小部件,我們需要使用屬性 data-do="embedPin"。這裡展示了一個工作示例:
<!doctype html>
<html amp lang = "en">
<head>
<meta charset = "utf-8">
<script async src = "https://cdn.ampproject.org/v0.js">
</script>
<title>Google AMP - Amp Pinterest Widget</title>
<link rel = "canonical" href =
"http://example.ampproject.org/article-metadata.html">
<meta name = "viewport" content = "width = device-width,
minimum-scale = 1,initial-scale = 1">
<style amp-boilerplate>
body{
-webkit-animation:
-amp-start 8s steps(1,end) 0s 1 normal both;-moz-animation:
-amp-start 8s steps(1,end) 0s 1 normal both;-ms-animation:
-amp-start 8s steps(1,end) 0s 1 normal both;animation:
-amp-start 8s steps(1,end) 0s 1 normal both}@-webkit-keyframes
-amp-start 8s steps(1,end) 0s 1 normal both
}
@-webkit-keyframes
-amp-start{from{visibility:hidden}to{visibility:visible}}@-moz-keyframes
-amp-start{from{visibility:hidden}to{visibility:visible}}@-ms-keyframes
-amp-start{from{visibility:hidden}to{visibility:visible}}@-o-keyframes
-amp-start{from{visibility:hidden}to{visibility:visible}}@keyframes
-amp-start{from{visibility:hidden}to{visibility:visible}}
</style>
<noscript>
<style amp-boilerplate>
body{
-webkit-animation:none;
-moz-animation:none;
-ms-animation:none;
animation:none}
</style>
</noscript>
<script async custom-element = "amp-pinterest"
src = "https://cdn.ampproject.org/v0/amp-pinterest-0.1.js">
</script>
<style amp-custom>
amp-facebook-like {
margin: 1rem
}
</style>
</head>
<body>
<h3>Google AMP - Amp Pinterest Widget</h3>
<amp-pinterest
width = 300
height = 450
data-do = "embedPin"
data-url = "https://in.pinterest.com/pin/856739529089490354/">
</amp-pinterest>
</body>
</html>
輸出
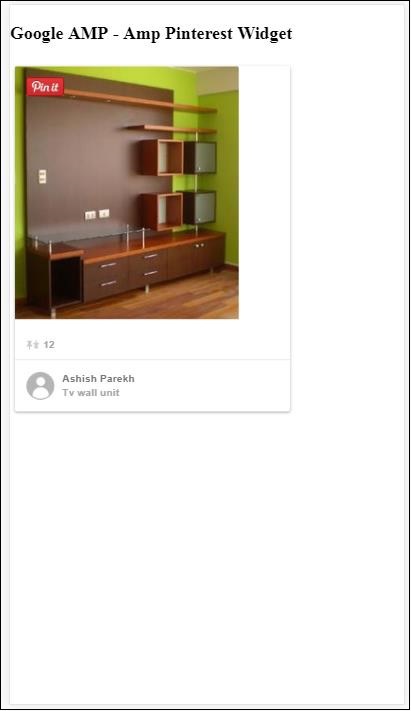
Pinterest 儲存按鈕
要顯示 Pinterest 的儲存按鈕,我們需要使用屬性 data-do="buttonPin"。這裡展示了一個 Pinterest 儲存按鈕的工作示例:
示例
<!doctype html>
<html amp lang = "en">
<head>
<meta charset = "utf-8">
<script async src = "https://cdn.ampproject.org/v0.js">
</script>
<title>Google AMP - Amp Pinterest Widget</title>
<link rel = "canonical" href =
"http://example.ampproject.org/article-metadata.html">
<meta name = "viewport" content = "width = device-width,
minimum-scale = 1,initial-scale = 1">
<style amp-boilerplate>
body{
-webkit-animation:
-amp-start 8s steps(1,end) 0s 1 normal both;-moz-animation:
-amp-start 8s steps(1,end) 0s 1 normal both;-ms-animation:
-amp-start 8s steps(1,end) 0s 1 normal both;animation:
-amp-start 8s steps(1,end) 0s 1 normal both
}
@-webkit-keyframes
-amp-start{from{visibility:hidden}to{visibility:visible}}@-moz-keyframes
-amp-start{from{visibility:hidden}to{visibility:visible}}@-ms-keyframes
-amp-start{from{visibility:hidden}to{visibility:visible}}@-o-keyframes
-amp-start{from{visibility:hidden}to{visibility:visible}}@keyframes
-amp-start{from{visibility:hidden}to{visibility:visible}}
</style>
<noscript>
<style amp-boilerplate>
body{
-webkit-animation:none;
-moz-animation:none;
-ms-animation:none;
animation:none}
</style>
</noscript>
<script async custom-element = "amp-pinterest"
src = "https://cdn.ampproject.org/v0/amp-pinterest-0.1.js">
</script>
<style amp-custom>
amp-facebook-like {
margin: 1rem
}
</style>
</head>
<body>
<h3>Google AMP - Amp Pinterest Save Button</h3>
<h3>TutorialsPoint - ReactJS</h3>
<amp-img
src = "images/reactjs.png"
width = "100"
height = "100"
alt = "blockchain image">
</amp-img>
<amp-pinterest
height = "18"
width = "56"
data-do = "buttonPin"
data-url = "https://tutorialspoint.tw/"
data-media = "https://tutorialspoint.tw/images/tp-logo-diamond.png"
data-description = "amp-pinterest in action">
</amp-pinterest>
</body>
</html>
輸出
Pinterest 關注按鈕
要顯示 Pinterest 的關注按鈕,我們需要使用屬性 data-do="buttonFollow"。這裡展示了一個 Pinterest 關注按鈕的工作示例:
示例
<!doctype html>
<html amp lang = "en">
<head>
<meta charset = "utf-8">
<script async src = "https://cdn.ampproject.org/v0.js">
</script>
<title>Google AMP - Amp Pinterest Widget</title>
<link rel = "canonical" href =
"http://example.ampproject.org/article-metadata.html">
<meta name = "viewport" content = "width = device-width,
minimum-scale = 1,initial-scale = 1">
<style amp-boilerplate>
body{
-webkit-animation:
-amp-start 8s steps(1,end) 0s 1 normal both;-moz-animation:
-amp-start 8s steps(1,end) 0s 1 normal both;-ms-animation:
-amp-start 8s steps(1,end) 0s 1 normal both;animation:
-amp-start 8s steps(1,end) 0s 1 normal both
}
@-webkit-keyframes
-amp-start{from{visibility:hidden}to{visibility:visible}}@-moz-keyframes
-amp-start{from{visibility:hidden}to{visibility:visible}}@-ms-keyframes
-amp-start{from{visibility:hidden}to{visibility:visible}}@-o-keyframes
-amp-start{from{visibility:hidden}to{visibility:visible}}@keyframes
-amp-start{from{visibility:hidden}to{visibility:visible}}
</style>
<noscript>
<style amp-boilerplate>
body{
-webkit-animation:none;
-moz-animation:none;
-ms-animation:none;
animation:none}
</style>
</noscript>
<script async custom-element = "amp-pinterest"
src = "https://cdn.ampproject.org/v0/amp-pinterest-0.1.js">
</script>
<style amp-custom>
amp-facebook-like {
margin: 1rem
}
</style>
</head>
<body>
<h3>Google AMP - Amp Pinterest Follow Button</h3>
<amp-pinterest
height = 50
width = 130
data-do = "buttonFollow"
data-href = "https://in.pinterest.com/wedgehairstyles/"
data-label = "wedgehairstyles">
</amp-pinterest>
</body>
</html>
輸出
Google AMP - Twitter
AMP 提供了一個使用 amp-twitter 顯示 Twitter 資訊流的元件。
要使用 amp-twitter,我們需要新增以下指令碼:
<script async custom-element = "amp-twitter" src = "https://cdn.ampproject.org/v0/amp-twitter-0.1.js"> </script>
Amp-twitter 標籤
<amp-twitter width = "375" height = "472" layout = "responsive" data-tweetid = "885634330868850689"> </amp-twitter>
這裡展示了一個顯示推文的工作示例。
示例
<!doctype html>
<html amp lang = "en">
<head>
<meta charset = "utf-8">
<script async src = "https://cdn.ampproject.org/v0.js">
</script>
<title>Google AMP - Amp Twitter</title>
<link rel = "canonical" href =
"http://example.ampproject.org/article-metadata.html">
<meta name = "viewport" content = "width = device-width,
minimum-scale = 1,initial-scale = 1">
<style amp-boilerplate>
body{
-webkit-animation:
-amp-start 8s steps(1,end) 0s 1 normal both;-moz-animation:
-amp-start 8s steps(1,end) 0s 1 normal both;-ms-animation:
-amp-start 8s steps(1,end) 0s 1 normal both;animation:
-amp-start 8s steps(1,end) 0s 1 normal both
}
@-webkit-keyframes
-amp-start{from{visibility:hidden}to{visibility:visible}}@-moz-keyframes
-amp-start{from{visibility:hidden}to{visibility:visible}}@-ms-keyframes
-amp-start{from{visibility:hidden}to{visibility:visible}}@-o-keyframes
-amp-start{from{visibility:hidden}to{visibility:visible}}@keyframes
-amp-start{from{visibility:hidden}to{visibility:visible}}
</style>
<noscript>
<style amp-boilerplate>
body{
-webkit-animation:none;
-moz-animation:none;
-ms-animation:none;
animation:none}
</style>
</noscript>
<script async custom-element = "amp-twitter" src =
"https://cdn.ampproject.org/v0/amp-twitter-0.1.js">
</script>
<style amp-custom>
amp-facebook-like {
margin: 1rem
}
</style>
</head>
<body>
<h3>Google AMP - Amp Twitter</h3>
<amp-twitter
width = "375"
height = "472"
layout = "responsive"
data-tweetid = "885634330868850689">
</amp-twitter>
</body>
</html>
輸出
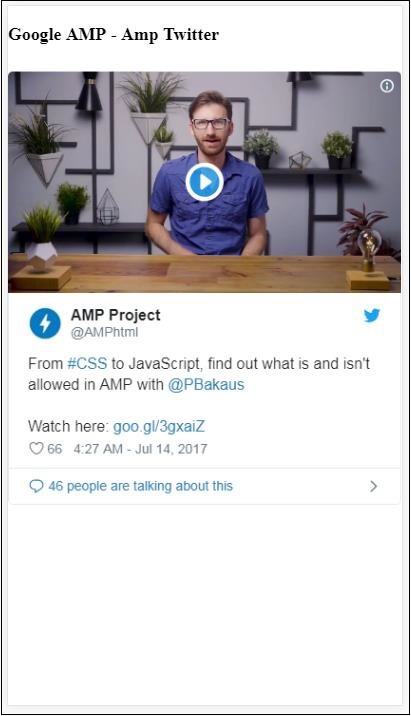
Google AMP - 媒體
在本節中,我們將討論如何顯示來自第三方合作伙伴(如 JW Player 和 YouTube)的影片和音訊。讓我們詳細瞭解以下內容:
Google AMP - JW Player
Google AMP - YouTube
Google AMP - 音訊
Google AMP - JW Player
如果您想使用 JW Player 在頁面上顯示影片,AMP 提供了 amp-jwplayer 來實現。
要使用 amp-jwplayer,請在您的頁面中包含以下指令碼:
<script async custom-element = "amp-jwplayer" src = " https://cdn.ampproject.org/v0/amp-jwplayer-0.1.js"> </script>
Amp-jwplayer 標籤
<amp-jwplayer data-playlist-id = "482jsTAr" data-player-id = "uoIbMPm3" layout = "responsive" width = "16" height = "9"> </amp-jwplayer>
下面顯示了在 AMP 頁面中使用 JW Player 的工作示例:
示例
<!doctype html>
<html amp lang = "en">
<head>
<meta charset = "utf-8">
<script async src = "https://cdn.ampproject.org/v0.js">
</script>
<title>Google AMP - Amp Jwplayer</title>
<link rel = "canonical" href =
"http://example.ampproject.org/article-metadata.html">
<meta name = "viewport" content = "width = device-width,
minimum-scale = 1,initial-scale = 1">
<style amp-boilerplate>
body{
-webkit-animation:
-amp-start 8s steps(1,end) 0s 1 normal both;-moz-animation:
-amp-start 8s steps(1,end) 0s 1 normal both;-ms-animation:
-amp-start 8s steps(1,end) 0s 1 normal both;animation:
-amp-start 8s steps(1,end) 0s 1 normal both
}
@-webkit-keyframes
-amp-start{from{visibility:hidden}to{visibility:visible}}@-moz-keyframes
-amp-start{from{visibility:hidden}to{visibility:visible}}@-ms-keyframes
-amp-start{from{visibility:hidden}to{visibility:visible}}@-o-keyframes
-amp-start{from{visibility:hidden}to{visibility:visible}}@keyframes
-amp-start{from{visibility:hidden}to{visibility:visible}}
</style>
<noscript>
<style amp-boilerplate>
body{
-webkit-animation:none;
-moz-animation:none;
-ms-animation:none;
animation:none}
</style>
</noscript>
<script async custom-element = "amp-jwplayer" src =
"https://cdn.ampproject.org/v0/amp-jwplayer-0.1.js">
</script>
</head>
<body>
<h3>Google AMP - Amp Jwplayer</h3>
<amp-jwplayer
data-playlist-id = "482jsTAr"
data-player-id = "uoIbMPm3"
layout = "responsive"
width = "16"
height = "9">
</amp-jwplayer>
</body>
</html>
輸出

對於 amp-jwplayer,有三個重要的屬性
data-player-id
data-media-id
data-playlist-id
要獲取播放器、媒體和播放列表的 ID,您需要在 JW Player 中登入,可以透過以下連結進行操作:https://dashboard.jwplayer.com/#/players
播放器 ID 將在 JW Player 播放器部分提供。媒體 ID 將在JW Player 內容部分提供,播放列表 ID 將在JW Player 播放列表部分.
JW Player 提供一個 8 位字母數字 ID,需要在 amp-jwplayer 中用於相應的屬性。
Google AMP - YouTube
如果您想在您的 AMP 頁面上顯示 YouTube 影片,AMP 提供了 amp-youtube 來在頁面上嵌入 YouTube 影片。
要使用 amp-youtube,您需要將以下指令碼新增到您的頁面中:
<script async custom-element = "amp-youtube" src = " https://cdn.ampproject.org/v0/amp-youtube-0.1.js"> </script>
Amp-youtube 標籤
<amp-youtube width = "480" height = "270" layout = "responsive" autoplay = "true" data-videoid = "fWZ6-p7mGK0"> </amp-youtube>
現在讓我們來看一個展示 amp-youtube 在頁面上工作原理的示例。
示例
<!doctype html>
<html amp lang = "en">
<head>
<meta charset = "utf-8">
<script async src = "https://cdn.ampproject.org/v0.js">
</script>
<title>Google AMP - Youtube</title>
<link rel = "canonical" href =
"http://example.ampproject.org/article-metadata.html">
<meta name = "viewport" content = "width = device-width,
minimum-scale = 1,initial-scale = 1">
<style amp-boilerplate>
body{
-webkit-animation:
-amp-start 8s steps(1,end) 0s 1 normal both;-moz-animation:
-amp-start 8s steps(1,end) 0s 1 normal both;-ms-animation:
-amp-start 8s steps(1,end) 0s 1 normal both;animation:
-amp-start 8s steps(1,end) 0s 1 normal both
}
@-webkit-keyframes
-amp-start{from{visibility:hidden}to{visibility:visible}}@-moz-keyframes
-amp-start{from{visibility:hidden}to{visibility:visible}}@-ms-keyframes
-amp-start{from{visibility:hidden}to{visibility:visible}}@-o-keyframes
-amp-start{from{visibility:hidden}to{visibility:visible}}@keyframes
-amp-start{from{visibility:hidden}to{visibility:visible}}
</style>
<noscript>
<style amp-boilerplate>
body{
-webkit-animation:none;
-moz-animation:none;
-ms-animation:none;
animation:none}
</style>
</noscript>
<script async custom-element = "amp-youtube" src =
"https://cdn.ampproject.org/v0/amp-youtube-0.1.js">
</script>
</head>
<body>
<h3>Google AMP - Youtube</h3>
<h3>Youtube Videos from Tutorialspoint</h3>
<amp-youtube
width = "480"
height = "270"
layout = "responsive"
autoplay = "true"
data-videoid = "fWZ6-p7mGK0">
</amp-youtube>
</body>
</html>
輸出

要顯示 YouTube 影片,您需要像下面這樣將 videoid 提供給 amp-youtube:
<amp-youtube width = "480" height = "270" layout = "responsive" autoplay = "true" data-videoid = "fWZ6-p7mGK0"> </amp-youtube>
如何獲取 data-videoid?
以任何 YouTube URL 為例,例如:https://www.youtube.com/watch?v=fWZ6-p7mGK0。高亮顯示的部分是需要在您的 amp-youtube 中使用的 ID。
我們使用了 autoplay 屬性並將其設定為 true。影片將在瀏覽器支援的情況下自動播放,並且影片將以靜音模式播放。您需要點選影片才能取消靜音。當影片超出視野時,它將暫停,並在回到視野時從暫停狀態恢復播放。如果使用者暫停影片並進出視野,影片將保持暫停狀態。靜音/取消靜音也是如此。
Google AMP - 音訊
AMP 提供了一個用於播放音訊的標籤,它是 HTML5 音訊標籤的替代品。要在 AMP 頁面中播放音訊,我們可以使用 amp-audio。
要使用 amp-audio,我們需要新增以下指令碼:
<script async custom-element = "amp-audio" src = " https://cdn.ampproject.org/v0/amp-audio-0.1.js"> </script>
Amp-audio 標籤
<amp-audio
width = "auto"
height = "50"
src = "audio/test.mp3">
<div fallback>
<p>HTML5 audio is not supported on your browser!</p>
</div>
</amp-audio>
因此,amp-audio 將使用 src 屬性,該屬性是一個指向音訊檔案的 HTTP 請求。我們使用 amp-audio 而不是標準的 HTML5 音訊的原因是,AMP 為需要 HTTP 請求的元素引入了延遲載入的概念。
它將根據優先順序開始載入請求。它將在即將到達視口之前或到達視口時載入。
這裡展示了在您的頁面中使用 amp-audio 的工作示例:
示例
<!doctype html>
<html amp lang = "en">
<head>
<meta charset = "utf-8">
<script async src = "https://cdn.ampproject.org/v0.js">
</script>
<title>Google AMP - Audio</title>
<link rel = "canonical" href =
"http://example.ampproject.org/article-metadata.html">
<meta name = "viewport" content = "width = device-width,
minimum-scale = 1,initial-scale = 1">
<style amp-boilerplate>
body{
-webkit-animation:
-amp-start 8s steps(1,end) 0s 1 normal both;-moz-animation:
-amp-start 8s steps(1,end) 0s 1 normal both;-ms-animation:
-amp-start 8s steps(1,end) 0s 1 normal both;animation:
-amp-start 8s steps(1,end) 0s 1 normal both
}
@-webkit-keyframes
-amp-start{from{visibility:hidden}to{visibility:visible}}@-moz-keyframes
-amp-start{from{visibility:hidden}to{visibility:visible}}@-ms-keyframes
-amp-start{from{visibility:hidden}to{visibility:visible}}@-o-keyframes
-amp-start{from{visibility:hidden}to{visibility:visible}}@keyframes
-amp-start{from{visibility:hidden}to{visibility:visible}}
</style>
<noscript>
<style amp-boilerplate>
body{
-webkit-animation:none;
-moz-animation:none;
-ms-animation:none;
animation:none}
</style>
</noscript>
<script async custom-element = "amp-audio"
src = "https://cdn.ampproject.org/v0/amp-audio-0.1.js">
</script>
</head>
<body>
<h3>Google AMP - Audio</h3>
<amp-audio
width = "auto"
height = "50"
src="audio/test.mp3">
<div fallback>
<p>HTML5 audio is not supported on your browser!</p>
</div>
</amp-audio>
</body>
</html>
輸出

這裡顯示了 amp-audio 的標籤,其中指定了 width、height、src 等屬性。我們還添加了一個帶有 fallback 屬性的 div,如果瀏覽器不支援 amp-audio,它將作為後備。
<amp-audio
width = "auto"
height = "50"
src = "audio/test.mp3">
<div fallback>
<p>HTML5 audio is not supported on your browser!</p>
</div>
</amp-audio>
請注意,預設情況下會向音訊標籤新增控制元件,可用於播放/暫停以及靜音/取消靜音音訊。您還可以獲取音訊標籤的下載選項,如下所示:
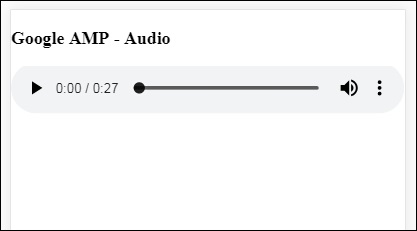
點選下載,您可以下載使用的媒體檔案。要停用下載,可以使用屬性 controlsList="nodownload",如下面的示例所示:
示例
<!doctype html>
<html amp lang = "en">
<head>
<meta charset = "utf-8">
<script async src = "https://cdn.ampproject.org/v0.js">
</script>
<title>Google AMP - Audio</title>
<link rel = "canonical" href =
"http://example.ampproject.org/article-metadata.html">
<meta name = "viewport" content = "width = device-width,
minimum-scale = 1,initial-scale = 1">
<style amp-boilerplate>
body{
-webkit-animation:
-amp-start 8s steps(1,end) 0s 1 normal both;-moz-animation:
-amp-start 8s steps(1,end) 0s 1 normal both;-ms-animation:
-amp-start 8s steps(1,end) 0s 1 normal both;animation:
-amp-start 8s steps(1,end) 0s 1 normal both
}
@-webkit-keyframes
-amp-start{from{visibility:hidden}to{visibility:visible}}@-moz-keyframes
-amp-start{from{visibility:hidden}to{visibility:visible}}@-ms-keyframes
-amp-start{from{visibility:hidden}to{visibility:visible}}@-o-keyframes
-amp-start{from{visibility:hidden}to{visibility:visible}}@keyframes
-amp-start{from{visibility:hidden}to{visibility:visible}}
</style>
<noscript>
<style amp-boilerplate>
body{
-webkit-animation:none;
-moz-animation:none;
-ms-animation:none;
animation:none}
</style>
</noscript>
<script async custom-element = "amp-audio"
src = "https://cdn.ampproject.org/v0/amp-audio-0.1.js">
</script>
</head>
<body>
<h3>Google AMP - Audio</h3>
<amp-audio
width = "auto"
height = "50"
src = "audio/test.mp3"
controlsList = "nodownload">
<div fallback>
<p>HTML5 audio is not supported on your browser!</p>
</div>
</amp-audio>
</body>
</html>
輸出

使用 controlsList="nodownload",右側的三個垂直點將消失。
還有一些屬性,如 preload 和 autoplay,如果將它們新增到音訊標籤中,則音訊檔案將在頁面載入時載入,並在瀏覽器支援的情況下自動播放。以下示例顯示了音訊自動播放。
示例
<!doctype html>
<html amp lang = "en">
<head>
<meta charset="utf-8">
<script async src = "https://cdn.ampproject.org/v0.js">
</script>
<title>Google AMP - Audio</title>
<link rel = "canonical" href =
"http://example.ampproject.org/article-metadata.html">
<meta name = "viewport" content = "width = device-width,
minimum-scale = 1,initial-scale = 1">
<style amp-boilerplate>
body{
-webkit-animation:
-amp-start 8s steps(1,end) 0s 1 normal both;-moz-animation:
-amp-start 8s steps(1,end) 0s 1 normal both;-ms-animation:
-amp-start 8s steps(1,end) 0s 1 normal both;animation:
-amp-start 8s steps(1,end) 0s 1 normal both
}
@-webkit-keyframes
-amp-start{from{visibility:hidden}to{visibility:visible}}@-moz-keyframes
-amp-start{from{visibility:hidden}to{visibility:visible}}@-ms-keyframes
-amp-start{from{visibility:hidden}to{visibility:visible}}@-o-keyframes
-amp-start{from{visibility:hidden}to{visibility:visible}}@keyframes
-amp-start{from{visibility:hidden}to{visibility:visible}}
</style>
<noscript>
<style amp-boilerplate>
body{
-webkit-animation:none;
-moz-animation:none;
-ms-animation:none;
animation:none}
</style>
</noscript>
<script async custom-element = "amp-audio"
src = "https://cdn.ampproject.org/v0/amp-audio-0.1.js">
</script>
</head>
<body>
<h3>Google AMP - Audio</h3>
<amp-audio
width = "auto"
height = "50"
src = "audio/test.mp3" preload autoplay>
<div fallback>
<p>HTML5 audio is not supported on your browser!</p>
</div>
</amp-audio>
</body>
</html>
輸出

如果存在屬性 loop,則音訊播放完成後將再次播放。
示例
<amp-audio
width = "auto"
height = "50"
src = "audio/test.mp3" loop>
<div fallback>
<p>HTML5 audio is not supported on your browser!</p>
</div>
</amp-audio>
Google AMP - HTML 頁面轉換為 AMP 頁面
在本節中,我們將瞭解如何將普通的 HTML 頁面轉換為 AMP 頁面。我們還將驗證 AMP 頁面,並在最後檢查輸出。
首先,讓我們使用以下所示的普通 HTML 頁面:
test.html
<!DOCTYPE html>
<html>
<head>
<meta charset = "utf-8">
<title>Tutorials</title>
<link href = "style.css" rel = "stylesheet" />
<meta name = "viewport" content = "width = device-width, initial-scale = 1.0">
<script src = "js/jquery.js"></script>
</head>
<body>
<header role = "banner">
<h2>Tutorials</h2>
</header>
<h2>Some Important Tutorials List</h2>
<article>
<section>
<img src = "images/tut1.png" width="90%" height = "90%"/>
</section>
<section>
<img src = "images/tut2.png" width="90%" height = "90%"/>
</section>
<section>
<img src = "images/tut3.png" width="90%" height = "90%"/>
</section>
<section>
<img src = "images/tut4.png" width="90%" height = "90%"/>
</section>
</article>
<footer>
<p>For More tutorials Visit <a href =
"https://tutorialspoint.tw/">Tutorials Point</a></p>
</footer>
</body>
</html>
請注意,我們正在其中使用 style.css,CSS 檔案的詳細資訊如下所示:
h1 {color: blue;text-align: center;}
h2 {text-align: center;}
img {
border: 1px solid #ddd;
border-radius: 4px;
padding: 5px;
}
article {
text-align: center;
}
header{
width: 100%;
height: 50px;
margin: 5px auto;
border: 1px solid #000000;
text-align: center;
background-color: #ccc;
}
footer {
width: 100%;
height: 35px;
margin: 5px auto;
border: 1px solid #000000;
text-align: center;
background-color: yellow;
}
請注意,我們還在上面列出的 .html 中使用了 jquery.js 檔案。
現在,在本地主機 test.html 並檢視以下連結中顯示的輸出:
https://:8080/googleamp/test.html

現在,讓我們逐步將上述 test.html 檔案更改為 test_amp.html 檔案。
首先,我們必須將 test.html 儲存為 test_amp.html 並按照以下步驟操作。
步驟 1 - 在 head 部分新增 AMP 庫,如下所示:
<script async src = "https://cdn.ampproject.org/v0.js"> </script>
例如,新增到 test_amp.html 後,它將如下所示:
<head>
<meta charset = "utf-8">
<title>Tutorials</title>
<script async src = "https://cdn.ampproject.org/v0.js">
</script>
<link href = "style.css" rel = "stylesheet" />
<meta name = "viewport" content = "width = device-width, initial-scale = 1.0">
<script src = "js/jquery.js"></script>
</head>
現在在瀏覽器中執行 test_amp.html 頁面並開啟瀏覽器控制檯。它將顯示如下所示的控制檯訊息:

要了解您的 HTML 檔案是否為有效的 AMP,請在 HTML 頁面 URL 末尾新增 #development=1,如下所示:
https://:8080/googleamp/test_amp.html#development=1
在瀏覽器中訪問上述 URL,並在 Google Chrome 控制檯中檢視。它將列出 AMP 認為從 AMP 規範角度來看無效的錯誤。
我們為 test_amp.html 獲取的錯誤如下所示:
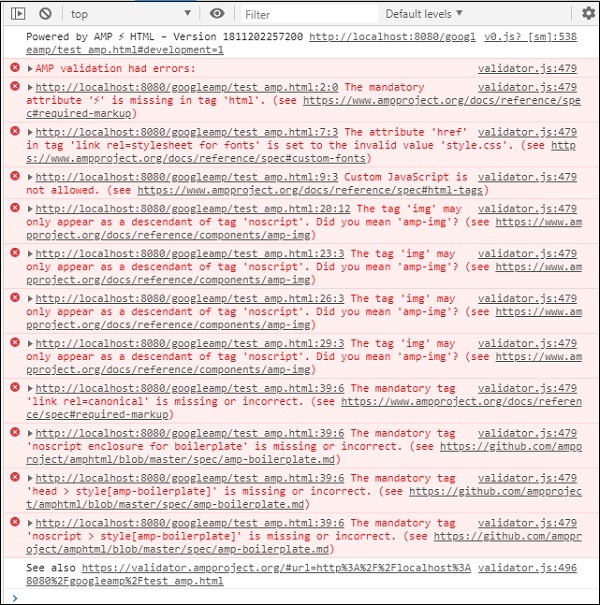
現在讓我們一個一個地修復它們,直到我們獲得 AMP 成功訊息。
步驟 2 - 我們可以在控制檯中看到以下錯誤:

我們可以透過為 HTML 標籤新增 ⚡ 或 amp 來修復它。我們將向 HTML 標籤新增 amp,如下所示:
<html amp>
步驟 3 - 請確保在 head 標籤中具有包含字元集和 name="viewport" 的元標籤,如下所示:
<head> <meta charset = "utf-8"> <meta name = "viewport" content = "width = device-width, initial-scale = 1.0"> </head>
步驟 4 - 我們遇到的下一個錯誤如下所示:

它表示 link rel=stylesheet 中的 href,即以下連結引發了錯誤。這是因為 AMP 不允許在頁面內部使用帶有 href 的 link 來引用外部樣式表。
<link href = "style.css" rel = "stylesheet" />
We can add the all the css in style.css as follows −
<style amp-custom> /*All styles from style.css please add here */ </style>
因此,style.css 中存在的 CSS 資料必須新增到帶有 amp-custom 屬性的 style 中。
<style amp-custom>
h1 {color: blue;text-align: center;}
h2 {text-align: center;}
img {
border: 1px solid #ddd;
border-radius: 4px;
padding: 5px;
}
article {
text-align: center;
}
header{
width: 100%;
height: 50px;
margin: 5px auto;
border: 1px solid #000000;
text-align: center;
background-color: #ccc;
}
footer {
width: 100%;
height: 35px;
margin: 5px auto;
border: 1px solid #000000;
text-align: center;
background-color: yellow;
}
</style>
將 style 標籤新增到您的 AMP 頁面中。現在讓我們在瀏覽器中使用上述 style 標籤測試它。到目前為止,我們對 test_amp.html 所做的更改如下所示:
<!DOCTYPE html>
<html amp>
<head>
<meta charset = "utf-8">
<title>Tutorials</title>
<script async src = "https://cdn.ampproject.org/v0.js">
</script>
<meta name = "viewport" content = "width = device-width, initial-scale = 1.0">
<script src = "js/jquery.js"></script>
<style amp-custom>
h1 {color: blue;text-align: center;}
h2 {text-align: center;}
img {
border: 1px solid #ddd;
border-radius: 4px;
padding: 5px;
}
article {
text-align: center;
}
header{
width: 100%;
height: 50px;
margin: 5px auto;
border: 1px solid #000000;
text-align: center;
background-color: #ccc;
}
footer {
width: 100%;
height: 35px;
margin: 5px auto;
border: 1px solid #000000;
text-align: center;
background-color: yellow;
}
</style>
</head>
<body>
<header role = "banner">
<h2>Tutorials</h2>
</header>
<h2>Some Important Tutorials List</h2>
<article>
<section>
<img src = "images/tut1.png" width = "90%" height = "90%"/>
</section>
<section>
<img src = "images/tut2.png" width = "90%" height = "90%"/>
</section>
<section>
<img src = "images/tut3.png" width = "90%" height = "90%"/>
</section>
<section>
<img src = "images/tut4.png" width="90%" height = "90%"/>
</section>
</article>
<footer>
<p>For More tutorials Visit <a href =
"https://tutorialspoint.tw/">Tutorials Point</a></p>
</footer>
</body>
</html>
讓我們檢視上述頁面在控制檯中的輸出和錯誤。請檢視以下螢幕截圖:

控制檯中顯示的錯誤如下:

現在,您可以看到對於某些 AMP 錯誤,樣式已被移除。現在讓我們修復其餘的錯誤。
步驟 5 - 我們在列表中看到的下一個錯誤如下:

我們添加了呼叫 jquery 檔案的 script 標籤。請注意,AMP 頁面不允許在頁面中使用任何自定義 JavaScript。我們將不得不將其刪除,並確保使用可用的 AMP 元件。
例如,如果需要任何動畫,我們有 amp-animation;如果想要將 Google Analytics 程式碼新增到頁面中,我們有 amp-analytics。同樣,我們有 amp-ad 元件來顯示要顯示在頁面上的廣告。還有一個 amp-iframe 元件,我們可以將 src 指向同一來源並在 amp-iframe 中呼叫任何所需的自定義 JavaScript。
現在,讓我們從頁面中刪除 script 標籤。
步驟 6 - 顯示的下一個錯誤如下:

上述錯誤指向我們在頁面上使用的 image 標籤。AMP 不允許在頁面內部使用 <img src="" /> 標籤。請注意,我們需要改用 amp-img 標籤。
讓我們將 <img> 標籤替換為 <amp-img>,如下所示:
<section>
<amp-img alt = "Beautiful Flower"
src = "images/tut1.png"
width = "500"
height = "160"
layout = "responsive">
</amp-img>
</section>
<section>
<amp-img alt = "Beautiful Flower"
src = "images/tut2.png"
width = "500"
height = "160"
layout = "responsive">
</amp-img>
</section>
<section>
<amp-img alt = "Beautiful Flower"
src = "images/tut3.png"
width = "500"
height = "160"
layout = "responsive">
</amp-img>
</section>
<section>
<amp-img alt = "Beautiful Flower"
src = "images/tut4.png"
width = "500"
height = "160"
layout = "responsive">
</amp-img>
</section>
我們已將所有 <img> 標籤替換為 <amp-img>,如上所示。現在,讓我們在瀏覽器中執行該頁面以檢視輸出和錯誤:
錯誤

觀察到錯誤現在越來越少了。
步驟 7 - 控制檯中顯示的下一個錯誤如下:

我們需要在頭部區域新增 link rel=canonical 標籤。請注意,這是一個必填標籤,應始終按以下方式新增到頭部中:
<link rel = "canonical" href = "http://example.ampproject.org/article-metadata.html">
步驟 8 - 控制檯顯示的下一個錯誤是缺少noscript 標籤,如下所示:

我們需要在頭部區域新增<noscript>標籤,並將其包含在 amp-boilerplate 中,如下所示:
<noscript>
<style amp-boilerplate>
body{
-webkit-animation:none;
-moz-animation:none;
-ms-animation:none;
animation:none}
</style>
</noscript>
步驟 9 - 下一個顯示的錯誤如下所示:

另一個必填標籤是帶有 amp-boilerplate 的 style 標籤,並且必須放在 noscript 標籤之前。帶有 amp-boilerplate 的 style 標籤如下所示:
<style amp-boilerplate>
body{
-webkit-animation:
-amp-start 8s steps(1,end) 0s 1 normal both;-moz-animation:
-amp-start 8s steps(1,end) 0s 1 normal both;-ms-animation:
-amp-start 8s steps(1,end) 0s 1 normal both;animation:
-amp-start 8s steps(1,end) 0s 1 normal both
}
@-webkit-keyframes
-amp-start{from{visibility:hidden}to{visibility:visible}}@-moz-keyframes
-amp-start{from{visibility:hidden}to{visibility:visible}}@-ms-keyframes
-amp-start{from{visibility:hidden}to{visibility:visible}}@-o-keyframes
-amp-start{from{visibility:hidden}to{visibility:visible}}@keyframes
-amp-start{from{visibility:hidden}to{visibility:visible}}
</style>
將上述 style 標籤新增到 test_amp.html 頁面中。
完成後,在瀏覽器中測試頁面以檢視輸出和控制檯:
控制檯詳細資訊如下所示:

因此,我們最終解決了所有錯誤,現在頁面 test_amp.html 是一個有效的 amp 頁面。
需要新增一些樣式,因為頁首和頁尾被截斷了,我們可以在我們新增的自定義樣式中更新它。因此,我們從頁首和頁尾中刪除了 width:100%。
這是最終輸出:
最終的 test_amp.html 檔案
<!DOCTYPE html>
<html amp>
<head>
<meta charset = "utf-8">
<title>Tutorials</title>
<link rel = "canonical" href=
"http://example.ampproject.org/article-metadata.html">
<script async src = "https://cdn.ampproject.org/v0.js">
</script>
<meta name = "viewport" content = "width = device-width,
initial-scale = 1.0">
<style amp-boilerplate>
body{
-webkit-animation:
-amp-start 8s steps(1,end) 0s 1 normal both;-moz-animation:
-amp-start 8s steps(1,end) 0s 1 normal both;-ms-animation:
-amp-start 8s steps(1,end) 0s 1 normal both;animation:
-amp-start 8s steps(1,end) 0s 1 normal both
}
@-webkit-keyframes
-amp-start{from{visibility:hidden}to{visibility:visible}}@-moz-keyframes
-amp-start{from{visibility:hidden}to{visibility:visible}}@-ms-keyframes
-amp-start{from{visibility:hidden}to{visibility:visible}}@-o-keyframes
-amp-start{from{visibility:hidden}to{visibility:visible}}@keyframes
-amp-start{from{visibility:hidden}to{visibility:visible}}
</style>
<noscript>
<style amp-boilerplate>
body{
-webkit-animation:none;
-moz-animation:none;
-ms-animation:none;
animation:none}
</style>
</noscript>
<style amp-custom>
h1 {color: blue;text-align: center;}
h2 {text-align: center;}
amp-img {
border: 1px solid #ddd;
border-radius: 4px;
padding: 5px;
}
article {
text-align: center;
}
header{
height: 50px;
margin: 5px auto;
border: 1px solid #000000;
text-align: center;
background-color: #ccc;
}
footer {
height: 35px;
margin: 5px auto;
border: 1px solid #000000;
text-align: center;
background-color: yellow;
}
</style>
</head>
<body>
<header role = "banner">
<h2>Tutorials</h2>
</header>
<h2>Some Important Tutorials List</h2>
<article>
<section>
<amp-img
alt = "Beautiful Flower"
src = "images/tut1.png"
width = "500"
height = "160"
layout = "responsive">
</amp-img>
</section>
<section>
<amp-img
alt = "Beautiful Flower"
src = "images/tut2.png"
width = "500"
height = "160"
layout = "responsive">
</amp-img>
</section>
<section>
<amp-img
alt = "Beautiful Flower"
src = "images/tut3.png"
width = "500"
height = "160"
layout = "responsive">
</amp-img>
</section>
<section>
<amp-img
alt = "Beautiful Flower"
src = "images/tut4.png"
width = "500"
height = "160"
layout = "responsive">
</amp-img>
</section>
</article>
<footer>
<p>For More tutorials Visit <a href =
"https://tutorialspoint.tw/">
Tutorials Point</a>
</p>
</footer>
</body>
</html>
因此,我們終於完成了將普通 html 檔案轉換為 amp 的過程。
Google AMP - 基本語法
在本章中,我們將討論開始使用 Google AMP 頁面的一些基本要求。
AMP 頁面示例
amp 頁面的基本示例如下所示:
<!doctype html>
<html amp>
<head>
<meta charset = "utf-8">
<title>Amp Sample Page</title>
<link rel = "canonical" href = "./regular-html-version.html">
<meta name = "viewport" content = "width = device-width,
minimum-scale = 1,initial-scale = 1">
<style amp-custom>
h1 {color: red}
</style>
<style amp-boilerplate>
body{
-webkit-animation:
-amp-start 8s steps(1,end) 0s 1 normal both;-moz-animation:
-amp-start 8s steps(1,end) 0s 1 normal both;-ms-animation:
-amp-start 8s steps(1,end) 0s 1 normal both;animation:
-amp-start 8s steps(1,end) 0s 1 normal both
}
@-webkit-keyframes
-amp-start{from{visibility:hidden}to{visibility:visible}}@-moz-keyframes
-amp-start{from{visibility:hidden}to{visibility:visible}}@-ms-keyframes
-amp-start{from{visibility:hidden}to{visibility:visible}}@-o-keyframes
-amp-start{from{visibility:hidden}to{visibility:visible}}@keyframes
-amp-start{from{visibility:hidden}to{visibility:visible}}
</style>
<noscript>
<style amp-boilerplate>
body{
-webkit-animation:none;
-moz-animation:none;
-ms-animation:none;
animation:none}
</style>
</noscript>
<script async src = "https://cdn.ampproject.org/v0.js">
</script>
</head>
<body>
<h1>Amp Sample Page</h1>
<p>
<amp-img
src = "images/christmas1.jpg"
width = "300"
height = "300"
layout = "responsive">
</amp-img>
</p>
</body>
</html>
必填標籤
amp 頁面中需要包含一些必填標籤。本節將詳細討論它們:
我們必須確保在 html 標籤中新增amp 或⚡,如下所示
<html amp> OR <html ⚡>
我們應該將<head>和<body>標籤新增到 html 頁面中。
如果缺少任何必填元標籤,則 amp 驗證可能會失敗。一些需要新增到頁面頭部區域的必填元標籤如下所示:
<meta charset="utf-8">
<meta name = "viewport"
content = "width = device-width,
minimum-scale = 1,
initial-scale = 1">
rel="canonical" 的連結需要新增到 head 標籤內
<link rel = "canonical" href = "./regular-html-version.html">
帶有 amp-boilerplate 的 style 標籤:
<style amp-boilerplate>
body{
-webkit-animation:
-amp-start 8s steps(1,end) 0s 1 normal both;-moz-animation:
-amp-start 8s steps(1,end) 0s 1 normal both;-ms-animation:
-amp-start 8s steps(1,end) 0s 1 normal both;animation:
-amp-start 8s steps(1,end) 0s 1 normal both
}
@-webkit-keyframes
-amp-start{from{visibility:hidden}to{visibility:visible}}@-moz-keyframes
-amp-start{from{visibility:hidden}to{visibility:visible}}@-ms-keyframes
-amp-start{from{visibility:hidden}to{visibility:visible}}@-o-keyframes
-amp-start{from{visibility:hidden}to{visibility:visible}}@keyframes
-amp-start{from{visibility:hidden}to{visibility:visible}}
</style>
帶有 amp-boilerplate 的 noscript 標籤:
<noscript>
<style amp-boilerplate>
body{
-webkit-animation:none;
-moz-animation:none;
-ms-animation:none;
animation:none}
</style>
</noscript>
添加了 async 屬性的 amp 指令碼標籤,如下所示。這是所有標籤中最重要的一個:
<script async src = "https://cdn.ampproject.org/v0.js"> </script>
如果您想向頁面新增自定義 css,則應使用此標籤。請在此處注意,我們不能在 amp 頁面中呼叫外部樣式表。要新增自定義 css,所有 css 都必須放在這裡:
<style amp-custom>
   //all your styles here
</style>
您可以在瀏覽器中使用頁面 url 末尾的 #developement=1 來驗證上述頁面。
現在,讓我們在瀏覽器中測試它。我已將頁面本地託管並將其儲存為 amppage.html。
要測試的上述 url 為
https:///googleamp/amppage.html#development=1
示例
<!doctype html>
<html amp>
<head>
<meta charset = "utf-8">
<title>Amp Sample Page</title>
<link rel = "canonical" href = "./regular-html-version.html">
<meta name = "viewport" content = "width=device-width,
minimum-scale = 1,initial-scale = 1">
<style amp-custom>
h1 {color: red}
</style>
<style amp-boilerplate>
body{
-webkit-animation:
-amp-start 8s steps(1,end) 0s 1 normal both;-moz-animation:
-amp-start 8s steps(1,end) 0s 1 normal both;-ms-animation:
-amp-start 8s steps(1,end) 0s 1 normal both;animation:
-amp-start 8s steps(1,end) 0s 1 normal both
}
@-webkit-keyframes
-amp-start{from{visibility:hidden}to{visibility:visible}}@-moz-keyframes
-amp-start{from{visibility:hidden}to{visibility:visible}}@-ms-keyframes
-amp-start{from{visibility:hidden}to{visibility:visible}}@-o-keyframes
-amp-start{from{visibility:hidden}to{visibility:visible}}@keyframes
-amp-start{from{visibility:hidden}to{visibility:visible}}
</style>
<noscript>
<style amp-boilerplate>
body{
-webkit-animation:none;
-moz-animation:none;
-ms-animation:none;
animation:none}
</style>
</noscript>
<script async src = "https://cdn.ampproject.org/v0.js">
</script>
</head>
<body>
<h1>Amp Sample Page</h1>
<p>
<amp-img
src = "images/christmas1.jpg"
width = "300"
height = "250"
layout = "responsive">
</amp-img>
</p>
</body>
</html>
輸出
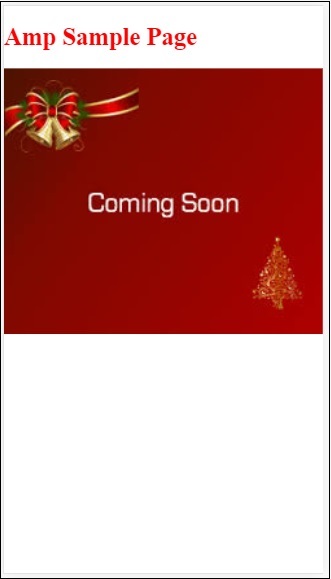
您可以在開發者控制檯中看到 amp 驗證狀態,如下所示:

由於我們添加了所有有效的 amp 頁面所需的必填標籤,因此它顯示 AMP 驗證成功。
Google AMP - 驗證
Google AMP 是一種使網頁在裝置上載入更快的速度的方法。要使用 amp,我們可以利用 HTML5、CSS 和 amp 元件。
Google Amp 提供了許多驗證 amp 頁面的方法。我們將在這章中討論的一些重要方法是:
使用 #development=1
使用 Amp 驗證器
使用命令列
讓我們詳細討論每一個。
使用 #development =1
一旦您知道您的頁面已準備好進行驗證,只需將 #development=1 新增到頁面 url 的末尾並在 Chrome 開發者工具中進行測試。
您可以在 html 頁面 url 的末尾新增#development=1,如下例所示:
https://:8080/googleamp/test_amp.html#development=1
在瀏覽器和 Google Chrome 控制檯中訪問上述 url。它將列出 amp 認為從 amp 規範角度來看無效的錯誤。
以下是我們為 test_amp.html 獲取的錯誤。

您可以修復顯示的錯誤,一旦所有錯誤都得到修復,它將顯示如下:
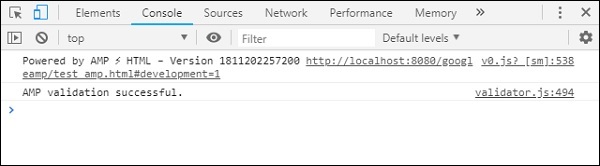
使用 Amp 驗證器
Amp 有一個驗證器工具,我們可以在其中輸入 HTML 內容,它會將狀態顯示為 PASS 或 ERROR,並在頁面上顯示錯誤。連結為:https://validator.ampproject.org/
amp 驗證器工具的顯示如下所示:
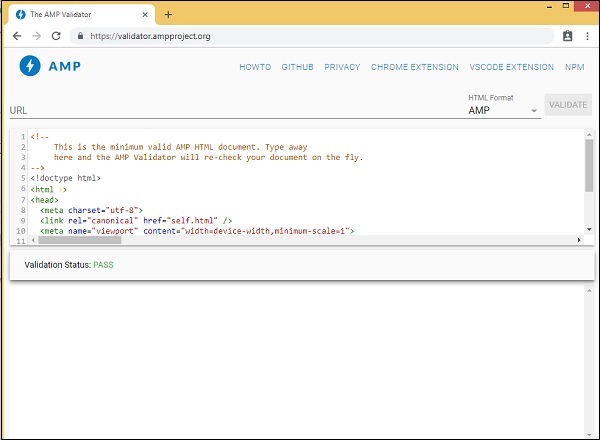
頁面內容中錯誤的示例如下所示:

使用命令列
您可以使用以下命令安裝 npm 包:
npm install -g amphtml-validator

我們建立了一個資料夾 amptest/ 並將 amp_test.html 檔案儲存在該資料夾中。讓我們在命令列中使用以下命令驗證 amp_test.html。
amphtml-validator youramppage.html
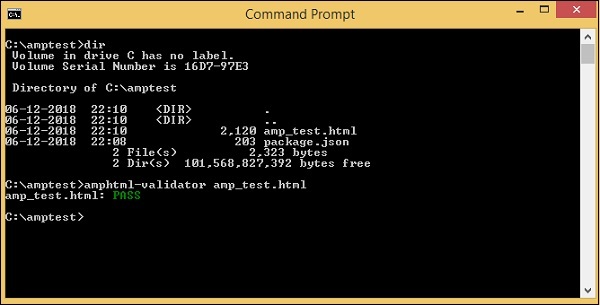
讓我們從頁面中刪除一些標籤,看看它是否顯示錯誤。

顯示的錯誤可以修復,直到我們獲得 PASS 狀態。
Google AMP - 快取
Google amp 提供快取功能,這是一種基於代理的內容交付網路,用於提供純 amp 頁面。Amp 快取預設情況下對所有有效的 amp 頁面可用。與非 amp 頁面相比,它有助於更快地呈現頁面。
目前,有 2 個 amp 快取提供商Google AMP Cache 和Cloudflare AMP Cache。如前所述,amp 快取對所有有效的 amp 頁面都可用。如果使用者不想使用 amp 快取功能,則需要使 amp 頁面無效。無效的 amp 頁面不應用 amp 快取。
一旦 Google 搜尋抓取並找到 html 內容的 amp (),它就會考慮進行快取。
在本節中,我們將討論 Google amp 快取 URL 的各個元件。
子域名
Google AMP 會向請求的 url 新增一個子域名。amp 快取子域名 url 遵循一些規則。它們如下所示:
子域名快取 URL 的規則
將 AMP 文件域名從 IDN(Punycode)轉換為 UTF-8。
url 中的破折號 (-) 將替換為兩個破折號 (--)。
url 中的點 (.) 將替換為破折號 (-)。
轉換回 IDN(Punycode)。
例如,pub.mypage 將替換為pub-mypage.cdn.ampproject.com。這裡 cdn.ampproject.com 是 Google amp 新增的子域名。現在快取的 url 為 Pub-mypage.cdn.ampproject.com。
內容型別
可用的內容型別有:c 表示 AMP HTML 文件,i 表示影像,r 表示資源(例如字型)。如果內容型別與指定的型別不匹配,您將收到 404 錯誤。
可選的“s”
如果存在 s,則內容將從 origin https:// 獲取;否則,將從 http:// 獲取。
從 https 和 http 快取影像的請求示例如下所示:
示例
https://pub-mypage-com.cdn.ampproject.org/i/s/examples/images/testimage.png
因此,在上述示例中,url 中包含 i 表示影像,s 表示 https -
示例
http://pub-mypage-com.cdn.ampproject.org/i/examples/images/testimage.png
因此,在上述示例中,url 中包含 i 表示影像,並且沒有 s,因此 url 將從 http 獲取。
對於字型快取檔案,url 將如下所示:
示例
https://pub-mypage-com.cdn.ampproject.org/r/s/examples/themes/lemon/fonts/Genericons.ttf
內容型別r用於字型等資源,s用於安全 url。
對於 html 文件,url 如下所示:
示例
https://pub-mypage-com.cdn.ampproject.org/c/s/trends/main.html
它在 url 中有 c 表示 HTML 文件,後跟 s 表示 https://
Google AMP 快取使用 http 標頭(如Max-age)來確定內容快取是否已過時或最新,並自動傳送最新請求並更新內容,以便下一個使用者獲得更新的內容。
Google AMP - 自定義 JavaScript
在前面的章節中,我們學習了許多 amp 元件。我們還看到,對於每個元件的工作,我們需要新增一個 javascript 檔案。
例如,對於 amp-iframe,新增的指令碼如下所示:
<script async custom-element="amp-iframe" src="https://cdn.ampproject.org/v0/amp-iframe-0.1.js"> </script>
我們在指令碼標籤中添加了async。這是 amp 的標準,因為它們非同步載入所有 javascript 檔案。添加了一個custom-element屬性,其中包含它用於的元件的名稱。
要使用任何 amp 元件,如果它不是核心 amp javascript 檔案的一部分,則必須按上述方式新增指令碼。
我們大多習慣於在頁面中編寫大量 javascript 程式碼,並使用 script 標籤包含 javascript 檔案。
我們如何在 amp 中做到這一點?因此,對於 amp,不允許編寫任何指令碼程式碼或從外部載入 script 標籤。
Amp 有自己的元件來處理應該由新增到頁面上的附加指令碼完成的任務。這主要是出於效能原因,以便更快地載入頁面內容,並且不會讓 javascript 延遲渲染或對 DOM 進行任何更改。
這是 AMP 根據其官方網站為指令碼標籤提供的規範:
除非型別為 application/ld+json,否則禁止使用。(根據需要可以新增其他非可執行值。)例外情況是載入 AMP 執行時的必填指令碼標籤和載入擴充套件元件的指令碼標籤。
一個工作示例,我們可以在 amp 頁面中使用application/ld+json,如下所示。請注意,我們正在使用型別為“application/ld+json”的 script 標籤,以便 amp-analytics 元件觸發跟蹤器。
類似地,我們可以在其他 amp 元件上根據需要使用型別為“application/ld+json”的 script 標籤。
示例
<!doctype html>
<html amp>
<head>
<meta charset = "utf-8">
<title>amp-analytics</title>
<script async src = "https://cdn.ampproject.org/v0.js">
</script>
<script async custom-element = "amp-analytics"
src = "https://cdn.ampproject.org/v0/amp-analytics-0.1.js">
</script>
<link rel = "canonical" href = "ampanalytics.html">
<meta name = "viewport" content = "width=device-width,
minimum-scale = 1,initial-scale = 1">
<style amp-boilerplate>
body{
-webkit-animation:
-amp-start 8s steps(1,end) 0s 1 normal both;-moz-animation:
-amp-start 8s steps(1,end) 0s 1 normal both;-ms-animation:
-amp-start 8s steps(1,end) 0s 1 normal both;animation:
-amp-start 8s steps(1,end) 0s 1 normal both
}
@-webkit-keyframes
-amp-start{from{visibility:hidden}to{visibility:visible}}@-moz-keyframes
-amp-start{from{visibility:hidden}to{visibility:visible}}@-ms-keyframes
-amp-start{from{visibility:hidden}to{visibility:visible}}@-o-keyframes
-amp-start{from{visibility:hidden}to{visibility:visible}}@keyframes
-amp-start{from{visibility:hidden}to{visibility:visible}}
</style>
<noscript>
<style amp-boilerplate>
body{
-webkit-animation:none;
-moz-animation:none;
-ms-animation:none;
animation:none}
</style>
</noscript>
</head>
<body>
<h1>Google Amp - Analytics</h1>
<amp-analytics>
<script type = "application/json">
{
"requests": {
"event": "https://:8080/googleamp/tracking.php?
user=test&account=localhost&event=${eventId}"
},
"triggers": {
"trackPageview": {
"on": "visible",
"request": "event",
"vars": {
"eventId": "pageview"
}
}
}
}
</script>
</amp-analytics>
</body>
</html>
當在瀏覽器中訪問頁面時,將為頁面瀏覽觸發跟蹤器。它可以在 Google 網路選項卡中看到,如下所示。
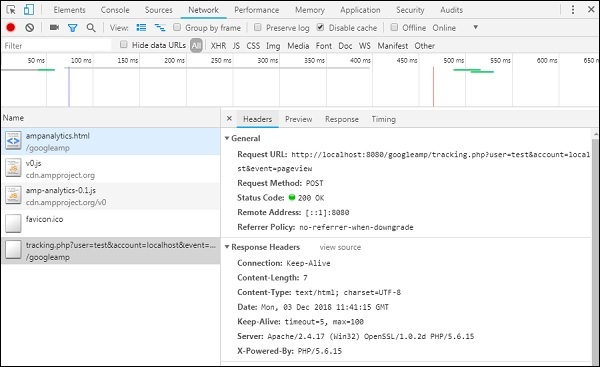
Google AMP - CORS
在本章中,我們將嘗試瞭解 AMP 中的 CORS。在我們深入瞭解細節之前,讓我們先了解 CORS 的基礎知識以及它如何發揮作用。
什麼是 CORS?
CORS 代表跨源資源共享。CORS 是一種需要額外 HTTP 標頭資料來告訴瀏覽器,由在例如xyz.com來源執行的網頁發出的 url 請求是否應該被授予許可權以訪問請求 url 的資料。我們從網頁發出許多 http 請求,為此我們需要部署 CORS 以獲取所需的資料。
當我們向與主機不同的伺服器發出 http 請求時,我們將其稱為跨源請求,這意味著域名、協議和埠與主機來源不同。在這種情況下,請求的 url 應允許訪問資料;這意味著發出的 GET/PUT/POST/DELETE 請求。
此額外資料在發出的 http 請求的瀏覽器標頭中可用。此許可權步驟主要是出於安全原因,以便任何網頁都不能在沒有必要許可權的情況下從另一個域名發出或獲取資料。
瀏覽器頭部應該包含一些詳細資訊,例如Access-Control-Allow-Origin,其值可以如下所示:
Access-Control-Allow-Origin : *
在請求 URL 頭部中將值設定為 * 表示告訴瀏覽器允許任何來源請求資料以訪問資源。
Access-Control-Allow-Origin: https://www.example.com
將值設定為以上內容,表示瀏覽器只允許來自網頁 www.example.com 的請求獲取請求 URL 的資料。
CORS 的伺服器配置必須考慮到共享資料的用途。根據用途,需要在伺服器端設定必要的頭部。
現在我們知道了什麼是 CORS,讓我們更進一步。在 AMP 的情況下,我們有像 amp-form、amp-list 這樣的元件,它們使用 HTTP 端點動態載入資料。
在 AMP 頁面中,即使 HTTP 請求來自同一來源,也需要設定 CORS。這裡會出現一些問題——即使請求和響應來自同一來源,為什麼也需要啟用 CORS?從技術上講,在這種情況下我們不需要啟用 CORS,因為我們正在請求和顯示同一域名、來源等的資料。
AMP 有一個稱為快取的功能,它可以加快訪問頁面使用者的獲取資料速度。如果使用者之前訪問過該頁面,資料將快取在 Google CDN 上,下一個使用者將從快取中獲取服務資料。
資料儲存在 AMP 端,現在它擁有不同的域名。當用戶點選任何按鈕以獲取最新資料時,AMP 快取 URL 會與網頁域名進行比較以獲取新資料。現在,如果 CORS 未啟用,因為它處理 AMP 快取 URL 和網頁域名,則請求將無效,並且由於 CORS 許可權而失敗。這就是為什麼即使在 AMP 頁面中對於同一來源也需要啟用 CORS 的原因。
此處顯示了一個啟用 CORS 的表單工作示例:
<!doctype html>
<html amp lang = "en">
<head>
<meta charset = "utf-8">
<script async src = "https://cdn.ampproject.org/v0.js">
</script>
<title>Google AMP - Form</title>
<link rel = "canonical" href = "ampform.html">
<meta name = "viewport" content = "width = device-width,
minimum-scale = 1,initial-scale = 1">
<style amp-boilerplate>
body{
-webkit-animation:
-amp-start 8s steps(1,end) 0s 1 normal both;-moz-animation:
-amp-start 8s steps(1,end) 0s 1 normal both;-ms-animation:
-amp-start 8s steps(1,end) 0s 1 normal both;animation:
-amp-start 8s steps(1,end) 0s 1 normal both
}
@-webkit-keyframes
-amp-start{from{visibility:hidden}to{visibility:visible}}@-moz-keyframes
-amp-start{from{visibility:hidden}to{visibility:visible}}@-ms-keyframes
-amp-start{from{visibility:hidden}to{visibility:visible}}@-o-keyframes
-amp-start{from{visibility:hidden}to{visibility:visible}}@keyframes
-amp-start{from{visibility:hidden}to{visibility:visible}}
</style>
<noscript>
<style amp-boilerplate>
body{
-webkit-animation:none;
-moz-animation:none;
-ms-animation:none;
animation:none}
</style>
</noscript>
<script async custom-element = "amp-form"
src = "https://cdn.ampproject.org/v0/amp-form-0.1.js">
</script>
<script async custom-template = "amp-mustache"
src = "https://cdn.ampproject.org/v0/amp-mustache-0.2.js">
</script>
<style amp-custom>
form.amp-form-submit-success [submit-success],
form.amp-form-submit-error [submit-error]{
margin-top: 16px;
}
form.amp-form-submit-success [submit-success] {
color: white;
background-color:gray;
}
form.amp-form-submit-error [submit-error] {
color: red;
}
form.amp-form-submit-success.hide-inputs > input {
display: none;
}
</style>
</head>
<body>
<h3>Google AMP - Form</h3>
<form
method = "post"
class = "p2"
action-xhr = "submitform.php"
target = "_top">
<p>AMP - Form Example</p>
<div>
<input
type = "text"
name = "name"
placeholder = "Enter Name" required>
<br/>
<br/>
<input
type = "email"
name = "email"
placeholder = "Enter Email"
required>
<br/>
<br/>
</div>
<input type = "submit" value = "Submit">
<div submit-success>
<template type = "amp-mustache">
Form Submitted! Thanks {{name}}.
</template>
</div>
<div submit-error>
<template type = "amp-mustache">
Error! {{name}}, please try again.
</template>
</div>
</form>
</body>
</html>
submitform.php
<?php
   if(!empty($_POST)){
      $domain_url = (isset($_SERVER['HTTPS']) ? "https" : "http") .      "://$_SERVER[HTTP_HOST]";
      header("Content-type: application/json");
      header("AMP-Access-Control-Allow-Source-Origin: " . $domain_url);
      header("Access-Control-Expose-Headers: AMP-Access-Control-Allow-Source-Origin");
      $myJSON = json_encode($_POST);
      echo $myJSON;
   }
?>
輸出
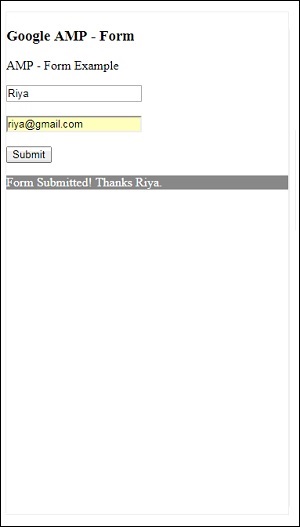
新增到 submitform.php 的響應頭部的詳細資訊:
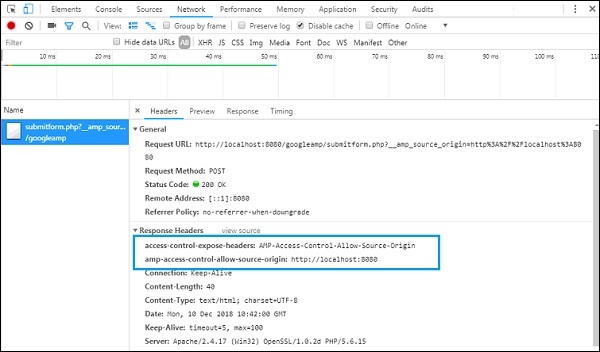
為了使表單正常工作,我們需要新增諸如 access-control-expose-headers(其值為 AMP-Access-Control-Allow-Source-Origin)和 amp-access-control-allow-source-origin 之類的頭部,例如:https://:8080。
這裡我們使用 PHP 檔案,並且 Apache 是使用的伺服器。在 PHP 檔案中,我們添加了如下所示的必要頭部:
<?php
if(!empty($_POST)){
$domain_url = (isset($_SERVER['HTTPS']) ? "https" : "http") .
"://$_SERVER[HTTP_HOST]";
header("Content-type: application/json");
header("AMP-Access-Control-Allow-Source-Origin: " . $domain_url);
header("Access-Control-Expose-Headers:
AMP-Access-Control-Allow-Source-Origin");
$myJSON = json_encode($_POST);
echo $myJSON;
}
?>
新增必要的頭部後,來源https://:8080將被允許互動並獲取資料。