- Windows 10 開發教程
- Windows 10 - 首頁
- Windows 10 - 簡介
- Windows 10 – UWP
- Windows 10 – 第一個應用
- Windows 10 - 應用商店
- Windows 10 - XAML 控制元件
- Windows 10 - 資料繫結
- Windows 10 - XAML 效能
- Windows 10 - 自適應設計
- Windows 10 - 自適應 UI
- Windows 10 - 自適應程式碼
- Windows 10 - 檔案管理
- Windows 10 - SQLite 資料庫
- Windows 10 – 通訊
- Windows 10 - 應用本地化
- Windows 10 - 應用生命週期
- Windows 10 - 後臺執行
- Windows 10 - 應用服務
- Windows 10 - Web 平臺
- Windows 10 - 連線體驗
- Windows 10 - 導航
- Windows 10 - 網路
- Windows 10 - 雲服務
- Windows 10 - 即時磁貼
- Windows 10 - 共享契約
- Windows 10 - 移植到 Windows
- Windows 10 有用資源
- Windows 10 - 快速指南
- Windows 10 - 有用資源
- Windows 10 - 討論
Windows 10 開發 - SQLite 資料庫
在許多應用程式中,存在某些型別的資料,它們之間存在某種關係。這些難以儲存在檔案中的資料型別可以儲存在資料庫中。
如果您熟悉各種型別的資料庫,例如任何應用程式中的 SQL Server 或 Oracle 資料庫,那麼理解 **SQLite 資料庫** 就非常容易了。
什麼是 SQLite?
SQLite 是一個軟體庫,它實現了一個自包含、無伺服器、零配置的事務性 SQL 資料庫引擎。
重要特性包括 -
SQLite 是世界上部署最廣泛的資料庫引擎。
SQLite 的原始碼是開源的。
由於其可移植性和較小的佔用空間,它對遊戲和移動應用程式開發產生了重大影響。
SQLite 的優點
以下是 SQLite 的優點 -
- 它是一個非常輕量級的資料庫。
- 它是平臺無關的,可以在所有平臺上執行。
- 它具有較小的記憶體佔用。
- 它是可靠的。
- 無需任何設定和安裝。
- 它沒有任何依賴項。
要在您的通用 Windows 平臺 (UWP) 應用程式中使用 **SQLite**,您需要按照以下步驟操作。
建立一個名為 **UWPSQLiteDemo** 的新的通用 Windows 空白應用程式。
轉到 **工具** 選單並選擇擴充套件和更新。將開啟以下對話方塊。
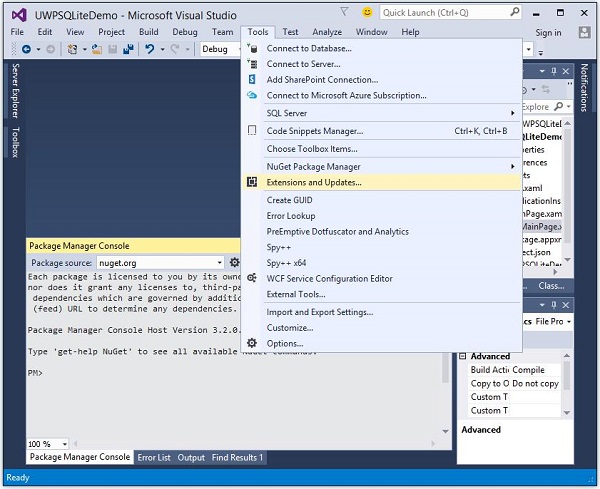
- 選擇擴充套件和更新後,將開啟以下視窗。
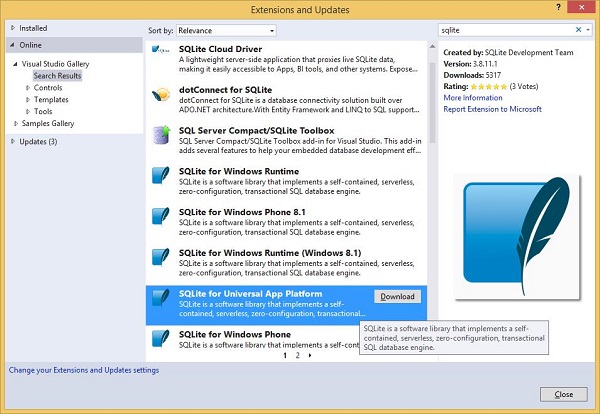
現在選擇 **聯機** 選項,然後從左側窗格中搜索 SQLite。
下載並安裝適用於通用應用平臺的 SQLite。
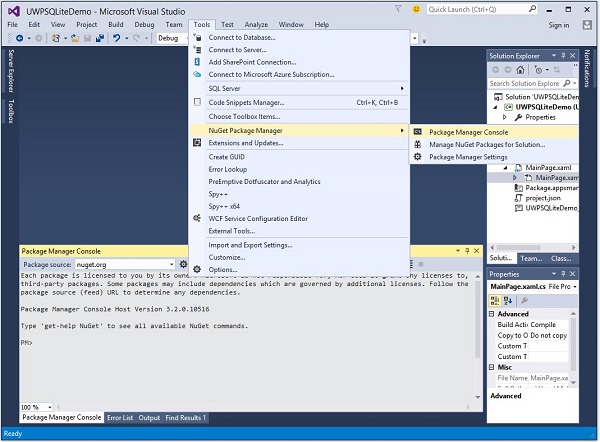
現在,再次轉到工具選單,然後選擇 **NuGet 包管理器 > 包管理器控制檯** 選單選項,如下所示。
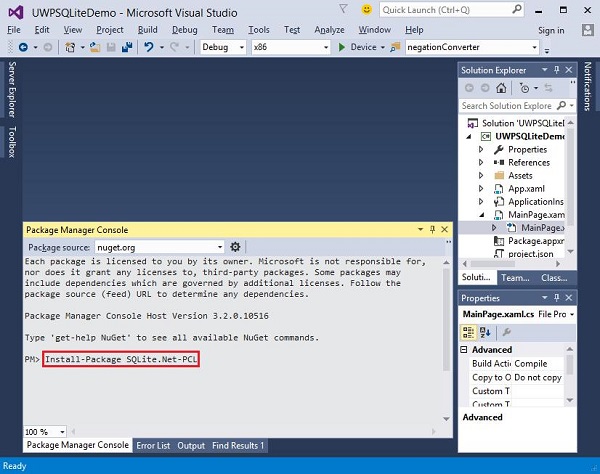
在包管理器控制檯中寫入以下命令,然後按 Enter 執行此命令 -
Install-Package SQLite.Net-PCL
現在右鍵單擊解決方案資源管理器中的 **引用**,然後選擇 **新增引用**。
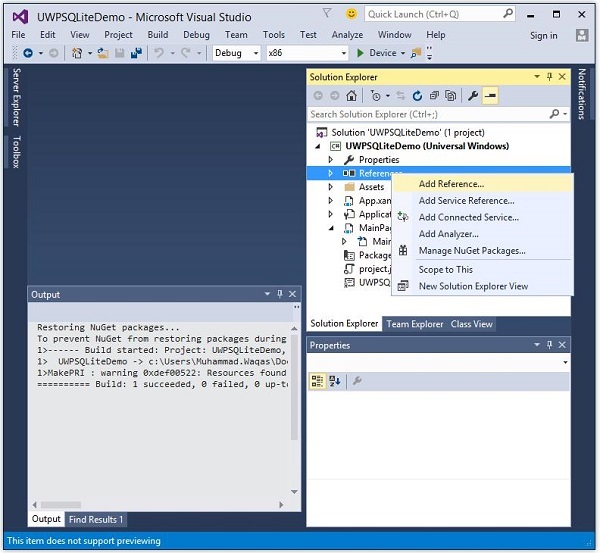
- 將開啟以下對話方塊。
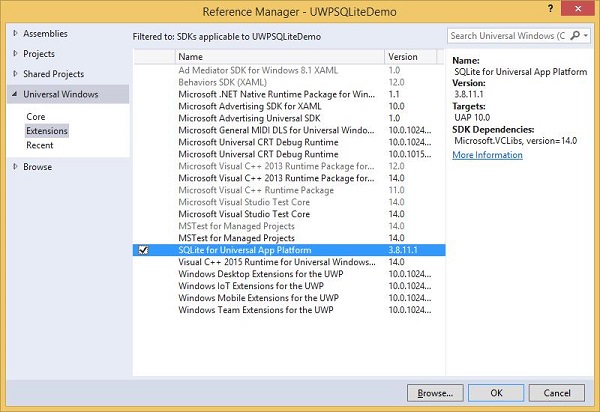
從 **通用 Windows** 下的左側窗格中選擇 **擴充套件**,在中間窗格中選中適用於通用應用平臺的 SQLite,然後單擊確定。
現在,您已準備好開始在您的 UWP 應用程式中使用 SQLite 了。
您可以使用以下程式碼建立資料庫。
string path = Path.Combine(Windows.Storage.ApplicationData.
   Current.LocalFolder.Path, "db.sqlite");

SQLite.Net.SQLiteConnection conn = new SQLite.Net.SQLiteConnection(new
   SQLite.Net.Platform.WinRT.SQLitePlatformWinRT(), path);
要建立表,您需要使用表名物件呼叫 **CreateTable** 方法。
conn.CreateTable<Customer>();
您可以使用以下程式碼將資料插入到您的表中。
conn.Insert(new Customer(){
   Name = textBox.Text,
   Age = textBox1.Text
});
以下是從表中檢索資料的程式碼。
var query = conn.Table<Customer>();
string id = "";
string name = "";
string age = "";

foreach (var message in query) {
   id = id + " " + message.Id;
   name = name + " " + message.Name;
   age = age + " " + message.Age;
}
讓我們透過一個簡單的示例瞭解如何建立資料庫、表以及如何從資料庫中插入和檢索資料。我們將新增姓名和年齡,然後我們將從表中檢索相同的資料。以下是新增不同控制元件的 XAML 程式碼。
<Page
   x:Class = "UWPSQLiteDemo.MainPage"
   xmlns = "http://schemas.microsoft.com/winfx/2006/xaml/presentation"
   xmlns:x = "http://schemas.microsoft.com/winfx/2006/xaml"
   xmlns:local = "using:UWPSQLiteDemo"
   xmlns:d = "http://schemas.microsoft.com/expression/blend/2008"
   xmlns:mc = "http://schemas.openxmlformats.org/markup-compatibility/2006"
   mc:Ignorable = "d">

   <Grid Background = "{ThemeResource ApplicationPageBackgroundThemeBrush}" >
      <Button x:Name = "Retrieve" Content = "Retrieve" HorizontalAlignment = "Left"
         VerticalAlignment = "Top" Margin = "384,406,0,0"
         Click = "Retrieve_Click"/>

      <Button x:Name = "Add" Content = "Add" HorizontalAlignment = "Left"
         VerticalAlignment = "Top" Margin = "291,406,0,0" Click = "Add_Click"/>

      <TextBlock x:Name = "textBlock" HorizontalAlignment = "Left"
         TextWrapping = "Wrap" Text = "Name" VerticalAlignment = "Top"
         Margin = "233,280,0,0" Width = "52"/>

      <TextBox x:Name = "textBox" HorizontalAlignment = "Left" TextWrapping = "Wrap"
         VerticalAlignment = "Top" Margin = "289,274,0,0" Width = "370"/>

      <TextBlock x:Name = "textBlock1" HorizontalAlignment = "Left"
         TextWrapping = "Wrap" Text = "Age" VerticalAlignment = "Top"
         Margin = "233,342,0,0" Width = "52"/>

      <TextBox x:Name = "textBox1" HorizontalAlignment = "Left" TextWrapping = "Wrap"
         VerticalAlignment = "Top" Margin = "289,336,0,0" Width = "191"/>

      <TextBlock x:Name = "textBlock2" HorizontalAlignment = "Left"
         Margin = "290,468,0,0" TextWrapping = "Wrap"
         VerticalAlignment = "Top" Width = "324" Height = "131"/>

   </Grid>

</Page>
以下是事件和 **SQLite 資料庫** 的 C# 實現。
using SQLite.Net.Attributes;

using System;
using System.Collections.Generic;
using System.IO;
using System.Linq;
using System.Runtime.InteropServices.WindowsRuntime;

using Windows.Foundation;
using Windows.Foundation.Collections;

using Windows.UI.Xaml;
using Windows.UI.Xaml.Controls;
using Windows.UI.Xaml.Controls.Primitives;
using Windows.UI.Xaml.Data;
using Windows.UI.Xaml.Input;
using Windows.UI.Xaml.Media;
using Windows.UI.Xaml.Navigation;

// The Blank Page item template is documented at
   http://go.microsoft.com/fwlink/?LinkId=402352&clcid=0x409

namespace UWPSQLiteDemo {

   /// <summary>
      /// An empty page that can be used on its own or navigated to within a Frame.
   /// </summary>

   public sealed partial class MainPage : Page {
      string path;
      SQLite.Net.SQLiteConnection conn;

      public MainPage(){
         this.InitializeComponent();
         path = Path.Combine(Windows.Storage.ApplicationData.Current.LocalFolder.Path,
            "db.sqlite");
         conn = new SQLite.Net.SQLiteConnection(new
            SQLite.Net.Platform.WinRT.SQLitePlatformWinRT(), path);
         conn.CreateTable<Customer>();
      }

      private void Retrieve_Click(object sender, RoutedEventArgs e) {
         var query = conn.Table<Customer>();
         string id = "";
         string name = "";
         string age = "";

         foreach (var message in query) {
            id = id + " " + message.Id;
            name = name + " " + message.Name;
            age = age + " " + message.Age;
         }

         textBlock2.Text = "ID: " + id + "\nName: " + name + "\nAge: " + age;
      }

      private void Add_Click(object sender, RoutedEventArgs e){

         var s = conn.Insert(new Customer(){
            Name = textBox.Text,
            Age = textBox1.Text
         });

      }
   }

   public class Customer {
      [PrimaryKey, AutoIncrement]
      public int Id { get; set; }
      public string Name { get; set; }
      public string Age { get; set; }
   }

}
編譯並執行上述程式碼後,您將看到以下視窗。
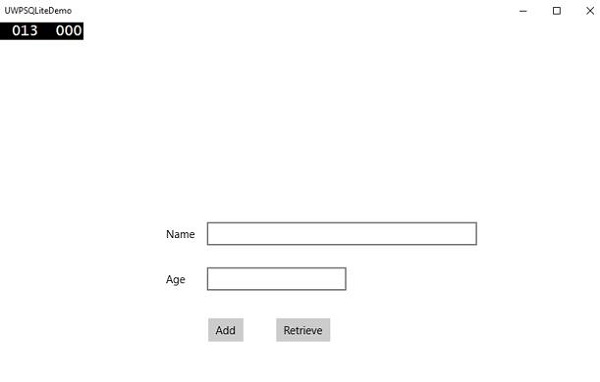
輸入 **姓名** 和 **年齡**,然後單擊 **新增** 按鈕。
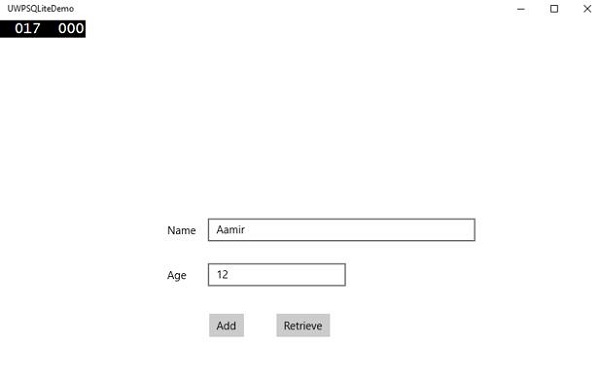
現在單擊 **檢索** 按鈕。您將在 **文字塊** 上看到以下資料。
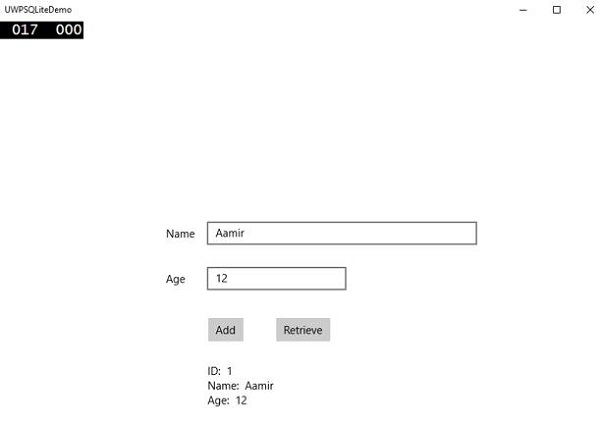
ID 欄位是主鍵和自動遞增欄位,在 Customer 類中指定。
[PrimaryKey, AutoIncrement]
public int Id { get; set; }