- ReactJS 教程
- ReactJS - 首頁
- ReactJS - 簡介
- ReactJS - 路線圖
- ReactJS - 安裝
- ReactJS - 特性
- ReactJS - 優點與缺點
- ReactJS - 架構
- ReactJS - 建立 React 應用
- ReactJS - JSX
- ReactJS - 元件
- ReactJS - 巢狀元件
- ReactJS - 使用新建立的元件
- ReactJS - 元件集合
- ReactJS - 樣式
- ReactJS - 屬性 (props)
- ReactJS - 使用屬性建立元件
- ReactJS - props 驗證
- ReactJS - 建構函式
- ReactJS - 元件生命週期
- ReactJS - 事件管理
- ReactJS - 建立一個事件感知元件
- ReactJS - 在 Expense Manager 應用中引入事件
- ReactJS - 狀態管理
- ReactJS - 狀態管理 API
- ReactJS - 無狀態元件
- ReactJS - 使用 React Hooks 進行狀態管理
- ReactJS - 使用 React Hooks 進行元件生命週期管理
- ReactJS - 佈局元件
- ReactJS - 分頁
- ReactJS - Material UI
- ReactJS - Http 客戶端程式設計
- ReactJS - 表單程式設計
- ReactJS - 受控元件
- ReactJS - 非受控元件
- ReactJS - Formik
- ReactJS - 條件渲染
- ReactJS - 列表
- ReactJS - 鍵
- ReactJS - 路由
- ReactJS - Redux
- ReactJS - 動畫
- ReactJS - Bootstrap
- ReactJS - 地圖
- ReactJS - 表格
- ReactJS - 使用 Flux 管理狀態
- ReactJS - 測試
- ReactJS - CLI 命令
- ReactJS - 構建和部署
- ReactJS - 示例
- Hooks
- ReactJS - Hooks 簡介
- ReactJS - 使用 useState
- ReactJS - 使用 useEffect
- ReactJS - 使用 useContext
- ReactJS - 使用 useRef
- ReactJS - 使用 useReducer
- ReactJS - 使用 useCallback
- ReactJS - 使用 useMemo
- ReactJS - 自定義 Hooks
- ReactJS 高階
- ReactJS - 可訪問性
- ReactJS - 程式碼分割
- ReactJS - 上下文
- ReactJS - 錯誤邊界
- ReactJS - 轉發 Refs
- ReactJS - 碎片
- ReactJS - 高階元件
- ReactJS - 整合其他庫
- ReactJS - 最佳化效能
- ReactJS - Profiler API
- ReactJS - 埠
- ReactJS - 無 ES6/ECMAScript 的 React
- ReactJS - 無 JSX 的 React
- ReactJS - 調和
- ReactJS - Refs 和 DOM
- ReactJS - 渲染 Props
- ReactJS - 靜態型別檢查
- ReactJS - 嚴格模式
- ReactJS - Web Components
- 其他概念
- ReactJS - 日期選擇器
- ReactJS - Helmet
- ReactJS - 內聯樣式
- ReactJS - PropTypes
- ReactJS - BrowserRouter
- ReactJS - DOM
- ReactJS - 走馬燈
- ReactJS - 圖示
- ReactJS - 表單元件
- ReactJS - 參考 API
- ReactJS 有用資源
- ReactJS - 快速指南
- ReactJS - 有用資源
- ReactJS - 討論
ReactJS - 埠
埠提供了一種方式,讓元件可以將其子元素渲染到其自身 DOM 層次結構之外的 DOM 節點中。埠可用於模態對話方塊、彈出視窗、工具提示等,在這些場景中,父元件(渲染元件)和子 DOM 節點(模態對話方塊)最好渲染在不同的 DOM 節點中。
在本章中,我們將學習埠的工作原理以及如何在我們的應用程式中應用它。
埠的概念和用法
假設我們在主文件中有兩個 DOM 節點,如下所示:
<div id='root'></div>
<div id='modalRoot'></div>
這裡,根 DOM 節點將附加到主 React 元件。modalRoot 將在 React 應用需要顯示模態對話方塊時使用,它將模態對話方塊附加到 modelRoot DOM 節點,而不是將其渲染到自身 DOM 元素內。
這將有助於將模態對話方塊與實際應用分離。將模態對話方塊與其父 DOM 元素分離,可以使其免受父 DOM 元素樣式的影響。樣式可以單獨應用,因為模態對話方塊、工具提示等在樣式方面與其父元素有所不同。
React 在 ReactDOM 包中提供了一個特殊的 createPortal 方法來建立埠。該方法的簽名如下:
ReactDOM.createPortal(child, container)
這裡,
child 是由父元件渲染的模態對話方塊、工具提示等。
render() {
   return ReactDOM.createPortal(
      this.props.children, // modal dialog / tooltips
      domNode // dom outside the component
   );
}
container 是父 DOM 節點之外的 DOM 元素(在上面的示例中為 domNode)。
應用埠
在本節中,我們將建立一個新的 React 應用來學習如何在其中應用埠。
首先,使用以下命令建立一個新的 React 應用並啟動它。
create-react-app myapp
cd myapp
npm start
接下來,開啟 App.css (src/App.css) 並移除所有 CSS 類,幷包含模態對話方塊的 CSS。
.modal {
   position: absolute;
   top: 0;
   bottom: 0;
   left: 0;
   right: 0;
   display: grid;
   justify-content: center;
   align-items: center;
   background-color: rgba(0,0,0,0.2);
}
.modalContent {
   padding: 20px;
   background-color: #fff;
   border-radius: 2px;
   display: inline-block;
   min-height: 300px;
   margin: 1rem;
   position: relative;
   min-width: 300px;
   box-shadow: 0 3px 6px rgba(0,0,0,0.16), 0 3px 6px rgba(0,0,0,0.23);
   justify-self: center;
}
接下來,開啟 index.html (public/index.html) 並新增一個 DOM 節點以支援埠
<!DOCTYPE html>
<html lang="en">
   <head>
      <link rel="icon" href="%PUBLIC_URL%/favicon.ico" />
      <link rel="apple-touch-icon" href="%PUBLIC_URL%/logo192.png" />
      <link rel="manifest" href="%PUBLIC_URL%/manifest.json" />
   </head>
   <body>
      <noscript>You need to enable JavaScript to run this app.</noscript>
      <div style="padding: 10px;">
         <div id="root"></div>
      </div>
      <div id="modalRoot"></div>
   </body>
</html>
接下來,建立一個簡單的元件 SimplePortal (src/Components/SimplePortal.js) 並渲染一個模態對話方塊,如下所示:
import React from "react";
import PortalReactDOM from 'react-dom'
const modalRoot = document.getElementById('modalRoot')
class SimplePortal extends React.Component {
   constructor(props) {
      super(props);
   }
   render() {
      return PortalReactDOM.createPortal(
         <div
            className="modal"
            onClick={this.props.onClose}
            >
            <div className="modalContent">
               {this.props.children}
               <hr />
               <button onClick={this.props.onClose}>Close</button>
            </div>
         </div>,
         modalRoot,
      )
   }
}
export default SimplePortal;
這裡,
createPortal 用於建立一個新的埠並渲染一個模態對話方塊。
模態對話方塊的內容透過 this.props.children 從元件的子元素中獲取。
關閉按鈕操作透過 props 處理,並將由父元件處理。
接下來,開啟 App 元件 (src/App.js),並使用 SimplePortal 元件,如下所示:
import './App.css'
import React from 'react';
import SimplePortal from './Components/SimplePortal'
class App extends React.Component {
   constructor(props) {
      super(props);
      this.state = { modal: false }
   }
   handleOpenModal = () => this.setState({ modal: true })
   handleCloseModal = () => this.setState({ modal: false })
   render() {
      return (
         <div className="container">
            <div style={{ padding: "10px" }}>
               <div>
                  <div><p>Main App</p></div>
                  <div>
                     <button onClick={this.handleOpenModal}>
                        Show Modal
                     </button>
                     { this.state.modal ? (
                        <SimplePortal onClose={this.handleCloseModal}>
                           Hi, I am the modal dialog created using portal.
                        </SimplePortal>
                     ) : null}
                  </div>
               </div>
            </div>
         </div>
      );
   }
}
export default App;
這裡,
匯入了 SimplePortal 元件
添加了一個按鈕來開啟模態對話方塊
建立了一個處理程式來開啟模態對話方塊
建立了一個處理程式來關閉模態對話方塊,並將其透過 onClose props 傳遞給 SimplePortal 元件。
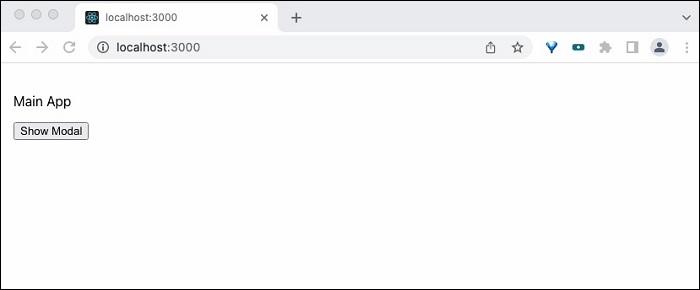
最後,在瀏覽器中開啟應用程式並檢查最終結果。
總結
React 埠提供了一種簡單的方法來訪問和處理元件外部的 DOM。它能夠在不同的 DOM 節點之間輕鬆地進行事件冒泡。