- ReactJS 教程
- ReactJS - 首頁
- ReactJS - 簡介
- ReactJS - 路線圖
- ReactJS - 安裝
- ReactJS - 特性
- ReactJS - 優點和缺點
- ReactJS - 架構
- ReactJS - 建立 React 應用
- ReactJS - JSX
- ReactJS - 元件
- ReactJS - 巢狀元件
- ReactJS - 使用新建立的元件
- ReactJS - 元件集合
- ReactJS - 樣式
- ReactJS - 屬性 (props)
- ReactJS - 使用屬性建立元件
- ReactJS - props 驗證
- ReactJS - 建構函式
- ReactJS - 元件生命週期
- ReactJS - 事件管理
- ReactJS - 建立一個事件感知元件
- ReactJS - 在 Expense Manager 應用中引入事件
- ReactJS - 狀態管理
- ReactJS - 狀態管理 API
- ReactJS - 無狀態元件
- ReactJS - 使用 React Hooks 進行狀態管理
- ReactJS - 使用 React Hooks 進行元件生命週期管理
- ReactJS - 佈局元件
- ReactJS - 分頁
- ReactJS - Material UI
- ReactJS - Http 客戶端程式設計
- ReactJS - 表單程式設計
- ReactJS - 受控元件
- ReactJS - 非受控元件
- ReactJS - Formik
- ReactJS - 條件渲染
- ReactJS - 列表
- ReactJS - Keys
- ReactJS - 路由
- ReactJS - Redux
- ReactJS - 動畫
- ReactJS - Bootstrap
- ReactJS - 地圖
- ReactJS - 表格
- ReactJS - 使用 Flux 管理狀態
- ReactJS - 測試
- ReactJS - CLI 命令
- ReactJS - 構建和部署
- ReactJS - 示例
- Hooks
- ReactJS - Hooks 簡介
- ReactJS - 使用 useState
- ReactJS - 使用 useEffect
- ReactJS - 使用 useContext
- ReactJS - 使用 useRef
- ReactJS - 使用 useReducer
- ReactJS - 使用 useCallback
- ReactJS - 使用 useMemo
- ReactJS - 自定義 Hooks
- ReactJS 高階
- ReactJS - 可訪問性
- ReactJS - 程式碼分割
- ReactJS - 上下文
- ReactJS - 錯誤邊界
- ReactJS - 轉發 Refs
- ReactJS - 片段
- ReactJS - 高階元件
- ReactJS - 整合其他庫
- ReactJS - 最佳化效能
- ReactJS - Profiler API
- ReactJS - 埠
- ReactJS - 無 ES6 ECMAScript 的 React
- ReactJS - 無 JSX 的 React
- ReactJS - 調和
- ReactJS - Refs 和 DOM
- ReactJS - 渲染 Props
- ReactJS - 靜態型別檢查
- ReactJS - 嚴格模式
- ReactJS - Web Components
- 其他概念
- ReactJS - 日期選擇器
- ReactJS - Helmet
- ReactJS - 內聯樣式
- ReactJS - PropTypes
- ReactJS - BrowserRouter
- ReactJS - DOM
- ReactJS - 走馬燈
- ReactJS - 圖示
- ReactJS - 表單元件
- ReactJS - 參考 API
- ReactJS 有用資源
- ReactJS - 快速指南
- ReactJS - 有用資源
- ReactJS - 討論
ReactJS - 高階元件
由於 React 元件透過組合(一個元件包含在另一個元件內部)而不是繼承來進行互連,因此在一個 React 元件中使用的邏輯不會直接共享到另一個元件。React 社群提供了多種在元件之間共享邏輯的選項,其中一個選項就是高階元件。HOC 本身並不是 React API,而是一種沒有副作用的設計模式。
讓我們在本節學習如何在 React 中使用高階元件。
如何使用高階元件
基本上,HOC 是一個函式,它接收一個 React 元件作為輸入,然後基於輸入元件建立一個新的 React 元件,並返回新建立的(包裝的)元件。例如,HOC 函式可能接收一個純資料渲染元件作為輸入,然後返回一個新元件,該元件將具有資料獲取功能和使用輸入元件的資料渲染功能。
讓我們看看如何使用 HOC 並逐步在兩個元件之間共享邏輯。讓我們考慮從外部 URL 獲取和渲染資料的場景。
建立一個 HOC 函式,根據功能包含一個或多個輸入引數。
HOC 函式的第一個引數應為具有次要邏輯的 React 元件(例如,資料渲染邏輯)。
應根據我們的需求定義 HOC 函式的第二個引數。對於我們的資料獲取場景,資料 URL 是獲取資料所需的必要資訊。因此,我們應該將其作為 HOC 函式的第二個引數。
function createHOC(WrappedComponent, url) {
   // create new component using WrappedComponent
}
如果確實必要,HOC 函式可以包含任意數量的引數。
在 HOC 函式內部建立一個新的元件,並在其 componentDidMount 事件中支援主要邏輯(例如,使用第二個 URL 引數進行資料獲取邏輯)。
function createFetchHOC(WrappedComponent, url) {
   class DataFetcher extends React.Component {
      componentDidMount() {
         fetch(url)
            .then((response) => response.json())
            .then((data) => {
               this.setState({
                  data: data
               });
         });
      }
   }
}
透過傳遞從 componentDidMount 事件獲取的資料來渲染輸入元件。
function createFetchHOC(WrappedComponent, url) {
   class DataFetcher extends React.Component {
      render() {
         return (
            <WrappedComponent data={this.state.data} {...this.props} />
         )
      }
   }
}
返回新建立的元件。
function createFetchHOC(WrappedComponent, url) {
   class DataFetcher extends React.Component {
   }
   return DataFetcher;
}
透過組合 DataFetcher (createFetchHOC) 和 Wrapped 元件建立一個新元件。
const UserListWithFetch = createFetchHOC(
   UserList,
   "users.json"
);
最後,根據需要在任何地方使用新元件。
<UserListWithFetch />
應用 HOC 元件
讓我們透過應用 HOC 元件建立一個新的應用程式。
首先,使用以下命令建立一個新的 React 應用程式並啟動它。
create-react-app myapp
cd myapp
npm start
接下來,開啟 App.css (src/App.css) 並刪除所有 CSS 類。
// remove all css classes
接下來,建立一個新的 HOC 函式,如下所示:
import React from 'react';
function createFetchHOC(WrappedComponent, url) {
   class DataFetcher extends React.Component {
      constructor(props) {
         super(props);
         this.state = {
            data: []
         };
      }

      componentDidMount() {
         fetch(url)
         .then((response) => response.json())
         .then((data) => {
            this.setState({
               data: data
            });
         });
      }
      render() {
         return (
            <WrappedComponent data={this.state.data} {...this.props} />
         )
      }
   }
   return DataFetcher;
}
export default createFetchHOC;
接下來,在 public 資料夾中建立一個名為 users.json (public/users.json) 的檔案來儲存使用者資訊。我們將嘗試使用 FetchRenderProps 元件獲取它並在我們的應用程式中顯示它。
[{"id":1,"name":"Fowler","age":18},
{"id":2,"name":"Donnell","age":24},
{"id":3,"name":"Pall","age":26}]
接下來,在 public 資料夾中建立一個名為 todo_list.json (public/todo_list.json) 的檔案來儲存待辦事項列表資訊。我們將嘗試使用 FetchRenderProps 元件獲取它並在我們的應用程式中顯示它。
[{"id":1,"title":"Learn JavaScript","is_done":true},
{"id":2,"title":"Learn React","is_done":true},
{"id":3,"title":"Learn Typescript","is_done":false}]
接下來,建立一個新的元件 UserList (src/Components/UserList.js) 來渲染使用者,如下所示:
import React from "react";
class UserList extends React.Component {
   constructor(props) {
      super(props);
   }
   render() {
      return (
         <>
            <ul>
               {this.props.data && this.props.data.length && this.props.data.map((item) =>
                  <li key={item.id}>{item.name}</li>
               )}
            </ul>
         </>
      )
   }
}
export default UserList;
在這裡,我們使用了 data props 來渲染使用者列表。
接下來,建立一個新的元件 TodoList (src/Components/TodoList.js) 來渲染待辦事項,如下所示:
import React from "react";
class TodoList extends React.Component {
   constructor(props) {
      super(props);
      this.todos = this.props.data
   }
   render() {
      return (
         <>
            <ul>
               {this.props.data && this.props.data.length && this.props.data.map(
                  (item) =>
                  <li key={item.id}>{item.title} {item.is_done && <strong>Done</strong>}</li>
               )}
            </ul>
         </>
      )
   }
}
export default TodoList;
在這裡,我們使用了 data props 來渲染待辦事項列表。
接下來,建立一個新的元件 SimpleHOC 透過單個 HOC 元件渲染使用者列表和待辦事項列表。
import React from "react";
import UserList from "./UserList";
import TodoList from "./TodoList";
import createFetchHOC from "./createFetchHOC";
const UserListWithFetch = createFetchHOC(
   UserList,
   "users.json"
);

const TodoListWithFetch = createFetchHOC(
   TodoList,
   "todo_list.json"
);

class SimpleHOC extends React.Component {
   constructor(props) {
      super(props);
   }
   render() {
      return (
      <>
         <UserListWithFetch />
         <TodoListWithFetch />
      </>
      )
   }
}
export default SimpleHOC;
這裡我們:
透過組合 TodoList 和 DataFetcher 元件建立了 UserListWithFetch 元件。
透過組合 Users 和 DataFetcher 元件建立了 TodoListWithFetch 元件。
接下來,開啟 App.js 並使用 SimpleHOC 元件更新它。
import './App.css'
import React from 'react';
import SimpleHOC from './Components/SimpleHOC'

function App() {
   return (
      <div className="container">
         <div style={{ padding: "10px" }}>
            <div>
               <SimpleHOC />
            </div>
         </div>
      </div>
   );
}
export default App;
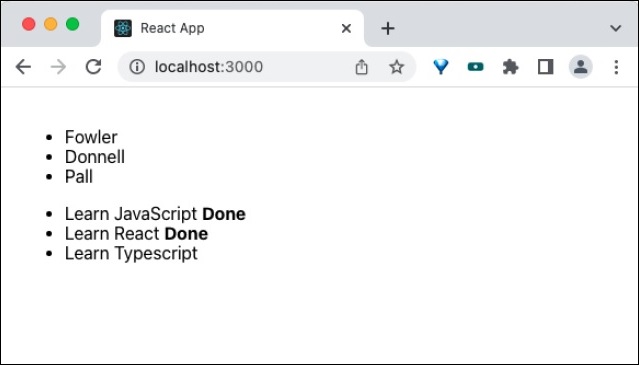
最後,在瀏覽器中開啟應用程式並檢查最終結果。應用程式將按如下所示渲染:
總結
高階元件是共享元件之間邏輯的有效方法。它被廣泛用於許多第三方元件,並且具有良好的成功率,並且是共享 React 領域邏輯的經過時間考驗的方法。