- ReactJS 教程
- ReactJS - 首頁
- ReactJS - 簡介
- ReactJS - 路線圖
- ReactJS - 安裝
- ReactJS - 特性
- ReactJS - 優點和缺點
- ReactJS - 架構
- ReactJS - 建立 React 應用
- ReactJS - JSX
- ReactJS - 元件
- ReactJS - 巢狀元件
- ReactJS - 使用新建立的元件
- ReactJS - 元件集合
- ReactJS - 樣式
- ReactJS - 屬性 (props)
- ReactJS - 使用屬性建立元件
- ReactJS - props 驗證
- ReactJS - 建構函式
- ReactJS - 元件生命週期
- ReactJS - 事件管理
- ReactJS - 建立一個事件感知元件
- ReactJS - 在 Expense Manager 應用中引入事件
- ReactJS - 狀態管理
- ReactJS - 狀態管理 API
- ReactJS - 無狀態元件
- ReactJS - 使用 React Hooks 進行狀態管理
- ReactJS - 使用 React Hooks 進行元件生命週期管理
- ReactJS - 佈局元件
- ReactJS - 分頁
- ReactJS - Material UI
- ReactJS - Http 客戶端程式設計
- ReactJS - 表單程式設計
- ReactJS - 受控元件
- ReactJS - 非受控元件
- ReactJS - Formik
- ReactJS - 條件渲染
- ReactJS - 列表
- ReactJS - Keys
- ReactJS - 路由
- ReactJS - Redux
- ReactJS - 動畫
- ReactJS - Bootstrap
- ReactJS - Map
- ReactJS - 表格
- ReactJS - 使用 Flux 管理狀態
- ReactJS - 測試
- ReactJS - CLI 命令
- ReactJS - 構建和部署
- ReactJS - 示例
- Hooks
- ReactJS - Hooks 簡介
- ReactJS - 使用 useState
- ReactJS - 使用 useEffect
- ReactJS - 使用 useContext
- ReactJS - 使用 useRef
- ReactJS - 使用 useReducer
- ReactJS - 使用 useCallback
- ReactJS - 使用 useMemo
- ReactJS - 自定義 Hooks
- ReactJS 高階
- ReactJS - 可訪問性
- ReactJS - 程式碼分割
- ReactJS - Context
- ReactJS - 錯誤邊界
- ReactJS - 轉發 Refs
- ReactJS - 片段
- ReactJS - 高階元件
- ReactJS - 整合其他庫
- ReactJS - 最佳化效能
- ReactJS - Profiler API
- ReactJS - Portals
- ReactJS - 無 ES6 ECMAScript 的 React
- ReactJS - 無 JSX 的 React
- ReactJS - 調和
- ReactJS - Refs 和 DOM
- ReactJS - 渲染 Props
- ReactJS - 靜態型別檢查
- ReactJS - 嚴格模式
- ReactJS - Web Components
- 其他概念
- ReactJS - 日期選擇器
- ReactJS - Helmet
- ReactJS - 內聯樣式
- ReactJS - PropTypes
- ReactJS - BrowserRouter
- ReactJS - DOM
- ReactJS - 走馬燈
- ReactJS - 圖示
- ReactJS - 表單元件
- ReactJS - 參考 API
- ReactJS 有用資源
- ReactJS - 快速指南
- ReactJS - 有用資源
- ReactJS - 討論
ReactJS - 受控元件
在受控元件中,React 為所有輸入元素提供了一個特殊的屬性 value,並控制輸入元素。value 屬性可用於獲取和設定輸入元素的值。它必須與元件的狀態保持同步。
換句話說,一個渲染表單的 React 元件也控制了在後續使用者輸入時表單中發生的事情。以這種方式由 React 控制其值的輸入表單元素稱為“受控元件”。
受控元件必須遵循特定的流程來進行表單程式設計。
帶有單個輸入的受控元件
讓我們檢查一下對於單個輸入元素需要遵循的分步流程。
步驟 1 - 建立表單元素。
<input type="text" name="username" />
步驟 2 - 為輸入元素建立狀態。
this.state = {
   username: ''
}
步驟 3 - 新增 value 屬性並從狀態分配值。
<input type="text" name="username" value={this.state.username} />
步驟 4 - 新增onChange 屬性並分配處理程式方法。
<input type="text" name="username" value={this.state.username} onChange={this.handleUsernameChange} />
步驟 5 - 編寫處理程式方法並在每次觸發事件時更新狀態。
handleUsernameChange(e) {
   this.setState({
      username = e.target.value
   });
}
步驟 6 - 在元件的建構函式中繫結事件處理程式。
this.handleUsernameChange = this.handleUsernameChange.bind(this)
最後,在驗證和提交期間,使用this.state中的username獲取輸入值。
handleSubmit(e) {
   e.preventDefault();
   alert(this.state.username);
}
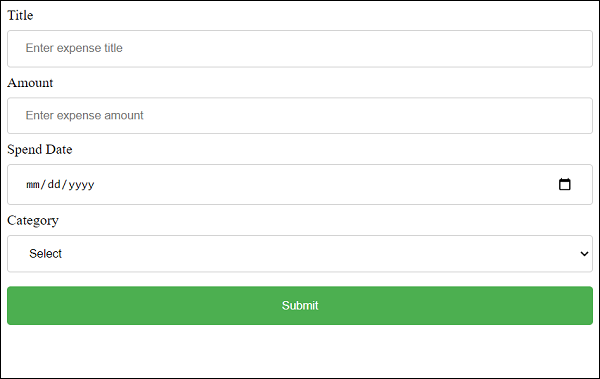
建立簡單的表單
在本節中,讓我們建立一個簡單的表單,使用受控元件新增費用條目。
步驟 1 - 首先,使用Create React App 或 Rollup打包器建立一個新的 React 應用 react-form-app,方法是按照建立 React 應用章節中的說明進行操作。
步驟 2 - 在你喜歡的編輯器中開啟應用程式。
在下一步中,在應用程式的根目錄下建立src資料夾。
此外,在src資料夾下建立components資料夾。
步驟 3 - 在src資料夾下建立一個檔案ExpenseForm.css,用於為元件設定樣式。
input[type=text], input[type=number], input[type=date], select {
   width: 100%;
   padding: 12px 20px;
   margin: 8px 0;
   display: inline-block;
   border: 1px solid #ccc;
   border-radius: 4px;
   box-sizing: border-box;
}
input[type=submit] {
   width: 100%;
   background-color: #4CAF50;
   color: white;
   padding: 14px 20px;
   margin: 8px 0;
   border: none;
   border-radius: 4px;
   cursor: pointer;
}
input[type=submit]:hover {
   background-color: #45a049;
}
input:focus {
   border: 1px solid #d9d5e0;
}
#expenseForm div {
   border-radius: 5px;
   background-color: #f2f2f2;
   padding: 20px;
}
步驟 4 - 在src/components資料夾下建立一個檔案ExpenseForm.js並開始編輯。
步驟 5 - 匯入React庫。
import React from 'react';
匯入ExpenseForm.css檔案。
import './ExpenseForm.css'
步驟 6 - 建立一個類ExpenseForm並使用 props 呼叫建構函式。
class ExpenseForm extends React.Component {
   constructor(props) {
      super(props);
   }
}
初始化元件的狀態。
this.state = {
   item: {}
}
建立render()方法並新增一個帶有輸入欄位的表單以新增費用專案。
render() {
   return (
      <div id="expenseForm">
         <form>
            <label for="name">Title</label>
            <input type="text" id="name" name="name" placeholder="Enter expense title" />
            <label for="amount">Amount</label>
            <input type="number" id="amount" name="amount" placeholder="Enter expense amount" />
            <label for="date">Spend Date</label>
            <input type="date" id="date" name="date" placeholder="Enter date" />
            <label for="category">Category</label>
            <select id="category" name="category"
              <option value="">Select</option>
              <option value="Food">Food</option>
              <option value="Entertainment">Entertainment</option>
              <option value="Academic">Academic</option>
            </select>
            <input type="submit" value="Submit" />
         </form>
      </div>
   )
}
為所有輸入欄位建立事件處理程式,以更新狀態中的費用詳細資訊。
handleNameChange(e) {
   this.setState( (state, props) => {
      let item = state.item
      item.name = e.target.value;
      return { item: item }
   });
}
handleAmountChange(e) {
   this.setState( (state, props) => {
      let item = state.item
      item.amount = e.target.value;
      return { item: item }
   });
}
handleDateChange(e) {
   this.setState( (state, props) => {
      let item = state.item
      item.date = e.target.value;
      return { item: item }
   });
}
handleCategoryChange(e) {
   this.setState( (state, props) => {
      let item = state.item
      item.category = e.target.value;
      return { item: item }
   });
}
在建構函式中繫結事件處理程式。
this.handleNameChange = this.handleNameChange.bind(this);
this.handleAmountChange = this.handleAmountChange.bind(this);
this.handleDateChange = this.handleDateChange.bind(this);
this.handleCategoryChange = this.handleCategoryChange.bind(this);
接下來,為提交操作新增一個事件處理程式。
onSubmit = (e) => {
   e.preventDefault();
   alert(JSON.stringify(this.state.item));
}
將事件處理程式附加到表單。
render() {
   return (
      <div id="expenseForm">
         <form onSubmit={(e) => this.onSubmit(e)}>
            <label for="name">Title</label>
            <input type="text" id="name" name="name" placeholder="Enter expense title"
               value={this.state.item.name}
               onChange={this.handleNameChange} />

            <label for="amount">Amount</label>
            <input type="number" id="amount" name="amount" placeholder="Enter expense amount"
               value={this.state.item.amount}
               onChange={this.handleAmountChange} />

            <label for="date">Spend Date</label>
            <input type="date" id="date" name="date" placeholder="Enter date"
               value={this.state.item.date}
               onChange={this.handleDateChange} />

            <label for="category">Category</label>
            <select id="category" name="category"
               value={this.state.item.category}
               onChange={this.handleCategoryChange} >
              <option value="">Select</option>
              <option value="Food">Food</option>
              <option value="Entertainment">Entertainment</option>
              <option value="Academic">Academic</option>
            </select>

            <input type="submit" value="Submit" />
         </form>
      </div>
   )
}
最後,匯出元件。
export default ExpenseForm
ExpenseForm元件的完整程式碼如下所示:
import React from 'react';
import './ExpenseForm.css'

class ExpenseForm extends React.Component {
   constructor(props) {
      super(props);
      this.state = {
         item: {}
      }
      this.handleNameChange = this.handleNameChange.bind(this);
      this.handleAmountChange = this.handleAmountChange.bind(this);
      this.handleDateChange = this.handleDateChange.bind(this);
      this.handleCategoryChange = this.handleCategoryChange.bind(this);
   }
   handleNameChange(e) {
      this.setState( (state, props) => {
         let item = state.item
         item.name = e.target.value;
         return { item: item }
      });
   }
   handleAmountChange(e) {
      this.setState( (state, props) => {
         let item = state.item
         item.amount = e.target.value;
         return { item: item }
      });
   }
   handleDateChange(e) {
      this.setState( (state, props) => {
         let item = state.item
         item.date = e.target.value;
         return { item: item }
      });
   }
   handleCategoryChange(e) {
      this.setState( (state, props) => {
         let item = state.item
         item.category = e.target.value;
         return { item: item }
      });
   }
   onSubmit = (e) => {
      e.preventDefault();
      alert(JSON.stringify(this.state.item));
   }
   render() {
      return (
         <div id="expenseForm">
           <form onSubmit={(e) => this.onSubmit(e)}>
            <label for="name">Title</label>
            <input type="text" id="name" name="name" placeholder="Enter expense title"
               value={this.state.item.name}
               onChange={this.handleNameChange} />

            <label for="amount">Amount</label>
            <input type="number" id="amount" name="amount" placeholder="Enter expense amount"
               value={this.state.item.amount}
               onChange={this.handleAmountChange} />

            <label for="date">Spend Date</label>
            <input type="date" id="date" name="date" placeholder="Enter date"
               value={this.state.item.date}
               onChange={this.handleDateChange} />

            <label for="category">Category</label>
            <select id="category" name="category"
               value={this.state.item.category}
               onChange={this.handleCategoryChange} >
              <option value="">Select</option>
              <option value="Food">Food</option>
              <option value="Entertainment">Entertainment</option>
              <option value="Academic">Academic</option>
            </select>

            <input type="submit" value="Submit" />
           </form>
         </div>
      )
   }
}
export default ExpenseForm;
index.js -
接下來,在src資料夾下建立一個檔案index.js並使用ExpenseForm元件。
import React from 'react';
import ReactDOM from 'react-dom';
import ExpenseForm from './components/ExpenseForm'

ReactDOM.render(
   <React.StrictMode>
      <ExpenseForm />
   </React.StrictMode>,
   document.getElementById('root')
);
index.html -
最後,在根資料夾下建立一個public資料夾並建立index.html檔案。
<!DOCTYPE html>
<html lang="en">
   <head>
      <meta charset="utf-8">
      <title>React App</title>
   </head>
   <body>
      <div id="root"></div>
      <script type="text/JavaScript" src="./index.js"></script>
   </body>
</html>
使用 npm 命令啟動應用程式。
npm start
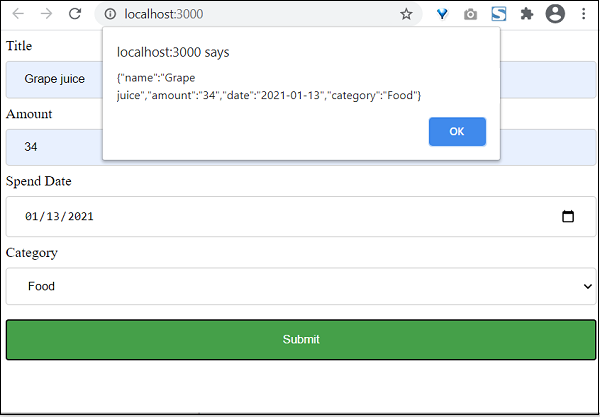
開啟瀏覽器並在位址列中輸入https://:3000,然後按 Enter 鍵。
最後,輸入示例費用詳細資訊並點選提交。提交的資料將被收集並在彈出訊息框中顯示。