- ReactJS 教程
- ReactJS - 首頁
- ReactJS - 簡介
- ReactJS - 路線圖
- ReactJS - 安裝
- ReactJS - 特性
- ReactJS - 優點與缺點
- ReactJS - 架構
- ReactJS - 建立 React 應用
- ReactJS - JSX
- ReactJS - 元件
- ReactJS - 巢狀元件
- ReactJS - 使用新建立的元件
- ReactJS - 元件集合
- ReactJS - 樣式
- ReactJS - 屬性 (props)
- ReactJS - 使用屬性建立元件
- ReactJS - props 驗證
- ReactJS - 建構函式
- ReactJS - 元件生命週期
- ReactJS - 事件管理
- ReactJS - 建立一個事件感知元件
- ReactJS - 在 Expense Manager APP 中引入事件
- ReactJS - 狀態管理
- ReactJS - 狀態管理 API
- ReactJS - 無狀態元件
- ReactJS - 使用 React Hooks 進行狀態管理
- ReactJS - 使用 React Hooks 進行元件生命週期管理
- ReactJS - 佈局元件
- ReactJS - 分頁
- ReactJS - Material UI
- ReactJS - Http 客戶端程式設計
- ReactJS - 表單程式設計
- ReactJS - 受控元件
- ReactJS - 非受控元件
- ReactJS - Formik
- ReactJS - 條件渲染
- ReactJS - 列表
- ReactJS - Keys
- ReactJS - 路由
- ReactJS - Redux
- ReactJS - 動畫
- ReactJS - Bootstrap
- ReactJS - 地圖
- ReactJS - 表格
- ReactJS - 使用 Flux 管理狀態
- ReactJS - 測試
- ReactJS - CLI 命令
- ReactJS - 構建和部署
- ReactJS - 示例
- Hooks
- ReactJS - Hooks 簡介
- ReactJS - 使用 useState
- ReactJS - 使用 useEffect
- ReactJS - 使用 useContext
- ReactJS - 使用 useRef
- ReactJS - 使用 useReducer
- ReactJS - 使用 useCallback
- ReactJS - 使用 useMemo
- ReactJS - 自定義 Hooks
- ReactJS 高階
- ReactJS - 可訪問性
- ReactJS - 程式碼分割
- ReactJS - Context
- ReactJS - 錯誤邊界
- ReactJS - 轉發 Ref
- ReactJS - 片段
- ReactJS - 高階元件
- ReactJS - 整合其他庫
- ReactJS - 最佳化效能
- ReactJS - Profiler API
- ReactJS - Portals
- ReactJS - 無 ES6 ECMAScript 的 React
- ReactJS - 無 JSX 的 React
- ReactJS - 調和
- ReactJS - Refs 和 DOM
- ReactJS - 渲染 Props
- ReactJS - 靜態型別檢查
- ReactJS - 嚴格模式
- ReactJS - Web Components
- 其他概念
- ReactJS - 日期選擇器
- ReactJS - Helmet
- ReactJS - 內聯樣式
- ReactJS - PropTypes
- ReactJS - BrowserRouter
- ReactJS - DOM
- ReactJS - 輪播圖
- ReactJS - 圖示
- ReactJS - 表單元件
- ReactJS - 參考 API
- ReactJS 有用資源
- ReactJS - 快速指南
- ReactJS - 有用資源
- ReactJS - 討論
ReactJS - 轉發 Ref
Ref 是一種用於直接操作 DOM 的逃生艙,不受狀態更改更新元件的影響。Ref 可以應用於 DOM 元素,但要將其應用於 React 元件並在元件內部獲取 DOM 元素,轉發 Ref 是最佳選擇。轉發 Ref 允許元件從頂級元件接收 ref 並將其進一步傳遞到下一級元件,以便獲取 DOM 元素。
讓我們在本節中學習如何在 React 中使用轉發 Ref。
forwardRef 方法的簽名
forwardRef 的簽名如下:
const new-component = React.forwardRef(fn)
其中 fn 的簽名如下:
(props, ref) => {
   // renders a react component by attaching the ref and returns it
}
使用 forwardRef 的一個簡單示例如下:
const MyInput = React.forwardRef((props, ref) => (
   <input type="text" ref={ref} value={props.value} />
));

const myRef = React.createRef();
<MyInput ref={myRef} value="Hi" />
這裡,
MyInput 從頂級元件獲取 ref 並將其傳遞給底層的 input 元素。
myRef 被分配給 MyInput 元件。
MyInput 元件將 myRef 傳遞給底層的 input 元素。
最後,myRef 指向 input 元素。
在元件中應用 forwardRef
讓我們透過開發一個應用程式來學習 forwardRef 的概念。
首先,建立一個新的 React 應用並使用以下命令啟動它。
create-react-app myapp
cd myapp
npm start
接下來,開啟 App.css (src/App.css) 並刪除所有 CSS 類。然後,建立一個簡單的元件,SimpleForwardRef (src/Components/SimpleForwardRef.js),如下所示:
import React from "react";
const SimpleForwardRef = React.forwardRef((props, ref) => (
   <input type="text" ref={ref} value={props.value} />
));
export default SimpleForwardRef
這裡我們有,
使用 forwardRef 將 ref 傳遞給 input 元素。
input 元素使用 ref 屬性來設定 ref 值。
接下來,開啟 App 元件 (src/App.js) 並使用 SimpleForwardRef 元件更新內容,如下所示:
import './App.css'
import React, { useEffect } from 'react';
import SimpleForwardRef from './Components/SimpleForwardRef'
function App() {
   const myRef = React.createRef();
   useEffect(() => {
      setTimeout(() => {
         myRef.current.value = "Hello"
      }, 5000)
   })
   return (
      <div className="container">
         <div style={{ padding: "10px" }}>
            <div>
               <SimpleForwardRef ref={myRef} value="Hi" />
            </div>
         </div>
      </div>
   );
}
export default App;
這裡,
myRef 使用 createRef 方法建立並傳遞給 SimpleForwardRef 元件。
myRef 代表由 SimpleForwardRef 元件渲染的 input 元素。
useEffect 將透過 myRef 訪問 input 元素並嘗試將 input 的值從 hi 更改為 Hello。
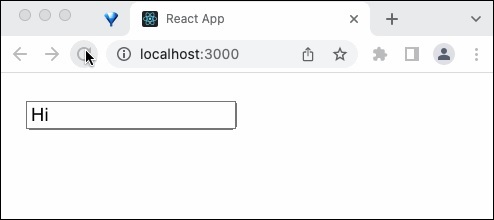
最後,在瀏覽器中開啟應用程式。input 的值將在 5 秒後更改為 Hello,如下所示:
總結
轉發 Ref 增強了 Ref 的概念,使其可以在 React 應用程式的任何地方使用。任何 DOM 元素(無論在元件層次結構中處於任何深度)都可以使用轉發 Ref 概念進行訪問和操作。