- ReactJS 教程
- ReactJS - 首頁
- ReactJS - 簡介
- ReactJS - 路線圖
- ReactJS - 安裝
- ReactJS - 特性
- ReactJS - 優點與缺點
- ReactJS - 架構
- ReactJS - 建立 React 應用
- ReactJS - JSX
- ReactJS - 元件
- ReactJS - 巢狀元件
- ReactJS - 使用新建立的元件
- ReactJS - 元件集合
- ReactJS - 樣式
- ReactJS - 屬性 (props)
- ReactJS - 使用屬性建立元件
- ReactJS - props 驗證
- ReactJS - 建構函式
- ReactJS - 元件生命週期
- ReactJS - 事件管理
- ReactJS - 建立事件感知元件
- ReactJS - 在 Expense Manager 應用中引入事件
- ReactJS - 狀態管理
- ReactJS - 狀態管理 API
- ReactJS - 無狀態元件
- ReactJS - 使用 React Hooks 進行狀態管理
- ReactJS - 使用 React Hooks 進行元件生命週期管理
- ReactJS - 佈局元件
- ReactJS - 分頁
- ReactJS - Material UI
- ReactJS - Http 客戶端程式設計
- ReactJS - 表單程式設計
- ReactJS - 受控元件
- ReactJS - 非受控元件
- ReactJS - Formik
- ReactJS - 條件渲染
- ReactJS - 列表
- ReactJS - 鍵
- ReactJS - 路由
- ReactJS - Redux
- ReactJS - 動畫
- ReactJS - Bootstrap
- ReactJS - 地圖
- ReactJS - 表格
- ReactJS - 使用 Flux 管理狀態
- ReactJS - 測試
- ReactJS - CLI 命令
- ReactJS - 構建和部署
- ReactJS - 示例
- Hooks
- ReactJS - Hooks 簡介
- ReactJS - 使用 useState
- ReactJS - 使用 useEffect
- ReactJS - 使用 useContext
- ReactJS - 使用 useRef
- ReactJS - 使用 useReducer
- ReactJS - 使用 useCallback
- ReactJS - 使用 useMemo
- ReactJS - 自定義 Hooks
- ReactJS 高階
- ReactJS - 可訪問性
- ReactJS - 程式碼分割
- ReactJS - 上下文
- ReactJS - 錯誤邊界
- ReactJS - 轉發 Refs
- ReactJS - 片段
- ReactJS - 高階元件
- ReactJS - 與其他庫整合
- ReactJS - 最佳化效能
- ReactJS - Profiler API
- ReactJS - 埠
- ReactJS - 無 ES6 ECMAScript 的 React
- ReactJS - 無 JSX 的 React
- ReactJS - 調和
- ReactJS - Refs 和 DOM
- ReactJS - 渲染 Props
- ReactJS - 靜態型別檢查
- ReactJS - 嚴格模式
- ReactJS - Web Components
- 其他概念
- ReactJS - 日期選擇器
- ReactJS - Helmet
- ReactJS - 內聯樣式
- ReactJS - PropTypes
- ReactJS - BrowserRouter
- ReactJS - DOM
- ReactJS - 走馬燈
- ReactJS - 圖示
- ReactJS - 表單元件
- ReactJS - 參考 API
- ReactJS 有用資源
- ReactJS - 快速指南
- ReactJS - 有用資源
- ReactJS - 討論
ReactJS - 建立事件感知元件
事件管理是 Web 應用中重要的功能之一。它使使用者能夠與應用互動。React 支援 Web 應用中所有可用的事件。React 事件處理與 DOM 事件非常相似,只是有一些細微的差別。例如,點選元件是可以在基於 React 的網站上觀察到的常見事件之一。
React 中的事件感知元件不過是一個在其內部包含事件處理程式方法的元件。該元件可以是類元件或函式元件。在本章中,我們將學習如何使用 React 建立此類事件感知元件。
如何建立事件感知元件?
以下是建立新的事件感知元件的步驟:
讓我們建立一個新的元件,MessageWithEvent,並在元件中處理事件,以便更好地理解 React 應用中的事件管理。
步驟 1 - 在您喜歡的編輯器中開啟 expense-manager 應用。
接下來,在 src/components 資料夾中建立一個檔案,MessageWithEvent.js,以建立 MessageWithEvent 元件。
匯入 React 庫。
import React from 'react';
步驟 2 - 建立一個類,MessageWithEvent,並使用 props 呼叫建構函式。
class MessageWithEvent extends React.Component {
   constructor(props) {
      super(props);
   }
}
步驟 3 - 建立一個事件處理程式方法,logEventToConsole,它將事件詳細資訊記錄到控制檯。
logEventToConsole(e) {
   console.log(e.target.innerHTML);
}
步驟 4 - 建立一個 render 函式。
render() {
}
在 render() 函式中,建立一個問候訊息並返回它。
render() {
   return (
      <div>
         <p>Hello {this.props.name}!</p>
      </div>
   );
}
步驟 5 - 然後,將 logEventToConsole 方法設定為根容器(div) 的點選事件的事件處理程式。
render() {
   return (
      <div onClick={this.logEventToConsole}>
         <p>Hello {this.props.name}!</p>
      </div>
   );
}
步驟 6 - 透過繫結事件處理程式更新建構函式。
class MessageWithEvent extends React.Component {
   constructor(props) {
      super(props);
      this.logEventToConsole = this.logEventToConsole.bind();
   }
}
最後,匯出元件。
export default MessageWithEvent;
下面給出 MessageWithEvent 元件的完整程式碼:
import React from 'react';

class MessageWithEvent extends React.Component {
   constructor(props) {
      super(props);

      this.logEventToConsole = this.logEventToConsole.bind();
   }
   logEventToConsole(e) {
      console.log(e.target.innerHTML);
   }
   render() {
      return (
         <div onClick={this.logEventToConsole}>
            <p>Hello {this.props.name}!</p>
         </div>
      );
   }
}
export default MessageWithEvent;
index.js
接下來,開啟 index.js 並匯入 MessageWithEvent。
import MessageWithEvent from './components/MessageWithEvent'
使用 MessageWithEvent 元件構建應用的使用者介面。
import React from 'react';
import ReactDOM from 'react-dom';
import MessageWithEvent from './components/MessageWithEvent'

ReactDOM.render(
   <React.StrictMode>
       <div>
            <MessageWithEvent name="React" />
            <MessageWithEvent name="React developer" />
      </div>
   </React.StrictMode>,
   document.getElementById('root')
);
使用 npm 命令啟動應用。
npm start
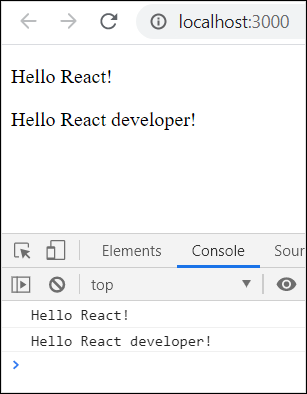
開啟瀏覽器並在位址列中輸入 https://:3000 並按回車鍵。
現在,點選 MessageWithEvent 元件,應用將在控制檯中發出訊息,如下所示。
將額外資訊傳遞給事件處理程式
讓我們嘗試將額外資訊(例如,msgid)傳遞給事件處理程式。
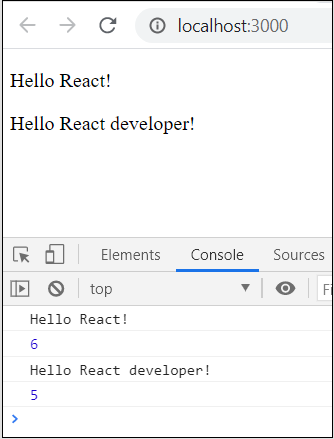
步驟 1 - 首先,更新 logEventToConsole 以接受一個額外的引數,msgid。
logEventToConsole(msgid, e) {
   console.log(e.target.innerHTML);
   console.log(msgid);
}
步驟 2 - 接下來,透過在 render 方法中繫結訊息 ID 將訊息 ID 傳遞給事件處理程式。
render() {
   return (
      <div onClick={this.logEventToConsole.bind(this, Math.floor(Math.random() * 10))}>
         <p>Hello {this.props.name}!</p>
      </div>
   );
}
步驟 3 - 完整且更新後的程式碼如下:
import React from 'react';

class MessageWithEvent extends React.Component {
   constructor(props) {
      super(props);

      this.logEventToConsole = this.logEventToConsole.bind();
   }
   logEventToConsole(msgid, e) {
      console.log(e.target.innerHTML);
      console.log(msgid);
   }
   render() {
      return (
         >div onClick={this.logEventToConsole.bind(this, Math.floor(Math.random() * 10))}>
            >p>Hello {this.props.name}!>/p>
         >/div>
      );
   }
}
export default MessageWithEvent;
執行應用,您會發現事件在控制檯中發出了訊息 ID。