- ReactJS 教程
- ReactJS - 首頁
- ReactJS - 簡介
- ReactJS - 路線圖
- ReactJS - 安裝
- ReactJS - 特性
- ReactJS - 優點與缺點
- ReactJS - 架構
- ReactJS - 建立 React 應用
- ReactJS - JSX
- ReactJS - 元件
- ReactJS - 巢狀元件
- ReactJS - 使用新建立的元件
- ReactJS - 元件集合
- ReactJS - 樣式
- ReactJS - 屬性 (props)
- ReactJS - 使用屬性建立元件
- ReactJS - props 驗證
- ReactJS - 建構函式
- ReactJS - 元件生命週期
- ReactJS - 事件管理
- ReactJS - 建立一個事件感知元件
- ReactJS - 在 Expense Manager 應用中引入事件
- ReactJS - 狀態管理
- ReactJS - 狀態管理 API
- ReactJS - 無狀態元件
- ReactJS - 使用 React Hooks 進行狀態管理
- ReactJS - 使用 React Hooks 的元件生命週期
- ReactJS - 佈局元件
- ReactJS - 分頁
- ReactJS - Material UI
- ReactJS - Http 客戶端程式設計
- ReactJS - 表單程式設計
- ReactJS - 受控元件
- ReactJS - 非受控元件
- ReactJS - Formik
- ReactJS - 條件渲染
- ReactJS - 列表
- ReactJS - Keys
- ReactJS - 路由
- ReactJS - Redux
- ReactJS - 動畫
- ReactJS - Bootstrap
- ReactJS - Map
- ReactJS - 表格
- ReactJS - 使用 Flux 管理狀態
- ReactJS - 測試
- ReactJS - CLI 命令
- ReactJS - 構建和部署
- ReactJS - 例子
- Hooks
- ReactJS - Hooks 簡介
- ReactJS - 使用 useState
- ReactJS - 使用 useEffect
- ReactJS - 使用 useContext
- ReactJS - 使用 useRef
- ReactJS - 使用 useReducer
- ReactJS - 使用 useCallback
- ReactJS - 使用 useMemo
- ReactJS - 自定義 Hooks
- ReactJS 高階
- ReactJS - 可訪問性
- ReactJS - 程式碼分割
- ReactJS - Context
- ReactJS - 錯誤邊界
- ReactJS - 轉發 Refs
- ReactJS - Fragments
- ReactJS - 高階元件
- ReactJS - 與其他庫整合
- ReactJS - 效能最佳化
- ReactJS - Profiler API
- ReactJS - Portals
- ReactJS - 不使用 ES6 ECMAScript 的 React
- ReactJS - 不使用 JSX 的 React
- ReactJS - 調和
- ReactJS - Refs 和 DOM
- ReactJS - 渲染 Props
- ReactJS - 靜態型別檢查
- ReactJS - Strict Mode
- ReactJS - Web Components
- 附加概念
- ReactJS - 日期選擇器
- ReactJS - Helmet
- ReactJS - 內聯樣式
- ReactJS - PropTypes
- ReactJS - BrowserRouter
- ReactJS - DOM
- ReactJS - 輪播圖
- ReactJS - 圖示
- ReactJS - 表單元件
- ReactJS - 參考 API
- ReactJS 有用資源
- ReactJS - 快速指南
- ReactJS - 有用資源
- ReactJS - 討論
ReactJS - 使用屬性建立元件
正如我們之前在本教程中學到的,React是一個非常靈活的庫,規則可以彎曲,但它嚴格遵守一條規則:如果一個元件被定義為函式或類,它必須像一個純函式一樣對待它們的屬性。在React中,純函式定義為輸入不能改變的函式,因此不會改變其結果。
簡而言之,傳遞給元件的 Props 是隻讀的。但是由於應用程式 UI 是動態的,並且會隨著時間的推移而改變其輸入,因此我們使用“狀態”概念來處理它。
狀態的概念允許 React 元件響應使用者操作、網路響應等更改其結果,而不會違反此規則。
如何使用屬性建立元件?
在本章中,讓我們看看使用屬性建立元件的步驟:
我們將首先修改我們的 ExpenseEntryItem 元件並嘗試使用屬性。
步驟 1 - 在你喜歡的編輯器中開啟我們的 expense-manager 應用程式。
在 src/components 資料夾中開啟 ExpenseEntryItem 檔案。
步驟 2 - 引入帶有引數 props 的建構函式。
constructor(props) {
   super(props);
}
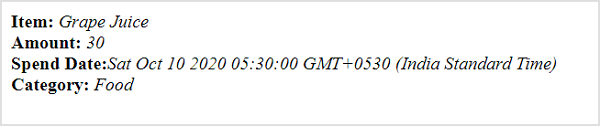
接下來,更改 render 方法並填充來自 props 的值。
render() {
   return (
      <div>
         <div><b>Item:</b> <em>{this.props.name}</em></div>
         <div><b>Amount:</b> <em>{this.props.amount}</em></div>
         <div><b>Spend date:</b>
            <em>{this.props.spenddate.tostring()}</em></div>
         <div><b>Category:</b> <em>{this.props.category}</em></div>
      </div>
   );
}
這裡:
name 代表專案名稱,型別為 String
amount 代表專案的金額,型別為 number
spendDate 代表專案的支出日期,型別為 date
category 代表專案的類別,型別為 String
現在,我們已經成功地使用屬性更新了元件。
import React from 'react'
import './ExpenseEntryItem.css';
import styles from './ExpenseEntryItem.module.css'

class ExpenseEntryItem extends React.Component {
   constructor(props) {
      super(props);
   }
   render() {
      return (
         <div>
            <div><b>Item:</b> <em>{this.props.name}</em></div>
            <div><b>Amount:</b> <em>{this.props.amount}</em></div>
            <div><b>Spend Date:</b>
               <em>{this.props.spendDate.toString()}</em></div>
            <div><b>Category:</b> <em>{this.props.category}</em></div>
         </div>
      );
   }
}
export default ExpenseEntryItem;
index.js
現在,我們可以透過在 index.js 中透過屬性傳遞所有屬性來使用該元件。
import React from 'react';
import ReactDOM from 'react-dom';
import ExpenseEntryItem from './components/ExpenseEntryItem'

const name = "Grape Juice"
const amount = 30.00
const spendDate = new Date("2020-10-10")
const category = "Food"

ReactDOM.render(
   <React.StrictMode>
      <ExpenseEntryItem
         name={name}
         amount={amount}
         spendDate={spendDate}
         category={category} />
   </React.StrictMode>,
   document.getElementById('root')
);
使用 npm 命令啟動應用程式。
npm start
開啟瀏覽器,在位址列中輸入 https://:3000 並按 Enter 鍵。
使用 CDN 在網頁中執行此操作的完整程式碼如下:
<!DOCTYPE html>
<html>
   <head>
      <meta charset="UTF-8" />
      <title>React based application</title>
   </head>
   <body>
      <div id="react-app"></div>

      <script src="https://unpkg.com/react@17/umd/react.development.js" crossorigin></script>
      <script src="https://unpkg.com/react-dom@17/umd/react-dom.development.js" crossorigin></script>
      <script src="https://unpkg.com/@babel/standalone/babel.min.js"></script>
      <script type="text/babel">
         class ExpenseEntryItem extends React.Component {
            constructor(props) {
               super(props);
            }
            render() {
               return (
                  <div>
                     <div><b>Item:</b> <em>{this.props.name}</em></div>
                     <div><b>Amount:</b> <em>{this.props.amount}</em></div>
                     <div><b>Spend Date:</b> <em>{this.props.spendDate.toString()}</em></div>
                     <div><b>Category:</b> <em>{this.props.category}</em></div>
                  </div>
               );
            }
         }
         const name = "Grape Juice"
         const amount = 30.00
         const spendDate = new Date("2020-10-10")
         const category = "Food"

         ReactDOM.render(
            <ExpenseEntryItem
               name={name}
               amount={amount}
               spendDate={spendDate}
               category={category} />,
            document.getElementById('react-app') );
      </script>
   </body>
</html>
物件作為屬性
讓我們在本節學習如何在 React 中使用 JavaScript 物件作為屬性。
步驟 1 - 在你喜歡的編輯器中開啟我們的 expense-manager 應用程式。
開啟 ExpenseEntryItem.js 檔案。
步驟 2 - 接下來,更改 render() 方法並透過 this.props.item 屬性訪問輸入物件 item。
render() {
   return (
      <div>
         <div><b>Item:</b> <em>{this.props.item.name}</em></div>
         <div><b>Amount:</b> <em>{this.props.item.amount}</em></div>
         <div><b>Spend Date:</b>
            <em>{this.props.item.spendDate.toString()}</em></div>
         <div><b>Category:</b> <em>{this.props.item.category}</em></div>
      </div>
   );
}
開啟 index.js 並用 JavaScript 物件表示費用條目專案。
const item = {
   id: 1,
   name : "Grape Juice",
   amount : 30.5,
   spendDate: new Date("2020-10-10"),
   category: "Food"
}
使用花括號 ({}) 語法在元件屬性中將物件傳遞給元件。
<ExpenseEntryItem item={item} />
index.js
index.js 的完整程式碼如下:
import React from 'react';
import ReactDOM from 'react-dom';
import ExpenseEntryItem from './components/ExpenseEntryItem'

const item = {
   id: 1,
   name : "Grape Juice",
   amount : 30.5,
   spendDate: new Date("2020-10-10"),
   category: "Food"
}
ReactDOM.render(
   <React.StrictMode>
   <ExpenseEntryItem item={item} />
   </React.StrictMode>,
   document.getElementById('root')
);
使用 npm 命令啟動應用程式。
npm start
開啟瀏覽器,在位址列中輸入 https://:3000 並按 Enter 鍵。
使用 CDN 在網頁中執行此操作的完整程式碼如下:
<!DOCTYPE html>
<html>
   <head>
      <meta charset="UTF-8" />
      <title>React based application</title>
   </head>
   <body>
      <div id="react-app"></div>

      <script src="https://unpkg.com/react@17/umd/react.development.js" crossorigin></script>
      <script src="https://unpkg.com/react-dom@17/umd/react-dom.development.js" crossorigin></script>
      <script src="https://unpkg.com/@babel/standalone/babel.min.js"></script>
      <script type="text/babel">
         class ExpenseEntryItem extends React.Component {
            constructor(props) {
               super(props);
            }
            render() {
               return (
                  <div>
                     <div><b>Item:</b>
                        <em>{this.props.item.name}</em></div>
                     <div><b>Amount:</b>
                        <em>{this.props.item.amount}</em></div>
                     <div><b>Spend Date:</b>
                        <em>{this.props.item.spendDate.toString()}</em>
                     </div>
                     <div><b>Category:</b>
                        <em>{this.props.item.category}</em>
                     </div>
                  </div>
               );
            }
         }
         const item = {
            id: 1,
            name : "Grape Juice",
            amount : 30.5,
            spendDate: new Date("2020-10-10"),
            category: "Food"
         }
         ReactDOM.render(
            <ExpenseEntryItem item={item} />,
            document.getElementById('react-app')
         );
      </script>
   </body>
</html>