- Microsoft Expression Web 教程
- MS Expression Web - 首頁
- MS Expression Web - 概述
- 環境設定
- MS Expression Web - 新建網站
- 空白網頁
- 網頁佈局
- MS Expression Web - HTML 佈局
- 水平導航
- 垂直導航
- MS Expression Web - 驗證頁面
- 動態網頁模板
- MS Expression Web - 搜尋頁面
- MS Expression Web - 圖片
- MS Expression Web - 超連結
- MS Expression Web - 影片
- SQL 資料來源
- MS Expression Web - MS Word
- MS Expression Web - 網格檢視
- MS Expression Web - 主頁
- MS Expression Web - 資料表
- MS Expression Web - 釋出
- 備份網站
- MS Expression Web - 附加元件
- MS Expression Web 資源
- MS Expression Web - 快速指南
- MS Expression Web - 資源
- MS Expression Web - 討論
水平導航
本章我們將學習如何向網站新增水平導航或選單項。
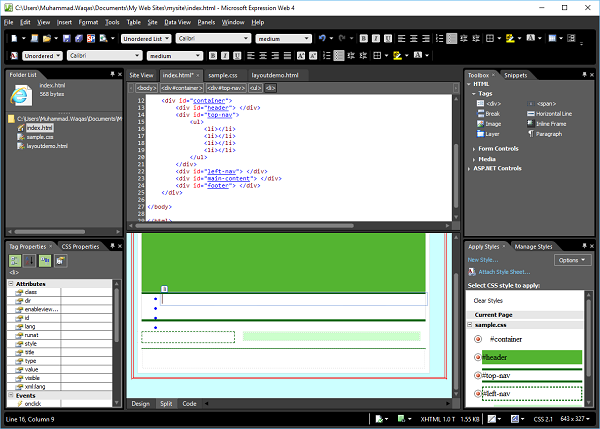
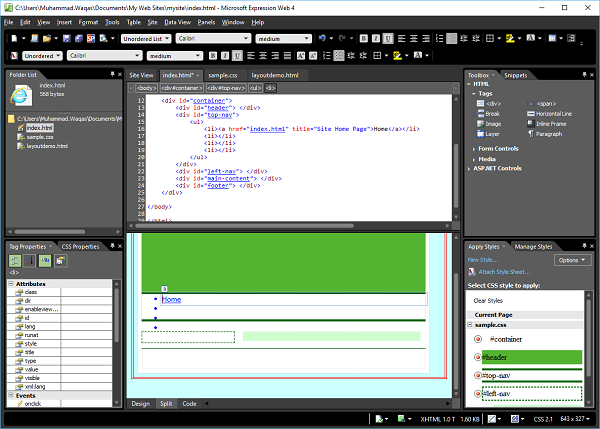
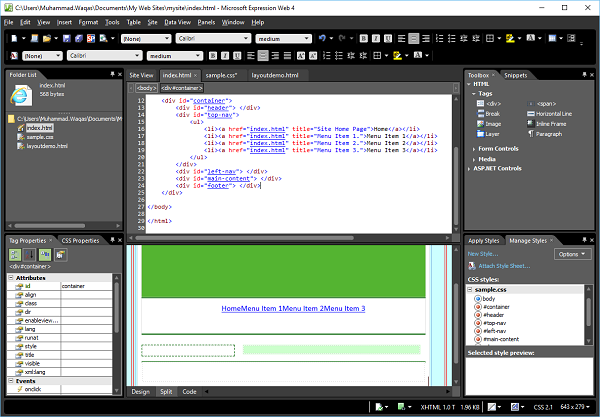
步驟 1 − 要建立選單項或水平導航,讓我們在index.html檔案的<div id = “top-nav”>中新增以下程式碼,其中包含選單項列表。
<div id = "top-nav">
   <ul>
      <li></li>
      <li></li>
      <li></li>
      <li></li>
   </ul>
</div>
步驟 2 − 這是一個簡單的頂部選單專案符號列表。要建立超連結,請轉到設計檢視或程式碼檢視。
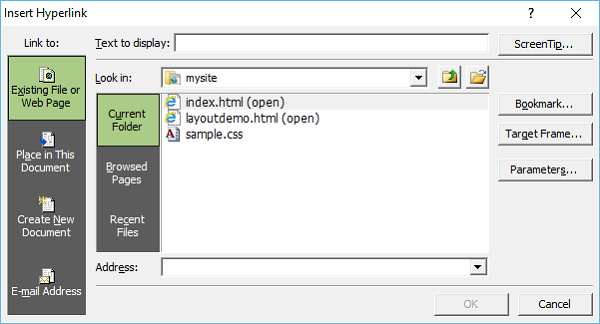
步驟 3 − 選擇要用作超連結的專案,然後按 Ctrl + K。
步驟 4 − 點選螢幕提示…按鈕。
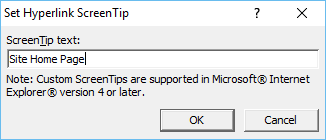
步驟 5 − 輸入您想要的螢幕提示文字,然後點選確定。
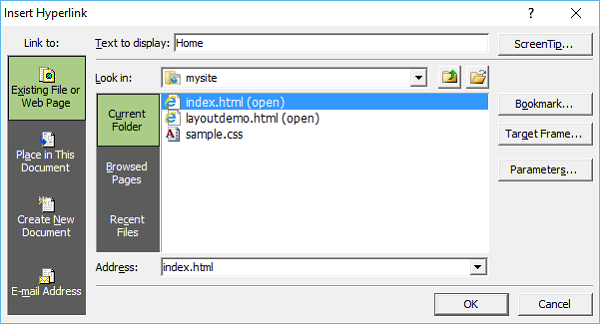
步驟 6 − 在顯示文字欄位中,輸入首頁,然後選擇index.html檔案,然後點選確定。
步驟 7 − 同樣,為其他選單項新增超連結,如下面的程式碼所示。
<!DOCTYPE html PUBLIC "-//W3C//DTD XHTML 1.0 Transitional//EN"
   "http://www.w3.org/TR/xhtml1/DTD/xhtml1-transitional.dtd">
<html xmlns = "http://www.w3.org/1999/xhtml">
   <head>
      <meta content = "text/html; charset=utf-8" http-equiv = "Content-Type" />
      <style type = "text/css"></style>
      <link href = "sample.css" rel="stylesheet" type = "text/css" />
   </head>

   <body>
      <div id = "container">
         <div id = "header"></div>
         <div id = "top-nav">
            <ul>
               <li><a href = "index.html" title = "Site Home Page">Home</a></li>
               <li><a href = "index.html" title = "Menu Item 1.">Menu Item 1</a></li>
               <li><a href = "index.html" title =  "Menu Item 2.">Menu Item 2</a></li>
               <li><a href = "index.html" title = "Menu Item 3.">Menu Item 3</a></li>
            </ul>
         </div>
         <div id = "left-nav"> </div>
         <div id = "main-content"> </div>
         <div id = "footer"> </div>
      </div>
   </body>
</html>
步驟 8 − 要設定頂部導航的樣式,請轉到管理樣式面板。
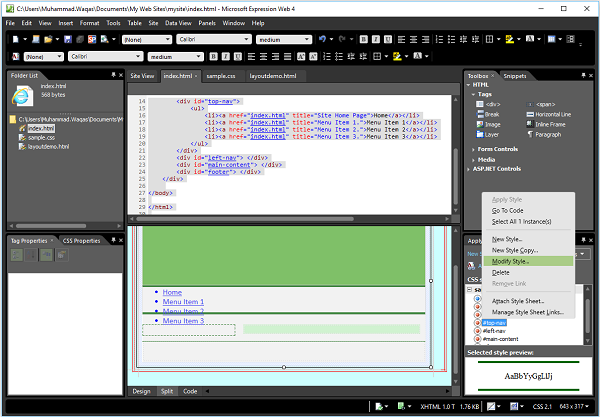
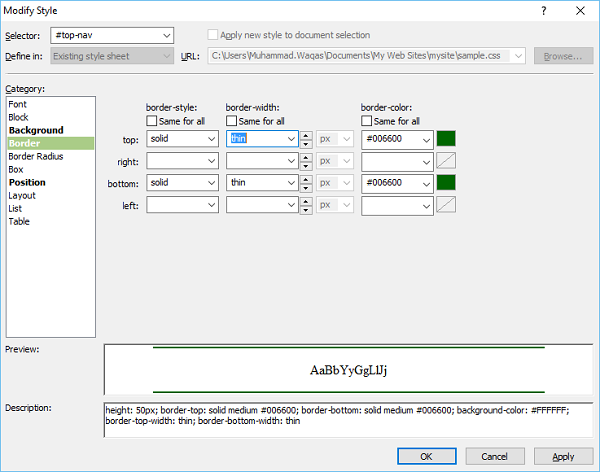
步驟 9 − 右鍵點選“#top-nav”並選擇修改樣式。選擇“邊框”類別並將寬度更改為細。
步驟 10 − 選擇“邊框”類別,取消選中“所有邊距相同”複選框,並在頂部和底部欄位中輸入 10。
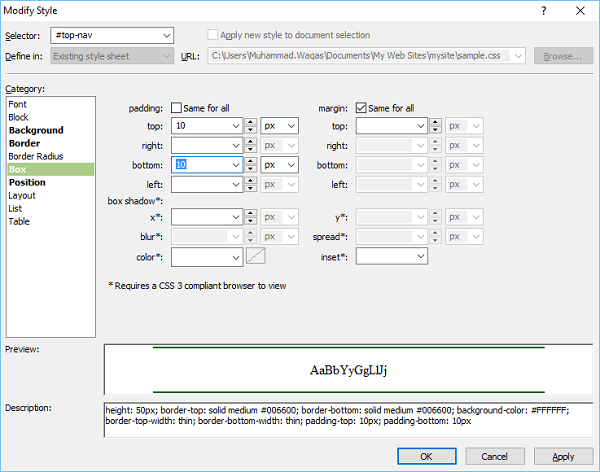
步驟 11 − 轉到位置類別。
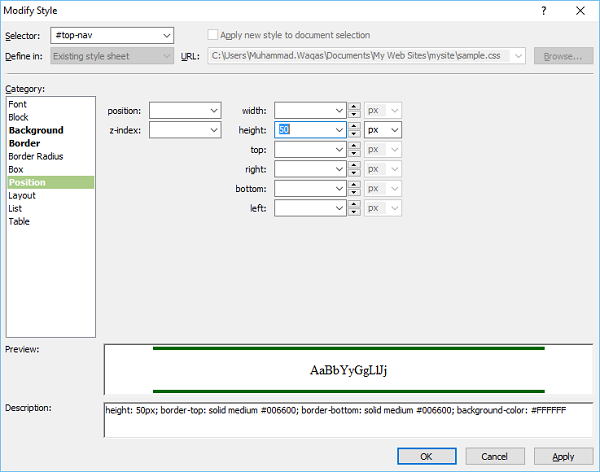
步驟 12 − 從高度欄位中刪除 50,然後單擊確定。在“應用樣式”面板中,單擊“新建樣式…”。
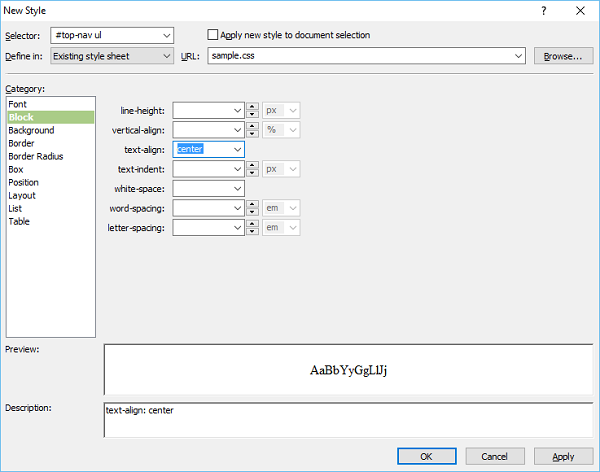
步驟 13 − 在“選擇器”欄位中輸入#top-nav ul,並從“定義於”下拉列表中選擇現有的樣式表。在“塊”類別中,從“文字對齊”欄位中選擇“居中”,然後轉到“列表”類別。
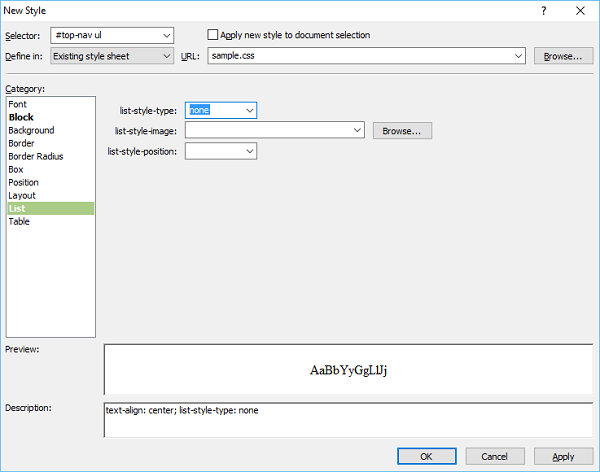
步驟 14 − 從list-style-type欄位中選擇無,然後單擊確定。

步驟 15 − 再次從應用樣式面板中,單擊“新建樣式…”。在“選擇器”欄位中輸入#top-nav ul li。然後從“定義於”下拉列表中選擇現有的樣式表,然後轉到“佈局”類別。
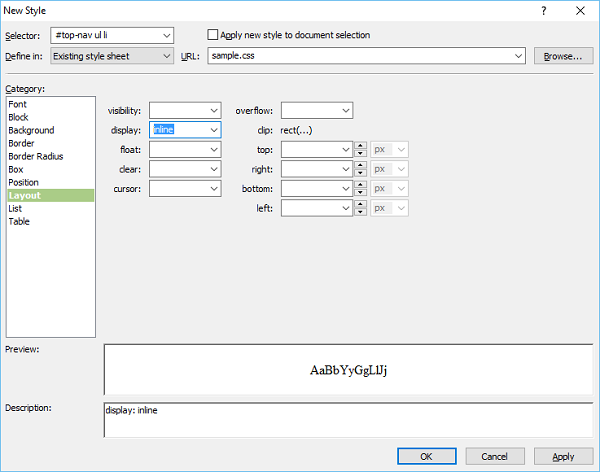
步驟 16 − 從display欄位中選擇inline,然後單擊確定。
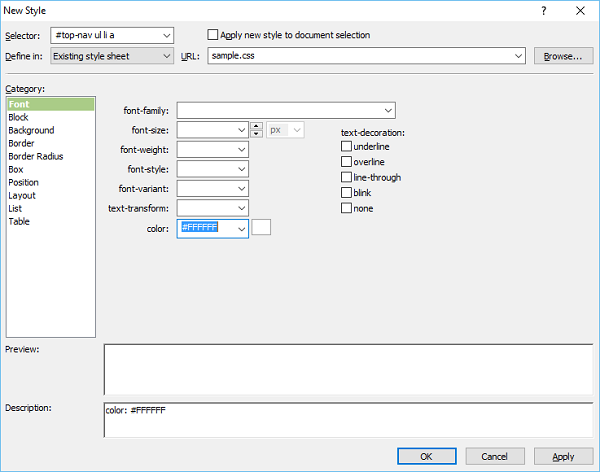
步驟 17 − 轉到“應用樣式”面板,單擊“新建樣式…”。在“選擇器”欄位中輸入#top-nav ul li a,並從“定義於”下拉列表中選擇現有的樣式表,然後選擇白色作為字型顏色。
步驟 18 − 轉到背景類別。
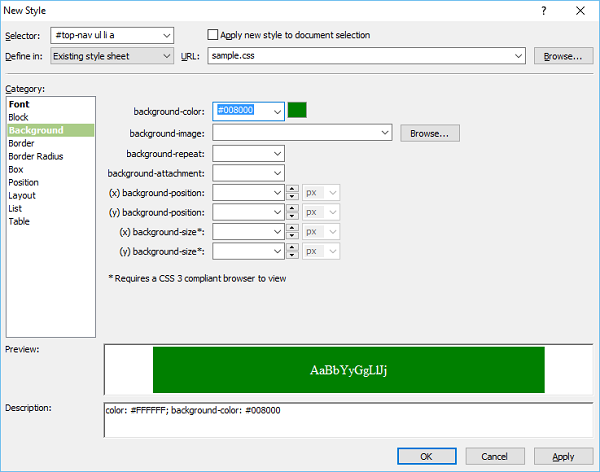
步驟 19 − 選擇綠色作為背景顏色,然後轉到邊框類別。
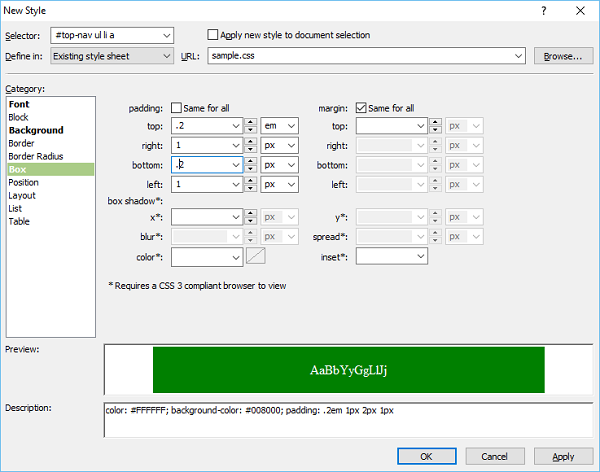
步驟 20 − 設定填充值,然後單擊確定。
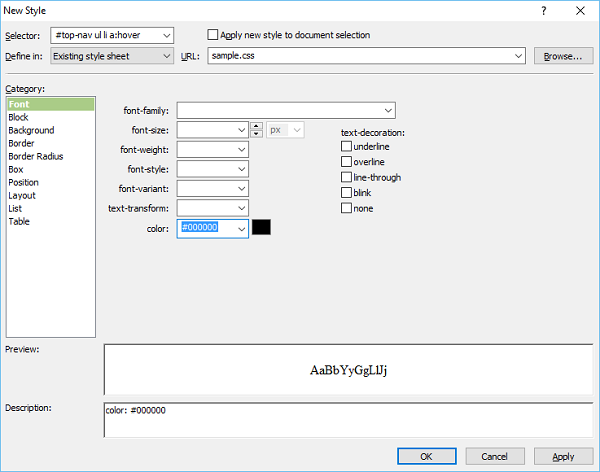
步驟 21 − 現在讓我們再次轉到“應用樣式”面板,然後單擊“新建樣式”。在“選擇器”欄位中輸入#topnav ul li a:hover,並從“定義於”下拉列表中選擇現有的樣式表,然後選擇黑色作為字型顏色。
步驟 22 − 現在轉到背景類別。

步驟 23 − 選擇滑鼠懸停在選單項上時選單選項的背景顏色,然後轉到“邊框”類別。
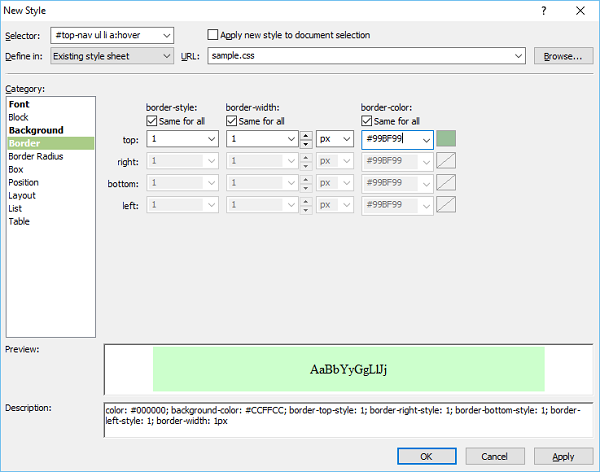
步驟 24 − 選擇邊框樣式、寬度和顏色,然後單擊確定。要檢查其外觀,請轉到“檔案”選單並選擇“在瀏覽器中預覽”。
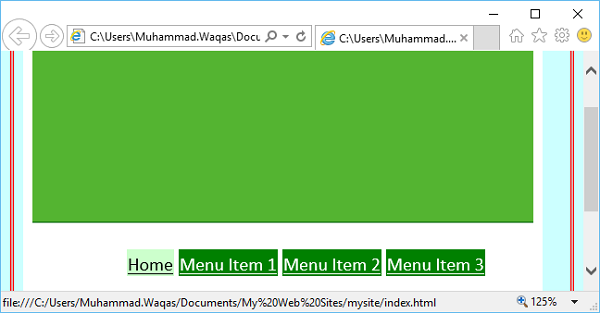
當您將滑鼠懸停在任何選單項上時,它將更改背景和字型顏色。