- FastAPI 教程
- FastAPI - 首頁
- FastAPI - 簡介
- FastAPI - Hello World
- FastAPI - OpenAPI
- FastAPI - Uvicorn
- FastAPI - 型別提示
- FastAPI - IDE 支援
- FastAPI - REST 架構
- FastAPI - 路徑引數
- FastAPI - 查詢引數
- FastAPI - 引數驗證
- FastAPI - Pydantic
- FastAPI - 請求體
- FastAPI - 模板
- FastAPI - 靜態檔案
- FastAPI - HTML 表單模板
- FastAPI - 訪問表單資料
- FastAPI - 上傳檔案
- FastAPI - Cookie 引數
- FastAPI - 頭部引數
- FastAPI - 響應模型
- FastAPI - 巢狀模型
- FastAPI - 依賴項
- FastAPI - CORS
- FastAPI - CRUD 操作
- FastAPI - SQL 資料庫
- FastAPI - 使用 MongoDB
- FastAPI - 使用 GraphQL
- FastAPI - WebSockets
- FastAPI - FastAPI 事件處理器
- FastAPI - 掛載子應用
- FastAPI - 中介軟體
- FastAPI - 掛載 Flask 應用
- FastAPI - 部署
- FastAPI 有用資源
- FastAPI - 快速指南
- FastAPI - 有用資源
- FastAPI - 討論
FastAPI - 部署
到目前為止,我們一直在使用本地開發伺服器“Uvicorn”來執行我們的 FastAPI 應用程式。為了使應用程式公開可用,必須將其部署到具有靜態 IP 地址的遠端伺服器上。可以使用免費計劃或基於訂閱的服務將其部署到不同的平臺,例如 Heroku、Google Cloud、nginx 等。
在本章中,我們將使用Deta雲平臺。它的免費部署服務非常易於使用。
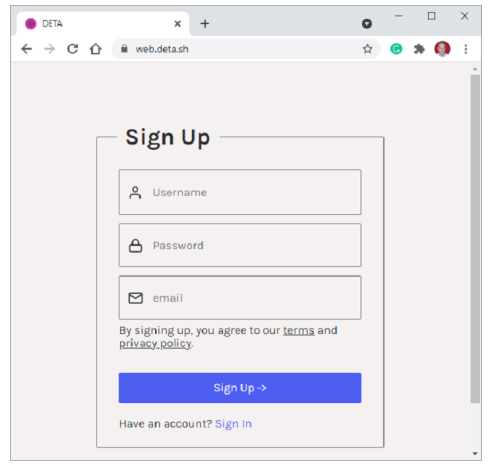
首先,要使用 Deta,我們需要在其網站上建立一個帳戶,並選擇合適的使用者名稱和密碼。
建立帳戶後,在本地機器上安裝Deta CLI(命令列介面)。為您的應用程式建立一個資料夾(c:\fastapi_deta_app)。如果您使用的是 Linux,請在終端中使用以下命令:
iwr https://get.deta.dev/cli.ps1 -useb | iex
如果您使用的是 Windows,請從 Windows PowerShell 終端執行以下命令:
PS C:\fastapi_deta_app> iwr https://get.deta.dev/cli.ps1 -useb | iex
Deta was installed successfully to
C:\Users\User\.deta\bin\deta.exe
Run 'deta --help' to get started
使用登入命令並驗證您的使用者名稱和密碼。
PS C:\fastapi_deta_app> deta login
Please, log in from the web page. Waiting...
https://web.deta.sh/cli/60836
Logged in successfully.
在同一個應用程式資料夾中,在main.py檔案中建立一個最小的 FastAPI 應用程式。
# main.py
from fastapi import FastAPI
app = FastAPI()
@app.get("/")
def read_root():
   return {"Hello": "World"}
@app.get("/items/{item_id}")
def read_item(item_id: int):
   return {"item_id": item_id}
現在我們準備部署我們的應用程式。從 PowerShell 終端使用deta new命令。
PS C:\fastapi_deta_app> deta new
Successfully created a new micro
{
   "name": "fastapi_deta_app",
   "id": "2b236e8f-da6a-409b-8d51-7c3952157d3c",
   "project": "c03xflte",
   "runtime": "python3.9",
   "endpoint": "https://vfrjgd.deta.dev",
   "region": "ap-southeast-1",
   "visor": "enabled",
   "http_auth": "disabled"
}
Adding dependencies...
…..
Installing collected packages: typing-extensions, pydantic, idna, sniffio, anyio, starlette, fastapi
Successfully installed anyio-3.4.0 fastapi-0.70.0 idna-3.3 pydantic-1.8.2 sniffio-1.2.0 starlette-0.16.0 typingextensions-4.0.0
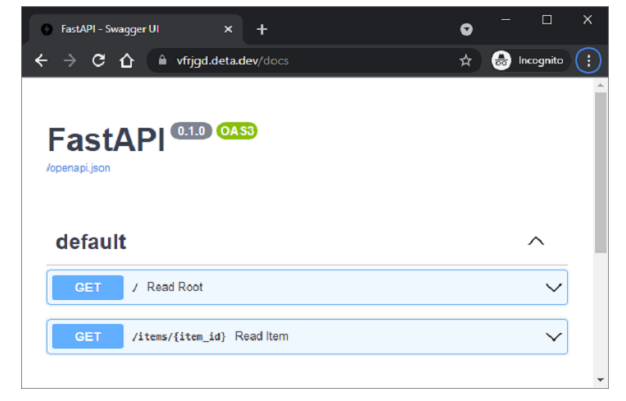
Deta 將應用程式部署到給定的端點(每個應用程式可能隨機建立)。它首先安裝所需的依賴項,就像它安裝在本地機器上一樣。部署成功後,開啟瀏覽器並訪問端點金鑰前面的 URL。Swagger UI 文件也可以在 https://vfrigd.deta.dev/docs 找到。
廣告