- Angular 教程
- Angular - 首頁
- Angular - 概述
- Angular - 特性
- Angular - 優點與缺點
- Angular 基礎
- Angular - 環境設定
- Angular - 第一個應用
- Angular - MVC 架構
- Angular 元件
- Angular - 元件
- Angular - 元件生命週期
- Angular - 檢視封裝
- Angular - 元件互動
- Angular - 元件樣式
- Angular - 巢狀元件
- Angular - 內容投影
- Angular - 動態元件
- Angular - 元素
- Angular 模板
- Angular - 模板
- Angular - 文字插值
- Angular - 模板語句
- Angular - 模板中的變數
- Angular - SVG 作為模板
- Angular 繫結
- Angular - 繫結及其型別
- Angular - 資料繫結
- Angular - 事件繫結
- Angular - 屬性繫結
- Angular - 屬性繫結
- Angular - 類和樣式繫結
- Angular 指令
- Angular - 指令
- Angular - 內建指令
- Angular 管道
- Angular - 管道
- Angular - 使用管道轉換資料
- Angular 依賴注入
- Angular - 依賴注入
- Angular HTTP 客戶端程式設計
- Angular - 服務
- Angular - HTTP 客戶端
- Angular - 請求
- Angular - 響應
- Angular - 獲取
- Angular - PUT
- Angular - DELETE
- Angular - JSON-P
- Angular - 使用 HTTP 進行 CRUD 操作
- Angular 路由
- Angular - 路由
- Angular - 導航
- Angular - Angular Material
- Angular 動畫
- Angular - 動畫
- Angular 表單
- Angular - 表單
- Angular - 表單驗證
- Angular Service Workers 和 PWA
- Angular - Service Workers 和 PWA
- Angular 測試
- Angular - 測試概述
- Angular NgModules
- Angular - 模組簡介
- Angular 高階
- Angular - 身份驗證和授權
- Angular - 國際化
- Angular - 可訪問性
- Angular - Web Workers
- Angular - 伺服器端渲染
- Angular - Ivy 編譯器
- Angular - 使用 Bazel 構建
- Angular - 向後相容性
- Angular - 響應式程式設計
- Angular - 在指令和元件之間共享資料
- Angular 工具
- Angular - CLI
- Angular 其他
- Angular - 第三方控制元件
- Angular - 配置
- Angular - 顯示資料
- Angular - 裝飾器和元資料
- Angular - 基本示例
- Angular - 錯誤處理
- Angular - 測試和構建專案
- Angular - 生命週期鉤子
- Angular - 使用者輸入
- Angular - 有什麼新功能?
- Angular 有用資源
- Angular - 快速指南
- Angular - 有用資源
- Angular - 討論
Angular - 獲取
HttpClient get() 方法
要從伺服器獲取資源,可以使用 HTTP 動詞 get。get 的目的是簡單地請求一個資源。伺服器將檢查伺服器中的資源並將其傳送回,如果伺服器中存在特定的資源。
Angular HttpClient 提供了一個方法 get(),用於使用 get HTTP 動詞請求伺服器。讓我們在本節中學習 HttpClient get() 方法。
get() 方法的簽名
get() 方法的簽名如下:
get(<url as string>, <options as object>)
url 表示要請求的資源的 uri。
options 表示要與資源 url 一起傳送的選項。
工作示例
為了實現 HTTP 客戶端-伺服器通訊,我們需要設定一個 Web 應用程式,並需要公開一組 Web API。可以從客戶端請求 Web API。讓我們建立一個示例伺服器應用程式,Expense API App,為費用提供 CRUD REST API(主要是 get 請求)。
步驟 1:轉到您喜歡的 workspace,如下所示:
cd /go/to/your/favorite/workspace
步驟 2:建立一個新資料夾 expense-rest-api 並移動到該資料夾中
mkdir expense-rest-api && cd expense-rest-api
步驟 3:使用 npm 命令提供的 init 子命令建立一個新應用程式,如下所示:
npm init
以上命令會詢問一些問題,並使用預設答案回答所有問題。
步驟 4:安裝 express 和 cors 包以建立基於節點的 Web 應用程式。
npm install express cors --save
步驟 5:安裝 sqlite 包以將費用儲存在基於 sqlite 的資料庫中
npm install sqlite3 --save
步驟 6:建立一個新檔案 sqlitedb.js,並在其中新增以下程式碼以使用費用表和示例費用條目初始化資料庫。費用表將用於儲存費用專案
var sqlite3 = require('sqlite3').verbose()
const DBSOURCE = "expensedb.sqlite"

let db = new sqlite3.Database(DBSOURCE, (err) => {
   if (err) {
      console.error(err.message)
      throw err
   }else{
      console.log('Connected to the SQLite database.')
      db.run(`CREATE TABLE IF NOT EXISTS expense (
         id INTEGER PRIMARY KEY AUTOINCREMENT,
         item text,
         amount real,
         category text,
         location text,
         spendOn text,
         createdOn text
      )`,
         (err) => {
            if (err) {
               console.log(err);
            }else{
               var insert = 'INSERT INTO expense (item, amount, category, location, spendOn, createdOn) VALUES (?,?,?,?,?,?)'
               db.run(insert, ['Pizza', 10, 'Food', 'KFC', '2020-05-26 10:10', '2020-05-26 10:10'])
               db.run(insert, ['Pizza', 9, 'Food', 'Mcdonald', '2020-05-28 11:10', '2020-05-28 11:10'])
               db.run(insert, ['Pizza', 12, 'Food', 'Mcdonald', '2020-05-29 09:22', '2020-05-29 09:22'])
               db.run(insert, ['Pizza', 15, 'Food', 'KFC', '2020-06-06 16:18', '2020-06-06 16:18'])
               db.run(insert, ['Pizza', 14, 'Food', 'Mcdonald', '2020-06-01 18:14', '2020-05-01 18:14'])
            }
         }
      );
   }
});

module.exports = db
步驟 7:開啟 index.js 並更新以下程式碼:
var express = require("express")
var cors = require('cors')
var db = require("./sqlitedb.js")

var app = express()
app.use(cors());

var bodyParser = require("body-parser");
app.use(express.urlencoded({ extended: true }));
app.use(express.json());

var HTTP_PORT = 8000
app.listen(HTTP_PORT, () => {
   console.log("Server running on port %PORT%".replace("%PORT%", HTTP_PORT))
});

app.get("/", (req, res, next) => {
   res.json({ "message": "Ok" })
});

app.get("/api/expense", (req, res, next) => {
   var sql = "select * from expense"
   var params = []
   db.all(sql, params, (err, rows) => {
      if (err) {
         res.status(400).json({ "error": err.message });
         return;
      }
      res.json(rows)
   });

});

app.get("/api/expense/:id", (req, res, next) => {
   var sql = "select * from expense where id = ?"
   var params = [req.params.id]
   db.get(sql, params, (err, row) => {
      if (err) {
         res.status(400).json({ "error": err.message });
         return;
      }
      res.json(row)
   });
});

app.use(function (req, res) {
   res.status(404);
});
這裡,程式碼將建立以下六個提到的 REST API 端點。
/ 端點返回 OK 訊息以確保應用程式正常工作。
/api/expense 端點返回資料庫中所有可用的費用專案。
/api/expense/:id 端點根據費用條目 ID 返回費用條目。
步驟 8:執行應用程式,如下所示:
node index.js
步驟 9:要測試應用程式並確保其正常工作,請開啟瀏覽器並轉到 https://:8000/。如果應用程式正常工作,它應該返回以下訊息。
{
   "message": "Ok"
}
讓我們建立一個可行的 Angular 示例,透過使用 HttpClient 服務類和 get() 方法從上述伺服器應用程式獲取所有費用專案。
步驟 1:透過執行 ng new 命令建立一個新的 Angular 應用程式,如下所示:
ng new my-http-app
啟用 Angular 路由和 CSS,如下所示:
? Would you like to add Angular routing? Yes
? Which stylesheet format would you like to use? CSS
步驟 2:透過在模組配置檔案 (app.module.ts) 中匯入 HttpClientModule 來啟用應用程式中的 http 通訊。
import { NgModule } from '@angular/core';
import { BrowserModule } from '@angular/platform-browser';

import { AppRoutingModule } from './app-routing.module';
import { AppComponent } from './app.component';

import { HttpClientModule } from '@angular/common/http';

@NgModule({
   declarations: [
      AppComponent
   ],
   imports: [
      BrowserModule,
      AppRoutingModule,
      HttpClientModule
   ],
   providers: [],
   bootstrap: [AppComponent]
})
export class AppModule { }
這裡,
從 @angular/common/http 模組匯入 HttpClientModule。
將 HttpClientModule 新增到 @NgModule 配置的 imports 部分。
步驟 3:建立一個新的介面 Expense 來表示我們的費用專案。
interface Expense {
   id: Number,
   item: String,
   amount: Number,
   category: String,
   location: String,
   spendOn: Date
}

export default Expense;
步驟 4:建立新的元件 ListExpenses 以顯示來自伺服器的費用專案。
ng generate component ListExpenses
它將建立如下所示的元件:
CREATE src/app/list-expenses/list-expenses.component.css (0 bytes)
CREATE src/app/list-expenses/list-expenses.component.html (28 bytes)
CREATE src/app/list-expenses/list-expenses.component.spec.ts (602 bytes)
CREATE src/app/list-expenses/list-expenses.component.ts (229 bytes)
UPDATE src/app/app.module.ts (581 bytes)
步驟 5:將我們的新元件包含到 App 根元件的檢視 app.component.html 中,如下所示:
<app-list-expenses></app-list-expenses>

<router-outlet></router-outlet>
步驟 6:透過建構函式將 HttpClient 注入到 ListExpenses 元件中,如下所示:
import { Component } from '@angular/core';
import { HttpClient } from '@angular/common/http';

@Component({
   selector: 'app-list-expenses',
   templateUrl: './list-expenses.component.html',
   styleUrls: ['./list-expenses.component.css']
})
export class ListExpensesComponent {

   constructor(private http: HttpClient) { }
}
步驟 7:實現 OnInit 生命週期鉤子,以便在 ListExpenses 元件初始化後請求伺服器的費用。
export class ListExpensesComponent implements OnInit{
   constructor(private http: HttpClient) { }
   ngOnInit(): void {

   }
}
步驟 8:建立一個區域性變數 expenses 來儲存來自伺服器的費用。
export class ListExpensesComponent implements OnInit{
   expenses: Expense[] = [];
   constructor(private http: HttpClient) { }
   ngOnInit(): void {
   }
}
步驟 9:透過傳遞 url 和 options 呼叫 this.http(HttpClient 例項)物件的 get 方法,並從伺服器獲取費用物件。然後,將費用設定為我們的區域性變數 expenses。
export class ListExpensesComponent implements OnInit{
   expenses: Expense[] = [];
   constructor(private http: HttpClient) { }
   ngOnInit(): void {
      this.http.get<Expense[]>('https://:8000/api/expense', {
         'observe': 'body',
         'responseType': 'json'
      })
      .subscribe( data => {
         this.expenses = data as Expense[]
         console.log(this.expenses)
      })

   }
}
這裡,
將 Expense[] 設定為伺服器返回的物件的型別。伺服器將在其主體中以 json 格式傳送費用物件的陣列。
訂閱請求 (this.http.get) 物件。然後將訂閱的資料解析為費用物件的陣列,並將其設定為區域性費用變數 (this.expenses)
步驟 10:ListExpensesComponent 的完整程式碼如下:
import { Component, OnInit } from '@angular/core';
import { HttpClient, HttpRequest, HttpResponse, HttpEvent } from '@angular/common/http';
import Expense from '../Expense';

@Component({
   selector: 'app-list-expenses',
   templateUrl: './list-expenses.component.html',
   styleUrls: ['./list-expenses.component.css']
})
export class ListExpensesComponent implements OnInit {
   expenses: Expense[] = [];
   constructor(private http: HttpClient) { }
   ngOnInit(): void {
      this.http.get<Expense[]>('https://:8000/api/expense', {
         'observe': 'body',
         'responseType': 'json'
      })
      .subscribe( data => {
         this.expenses = data as Expense[]
         console.log(this.expenses)
      })
   }
}
步驟 11:接下來,從元件獲取 expenses 物件並在我們的元件模板頁面 (list-expenses.component.html) 中呈現它
<div><h3>Expenses</h3></div>
<ul>
   <li *ngFor="let expense of expenses">
      {{expense.item}} @ {{expense.location}} for {{expense.amount}} USD on {{expense.spendOn | date:'shortDate' }}
   </li>
</ul>
步驟 12:最後,使用以下命令執行應用程式,
ng serve
步驟 13:開啟瀏覽器並導航到 https://:4200/ url 並檢查輸出
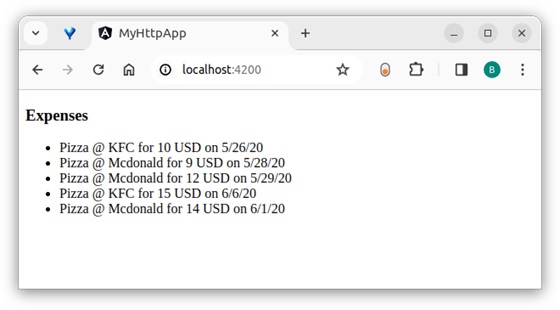
這裡,輸出顯示我們的費用作為專案列表。
結論
Angular 提供了一種簡單的方法透過 HttpClient 物件請求伺服器。get() 是一個用於從伺服器獲取資源的特定方法。我們將在接下來的章節中學習更多 HTTP 方法來定位其他 HTTP 動詞。