- Angular 教程
- Angular - 首頁
- Angular - 概述
- Angular - 特性
- Angular - 優點與缺點
- Angular 基礎
- Angular - 環境搭建
- Angular - 第一個應用
- Angular - MVC 架構
- Angular 元件
- Angular - 元件
- Angular - 元件生命週期
- Angular - 檢視封裝
- Angular - 元件互動
- Angular - 元件樣式
- Angular - 巢狀元件
- Angular - 內容投影
- Angular - 動態元件
- Angular - 元素
- Angular 模板
- Angular - 模板
- Angular - 文字插值
- Angular - 模板語句
- Angular - 模板中的變數
- Angular - SVG 作為模板
- Angular 繫結
- Angular - 繫結及其型別
- Angular - 資料繫結
- Angular - 事件繫結
- Angular - 屬性繫結
- Angular - 屬性繫結
- Angular - 類和樣式繫結
- Angular 指令
- Angular - 指令
- Angular - 內建指令
- Angular 管道
- Angular - 管道
- Angular - 使用管道轉換資料
- Angular 依賴注入
- Angular - 依賴注入
- Angular HTTP 客戶端程式設計
- Angular - 服務
- Angular - HTTP 客戶端
- Angular - 請求
- Angular - 響應
- Angular - GET 請求
- Angular - PUT 請求
- Angular - DELETE 請求
- Angular - JSON-P
- Angular - 使用 HTTP 進行 CRUD 操作
- Angular 路由
- Angular - 路由
- Angular - 導航
- Angular - Angular Material
- Angular 動畫
- Angular - 動畫
- Angular 表單
- Angular - 表單
- Angular - 表單驗證
- Angular Service Workers 和 PWA
- Angular - Service Workers 和 PWA
- Angular 測試
- Angular - 測試概述
- Angular NgModules
- Angular - 模組簡介
- Angular 高階
- Angular - 認證與授權
- Angular - 國際化
- Angular - 可訪問性
- Angular - Web Workers
- Angular - 伺服器端渲染
- Angular - Ivy 編譯器
- Angular - 使用 Bazel 構建
- Angular - 向後相容性
- Angular - 響應式程式設計
- Angular - 在指令和元件之間共享資料
- Angular 工具
- Angular - CLI
- Angular 雜項
- Angular - 第三方控制元件
- Angular - 配置
- Angular - 顯示資料
- Angular - 裝飾器和元資料
- Angular - 基本示例
- Angular - 錯誤處理
- Angular - 測試和構建專案
- Angular - 生命週期鉤子
- Angular - 使用者輸入
- Angular - 新特性?
- Angular 有用資源
- Angular - 快速指南
- Angular - 有用資源
- Angular - 討論
Angular - 動畫
動畫使 Web 應用煥然一新,並提供了豐富的使用者互動體驗。在 HTML 中,動畫基本上是在特定時間段內將 HTML 元素從一種 CSS 樣式轉換為另一種 CSS 樣式的過程。例如,可以透過更改影像元素的寬度和高度來放大它。
如果在一段時間內(例如 10 秒)以步驟方式將影像的寬度和高度從初始值更改為最終值,則會產生動畫效果。因此,動畫的範圍取決於 CSS 為設定 HTML 元素樣式提供的功能/屬性。
Angular 提供了一個單獨的模組 **BrowserAnimationModule** 來執行動畫。**BrowserAnimationModule** 提供了一種簡單明瞭的方法來執行動畫。
配置動畫模組
讓我們在本節中學習如何在應用中配置動畫模組。
請按照以下步驟在應用中配置動畫模組 **BrowserAnimationModule** 。
在 AppModule 中匯入 **BrowserAnimationModule**。
import { BrowserAnimationsModule } from '@angular/platform-browser/animations';
@NgModule({
   imports: [
      BrowserModule,
      BrowserAnimationsModule
   ],
   declarations: [ ],
   bootstrap: [ ]
})
export class AppModule { }
在相關的元件中匯入動畫函式。
import { state, style, transition, animate, trigger } from '@angular/animations'
在相關的元件中新增 **animations** 元資料屬性。
@Component({
   animations: [
      // animation functionality goes here
   ]
})
export class MyAnimationComponent
概念
在 Angular 中,我們需要理解五個核心概念及其與動畫的關係。
狀態
狀態指的是元件的特定狀態。一個元件可以有多個定義的狀態。狀態是使用 state() 方法建立的。state() 方法有兩個引數。
**name:** 狀態的唯一名稱。
**style:** 使用 style() 方法定義的狀態樣式。
animations: [
   ...
   state('start', style( { width: 200px; } ))
   ...
]
這裡,**start** 是狀態的名稱。
樣式
**樣式** 指的是在特定狀態下應用的 CSS 樣式。style() 方法用於設定元件特定狀態的樣式。它使用 CSS 屬性,並且可以有多個專案。
animations: [
   ...
   state('start', style( { width: 200px; opacity: 1 } ))
   ...
]
這裡,**start** 狀態定義了兩個 CSS 屬性,**width** 值為 200px,**opacity** 值為 1。
過渡
**過渡** 指的是從一個狀態到另一個狀態的轉換。動畫可以有多個過渡。每個過渡都是使用 transition() 函式定義的。transition() 接受兩個引數。
指定兩個過渡狀態之間的方向。例如,**start => end** 表示初始狀態為 **start**,最終狀態為 **end**。實際上,它是一個具有豐富功能的表示式。
使用 **animate()** 函式指定動畫細節。
animations: [
   ...
   transition('start => end', [
      animate('1s')
   ])
   ...
]
這裡,**transition()** 函式定義了從 start 狀態到 end 狀態的過渡,並在 **animate()** 方法中定義了動畫。
動畫
動畫定義了從一個狀態到另一個狀態的轉換方式。**animation()** 函式用於設定動畫細節。**animate()** 接受一個以以下表達式形式表示的引數:
duration delay easing
**duration:** 指的是過渡的持續時間。表示為 1s、100ms 等。
**delay:** 指的是開始過渡的延遲時間。表示方式與 *duration* 相同。
**easing:** 指的是如何在給定的持續時間內加速/減速過渡。
觸發器
每個動畫都需要一個觸發器來啟動動畫。trigger() 方法用於在一個地方設定所有動畫資訊(如狀態、樣式、過渡和動畫),併為其提供一個唯一名稱。唯一名稱隨後用於觸發動畫。
animations: [
   trigger('enlarge', [
      state('start', style({
         height: '200px',
      })),
      state('end', style({
         height: '500px',
      })),
      transition('start => end', [
         animate('1s')
      ]),
      transition('end => start', [
         animate('0.5s')
   ]) ]),
]
這裡,**enlarge** 是給定動畫的唯一名稱。它有兩個狀態和相關的樣式。它有兩個過渡,一個是從 start 到 end,另一個是從 end 到 start。End 到 start 狀態執行動畫的反向操作。
**觸發器** 可以附加到元素上,如下所示:
<div [@triggerName]="expression">...</div>;
例如,
<img [@enlarge]="isEnlarge ? 'end' : 'start'">...</img>;
這裡,
**@enlarge:** 觸發器設定為 image 標籤並附加到表示式上。
如果 **isEnlarge** 的值更改為 true,則將設定 **end** 狀態,並觸發 **start => end** 過渡。
如果 **isEnlarge** 的值更改為 false,則將設定 **start** 狀態,並觸發 **end => start** 過渡。
簡單的動畫示例
讓我們編寫一個新的 Angular 應用,透過使用動畫效果放大影像來更好地理解動畫概念。
開啟命令提示符並建立一個新的 Angular 應用。
cd /go/to/workspace
ng new animation-app
cd animation-app
在 **AppModule** (src/app/app.module.ts) 中配置 **BrowserAnimationModule** 。
import { BrowserModule } from '@angular/platform-browser';
import { NgModule } from '@angular/core'
import { BrowserAnimationsModule } from '@angular/platform-browser/animations';
import { AppComponent } from './app.component'; @NgModule({
   declarations: [
      AppComponent
   ],
   imports: [
      BrowserModule,
      BrowserAnimationsModule
   ],
   providers: [],
   bootstrap: [AppComponent]
})
export class AppModule { }
開啟 **AppComponent (src/app/app.component.ts)** 並匯入必要的動畫函式。
import { state, style, transition, animate, trigger } from '@angular/animations';
新增動畫功能,這將在放大/縮小影像期間為影像設定動畫。
@Component({
   selector: 'app-root',
   templateUrl: './app.component.html',
   styleUrls: ['./app.component.css'],
   animations: [
      trigger('enlarge', [
         state('start', style({
            height: '150px'
         })),
         state('end', style({
            height: '250px'
         })),
         transition('start => end', [
            animate('1s 2s')
         ]),
         transition('end => start', [
            animate('1s 2s')
         ])
      ])
   ]
})
開啟 **AppComponent** 模板 **src/app/app.component.html** 並刪除示例程式碼。然後,包括一個帶有應用標題、影像和一個用於放大/縮小影像的按鈕的標題。
<h1>{{ title }}</h1>
<img src="assets/puppy.jpeg" style="height: 200px" /> <br />
<button>{{ this.buttonText }}</button>
編寫一個函式來更改動畫表達式。
export class AppComponent {
   title = 'Animation Application';
   isEnlarge: boolean = false;
   buttonText: string = "Enlarge";
   triggerAnimation() {
      this.isEnlarge = !this.isEnlarge;
      if(this.isEnlarge)
         this.buttonText = "Shrink";
      else
         this.buttonText = "Enlarge";
   }
}
在 image 標籤中附加動畫。此外,為按鈕附加點選事件。
<h1>{{ title }}</h1>
<img [@enlarge]="isEnlarge ? 'end' : 'start'" src="assets/puppy.jpeg" style="height: 200px" />
<br />
<button (click)='triggerAnimation()'>{{ this.buttonText }}</button>
完整的 **AppComponent** 程式碼如下:
import { Component } from '@angular/core';
import { state, style, transition, animate, trigger } from '@angular/animations';

@Component({
   selector: 'app-root',
   templateUrl: './app.component.html',
   styleUrls: ['./app.component.css'],
   animations: [
      trigger('enlarge', [
         state('start', style({
            height: '150px'
         })),
         state('end', style({
            height: '250px'
         })),
         transition('start => end', [
            animate('1s 2s')
         ]),
         transition('end => start', [
            animate('1s 2s')
         ])
      ])
   ]
})
export class AppComponent {
   title = 'Animation Application';
   isEnlarge: boolean = false;
   buttonText: string = "Enlarge";


   triggerAnimation() {
      this.isEnlarge = !this.isEnlarge;

      if(this.isEnlarge)
         this.buttonText = "Shrink";
      else
         this.buttonText = "Enlarge";
   }
}
完整的 AppComponent 模板程式碼如下:
<h1>{{ title }}</h1>
<img [@enlarge]="isEnlarge ? 'end' : 'start'" src="assets/puppy.jpeg" style="height: 200px" />
<br />
<button (click)='triggerAnimation()'>{{ this.buttonText }}</button>
使用以下命令執行應用:
ng serve
單擊“放大”按鈕,它將使用動畫放大影像。結果將如下所示:
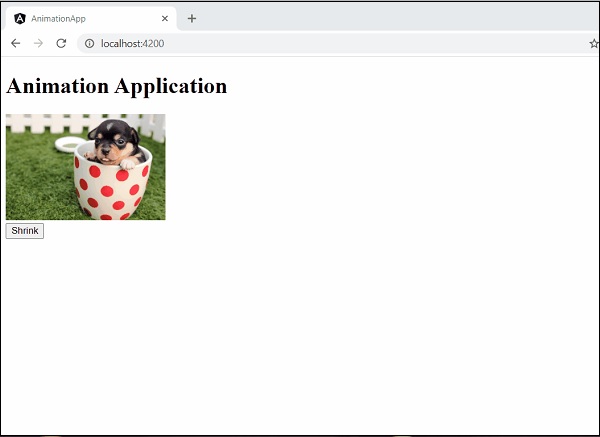
再次單擊按鈕以縮小它。結果將如下所示:
