- iOS 教程
- iOS - 首頁
- iOS - 開始
- iOS - 環境設定
- iOS - Objective-C 基礎
- iOS - 第一個 iPhone 應用
- iOS - 動作和出口
- iOS - 代理
- iOS - UI 元素
- iOS - 加速計
- iOS - 通用應用程式
- iOS - 相機管理
- iOS - 位置處理
- iOS - SQLite 資料庫
- iOS - 傳送郵件
- iOS - 音訊和影片
- iOS - 檔案處理
- iOS - 訪問地圖
- iOS - 應用內購買
- iOS - iAd 整合
- iOS - GameKit
- iOS - 故事板
- iOS - 自動佈局
- iOS - Twitter 和 Facebook
- iOS - 記憶體管理
- iOS - 應用程式除錯
- iOS 有用資源
- iOS - 快速指南
- iOS - 有用資源
- iOS - 討論
iOS - 文字欄位
文字欄位的使用
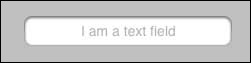
文字欄位是一個UI元素,允許應用程式獲取使用者輸入。
下面顯示了一個UITextfield。
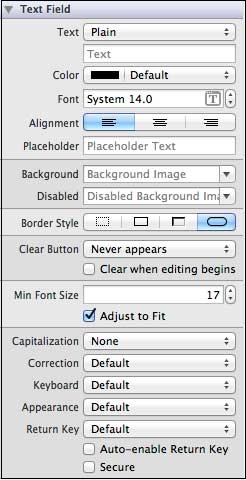
文字欄位的重要屬性
- 佔位符文字,在沒有使用者輸入時顯示
- 普通文字
- 自動更正型別
- 鍵盤型別
- 回車鍵型別
- 清除按鈕模式
- 對齊方式
- 委託
在xib中更新屬性
您可以在實用程式區域(視窗右側)的屬性檢查器中更改xib中的文字欄位屬性。
文字欄位委託
我們可以透過右鍵單擊UIElement並將其連線到檔案所有者來在Interface Builder中設定委託,如下所示。
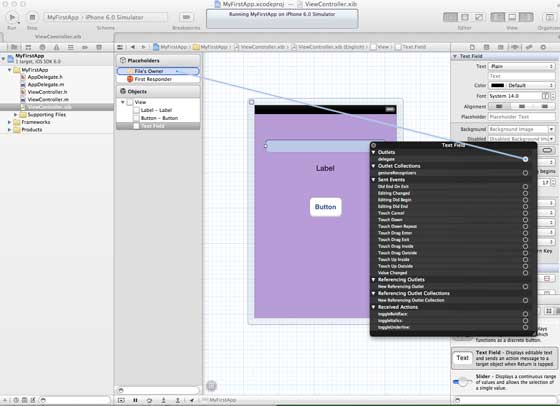
使用委託的步驟
步驟1 - 如上圖所示設定委託。
步驟2 - 新增您的類響應的委託。
步驟3 - 實現textField委託,重要的文字欄位委託如下:
- (void)textFieldDidBeginEditing:(UITextField *)textField
- (void)textFieldDidEndEditing:(UITextField *)textField
步驟4 - 正如名稱所示,這兩個委託分別在我們開始編輯文字欄位和結束編輯時被呼叫。
步驟5 - 對於其他委託,請參考UITextDelegate協議參考。
示例程式碼和步驟
步驟1 - 我們將使用為UI元素建立的示例應用程式。
步驟2 - 我們的ViewController類將採用UITextFieldDelegate,我們的ViewController.h檔案更新如下:
#import <UIKit/UIKit.h>

// You can notice the adddition of UITextFieldDelegate below
@interface ViewController : UIViewController<UITextFieldDelegate>

@end
步驟3 - 然後我們將方法addTextField新增到我們的ViewController.m檔案中。
步驟4 - 然後我們在我們的viewDidLoad方法中呼叫此方法。
步驟5 - 更新ViewController.m中的viewDidLoad如下:
#import "ViewController.h"
@interface ViewController ()

@end

@implementation ViewController

- (void)viewDidLoad {
   [super viewDidLoad];
   //The custom method to create our textfield is called

   [self addTextField];
   // Do any additional setup after loading the view, typically from a nib.
}

- (void)didReceiveMemoryWarning {
   [super didReceiveMemoryWarning];
   // Dispose of any resources that can be recreated.
}

-(void)addTextField {
   // This allocates a label
   UILabel *prefixLabel = [[UILabel alloc]initWithFrame:CGRectZero];

   //This sets the label text
   prefixLabel.text =@"## ";

   // This sets the font for the label
   [prefixLabel setFont:[UIFont boldSystemFontOfSize:14]];

   // This fits the frame to size of the text
   [prefixLabel sizeToFit];

   // This allocates the textfield and sets its frame
   UITextField *textField = [[UITextField  alloc] initWithFrame:
   CGRectMake(20, 50, 280, 30)];

   // This sets the border style of the text field
   textField.borderStyle = UITextBorderStyleRoundedRect;
   textField.contentVerticalAlignment = UIControlContentVerticalAlignmentCenter;
   [textField setFont:[UIFont boldSystemFontOfSize:12]];

   //Placeholder text is displayed when no text is typed
   textField.placeholder = @"Simple Text field";

   //Prefix label is set as left view and the text starts after that
   textField.leftView = prefixLabel;

   //It set when the left prefixLabel to be displayed
   textField.leftViewMode = UITextFieldViewModeAlways;

   // Adds the textField to the view.
   [self.view addSubview:textField];

   // sets the delegate to the current class
   textField.delegate = self;
}

// pragma mark is used for easy access of code in Xcode
#pragma mark - TextField Delegates

// This method is called once we click inside the textField
-(void)textFieldDidBeginEditing:(UITextField *)textField {
   NSLog(@"Text field did begin editing");
}

// This method is called once we complete editing
-(void)textFieldDidEndEditing:(UITextField *)textField {
   NSLog(@"Text field ended editing");
}

// This method enables or disables the processing of return key
-(BOOL) textFieldShouldReturn:(UITextField *)textField {
   [textField resignFirstResponder];
   return YES;
}

- (void)viewDidUnload {
   label = nil;
   [super viewDidUnload];
}
@end
步驟6 - 當我們執行應用程式時,我們將獲得以下輸出。
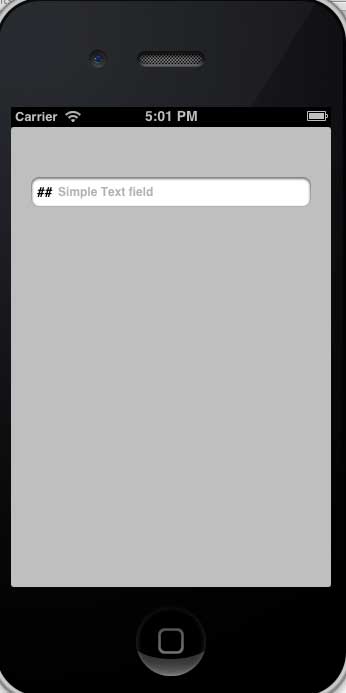
步驟7 - 委託方法根據使用者操作呼叫。檢視控制檯輸出以瞭解何時呼叫委託。
ios_ui_elements.htm
廣告