- iOS 教程
- iOS - 主頁
- iOS - 入門指南
- iOS - 環境設定
- iOS - Objective-C 基礎知識
- iOS - 第一個 iPhone 應用程式
- iOS - 動作和出口
- iOS - 代理
- iOS - UI 元素
- iOS - 加速器
- iOS - 通用應用程式
- iOS - 攝像機管理
- iOS - 位置處理
- iOS - SQLite 資料庫
- iOS - 傳送電子郵件
- iOS - 音訊和影片
- iOS - 檔案處理
- iOS - 訪問地圖
- iOS - 應用內購買
- iOS - iAd 整合
- iOS - GameKit
- iOS - 故事板
- iOS - 自動佈局
- iOS - Twitter 和 Facebook
- iOS - 記憶體管理
- iOS - 應用程式除錯
- iOS 實用資源
- iOS - 快速指南
- iOS - 實用資源
- iOS - 討論
iOS - 攝像機管理
攝像頭是移動裝置中最常見的特色之一。我們完全可以利用攝像頭拍出照片並將它們用於我們的應用程式,而且這非常簡單。
攝像頭管理 – 所涉及的步驟
步驟 1 − 建立一個簡單的基於檢視的應用程式。
步驟 2 − 在ViewController.xib 中新增一個按鈕併為該按鈕建立 IBAction。
步驟 3 − 新增一個影像檢視並建立 IBOutlet,將其命名為 imageView。
步驟 4 − 如下更新ViewController.h −
#import <UIKit/UIKit.h>

@interface ViewController : UIViewController<UIImagePickerControllerDelegate> {
   UIImagePickerController *imagePicker;
   IBOutlet UIImageView *imageView;
}

- (IBAction)showCamera:(id)sender;
@end
步驟 5 − 如下更新ViewController.m −
#import "ViewController.h"

@interface ViewController ()
@end

@implementation ViewController

- (void)viewDidLoad {
   [super viewDidLoad];
}

- (void)didReceiveMemoryWarning {
   [super didReceiveMemoryWarning];
   // Dispose of any resources that can be recreated.
}

- (IBAction)showCamera:(id)sender {
   imagePicker.allowsEditing = YES;

   if ([UIImagePickerController isSourceTypeAvailable:
   UIImagePickerControllerSourceTypeCamera]) {
      imagePicker.sourceType = UIImagePickerControllerSourceTypeCamera;
   } else {
      imagePicker.sourceType =
      UIImagePickerControllerSourceTypePhotoLibrary;
   }
   [self presentModalViewController:imagePicker animated:YES];
}

-(void)imagePickerController:(UIImagePickerController *)picker
   didFinishPickingMediaWithInfo:(NSDictionary *)info {
      UIImage *image = [info objectForKey:UIImagePickerControllerEditedImage];

      if (image == nil) {
         image = [info objectForKey:UIImagePickerControllerOriginalImage];
      }
   imageView.image = image;
}

-(void)imagePickerControllerDidCancel:(UIImagePickerController *)picker {
   [self dismissModalViewControllerAnimated:YES];
}
@end
輸出
當執行應用程式並單擊顯示攝像頭按鈕時,我們將獲得以下輸出 −

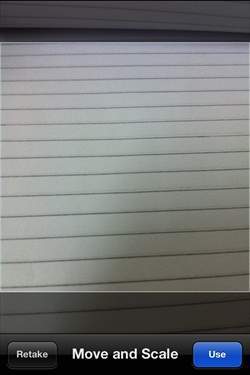
一旦拍下照片,便可以編輯照片,即移動和縮放,如下所示 −
廣告