- iOS 教程
- iOS - 首頁
- iOS - 開始
- iOS - 環境設定
- iOS - Objective-C 基礎
- iOS - 第一個 iPhone 應用
- iOS - 動作和出口
- iOS - 代理
- iOS - UI 元素
- iOS - 加速度計
- iOS - 通用應用程式
- iOS - 相機管理
- iOS - 位置處理
- iOS - SQLite 資料庫
- iOS - 傳送郵件
- iOS - 音訊和影片
- iOS - 檔案處理
- iOS - 訪問地圖
- iOS - 應用內購買
- iOS - iAd 整合
- iOS - GameKit
- iOS - 故事板
- iOS - 自動佈局
- iOS - Twitter 和 Facebook
- iOS - 記憶體管理
- iOS - 應用程式除錯
- iOS 有用資源
- iOS - 快速指南
- iOS - 有用資源
- iOS - 討論
iOS - 表格檢視
表格檢視的使用
它用於顯示一個垂直滾動的檢視,該檢視包含許多單元格(通常是可重用的單元格)。它具有標題、頁尾、行和節等特殊功能。
重要屬性
- 委託 (delegate)
- 資料來源 (dataSource)
- 行高 (rowHeight)
- 節頁尾高度 (sectionFooterHeight)
- 節標題高度 (sectionHeaderHeight)
- 分隔線顏色 (separatorColor)
- 表格頁首 (tableHeaderView)
- 表格頁尾 (tableFooterView)
重要方法
- (UITableViewCell *)cellForRowAtIndexPath:(NSIndexPath *)indexPath
- (void)deleteRowsAtIndexPaths:(NSArray *)indexPaths
withRowAnimation:(UITableViewRowAnimation)animation
- (id)dequeueReusableCellWithIdentifier:(NSString *)identifier
- (id)dequeueReusableCellWithIdentifier:(NSString *)identifier
forIndexPath:(NSIndexPath *)indexPath
- (void)reloadData
- (void)reloadRowsAtIndexPaths:(NSArray *)indexPaths
withRowAnimation:(UITableViewRowAnimation)animation
- (NSArray *)visibleCells
示例程式碼和步驟
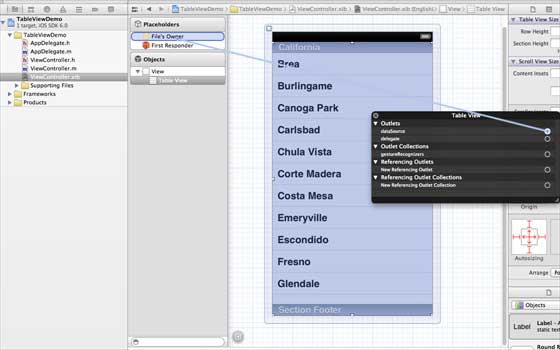
步驟 1 − 讓我們像下面這樣在ViewController.xib中新增一個表格檢視。

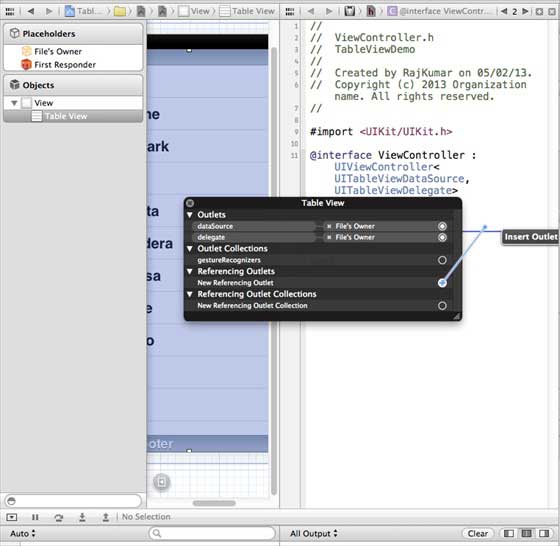
步驟 2 − 透過右鍵單擊並選擇資料來源和委託,將表格檢視的委託和資料來源設定為檔案所有者。設定資料來源如下圖所示。
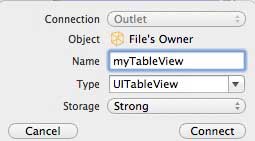
步驟 3 − 為 tableView 建立一個IBOutlet,並將其命名為myTableView。如下圖所示。
步驟 4 − 然後新增一個 NSMutableArray 用於儲存要在表格檢視中顯示的資料。
步驟 5 − 我們的 ViewController 應該採用UITableViewDataSource和UITableViewDelegate協議。ViewController.h應如下所示。
#import <UIKit/UIKit.h>

@interface ViewController : UIViewController<UITableViewDataSource,
   UITableViewDelegate> {
   IBOutlet UITableView *myTableView;
   NSMutableArray *myData;
}
@end
步驟 6 − 我們應該實現所需的表格檢視委託和資料來源方法。更新後的ViewController.m如下所示:
#import "ViewController.h"

@interface ViewController ()

@end

@implementation ViewController

- (void)viewDidLoad {
   [super viewDidLoad];
   // table view data is being set here
   myData = [[NSMutableArray alloc]initWithObjects:
   @"Data 1 in array",@"Data 2 in array",@"Data 3 in array",
   @"Data 4 in array",@"Data 5 in array",@"Data 5 in array",
   @"Data 6 in array",@"Data 7 in array",@"Data 8 in array",
   @"Data 9 in array", nil];
   // Do any additional setup after loading the view, typically from a nib.
}

- (void)didReceiveMemoryWarning {
   [super didReceiveMemoryWarning];
   // Dispose of any resources that can be recreated.
}

#pragma mark - Table View Data source
- (NSInteger)tableView:(UITableView *)tableView numberOfRowsInSection:
   (NSInteger)section {
   return [myData count]/2;
}

- (UITableViewCell *)tableView:(UITableView *)tableView cellForRowAtIndexPath:
   (NSIndexPath *)indexPath {
   static NSString *cellIdentifier = @"cellID";

   UITableViewCell *cell = [tableView dequeueReusableCellWithIdentifier:
   cellIdentifier];

   if (cell == nil) {
      cell = [[UITableViewCell alloc]initWithStyle:
      UITableViewCellStyleDefault reuseIdentifier:cellIdentifier];
   }

   NSString *stringForCell;

   if (indexPath.section == 0) {
      stringForCell= [myData objectAtIndex:indexPath.row];
   } else if (indexPath.section == 1) {
      stringForCell= [myData objectAtIndex:indexPath.row+ [myData count]/2];
   }
   [cell.textLabel setText:stringForCell];
   return cell;
}

// Default is 1 if not implemented
- (NSInteger)numberOfSectionsInTableView:(UITableView *)tableView {
   return 2;
}

- (NSString *)tableView:(UITableView *)tableView titleForHeaderInSection:
   (NSInteger)section {
   NSString *headerTitle;

   if (section==0) {
      headerTitle = @"Section 1 Header";
   } else {
      headerTitle = @"Section 2 Header";
   }
   return headerTitle;
}

- (NSString *)tableView:(UITableView *)tableView titleForFooterInSection:
   (NSInteger)section {
   NSString *footerTitle;

   if (section==0) {
      footerTitle = @"Section 1 Footer";
   } else {
      footerTitle = @"Section 2 Footer";
   }
   return footerTitle;
}

#pragma mark - TableView delegate

-(void)tableView:(UITableView *)tableView didSelectRowAtIndexPath:
   (NSIndexPath *)indexPath {
   [tableView deselectRowAtIndexPath:indexPath animated:YES];
   UITableViewCell *cell = [tableView cellForRowAtIndexPath:indexPath];
   NSLog(@"Section:%d Row:%d selected and its data is %@",
   indexPath.section,indexPath.row,cell.textLabel.text);
}
@end
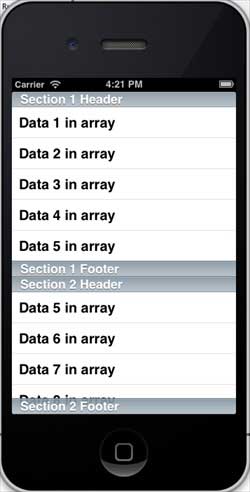
步驟 7 − 當我們執行應用程式時,我們將得到以下輸出:
ios_ui_elements.htm
廣告