- iOS 教程
- iOS - 首頁
- iOS - 開始
- iOS - 環境設定
- iOS - Objective-C 基礎
- iOS - 第一個 iPhone 應用程式
- iOS - 動作和出口
- iOS - 委託
- iOS - UI 元素
- iOS - 加速器
- iOS - 通用應用程式
- iOS - 相機管理
- iOS - 位置處理
- iOS - SQLite 資料庫
- iOS - 傳送電子郵件
- iOS - 音訊和影片
- iOS - 檔案處理
- iOS - 訪問地圖
- iOS - 應用內購買
- iOS - iAd 整合
- iOS - GameKit
- iOS - 故事板
- iOS - 自動佈局
- iOS - Twitter 和 Facebook
- iOS - 記憶體管理
- iOS - 應用程式除錯
- iOS 有用資源
- iOS - 快速指南
- iOS - 有用資源
- iOS - 討論
iOS - 影像檢視
影像檢視使用
影像檢視用於顯示單個影像或影像的動畫序列。
重要屬性
- 影像
- 高亮影像
- userInteractionEnabled
- 動畫影像
- 動畫重複計數
重要方法
- (id)initWithImage:(UIImage *)image
- (id)initWithImage:(UIImage *)image highlightedImage: (UIImage *)highlightedImage
- (void)startAnimating
- (void)stopAnimating
新增自定義方法 addImageView
-(void)addImageView {
   UIImageView *imgview = [[UIImageView alloc]
   initWithFrame:CGRectMake(10, 10, 300, 400)];
   [imgview setImage:[UIImage imageNamed:@"AppleUSA1.jpg"]];
   [imgview setContentMode:UIViewContentModeScaleAspectFit];
   [self.view addSubview:imgview];
}
新增另一個自定義方法 addImageViewWithAnimation
此方法說明如何在影像檢視中設定影像動畫。
-(void)addImageViewWithAnimation {
   UIImageView *imgview = [[UIImageView alloc]
   initWithFrame:CGRectMake(10, 10, 300, 400)];

   // set an animation
   imgview.animationImages = [NSArray arrayWithObjects:
   [UIImage imageNamed:@"AppleUSA1.jpg"],
   [UIImage imageNamed:@"AppleUSA2.jpg"], nil];
   imgview.animationDuration = 4.0;
   imgview.contentMode = UIViewContentModeCenter;
   [imgview startAnimating];
   [self.view addSubview:imgview];
}
注意 −
我們必須將命名為“AppleUSA1.jpg”和“AppleUSA2.jpg”的影像新增到我們的專案中,這可以透過將影像拖到導航區域(我們專案的列出的檔案)中來完成。
在 ViewController.m 中更新 viewDidLoad 如下 −
(void)viewDidLoad {
   [super viewDidLoad];
   [self addImageView];
}
輸出
當我們執行該應用程式時,我們將獲得以下輸出 −
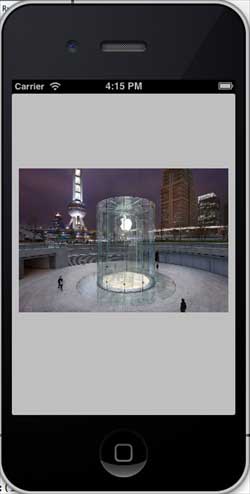
你可以嘗試呼叫 addImageViewWithAnimation 方法,而不是 addImageView 方法,來看看影像檢視的動畫效果。
ios_ui_elements.htm
廣告