- ASP.NET WP 教程
- ASP.NET WP - 首頁
- ASP.NET WP - 概述
- ASP.NET WP - 環境搭建
- ASP.NET WP - 快速入門
- ASP.NET WP - 檢視引擎
- 專案資料夾結構
- ASP.NET WP - 全域性頁面
- ASP.NET WP - 程式設計概念
- ASP.NET WP - 佈局
- ASP.NET WP - 表單使用
- ASP.NET WP - 頁面物件模型
- ASP.NET WP - 資料庫
- ASP.NET WP - 向資料庫新增資料
- ASP.NET WP - 編輯資料庫資料
- ASP.NET WP - 刪除資料庫資料
- ASP.NET WP - WebGrid
- ASP.NET WP - 圖表
- ASP.NET WP - 檔案操作
- ASP.NET WP - 圖片操作
- ASP.NET WP - 影片操作
- ASP.NET WP - 新增郵件功能
- ASP.NET WP - 新增搜尋功能
- 向網站新增社交網路功能
- ASP.NET WP - 快取
- ASP.NET WP - 安全性
- ASP.NET WP - 釋出
- ASP.NET WP 有用資源
- ASP.NET WP - 快速指南
- ASP.NET WP - 有用資源
- ASP.NET WP - 討論
ASP.NET WP - 表單使用
本章將介紹如何建立一個輸入表單,以及如何在使用 Razor 語法的 ASP.NET Web Pages 中處理使用者輸入。
表單是 HTML 文件中的一節,用於放置使用者輸入控制元件,例如文字框、複選框、單選按鈕和下拉列表。
當您需要收集和處理使用者輸入時,可以使用表單。
如何建立輸入表單?
讓我們來看一個簡單的例子,建立一個新的 cshtml 檔案,命名為 **MyForm.cshtml**,並將程式碼替換為以下程式。
<!DOCTYPE html>
<html>

   <head>
      <title>Customer Form</title>
   </head>

   <body>
      <form method = "post" action = "">
         <fieldset>
            <legend>Add Student</legend>
            <div>
               <label for = "StudentName">Student Name: </label>
               <input type = "text" name = "StudentName" value = "" />
            </div>

            <div>
               <label for = "UniName">University Name:</label>
               <input type = "text" name = "UniName" value = "" />
            </div>

            <div>
               <label for = "Address">Res. Address:</label>
               <input type = "text" name = "Address" value = "" />
            </div>

            <div>
               <label> </label>
               <input type = "submit" value = "Submit" class = "submit" />
            </div>
         </fieldset>
      </form>

   </body>
</html>
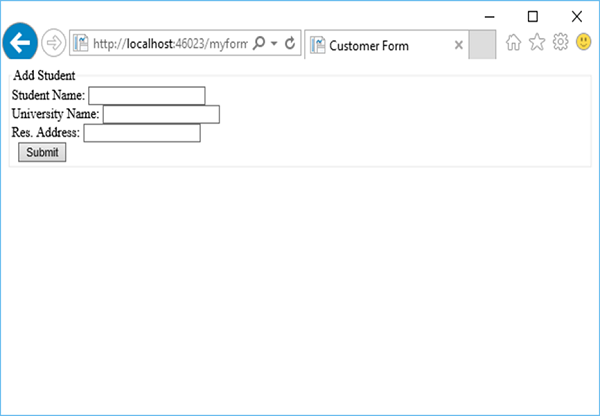
現在讓我們再次執行應用程式,並指定以下 URL:**https://:46023/myform**,然後您將看到以下輸出。
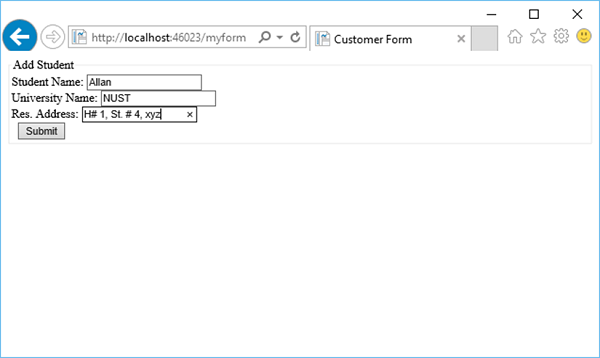
讓我們在所有欄位中輸入一些資料,如下圖所示。

現在,當您單擊“提交”按鈕時,您會發現什麼也沒有發生。為了使表單發揮作用,我們需要新增一些將在伺服器上執行的程式碼。
從表單讀取使用者輸入
要從表單讀取使用者輸入,我們將新增一些程式碼來讀取所有欄位的值,然後根據需要處理它們。此過程將向您展示如何讀取欄位並在頁面上顯示使用者輸入。
讓我們再次來看同一個例子,我們在其中添加了一些程式碼來處理所有欄位的值。
<!DOCTYPE html>
<html>

   <head>
      <title>Customer Form</title>
   </head>

   <body>
      @{
         if (IsPost){
            string StudentName = Request["StudentName"];
            string UniName = Request["UniName"];
            string Address = Request["Address"];

            <p>
               You entered: <br />
               Student Name: @StudentName <br />
               University Name: @UniName <br />
               Res. Address: @Address <br />
            </p>
         } else{
            <form method = "post" action = "">
               <fieldset>
                  <legend>Add Student</legend>
                  <div>
                     <label for = y"StudentName">Student Name: </label>
                     <input type = "text" name = "StudentName" value = "" />
                  </div>

                  <div>
                     <label for = "UniName">University Name:</label>
                     <input type = "text" name = "UniName" value = "" />
                  </div>

                  <div>
                     <label for = "Address">Res. Address:</label>
                     <input type = "text" name="Address" value = "" />
                  </div>

                  <div>
                     <label> </label>
                     <input type = "submit" value = "Submit" class = "submit" />
                  </div>

               </fieldset>
            </form>
         }
      }
   </body>
</html>
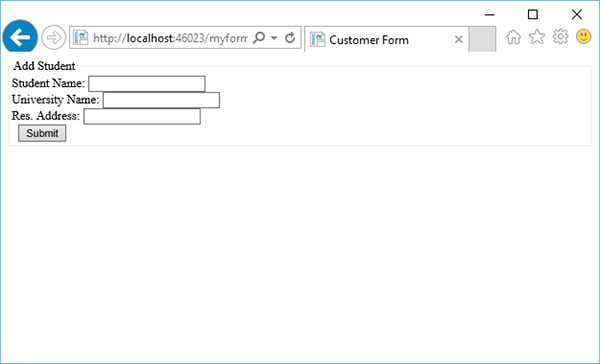
現在讓我們再次執行應用程式,並指定以下 URL:**https://:46023/myform**,然後您將看到以下輸出。
讓我們在所有欄位中輸入一些資料。
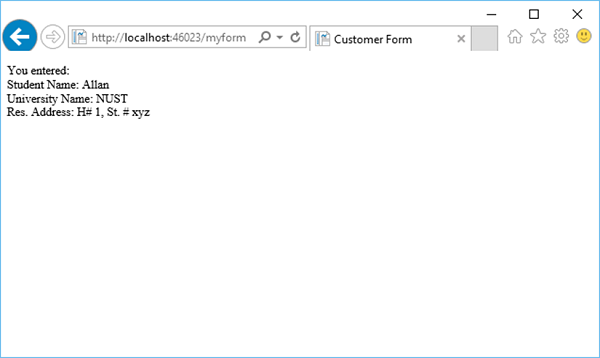
現在,當您單擊“提交”按鈕時,您將看到以下輸出。
讓我們來看另一個簡單的例子,在您的專案中建立一個新資料夾,命名為 images,然後向該資料夾中新增一些影像。
現在新增另一個名為 **MyPhotos.cshtml** 的 cshtml 檔案,並替換以下程式碼。
@{
   var imagePath = "";

   if (Request["Choice"] != null)
   { imagePath = "images/" + Request["Choice"]; }
}

<!DOCTYPE html>
<html>

   <body>
      <h1>Display Images</h1>

      <form method = "post" action = "">
         I want to see:
         <select name = "Choice">
            <option value = "index.jpg">Nature 1</option>
            <option value = "index1.jpg">Nature 2</option>
            <option value = "index2.jpg">Nature 3</option>
         </select>
         <input type = "submit" value = "Submit" />

         @if (imagePath != ""){
            <p><img src = "@imagePath" alt = "Sample" /></p>
         }
      </form>

   </body>
</html>
正如您所看到的,我們添加了一些位於 images 資料夾中的 jpg 檔案的引用,如下圖所示。

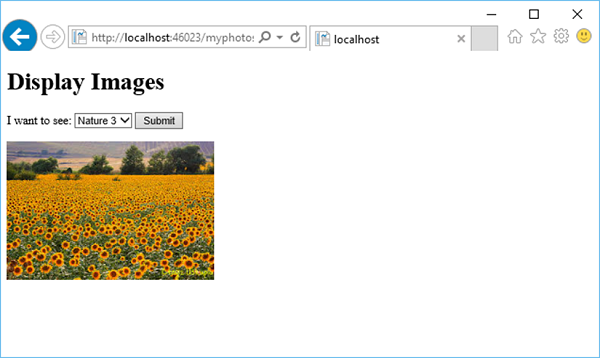
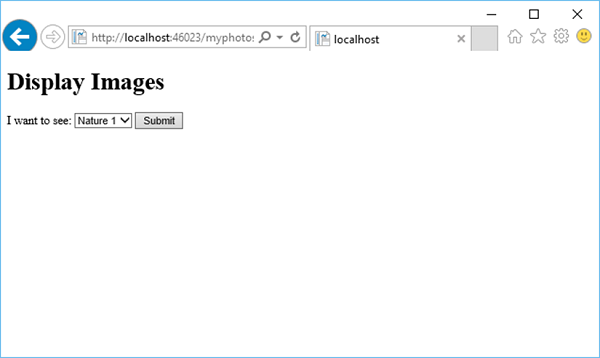
當您執行應用程式並指定以下 URL:**https://:46023/myphotos** 時,您將看到以下輸出。
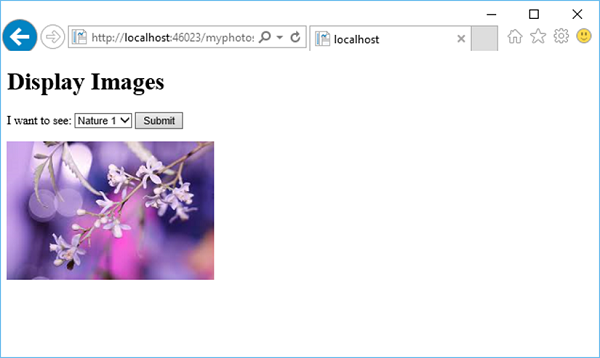
讓我們單擊“提交”,您將看到 **index.jpg** 檔案已載入到頁面上。
當從下拉列表中選擇另一張照片,例如“Nature 3”,然後單擊“提交”時,它將更新頁面上的照片,如下圖所示。