- ASP.NET WP 教程
- ASP.NET WP - 首頁
- ASP.NET WP - 概述
- ASP.NET WP - 環境設定
- ASP.NET WP - 入門
- ASP.NET WP - 檢視引擎
- 專案資料夾結構
- ASP.NET WP - 全域性頁面
- ASP.NET WP - 程式設計概念
- ASP.NET WP - 佈局
- ASP.NET WP - 使用表單
- ASP.NET WP - 頁面物件模型
- ASP.NET WP - 資料庫
- ASP.NET WP - 向資料庫新增資料
- ASP.NET WP - 編輯資料庫資料
- ASP.NET WP - 刪除資料庫資料
- ASP.NET WP - WebGrid
- ASP.NET WP - 圖表
- ASP.NET WP - 處理檔案
- ASP.NET WP - 處理影像
- ASP.NET WP - 處理影片
- ASP.NET WP - 新增電子郵件
- ASP.NET WP - 新增搜尋
- 向網站新增社交網路功能
- ASP.NET WP - 快取
- ASP.NET WP - 安全性
- ASP.NET WP - 釋出
- ASP.NET WP 有用資源
- ASP.NET WP - 快速指南
- ASP.NET WP - 有用資源
- ASP.NET WP - 討論
ASP.NET WP - 安全性
在本章中,我們將介紹如何保護網站安全,以便某些頁面僅對登入的使用者可用。要保護您的網站,您可以使您的網站能夠讓使用者登入。保護您的網站安全出於多種原因都很有用。
您的網站可能有一些頁面應該僅供會員訪問。
有時您需要使用者登入才能向您的網站傳送反饋或留下評論。
如果使用者未登入,他們仍然可以瀏覽某些頁面,但並非所有頁面。
未登入的使用者稱為匿名使用者。
如何使用身份驗證保護網站安全?
使用者首先需要在您的網站上註冊,然後才能登入網站。要註冊網站,使用者需要一個使用者名稱和一個電子郵件地址,以及一個密碼以確認使用者就是他們聲稱的那個人。此登入和確認使用者身份的過程稱為身份驗證。
WebMatrix 提供了一個名為入門站點的內建模板來建立網站,其中包含以下屬性。
一個可以儲存使用者使用者名稱和密碼的資料庫。
一個使用者可以註冊的註冊頁面。
一個登入/登出頁面。
一個密碼恢復和重置頁面。
讓我們透過建立一個新的入門站點來了解一個簡單的示例。
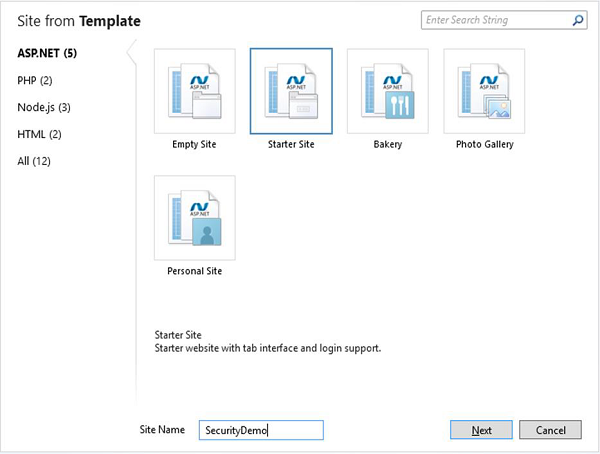
在“站點名稱”欄位中輸入SecurityDemo,然後單擊“下一步”。這將安裝和配置所需的包。
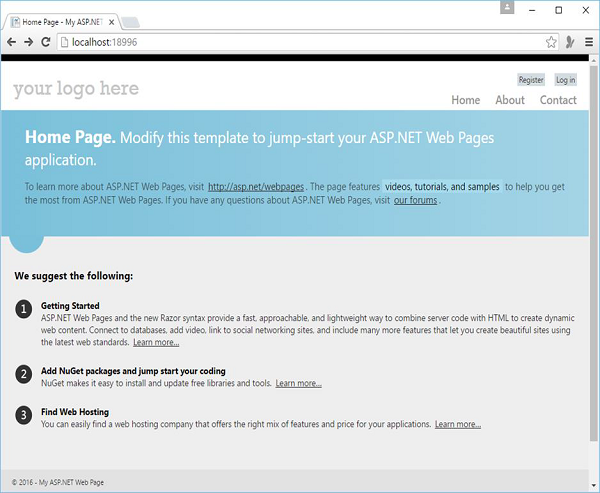
安裝完成後,讓我們執行應用程式,您將看到以下網頁。
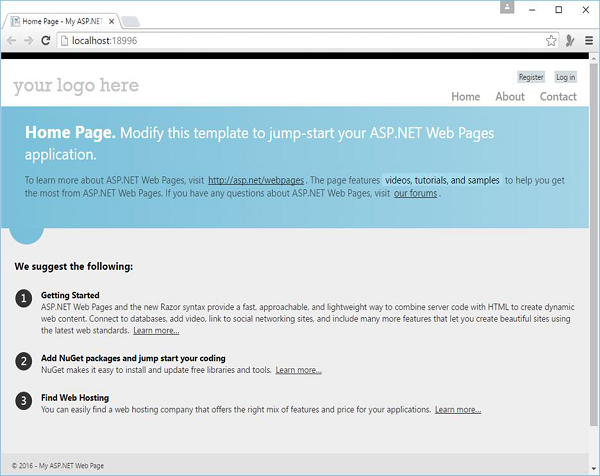
如您所見,頁面右上方有兩個按鈕註冊和登入。
讓我們點選註冊連結,您將看到以下網頁,您可以在其中透過提供以下資訊進行註冊。
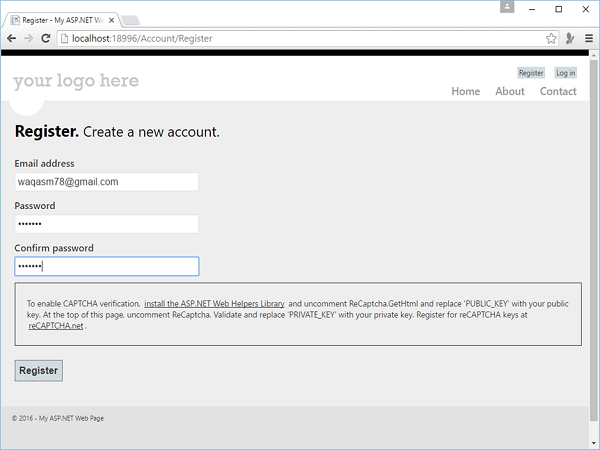
以下是位於站點“Account”資料夾下的Register.cshtml檔案的實現。
@* 如果您使用捆綁,請刪除此部分 *@
@section Scripts {
   <script src = "~/Scripts/jquery.validate.min.js"></script>
   <script src = "~/Scripts/jquery.validate.unobtrusive.min.js"></script>
}
@{
   Layout = "~/_SiteLayout.cshtml";
   Page.Title = "Register";

   // Initialize general page variables
   var email = "";
   var password = "";
   var confirmPassword = "";

   // Setup validation
   Validation.RequireField("email", "You must specify an email address.");
   Validation.RequireField("password", "Password cannot be blank.");
   Validation.Add("confirmPassword",
   Validator.EqualsTo("password", "Password and confirmation password do not match."));
   Validation.Add("password",
      Validator.StringLength(
         maxLength: Int32.MaxValue,
         minLength: 6,
         errorMessage: "Password must be at least 6 characters"));

   // If this is a POST request, validate and process data
   if (IsPost) {
      AntiForgery.Validate();
      email = Request.Form["email"];
      password = Request.Form["password"];
      confirmPassword = Request.Form["confirmPassword"];

      // Validate the user's captcha answer
      // if (!ReCaptcha.Validate("PRIVATE_KEY")) {
         // ModelState.AddError("recaptcha", "Captcha response was not correct");
      // }

      // If all information is valid, create a new account
      if (Validation.IsValid()) {
         // Insert a new user into the database
         var db = Database.Open("StarterSite");

         // Check if user already exists
         var user = db.QuerySingle("SELECT Email FROM UserProfile WHERE LOWER(Email) =
            LOWER(@0)", email);

         if (user == null) {
            // Insert email into the profile table
            db.Execute("INSERT INTO UserProfile (Email) VALUES (@0)", email);
            // Create and associate a new entry in the membership database.
            // If successful, continue processing the request

            try {
               bool requireEmailConfirmation = !WebMail.SmtpServer.IsEmpty();
               var token = WebSecurity.CreateAccount(email, password,
                  requireEmailConfirmation);

               if (requireEmailConfirmation) {
                  var hostUrl = Request.Url.GetComponents(UriComponents.SchemeAndServer,
                     UriFormat.Unescaped);
                  var confirmationUrl = hostUrl + VirtualPathUtility.ToAbsolute
                     ("~/Account/Confirm?confirmationCode = "
                     + HttpUtility.UrlEncode(token));
                  WebMail.Send(
                     to: email,
                     subject: "Please confirm your account",
                     body: "Your confirmation code is: " + token + ".
                     Visit <a href = \"" + confirmationUrl + "\">" +
                     confirmationUrl + "</a> to activate your account."
                  );
               }

               if (requireEmailConfirmation) {
                  // Thank the user for registering and let them know an
                     email is on its way
                  Response.Redirect("~/Account/Thanks");
               } else {
                  // Navigate back to the homepage and exit
                  WebSecurity.Login(email, password);
                  Response.Redirect("~/");
               }
            }catch (System.Web.Security.MembershipCreateUserException e) {
               ModelState.AddFormError(e.Message);
            }
         } else {
            // User already exists
            ModelState.AddFormError("Email address is already in use.");
         }
      }
   }
}

<hgroup class = "title">
   <h1>@Page.Title.</h1>
   <h2>Create a new account.</h2>
</hgroup>

<form method = "post">
   @AntiForgery.GetHtml()
   @* If at least one validation error exists, notify the user *@
   @Html.ValidationSummary("Account creation was unsuccessful.
      Please correct the errors and try again.",
      excludeFieldErrors: true, htmlAttributes: null)

   <fieldset>
      <legend>Registration Form</legend>
      <ol>
         <li class = "email">
            <label for = "email" @if(!ModelState.IsValidField("email")){
               <text>class = "error-label"</text>}>Email address</label>
            <input type = "text" id = "email" name = "email" value = "@email"
               @Validation.For("email") />

            @* Write any email validation errors to the page *@
            @Html.ValidationMessage("email")
         </li>

         <li class = "password">
            <label for = "password" @if(!ModelState.IsValidField("password")) {<text>
               class = "error-label"</text>}>Password</label>
            <input type = "password" id = "password" name = "password"
               @Validation.For("password") />

            @* Write any password validation errors to the page *@
            @Html.ValidationMessage("password")
         </li>

         <li class = "confirm-password">
            <label for = "confirmPassword"
               @if(!ModelState.IsValidField("confirmPassword"))
               {<text>class = "error-label"</text>}>Confirm password</label>
            <input type = "password" id = "confirmPassword" name = "confirmPassword"
               @Validation.For("confirmPassword") />

            @* Write any password validation errors to the page *@
            @Html.ValidationMessage("confirmPassword")
         </li>

         <li class = "recaptcha">
            <div class = "message-info">
               <p>
                  To enable CAPTCHA verification, <a href =
                  "http://go.microsoft.com/fwlink/?LinkId=204140">install the
                  ASP.NET Web Helpers Library</a> and uncomment ReCaptcha.GetHtml
                  and replace 'PUBLIC_KEY' with your public key. At the top of this
                  page, uncomment ReCaptcha. Validate and replace 'PRIVATE_KEY' with
                  your private key.Register for reCAPTCHA keys at <a href =
                  "http://recaptcha.net"> reCAPTCHA.net</a>.
               </p>
            </div>
            @*
               @ReCaptcha.GetHtml("PUBLIC_KEY", theme: "white")
               @Html.ValidationMessage("recaptcha")
            *@
         </li>
      </ol>
      <input type = "submit" value = "Register" />

   </fieldset>
</form>
當您點選“註冊”按鈕時,您將再次看到“主頁”,但您會看到現在您已登入,並顯示了您的電子郵件 ID。
建立僅供會員訪問的頁面
在網站中,您可能希望某些頁面僅供會員訪問。ASP.NET 允許您配置頁面,以便只有已登入的成員才能訪問它們。通常,如果匿名使用者嘗試訪問僅供會員訪問的頁面,您會將他們重定向到登入頁面。
讓我們來看一個簡單的示例,其中我們修改關於頁面。當用戶登入時,使用者可以訪問此頁面,否則使用者將被重定向到登入頁面。因此,讓我們在About.cshtml檔案中替換以下程式碼。
@if (!WebSecurity.IsAuthenticated) {
   Response.Redirect("~/Account/Login");
}
@{
   Layout = "~/_SiteLayout.cshtml";
   Page.Title = "About My Site";
}

<hgroup class = "title">
   <h1>@Page.Title.</h1>
   <h2>Your app description page.</h2>
</hgroup>

<article>
   <p>Use this area to provide additional information.</p>
   <p>Use this area to provide additional information.</p>
   <p>Use this area to provide additional information.</p>
</article>

<aside>
   <h3>Aside Title</h3>
   <p>Use this area to provide additional information.</p>

   <ul>
      <li><a href = "~/">Home</a></li>
      <li><a href = "~/About">About</a></li>
      <li><a href = "~/Contact">Contact</a></li>
   </ul>

</aside>
讓我們執行應用程式,您將看到以下主頁。
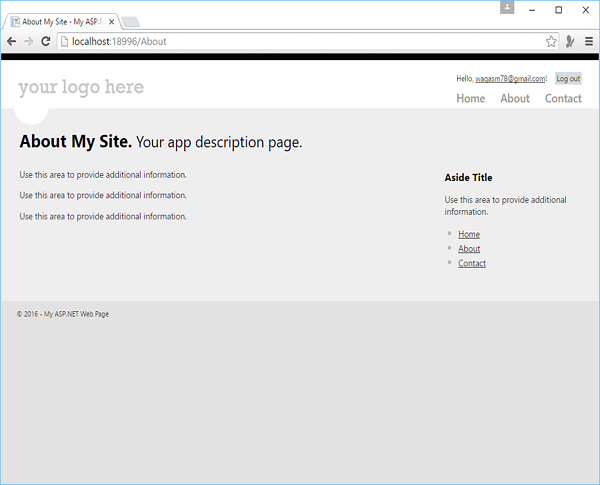
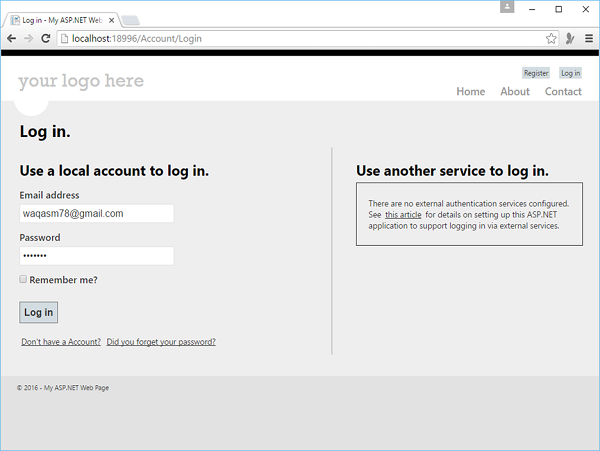
使用者目前尚未登入,因此當您點選“關於”連結時,您會看到您被重定向到登入頁面,如下面的螢幕截圖所示。

讓我們輸入憑據。
現在點選“登入”,您將看到“主頁”。
現在當您點選“關於”連結時,您會看到“關於”頁面現在對您可用,如下面的螢幕截圖所示。