- Yii 教程
- Yii - 首頁
- Yii - 概述
- Yii - 安裝
- Yii - 建立頁面
- Yii - 應用結構
- Yii - 入口指令碼
- Yii - 控制器
- Yii - 使用控制器
- Yii - 使用操作
- Yii - 模型
- Yii - 小部件
- Yii - 模組
- Yii - 檢視
- Yii - 佈局
- Yii - 資源
- Yii - 資源轉換
- Yii - 擴充套件
- Yii - 建立擴充套件
- Yii - HTTP 請求
- Yii - 響應
- Yii - URL 格式
- Yii - URL 路由
- Yii - URL 規則
- Yii - HTML 表單
- Yii - 驗證
- Yii - 即席驗證
- Yii - AJAX 驗證
- Yii - 會話
- Yii - 使用快閃記憶體資料
- Yii - Cookie
- Yii - 使用 Cookie
- Yii - 檔案上傳
- Yii - 格式化
- Yii - 分頁
- Yii - 排序
- Yii - 屬性
- Yii - 資料提供者
- Yii - 資料小部件
- Yii - ListView 小部件
- Yii - GridView 小部件
- Yii - 事件
- Yii - 建立事件
- Yii - 行為
- Yii - 建立行為
- Yii - 配置
- Yii - 依賴注入
- Yii - 資料庫訪問
- Yii - 資料訪問物件
- Yii - 查詢構建器
- Yii - 活動記錄
- Yii - 資料庫遷移
- Yii - 主題
- Yii - RESTful API
- Yii - RESTful API 實踐
- Yii - 欄位
- Yii - 測試
- Yii - 快取
- Yii - 片段快取
- Yii - 別名
- Yii - 日誌記錄
- Yii - 錯誤處理
- Yii - 身份驗證
- Yii - 授權
- Yii - 本地化
- Yii - Gii
- Gii – 建立模型
- Gii – 生成控制器
- Gii – 生成模組
- Yii 有用資源
- Yii - 快速指南
- Yii - 有用資源
- Yii - 討論
Yii - 模組
模組是一個擁有自己模型、檢視、控制器以及可能其他模組的實體。它實際上是應用程式內的應用程式。
步驟 1 − 在專案根目錄下建立一個名為modules的資料夾。在modules資料夾內,建立一個名為hello的資料夾。這將是我們 Hello 模組的基本資料夾。
步驟 2 − 在hello資料夾內,建立一個名為Hello.php的檔案,內容如下。
<?php
   namespace app\modules\hello;
   class Hello extends \yii\base\Module {
      public function init() {
         parent::init();
      }
   }
?>
我們剛剛建立了一個模組類。它應該位於模組的基礎路徑下。每次訪問模組時,都會建立一個相應的模組類的例項。init() 函式用於初始化模組的屬性。
步驟 3 − 現在,在 hello 資料夾內新增另外兩個目錄 - controllers 和 views。將CustomController.php檔案新增到controllers資料夾。
<?php
   namespace app\modules\hello\controllers;
   use yii\web\Controller;
   class CustomController extends Controller {
      public function actionGreet() {
         return $this->render('greet');
      }
   }
?>
建立模組時,慣例是將控制器類放在模組基路徑的 controllers 目錄中。我們剛剛定義了actionGreet函式,它只返回一個greet檢視。
模組中的檢視應放在模組基路徑的 views 資料夾中。如果檢視由控制器渲染,則它們應位於對應於controllerID的資料夾中。將custom資料夾新增到views資料夾。
步驟 4 − 在 custom 目錄內,建立一個名為greet.php的檔案,內容如下。
<h1>Hello world from custom module!</h1>
我們剛剛為actionGreet建立了一個檢視。要使用這個新建立的模組,我們應該配置應用程式。我們應該將我們的模組新增到應用程式的 modules 屬性中。
步驟 5 − 修改config/web.php檔案。
<?php
   $params = require(__DIR__ . '/params.php');
   $config = [
      'id' => 'basic',
      'basePath' => dirname(__DIR__),
      'bootstrap' => ['log'],
      'components' => [
         'request' => [
            // !!! insert a secret key in the following (if it is empty) - this is
               //required by cookie validation
            'cookieValidationKey' => 'ymoaYrebZHa8gURuolioHGlK8fLXCKjO',
         ],
         'cache' => [
            'class' => 'yii\caching\FileCache',
         ],
         'user' => [
            'identityClass' => 'app\models\User',
            'enableAutoLogin' => true,
         ],
         'errorHandler' => [
            'errorAction' => 'site/error',
         ],
         'mailer' => [
            'class' => 'yii\swiftmailer\Mailer',
            // send all mails to a file by default. You have to set
            // 'useFileTransport' to false and configure a transport
            // for the mailer to send real emails.
            'useFileTransport' => true,
         ],
         'log' => [
            'traceLevel' => YII_DEBUG ? 3 : 0,
            'targets' => [
               [
                  'class' => 'yii\log\FileTarget',
                  'levels' => ['error', 'warning'],
               ],
            ],
         ],
         'db' => require(__DIR__ . '/db.php'),
      ],
      'modules' => [
         'hello' => [
            'class' => 'app\modules\hello\Hello',
         ],
      ],
      'params' => $params,
   ];
   if (YII_ENV_DEV) {
      // configuration adjustments for 'dev' environment
      $config['bootstrap'][] = 'debug';
      $config['modules']['debug'] = [
         'class' => 'yii\debug\Module',
      ];
      $config['bootstrap'][] = 'gii';
      $config['modules']['gii'] = [
         'class' => 'yii\gii\Module',
      ];
   }
   return $config;
?>
模組控制器的路由必須以模組 ID 開頭,後跟控制器 ID 和操作 ID。
步驟 6 − 要在我們的應用程式中執行actionGreet,我們應該使用以下路由。
hello/custom/greet
其中 hello 是模組 ID,custom 是控制器 ID,greet 是操作 ID。
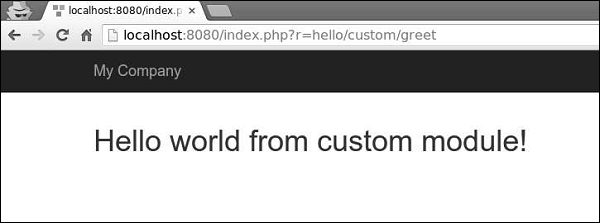
步驟 7 − 現在,輸入https://:8080/index.php?r=hello/custom/greet,您將看到以下輸出。
重要提示
模組應該:
用於大型應用程式。您應該將其功能分成幾個組。每個功能組都可以開發為一個模組。
可重用。一些常用的功能,如 SEO 管理或部落格管理,可以開發成模組,以便您可以在未來的專案中輕鬆重用它們。