- Spring Boot 教程
- Spring Boot - 首頁
- Spring Boot - 簡介
- Spring Boot - 快速入門
- Spring Boot - 引導
- Spring Tool Suite
- Spring Boot - Tomcat 部署
- Spring Boot - 構建系統
- Spring Boot - 程式碼結構
- Spring Bean & 依賴注入
- Spring Boot - 執行器
- Spring Boot - 啟動器
- Spring Boot - 應用屬性
- Spring Boot - 配置
- Spring Boot - 註解
- Spring Boot - 日誌
- 構建 RESTful Web 服務
- Spring Boot - 異常處理
- Spring Boot - 攔截器
- Spring Boot - Servlet 過濾器
- Spring Boot - Tomcat 埠號
- Spring Boot - Rest 模板
- Spring Boot - 檔案處理
- Spring Boot - 服務元件
- Spring Boot - Thymeleaf
- 使用 RESTful Web 服務
- Spring Boot - CORS 支援
- Spring Boot - 國際化
- Spring Boot - 定時任務
- Spring Boot - 啟用 HTTPS
- Spring Boot - Eureka 伺服器
- 使用 Eureka 註冊服務
- 閘道器代理伺服器和路由
- Spring Cloud 配置伺服器
- Spring Cloud 配置客戶端
- Spring Boot - Actuator
- Spring Boot - Admin 伺服器
- Spring Boot - Admin 客戶端
- Spring Boot - 啟用 Swagger2
- Spring Boot - 使用 SpringDoc OpenAPI
- Spring Boot - 建立 Docker 映象
- 追蹤微服務日誌
- Spring Boot - Flyway 資料庫
- Spring Boot - 傳送郵件
- Spring Boot - Hystrix
- Spring Boot - WebSocket
- Spring Boot - 批處理服務
- Spring Boot - Apache Kafka
- Spring Boot - Twilio
- Spring Boot - 單元測試用例
- Rest Controller 單元測試
- Spring Boot - 資料庫處理
- 保護 Web 應用
- Spring Boot - 使用 JWT 的 OAuth2
- Spring Boot - Google Cloud Platform
- Spring Boot - Google OAuth2 登入
- Spring Boot 資源
- Spring Boot - 快速指南
- Spring Boot - 有用資源
- Spring Boot - 討論
Spring Boot - 服務元件
服務元件是包含 @Service 註解的類檔案。這些類檔案用於在不同的層編寫業務邏輯,與 @RestController 類檔案分開。建立服務元件類檔案的邏輯如下所示:
public interface ProductService {
}
實現帶有 @Service 註解的介面的類如下所示:
@Service
public class ProductServiceImpl implements ProductService {
}
請注意,在本教程中,我們使用產品服務 API來儲存、檢索、更新和刪除產品。我們直接在 @RestController 類檔案中編寫了業務邏輯。現在,我們將業務邏輯程式碼從控制器移動到服務元件。
您可以建立一個介面,其中包含使用如下所示程式碼的新增、編輯、獲取和刪除方法:
ProductService.java
package com.tutorialspoint.demo.service;

import java.util.Collection;
import com.tutorialspoint.demo.model.Product;

public interface ProductService {
   public abstract void createProduct(Product product);
   public abstract void updateProduct(String id, Product product);
   public abstract void deleteProduct(String id);
   public abstract Collection<Product> getProducts();
}
以下程式碼將允許您建立一個實現 ProductService 介面並帶有 @Service 註解的類,並編寫儲存、檢索、刪除和更新產品的業務邏輯。
ProductServiceImpl.java
package com.tutorialspoint.demo.service;

import java.util.Collection;
import java.util.HashMap;
import java.util.Map;
import org.springframework.stereotype.Service;
import com.tutorialspoint.demo.model.Product;

@Service
public class ProductServiceImpl implements ProductService {
   private static Map<String, Product> productRepo = new HashMap<>();
   static {
      Product honey = new Product();
      honey.setId("1");
      honey.setName("Honey");
      productRepo.put(honey.getId(), honey);

      Product almond = new Product();
      almond.setId("2");
      almond.setName("Almond");
      productRepo.put(almond.getId(), almond);
   }
   @Override
   public void createProduct(Product product) {
      productRepo.put(product.getId(), product);
   }
   @Override
   public void updateProduct(String id, Product product) {
      productRepo.remove(id);
      product.setId(id);
      productRepo.put(id, product);
   }
   @Override
   public void deleteProduct(String id) {
      productRepo.remove(id);

   }
   @Override
   public Collection<Product> getProducts() {
      return productRepo.values();
   }
}
此程式碼顯示 Rest Controller 類檔案,在這裡我們 @Autowired ProductService 介面並呼叫了其方法。
ProductServiceController.java
package com.tutorialspoint.demo.controller;

import org.springframework.beans.factory.annotation.Autowired;
import org.springframework.http.HttpStatus;
import org.springframework.http.ResponseEntity;
import org.springframework.web.bind.annotation.DeleteMapping;
import org.springframework.web.bind.annotation.GetMapping;
import org.springframework.web.bind.annotation.PathVariable;
import org.springframework.web.bind.annotation.PostMapping;
import org.springframework.web.bind.annotation.PutMapping;
import org.springframework.web.bind.annotation.RequestBody;
import org.springframework.web.bind.annotation.RestController;

import com.tutorialspoint.demo.model.Product;
import com.tutorialspoint.demo.service.ProductService;

@RestController
public class ProductServiceController {
   @Autowired
   ProductService productService;

   @GetMapping(value = "/products")
   public ResponseEntity<Object> getProduct() {
      return new ResponseEntity<>(productService.getProducts(), HttpStatus.OK);
   }
   @PutMapping(value = "/products/{id}")
   public ResponseEntity<Object>
      updateProduct(@PathVariable("id") String id, @RequestBody Product product) {

      productService.updateProduct(id, product);
      return new ResponseEntity<>("Product is updated successsfully", HttpStatus.OK);
   }
   @DeleteMapping(value = "/products/{id}")
   public ResponseEntity<Object> delete(@PathVariable("id") String id) {
      productService.deleteProduct(id);
      return new ResponseEntity<>("Product is deleted successsfully", HttpStatus.OK);
   }
   @PostMapping(value = "/products")
   public ResponseEntity<Object> createProduct(@RequestBody Product product) {
      productService.createProduct(product);
      return new ResponseEntity<>("Product is created successfully", HttpStatus.CREATED);
   }
}
POJO 類 – Product.java 的程式碼如下所示:
Product.java
package com.tutorialspoint.demo.model;

public class Product {
   private String id;
   private String name;

   public String getId() {
      return id;
   }
   public void setId(String id) {
      this.id = id;
   }
   public String getName() {
      return name;
   }
   public void setName(String name) {
      this.name = name;
   }
}
下面給出一個主要的 Spring Boot 應用程式:
DemoApplication.java
package com.tutorialspoint.demo;

import org.springframework.boot.SpringApplication;
import org.springframework.boot.autoconfigure.SpringBootApplication;

@SpringBootApplication
public class DemoApplication {
   public static void main(String[] args) {
      SpringApplication.run(DemoApplication.class, args);
   }
}
Maven 構建 – pom.xml 的程式碼如下所示:
pom.xml
<?xml version="1.0" encoding="UTF-8"?>
   <project xmlns="http://maven.apache.org/POM/4.0.0" xmlns:xsi="http://www.w3.org/2001/XMLSchema-instance"
   xsi:schemaLocation="http://maven.apache.org/POM/4.0.0 https://maven.apache.org/xsd/maven-4.0.0.xsd">
   <modelVersion>4.0.0</modelVersion>
   <parent>
      <groupId>org.springframework.boot</groupId>
      <artifactId>spring-boot-starter-parent</artifactId>
      <version>3.3.3</version>
      <relativePath/> <!-- lookup parent from repository -->
   </parent>
   <groupId>com.tutorialspoint</groupId>
   <artifactId>demo</artifactId>
   <version>0.0.1-SNAPSHOT</version>
   <name>demo</name>
   <description>Demo project for Spring Boot</description>
   <url/>
   <licenses>
      <license/>
   </licenses>
   <developers>
      <developer/>
   </developers>
   <scm>
      <connection/>
      <developerConnection/>
      <tag/>
      <url/>
   </scm>
   <properties>
      <java.version>21</java.version>
   </properties>
   <dependencies>
      <dependency>
         <groupId>org.springframework.boot</groupId>
         <artifactId>spring-boot-starter-web</artifactId>
      </dependency>
      <dependency>
         <groupId>org.springframework.boot</groupId>
         <artifactId>spring-boot-starter-test</artifactId>
         <scope>test</scope>
      </dependency>
   </dependencies>
   <build>
      <plugins>
         <plugin>
            <groupId>org.springframework.boot</groupId>
            <artifactId>spring-boot-maven-plugin</artifactId>
         </plugin>
      </plugins>
   </build>
</project>
Gradle 構建 – build.gradle 的程式碼如下所示:
build.gradle
buildscript {
   ext {
      springBootVersion = '3.3.3'
   }
   repositories {
      mavenCentral()
   }
   dependencies {
      classpath("org.springframework.boot:spring-boot-gradle-plugin:${springBootVersion}")
   }
}

apply plugin: 'java'
apply plugin: 'eclipse'
apply plugin: 'org.springframework.boot'

group = 'com.tutorialspoint'
version = '0.0.1-SNAPSHOT'
sourceCompatibility = 21

repositories {
   mavenCentral()
}
dependencies {
   compile('org.springframework.boot:spring-boot-starter-web')
   testCompile('org.springframework.boot:spring-boot-starter-test')
}
您可以建立一個可執行的 JAR 檔案,並使用以下 Maven 或 Gradle 命令執行 Spring Boot 應用程式:
對於 Maven,使用如下所示的命令:
mvn clean install
“BUILD SUCCESS”之後,您可以在 target 目錄下找到 JAR 檔案。
對於 Gradle,您可以使用如下所示的命令:
gradle clean build
“BUILD SUCCESSFUL”之後,您可以在 build/libs 目錄下找到 JAR 檔案。
使用以下命令執行 JAR 檔案:
java –jar <JARFILE>
現在,應用程式已在 Tomcat 埠 8080 上啟動,如下圖所示:

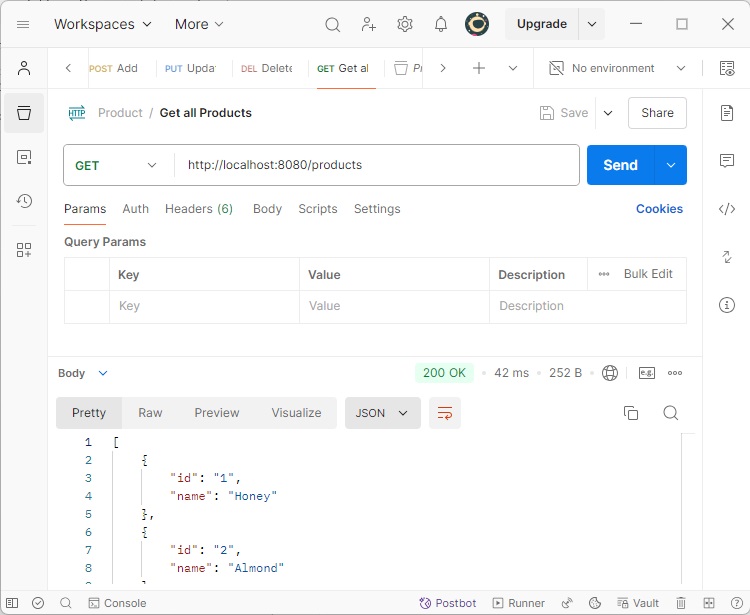
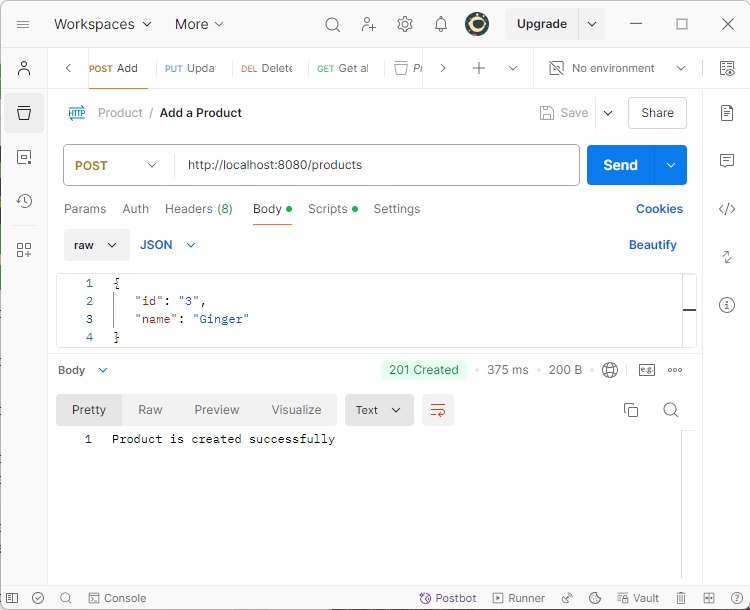
現在在 POSTMAN 應用程式中訪問以下 URL,您可以看到如下所示的輸出:
GET API URL 為:https://:8080/products
POST API URL 為:https://:8080/products
PUT API URL 為:https://:8080/products/3

DELETE API URL 為:https://:8080/products/3
