- React 本地教程
- React Native - 主頁
- 核心概念
- React Native - 概述
- React Native - 設定環境
- React Native - 應用
- React Native - 狀態
- React Native - 屬性
- React Native - 樣式
- React Native - Flexbox
- React Native - ListView
- React Native - 文字輸入
- React Native - 滾動檢視
- React Native - 影像
- React Native - HTTP
- React Native - 按鈕
- React Native - 動畫
- React Native - 除錯
- React Native - 路由器
- React Native - 在 IOS 上執行
- React Native - 在 Android 上執行
- 元件和 API
- React Native - 檢視
- React Native - 網頁檢視
- React Native - 模態
- React Native - 活動指示器
- React Native - 選擇器
- React Native - 狀態列
- React Native - 交換開關
- React Native - 文字
- React Native - 警報
- React Native - 地理位置
- React Native - 非同步儲存
- React Native 有用資源
- React Native - 快速指南
- React Native - 有用資源
- React Native - 討論
React Native - 交換開關
在本章中,我們將分幾步解釋交換開關元件。
步驟 1:建立檔案
我們將在HomeContainer元件中使用邏輯,但我們需要建立一個演示元件。
現在,讓我們建立一個新檔案:SwitchExample.js。
步驟 2:邏輯
我們正在從state中傳遞值,將函式切換到SwitchExample元件,以切換專案。切換函式將用於更新狀態。
App.js
import React, { Component } from 'react'
import { View } from 'react-native'
import SwitchExample from './switch_example.js'

export default class HomeContainer extends Component {
   constructor() {
      super();
      this.state = {
         switch1Value: false,
      }
   }
   toggleSwitch1 = (value) => {
      this.setState({switch1Value: value})
      console.log('Switch 1 is: ' + value)
   }
   render() {
      return (
         <View>
            <SwitchExample
            toggleSwitch1 = {this.toggleSwitch1}
            switch1Value = {this.state.switch1Value}/>
         </View>
      );
   }
}
步驟 3:展示
Switch 元件需要兩個屬性。在使用者按下交換開關後,onValueChange 屬性將觸發我們的切換函式。value 屬性繫結到HomeContainer元件的狀態。
switch_example.js
import React, { Component } from 'react'
import { View, Switch, StyleSheet }

from 'react-native'

export default SwitchExample = (props) => {
   return (
      <View style = {styles.container}>
         <Switch
         onValueChange = {props.toggleSwitch1}
         value = {props.switch1Value}/>
      </View>
   )
}
const styles = StyleSheet.create ({
   container: {
      flex: 1,
      alignItems: 'center',
      marginTop: 100
   }
})
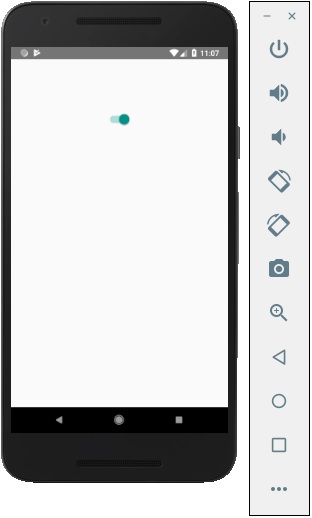
如果我們按下交換開關,將更新狀態。你可以在控制檯中檢視值。
輸出
廣告