- Puppeteer 教程
- Puppeteer - 首頁
- Puppeteer - 簡介
- Puppeteer - 元素處理
- Puppeteer - Google 使用
- Puppeteer - NodeJS 安裝
- Puppeteer VS Code 配置
- Puppeteer - 安裝
- Puppeteer - 基本測試
- Puppeteer - 無頭模式執行
- Puppeteer 與 Selenium 的比較
- Puppeteer 與 Protractor 的比較
- Puppeteer 與 Cypress 的比較
- Puppeteer - 瀏覽器操作
- Puppeteer - 標籤頁處理
- Puppeteer - 基本命令
- Puppeteer - Firefox
- Puppeteer - Chrome
- Puppeteer - 處理確認彈窗
- Puppeteer - 處理下拉選單
- Puppeteer - 定位器
- Puppeteer - XPath 函式
- Puppeteer - XPath 屬性
- Puppeteer - XPath 分組
- Puppeteer - 絕對 XPath
- Puppeteer - 相對 XPath
- Puppeteer - XPath 軸
- Puppeteer - 型別選擇器
- 名稱選擇器 & 類名選擇器
- Puppeteer - ID 選擇器
- Puppeteer - 屬性選擇器
- Puppeteer - 處理連結/按鈕
- 處理編輯框 & 複選框
- Puppeteer - 處理框架
- Puppeteer - 鍵盤模擬
- Puppeteer - 獲取元素文字
- Puppeteer - 獲取元素屬性
- Puppeteer - 裝置模擬
- Puppeteer - 停用 JavaScript
- Puppeteer - 同步
- Puppeteer - 捕獲截圖
- Puppeteer 有用資源
- Puppeteer - 快速指南
- Puppeteer - 有用資源
- Puppeteer - 討論
Puppeteer - ID 選擇器
一旦我們導航到一個網頁,我們就需要與頁面上可用的網頁元素進行互動,例如點選連結/按鈕、在編輯框中輸入文字等等,以完成我們的自動化測試用例。
為此,我們的首要任務是識別元素。id 屬性通常在一個頁面中是唯一的,可以用作 id 選擇器。它是一個非常有用的定位器,與所有其他選擇器相比,可以加快自動化測試的執行速度。
語法
ID 選擇器的語法如下:
const n = await page.$("#loc")
在下面的示例中,讓我們識別具有 id txtSearchText 的突出顯示元素,並在其中輸入文字。
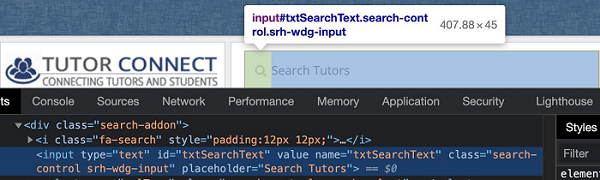
上述元素的 id 選擇器表示式為 #txtSearchText。
首先,請按照 Puppeteer 中“基本測試”章節中的步驟 1 到 2 操作,如下所示:
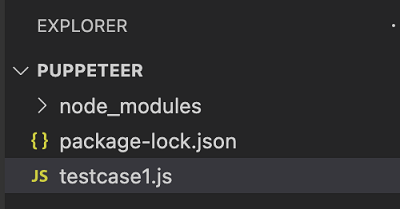
步驟 1 - 在建立 node_modules 資料夾的目錄(Puppeteer 和 Puppeteer core 已安裝的位置)中建立一個新檔案。
有關 Puppeteer 安裝的詳細資訊在“Puppeteer 安裝”章節中討論。
右鍵單擊建立 node_modules 資料夾的資料夾,然後單擊“新建檔案”按鈕。

步驟 2 - 輸入檔名,例如 testcase1.js。
步驟 3 - 將以下程式碼新增到建立的 testcase1.js 檔案中。
//Puppeteer library
const pt= require('puppeteer')
async function selectorId(){
   //launch browser in headless mode
   const browser = await pt.launch()
   //browser new page
   const page = await browser.newPage();
   //launch URL
   await page.goto('https://tutorialspoint.tw/tutor_connect/index.php')
   //identify element with id
   const f = await page.$("#txtSearchText")
   //enter text
   f.type("Puppeteer")
   //wait for sometime
   await page.waitForTimeout(4000)
   //browser close
   await browser.close()
}
selectorId()
步驟 4 - 使用以下命令執行程式碼:
node <filename>
因此,在我們的示例中,我們將執行以下命令:
node testcase1.js
廣告