- Puppeteer 教程
- Puppeteer - 首頁
- Puppeteer - 簡介
- Puppeteer - 元素操作
- Puppeteer - Google 使用
- Puppeteer - NodeJS 安裝
- Puppeteer VS Code 配置
- Puppeteer - 安裝
- Puppeteer - 基本測試
- Puppeteer - 非無頭模式執行
- Puppeteer 與 Selenium 的比較
- Puppeteer 與 Protractor 的比較
- Puppeteer 與 Cypress 的比較
- Puppeteer - 瀏覽器操作
- Puppeteer - 標籤頁處理
- Puppeteer - 基本命令
- Puppeteer - Firefox
- Puppeteer - Chrome
- Puppeteer - 處理確認警告框
- Puppeteer - 處理下拉選單
- Puppeteer - 定位器
- Puppeteer - XPath 函式
- Puppeteer - XPath 屬性
- Puppeteer - XPath 分組
- Puppeteer - 絕對 XPath
- Puppeteer - 相對 XPath
- Puppeteer - XPath 軸
- Puppeteer - 型別選擇器
- 名稱選擇器 & 類名選擇器
- Puppeteer - ID 選擇器
- Puppeteer - 屬性選擇器
- Puppeteer - 處理連結/按鈕
- 處理編輯框 & 複選框
- Puppeteer - 處理框架
- Puppeteer - 鍵盤模擬
- Puppeteer - 獲取元素文字
- Puppeteer - 獲取元素屬性
- Puppeteer - 裝置模擬
- Puppeteer - 停用 JavaScript
- Puppeteer - 同步
- Puppeteer - 擷取螢幕截圖
- Puppeteer 有用資源
- Puppeteer - 快速指南
- Puppeteer - 有用資源
- Puppeteer - 討論
Puppeteer - 處理確認警告框
Puppeteer 能夠處理警告框。像 Selenium、WebdriverIO 等自動化工具會在警告框出現在頁面後才接受或關閉它。
然而,在 Puppeteer 中,使用者必須在警告框出現在頁面之前指示是接受還是關閉它。為此,必須使用 Puppeteer 觸發 `on` 事件監聽器。
處理確認警告框的方法
下面列出了一些處理警告框的方法:
accept(): Promise<void> − 此方法用於接受警告框。
message(): string − 此方法用於獲取警告框中的訊息。
type(): DialogType − 此方法用於獲取對話方塊型別。對話方塊型別可以是提示框、確認框或提示框。
dismiss(): Promise<void> − 此方法用於關閉警告框。
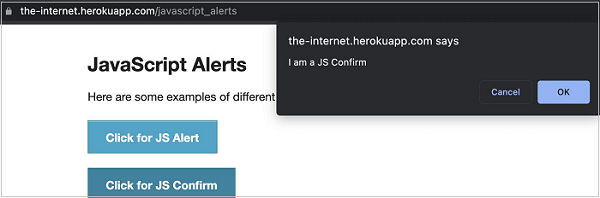
在下圖中,點選“Click for JS Confirm”後,會顯示一個確認警告框。讓我們獲取警告框中的文字。
首先,按照 Puppeteer 基本測試章節中的步驟 1 到步驟 2 操作,步驟如下:
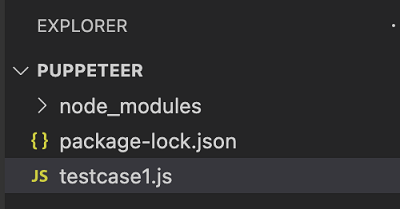
步驟 1 − 在建立 `node_modules` 資料夾的目錄(Puppeteer 和 Puppeteer core 已安裝的位置)中建立一個新檔案。
Puppeteer 安裝的詳細資訊在 Puppeteer 安裝章節中討論。
右鍵單擊建立 `node_modules` 資料夾的資料夾,然後單擊“新建檔案”按鈕。

步驟 2 − 輸入檔名,例如 `testcase1.js`。
步驟 3 − 在建立的 `testcase1.js` 檔案中新增以下程式碼。
//Puppeteer library
const pt= require('puppeteer')
async function confirmAlert(){
   //launch browser in headless mode
   const browser = await pt.launch()
   //browser new page
   const page = await browser.newPage();
   //on event listener trigger
   page.on('dialog', async dialog => {
      //get alert message
      console.log(dialog.message());
      //accept alert
      await dialog.accept();
   })
   //launch URL
   await page.goto('https://the-internet.herokuapp.com/javascript_alerts')
   //identify element with xpath then click
   const b = (await page.$x("//button[text()='Click for JS Confirm']"))[0]
   b.click()
}
confirmAlert()
步驟 4 − 使用以下命令執行程式碼。
node <filename>
在我們的示例中,我們將執行以下命令:
node testcase1.js

命令成功執行後,確認警告框文字“I am a JS Confirm”將列印到控制檯。
廣告