- Meteor 教程
- Meteor - 首頁
- Meteor - 概述
- Meteor - 環境搭建
- Meteor - 第一個應用
- Meteor - 模板
- Meteor - 集合
- Meteor - 表單
- Meteor - 事件
- Meteor - Session
- Meteor - Tracker
- Meteor - 包
- Meteor - 核心 API
- Meteor - Check
- Meteor - Blaze
- Meteor - 定時器
- Meteor - EJSON
- Meteor - HTTP
- Meteor - 郵件
- Meteor - 資源
- Meteor - 安全性
- Meteor - 排序
- Meteor - 賬戶
- Meteor - 方法
- Meteor - Package.js
- Meteor - 釋出與訂閱
- Meteor - 架構
- Meteor - 部署
- Meteor - 移動端執行
- Meteor - ToDo 應用
- Meteor - 最佳實踐
- Meteor 有用資源
- Meteor - 快速指南
- Meteor - 有用資源
- Meteor - 討論
Meteor - 釋出與訂閱
正如在集合章節中討論的那樣,我們所有的資料都可以在客戶端訪問。這是一個安全問題,可以使用釋出和訂閱方法來處理。
移除 Autopublish
在這個例子中,我們將使用包含以下資料的 **PlayersCollection** 集合。我們之前已經準備好了這個集合,以便能夠專注於本章節本身。如果您不確定如何在 Meteor 應用中建立 MongoDB 集合,請檢視我們的 集合 章節。
為了保護我們的資料,我們需要移除允許我們在客戶端使用資料的 **autopublish** 包。
C:\Users\username\Desktop\meteorApp>meteor remove autopublish
此步驟之後,我們將無法從客戶端獲取資料庫資料。我們只能在命令提示符視窗的伺服器端看到它。檢視以下程式碼:
meteorApp.js
var PlayersCollection = new Mongo.Collection('playersCollection');
var myLog = PlayersCollection.find().fetch();
console.log(myLog);
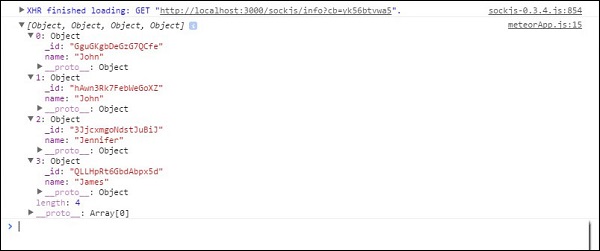
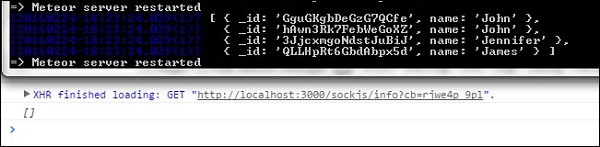
**命令提示符** 視窗將顯示包含四個物件的整個集合,而 **開發者控制檯** 將顯示一個空陣列。現在我們的應用更安全了。
使用釋出和訂閱
假設我們想允許客戶端使用我們的資料。為此,我們需要在伺服器上建立 **Meteor.publish()** 方法。此方法將資料傳送到客戶端。
為了能夠在客戶端接收和使用該資料,我們將建立 **Meteor.subscribe()** 方法。在示例的最後,我們正在搜尋資料庫。這段程式碼在客戶端和伺服器端都執行。
var PlayersCollection = new Mongo.Collection('playersCollection');

if(Meteor.isServer) {

   Meteor.publish('allowedData', function() {
      return PlayersCollection.find();
   })
}

if (Meteor.isClient) {
   Meteor.subscribe('allowedData');
};

Meteor.setTimeout(function() {
   var myLog = PlayersCollection.find().fetch();
   console.log(myLog);
}, 1000);
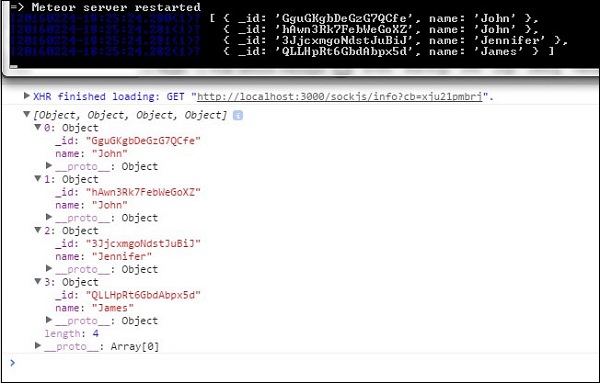
我們可以看到我們的資料已在 **開發者控制檯** 和 **命令提示符** 視窗中記錄。
過濾客戶端資料
我們也可以釋出部分資料。在這個例子中,我們釋出了 **name = "John"** 的資料。
var PlayersCollection = new Mongo.Collection('playersCollection');

if(Meteor.isServer) {

   Meteor.publish('allowedData', function() {
      return PlayersCollection.find({name: "John"});
   })
}

if (Meteor.isClient) {
   Meteor.subscribe('allowedData');
};

Meteor.setTimeout(function() {
   myLog = PlayersCollection.find().fetch();
   console.log(myLog);
}, 1000);
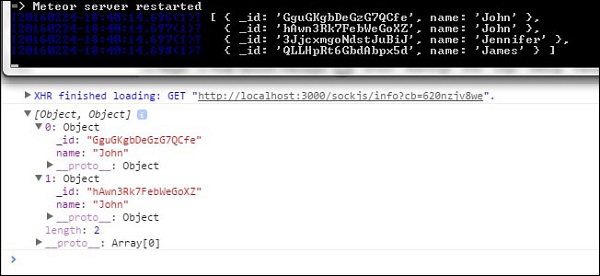
執行此程式碼後,**命令提示符** 將記錄所有資料,而客戶端 **控制檯** 只會記錄兩個名稱為 **John** 的物件。
廣告