- Meteor 教程
- Meteor - 首頁
- Meteor - 概述
- Meteor - 環境設定
- Meteor - 第一個應用程式
- Meteor - 模板
- Meteor - 集合
- Meteor - 表單
- Meteor - 事件
- Meteor - 會話
- Meteor - 追蹤器
- Meteor - 包
- Meteor - 核心 API
- Meteor - 檢查
- Meteor - Blaze
- Meteor - 計時器
- Meteor - EJSON
- Meteor - HTTP
- Meteor - 電子郵件
- Meteor - 資源
- Meteor - 安全
- Meteor - 排序
- Meteor - 帳戶
- Meteor - 方法
- Meteor - Package.js
- Meteor - 釋出和訂閱
- Meteor - 結構
- Meteor - 部署
- Meteor - 在移動裝置上執行
- Meteor - Todo 應用程式
- Meteor - 最佳實踐
- Meteor 有用資源
- Meteor - 快速指南
- Meteor - 有用資源
- Meteor - 討論
Meteor - 事件
在本章中,我們將學習如何使用 標籤、類 和 id 作為事件選擇器。事件處理非常簡單。
讓我們在 HTML 模板中建立三個元素。第一個是 p,第二個是 myClass 類,最後一個是 myId id。
meteorApp.html
<head>
   <title>meteorApp</title>
</head>

<body>
   <div>
      {{> myTemplate}}
   </div>
</body>

<template name = "myTemplate">
   <p>PARAGRAPH...</p>
   <button class = "myClass">CLASS</button>
   <button id = "myId">ID</button>
</template>
在我們的 JavaScript 檔案中,我們為上面建立的三個元素設定三個事件。您會看到,我們在 click 事件之後僅新增 p、.myClass 和 #myId。上面提到的就是這些 選擇器。
meteorApp.js
if (Meteor.isClient) {

   Template.myTemplate.events({

      'click p': function() {
         console.log("The PARAGRAPH is clicked...");
      },

      'click .myClass': function() {
         console.log("The CLASS is clicked...");
      },

      'click #myId': function() {
         console.log("The ID is clicked...");
      },
   });
}
為了進行測試,我們可以先單擊 段落,然後單擊 類 按鈕,最後單擊 ID 按鈕。我們將獲取以下控制檯日誌。
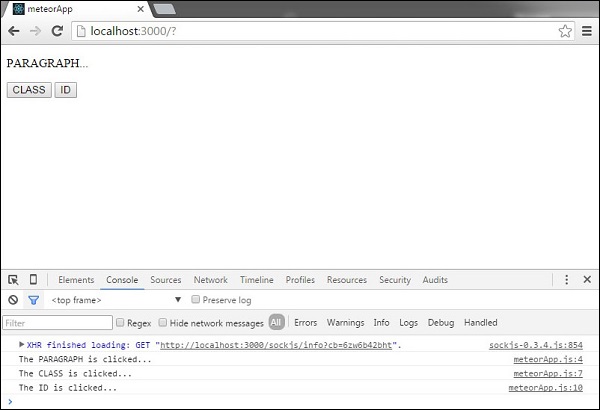
我們可以使用上述示例中的所有其他 JavaScript 事件,如單擊、雙擊、contextmenu、mousedown、mouseup、mouseover、mouseout、mousemove。
廣告