- Kibana 教程
- Kibana - 首頁
- Kibana - 概覽
- Kibana - 環境設定
- Kibana - ELK Stack 簡介
- Kibana - 載入示例資料
- Kibana - 管理
- Kibana - 發現
- Kibana - 聚合和指標
- Kibana - 建立視覺化
- Kibana - 使用圖表
- Kibana - 使用圖形
- Kibana - 使用熱力圖
- 使用座標地圖
- Kibana - 使用區域地圖
- 使用儀表和目標
- Kibana - 使用畫布
- Kibana - 建立儀表板
- Kibana - Timelion
- Kibana - 開發工具
- Kibana - 監控
- 使用 Kibana 建立報表
- Kibana 有用資源
- Kibana - 快速指南
- Kibana - 有用資源
- Kibana - 討論
Kibana - 載入示例資料
我們已經瞭解瞭如何將資料從 Logstash 上傳到 Elasticsearch。我們將在本文中使用 Logstash 和 Elasticsearch 上傳資料。但是,關於我們需要使用的具有日期、經度和緯度欄位的資料,我們將在接下來的章節中學習。如果我們沒有 CSV 檔案,我們還將瞭解如何在 Kibana 中直接上傳資料。
在本章中,我們將涵蓋以下主題:
- 使用 Logstash 上傳具有日期、經度和緯度欄位的資料到 Elasticsearch
- 使用開發工具上傳批次資料
使用 Logstash 上傳具有欄位的資料到 Elasticsearch
我們將使用 CSV 格式的資料,這些資料來自 Kaggle.com,該網站提供可用於分析的資料。
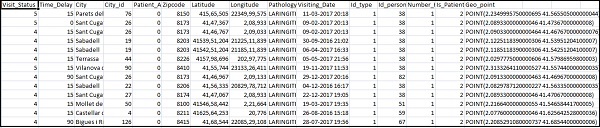
此處使用的資料是家庭醫療訪問資料,取自 Kaggle.com。
以下是在 CSV 檔案中可用的欄位:
["Visit_Status","Time_Delay","City","City_id","Patient_Age","Zipcode","Latitude","Longitude",
"Pathology","Visiting_Date","Id_type","Id_personal","Number_Home_Visits","Is_Patient_Minor","Geo_point"]
Home_visits.csv 如下所示:
以下是將與 Logstash 一起使用的配置檔案:
input {
   file {
      path => "C:/kibanaproject/home_visits.csv"
      start_position => "beginning"
      sincedb_path => "NUL"
   }
}
filter {
   csv {
      separator => ","
      columns =>
      ["Visit_Status","Time_Delay","City","City_id","Patient_Age",
      "Zipcode","Latitude","Longitude","Pathology","Visiting_Date",
      "Id_type","Id_personal","Number_Home_Visits","Is_Patient_Minor","Geo_point"]
   }
   date {
      match => ["Visiting_Date","dd-MM-YYYY HH:mm"]
      target => "Visiting_Date"
   }
   mutate {convert => ["Number_Home_Visits", "integer"]}
   mutate {convert => ["City_id", "integer"]}
   mutate {convert => ["Id_personal", "integer"]}
   mutate {convert => ["Id_type", "integer"]}
   mutate {convert => ["Zipcode", "integer"]}
   mutate {convert => ["Patient_Age", "integer"]}
   mutate {
      convert => { "Longitude" => "float" }
      convert => { "Latitude" => "float" }
   }
   mutate {
      rename => {
         "Longitude" => "[location][lon]"
         "Latitude" => "[location][lat]"
      }
   }
}
output {
   elasticsearch {
      hosts => ["localhost:9200"]
      index => "medicalvisits-%{+dd.MM.YYYY}"
   }
   stdout {codec => json_lines }
}
預設情況下,Logstash 將上傳到 Elasticsearch 的所有內容都視為字串。如果您的 CSV 檔案具有日期欄位,則需要執行以下操作以獲取日期格式。
對於日期欄位:
date {
   match => ["Visiting_Date","dd-MM-YYYY HH:mm"]
   target => "Visiting_Date"
}
對於地理位置,Elasticsearch 理解如下:
"location": {
   "lat":41.565505000000044,
   "lon": 2.2349995750000695
}
因此,我們需要確保經度和緯度採用 Elasticsearch 所需的格式。所以首先我們需要將經度和緯度轉換為浮點數,然後重新命名它,以便它作為location JSON 物件的一部分可用,其中包含lat 和lon。此處顯示了相應的程式碼:
mutate {
      convert => { "Longitude" => "float" }
      convert => { "Latitude" => "float" }
   }
mutate {
   rename => {
      "Longitude" => "[location][lon]"
      "Latitude" => "[location][lat]"
   }
}
要將欄位轉換為整數,請使用以下程式碼:
mutate {convert => ["Number_Home_Visits", "integer"]}
mutate {convert => ["City_id", "integer"]}
mutate {convert => ["Id_personal", "integer"]}
mutate {convert => ["Id_type", "integer"]}
mutate {convert => ["Zipcode", "integer"]}
mutate {convert => ["Patient_Age", "integer"]}
一旦欄位得到處理,執行以下命令將資料上傳到 Elasticsearch:
- 進入 Logstash 的 bin 目錄並執行以下命令。
logstash -f logstash_homevisists.conf
- 完成後,您應該在 Elasticsearch 中看到 Logstash 配置檔案中提到的索引,如下所示:
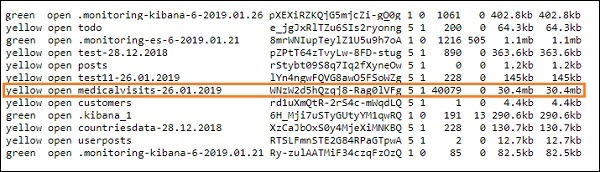
我們現在可以在上面上傳的索引上建立索引模式,並進一步用於建立視覺化。
使用開發工具上傳批次資料
我們將使用 Kibana UI 中的開發工具。開發工具有助於在 Elasticsearch 中上傳資料,而無需使用 Logstash。我們可以使用開發工具在 Kibana 中釋出、放置、刪除和搜尋我們想要的資料。
在本節中,我們將嘗試在 Kibana 本身載入示例資料。我們可以使用它來練習示例資料,並使用 Kibana 功能進行操作,以深入瞭解 Kibana。
讓我們從以下 URL 獲取 JSON 資料,並在 Kibana 中上傳。類似地,您可以嘗試將任何示例 JSON 資料載入到 Kibana 中。
在開始上傳示例資料之前,我們需要在 Elasticsearch 中使用索引的 JSON 資料。當我們使用 Logstash 上傳時,Logstash 會負責新增索引,使用者不必擔心 Elasticsearch 需要哪些索引。
普通 JSON 資料
[
   {"type":"act","line_id":1,"play_name":"Henry IV",

   "speech_number":"","line_number":"","speaker":"","text_entry":"ACT I"},
   {"type":"scene","line_id":2,"play_name":"Henry IV",
   "speech_number":"","line_number":"","speaker":"","text_entry":"SCENE I.London. The palace."},
   {"type":"line","line_id":3,"play_name":"Henry IV",
   "speech_number":"","line_number":"","speaker":"","text_entry":
   "Enter KING HENRY, LORD JOHN OF LANCASTER, the
   EARL of WESTMORELAND, SIR WALTER BLUNT, and others"}
]
與 Kibana 一起使用的 JSON 程式碼必須具有以下索引:
{"index":{"_index":"shakespeare","_id":0}}
{"type":"act","line_id":1,"play_name":"Henry IV",
"speech_number":"","line_number":"","speaker":"","text_entry":"ACT I"}
{"index":{"_index":"shakespeare","_id":1}}
{"type":"scene","line_id":2,"play_name":"Henry IV",
"speech_number":"","line_number":"","speaker":"",
"text_entry":"SCENE I. London. The palace."}
{"index":{"_index":"shakespeare","_id":2}}
{"type":"line","line_id":3,"play_name":"Henry IV",
"speech_number":"","line_number":"","speaker":"","text_entry":
"Enter KING HENRY, LORD JOHN OF LANCASTER, the EARL
of WESTMORELAND, SIR WALTER BLUNT, and others"}
請注意,JSON 檔案中還有其他資料:{"index":{"_index":"nameofindex","_id":key}}。
要將任何示例 JSON 檔案轉換為與 Elasticsearch 相容的格式,這裡我們提供了一個小的 PHP 程式碼,它會將給定的 JSON 檔案輸出為 Elasticsearch 所需的格式:
PHP 程式碼
<?php
   $myfile = fopen("todo.json", "r") or die("Unable to open file!"); // your json
   file here
   $alldata = fread($myfile,filesize("todo.json"));
   fclose($myfile);
   $farray = json_decode($alldata);
   $afinalarray = [];
   $index_name = "todo";
   $i=0;
   $myfile1 = fopen("todonewfile.json", "w") or die("Unable to open file!"); //
   writes a new file to be used in kibana dev tool
   foreach ($farray as $a => $value) {
      $_index = json_decode('{"index": {"_index": "'.$index_name.'", "_id": "'.$i.'"}}');
      fwrite($myfile1, json_encode($_index));
      fwrite($myfile1, "\n");
      fwrite($myfile1, json_encode($value));
      fwrite($myfile1, "\n");
      $i++;
   }
?>
我們從https://jsonplaceholder.typicode.com/todos獲取了 todo JSON 檔案,並使用 PHP 程式碼將其轉換為我們需要在 Kibana 中上傳的格式。
要載入示例資料,請開啟開發工具選項卡,如下所示:
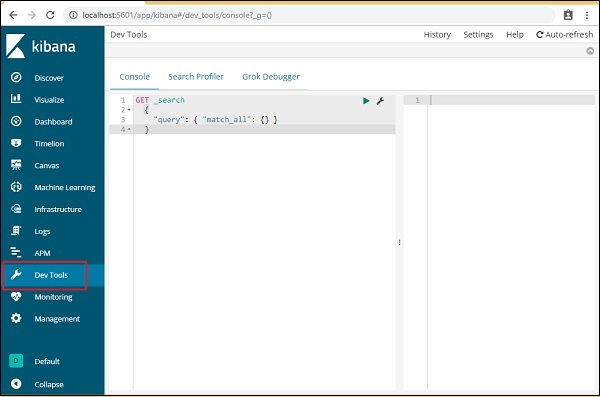
我們現在將使用上面顯示的控制檯。我們將獲取執行 PHP 程式碼後獲得的 JSON 資料。
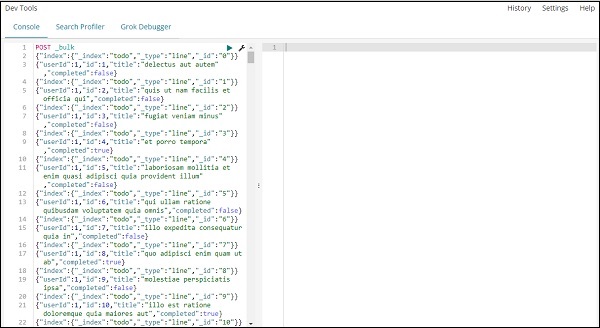
在開發工具中用於上傳 JSON 資料的命令為:
POST _bulk
請注意,我們正在建立的索引名稱為todo。
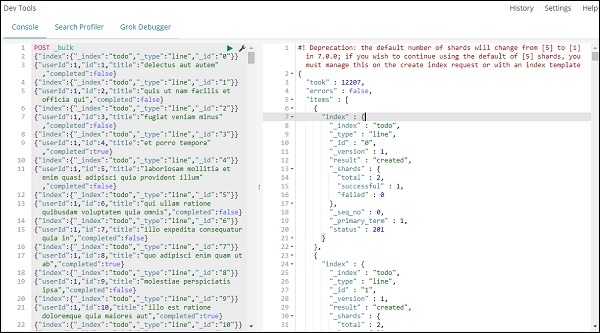
單擊綠色按鈕上傳資料後,您可以檢查索引是否已在 Elasticsearch 中建立,如下所示:
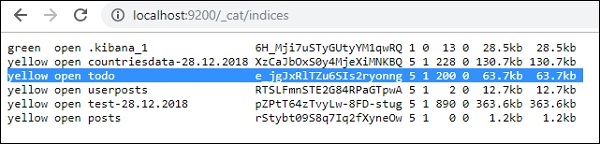
您可以在開發工具本身中檢查相同內容,如下所示:
命令:
GET /_cat/indices

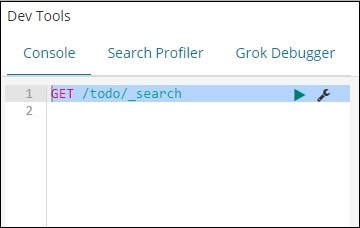
如果要搜尋索引:todo 中的內容,您可以按照以下步驟操作:
開發工具中的命令
GET /todo/_search
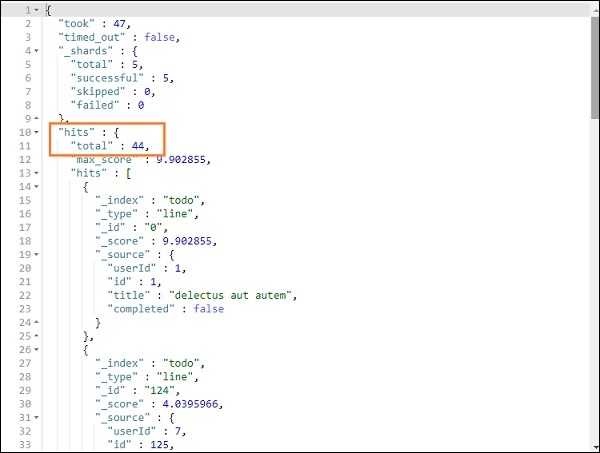
上述搜尋的輸出如下所示:

它提供 todo 索引中存在的所有記錄。我們獲得的總記錄數為 200。
在 todo 索引中搜索記錄
我們可以使用以下命令執行此操作:
GET /todo/_search
{
   "query":{
      "match":{
         "title":"delectusautautem"
      }
   }
}
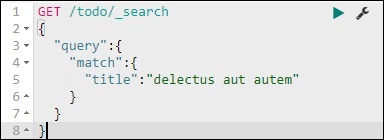
我們能夠獲取與我們提供的標題匹配的記錄。