- Aurelia 教程
- Aurelia - 首頁
- Aurelia - 概述
- Aurelia - 環境搭建
- Aurelia - 第一個應用
- Aurelia - 元件
- Aurelia - 元件生命週期
- Aurelia - 自定義元素
- Aurelia - 依賴注入
- Aurelia - 配置
- Aurelia - 外掛
- Aurelia - 資料繫結
- Aurelia - 繫結行為
- Aurelia - 轉換器
- Aurelia - 事件
- Aurelia - 事件聚合器
- Aurelia - 表單
- Aurelia - HTTP
- Aurelia - Refs
- Aurelia - 路由
- Aurelia - 歷史記錄
- Aurelia - 動畫
- Aurelia - 對話方塊
- Aurelia - 國際化
- Aurelia - 工具
- Aurelia - 打包
- Aurelia - 除錯
- Aurelia - 社群
- Aurelia - 最佳實踐
- Aurelia 有用資源
- Aurelia - 快速指南
- Aurelia - 有用資源
- Aurelia - 討論
Aurelia - 路由
路由是每個應用程式的重要組成部分。在本章中,您將學習如何在 Aurelia 框架中使用路由器。
步驟 1 - 建立頁面
我們已在前幾章中建立了一個 components 資料夾。如果您還沒有建立它,則應將其放在 src 資料夾內。
C:\Users\username\Desktop\aureliaApp\src>mkdir components
在這個資料夾中,我們將建立 home 和 about 目錄。
C:\Users\username\Desktop\aureliaApp\src\components>mkdir home
C:\Users\username\Desktop\aureliaApp\src\components>mkdir about
在 home 資料夾中,我們需要建立 view 和 view-model 檔案。
C:\Users\username\Desktop\aureliaApp\src\components\home>touch home.js
C:\Users\username\Desktop\aureliaApp\src\components\home>touch home.html
我們還需要 about 頁面的 view 和 view-model。
C:\Users\username\Desktop\aureliaApp\src\components\about>touch about.js
C:\Users\username\Desktop\aureliaApp\src\components\about>touch about.html
注意 - 您也可以手動建立以上所有資料夾。
步驟 2 - 頁面
接下來,我們需要在建立的檔案中新增一些預設程式碼。
home.html
<template>
   <h1>HOME</h1>
</template>
home.js
export class Home {}
about.html
<template>
   <h1>ABOUT</h1>
</template>
about.js
export class About {}
步驟 3 - 路由器
我們將在 app.js 檔案中為 路由器 建立 view-model。
app.js
export class App {
   configureRouter(config, router) {
      config.title = 'Aurelia';

      config.map([
         { route: ['','home'],  name: 'home',
            moduleId: './components/home/home',  nav: true, title:'Home' },
         { route: 'about',  name: 'about',
            moduleId: './components/about/about',    nav: true, title:'About' }
      ]);

      this.router = router;
   }
}
我們的路由器 view 將放置在 app.html 中。
app.html
<template>
   <nav>
      <ul>
         <li repeat.for = "row of router.navigation">
            <a href.bind = "row.href">${row.title}</a>
         </li>
      </ul>
   </nav>
   <router-view></router-view>
</template>
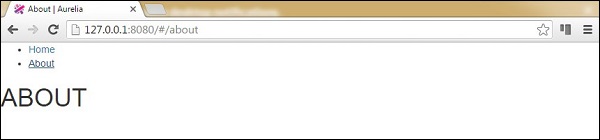
當我們執行應用程式時,可以透過點選 home 或 about 連結來更改路由。
廣告