- Angular 6 教程
- Angular 6 - 首頁
- Angular 6 - 概述
- Angular 6 - 環境設定
- Angular 6 - 專案設定
- Angular 6 - 元件
- Angular 6 - 模組
- Angular 6 - 資料繫結
- Angular 6 - 事件繫結
- Angular 6 - 模板
- Angular 6 - 指令
- Angular 6 - 管道
- Angular 6 - 路由
- Angular 6 - 服務
- Angular 6 - Http 服務
- Angular 6 - Http 客戶端
- Angular 6 - 表單
- Angular 6 - 動畫
- Angular 6 - 材料
- Angular 6 - CLI
- Angular 6 有用資源
- Angular 6 - 快速指南
- Angular 6 - 有用資源
- Angular 6 - 討論
Angular 6 - 專案設定
AngularJS 基於模型-檢視-控制器,而 Angular 4 基於元件結構。Angular 6 使用與 Angular 4 相同的結構,但速度更快。
Angular 6 使用 TypeScript 2.9 版本,而 Angular 4 使用 TypeScript 2.2 版本。這在效能方面帶來了很大的差異。
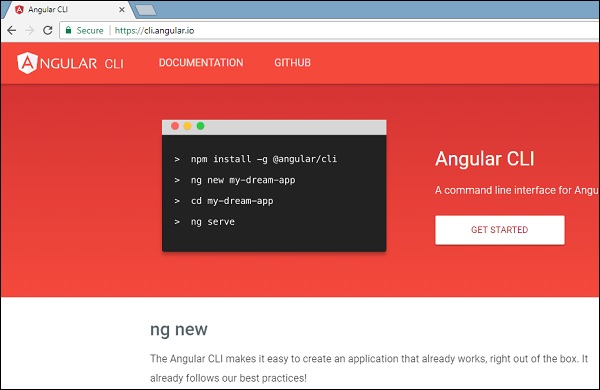
為了安裝 Angular 6,Angular 團隊推出了 Angular CLI,它簡化了安裝過程。您需要執行一些命令來安裝 Angular 6。
訪問此網站 https://cli.angular.io 安裝 Angular CLI。
要開始安裝,我們首先需要確保已安裝最新版本的 nodejs 和 npm。npm 包與 nodejs 一起安裝。
訪問 nodejs 網站 https://nodejs.com.tw/en/。
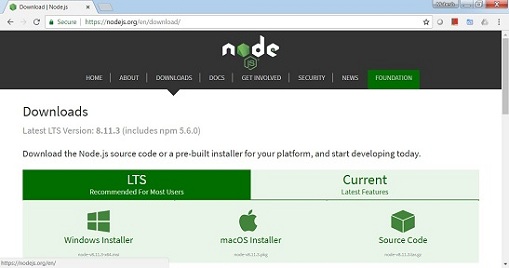
建議使用者使用最新版本的 Nodejs v8.11.3。已經安裝了高於 8.11 版本的 nodejs 的使用者可以跳過上述步驟。安裝 nodejs 後,可以使用命令 node -v 在命令列中檢查 node 的版本,如下所示:
node -v
v8.11.3
命令提示符顯示 v8.11.3。安裝 nodejs 後,npm 也會隨之安裝。
要檢查 npm 的版本,請在終端中輸入命令 npm -v。它將顯示 npm 的版本,如下所示。
npm -v
v5.6.0
npm 的版本是 5.6.0。現在我們已經安裝了 nodejs 和 npm,讓我們執行 angular cli 命令來安裝 Angular 6。您將在網頁上看到以下命令:
npm install -g @angular/cli //command to install angular 6
ng new Angular 6-app // name of the project
cd my-dream-app
ng serve
讓我們從命令列中的第一個命令開始,看看它是如何工作的。
首先,我們將建立一個空目錄,在其中執行 Angular CLI 命令。
npm install -g @angular/cli //command to install angular 6
我們建立了一個名為 ProjectA4 的空資料夾並安裝了 Angular CLI 命令。我們還使用了 -g 引數全域性安裝 Angular CLI。現在,您可以在任何目錄或資料夾中建立您的 Angular 4 專案,並且不必逐個專案安裝 Angular CLI,因為它已全域性安裝在您的系統上,您可以從任何目錄中使用它。
現在讓我們檢查 Angular CLI 是否已安裝。要檢查安裝情況,請在終端中執行以下命令:
ng -v
     _                      _                 ____ _     ___
    / \   _ __   __ _ _   _| | __ _ _ __     / ___| |   |_ _|
   / ? \ | '_ \ / _` | | | | |/ _` | '__|   | |   | |    | |
  / ___ \| | | | (_| | |_| | | (_| | |      | |___| |___ | |
 /_/   \_\_| |_|\__, |\__,_|_|\__,_|_|       \____|_____|___|
                |___/


Angular CLI: 6.1.3
Node: 8.11.3
OS: win32 x64
Angular:
...

Package                      Version
------------------------------------------------------
@angular-devkit/architect    0.7.3
@angular-devkit/core         0.7.3
@angular-devkit/schematics   0.7.3
@schematics/angular          0.7.3
@schematics/update           0.7.3
rxjs                         6.2.2
typescript                   2.9.2
我們獲得了 @angular/cli 版本,目前是 6.1.3。執行的 node 版本是 8.11.3,以及作業系統詳細資訊。上述資訊告訴我們我們已經成功安裝了 angular cli,現在我們準備開始我們的專案了。
我們現在已經安裝了 Angular 6。現在讓我們在 Angular 6 中建立我們的第一個專案。要在 Angular 6 中建立專案,我們將使用以下命令:
ng new projectname
我們將專案命名為 ng new Angular6App。
現在讓我們在命令列中執行上述命令。
ng new Angular6App
CREATE Angular6App/angular.json (3593 bytes)
CREATE Angular6App/package.json (1317 bytes)
CREATE Angular6App/README.md (1028 bytes)
CREATE Angular6App/tsconfig.json (408 bytes)
CREATE Angular6App/tslint.json (2805 bytes)
CREATE Angular6App/.editorconfig (245 bytes)
CREATE Angular6App/.gitignore (503 bytes)
CREATE Angular6App/src/favicon.ico (5430 bytes)
CREATE Angular6App/src/index.html (298 bytes)
CREATE Angular6App/src/main.ts (370 bytes)
CREATE Angular6App/src/polyfills.ts (3194 bytes)
CREATE Angular6App/src/test.ts (642 bytes)
CREATE Angular6App/src/styles.css (80 bytes)
CREATE Angular6App/src/browserslist (375 bytes)
CREATE Angular6App/src/karma.conf.js (964 bytes)
CREATE Angular6App/src/tsconfig.app.json (170 bytes)
CREATE Angular6App/src/tsconfig.spec.json (256 bytes)
CREATE Angular6App/src/tslint.json (314 bytes)
CREATE Angular6App/src/assets/.gitkeep (0 bytes)
CREATE Angular6App/src/environments/environment.prod.ts (51 bytes)
CREATE Angular6App/src/environments/environment.ts (642 bytes)
CREATE Angular6App/src/app/app.module.ts (314 bytes)
CREATE Angular6App/src/app/app.component.html (1141 bytes)
CREATE Angular6App/src/app/app.component.spec.ts (1010 bytes)
CREATE Angular6App/src/app/app.component.ts (215 bytes)
CREATE Angular6App/src/app/app.component.css (0 bytes)
CREATE Angular6App/e2e/protractor.conf.js (752 bytes)
CREATE Angular6App/e2e/tsconfig.e2e.json (213 bytes)
CREATE Angular6App/e2e/src/app.e2e-spec.ts (307 bytes)
CREATE Angular6App/e2e/src/app.po.ts (208 bytes)
專案 Angular6App 成功建立。它安裝了專案在 Angular 6 中執行所需的所有必需軟體包。現在讓我們切換到建立的專案,該專案位於 Angular6App 目錄中。在命令列中更改目錄 - cd Angular 6-app。
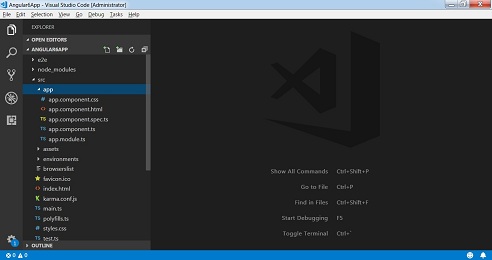
我們將使用 Visual Studio Code IDE 來處理 Angular 6;您可以使用任何 IDE,例如 Atom、WebStorm 等。
要下載 Visual Studio Code,請訪問 https://vscode.com.tw/ 並點選 下載 Windows 版。
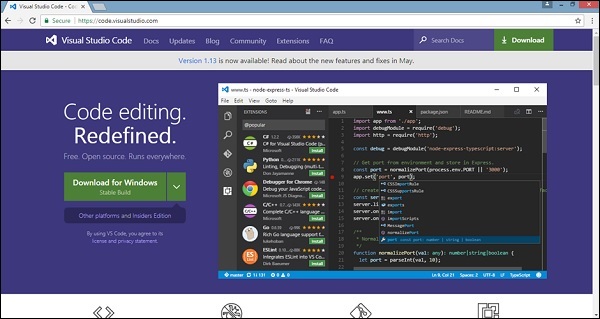
點選 下載 Windows 版 安裝 IDE 並執行安裝程式以開始使用 IDE。
編輯器如下所示:
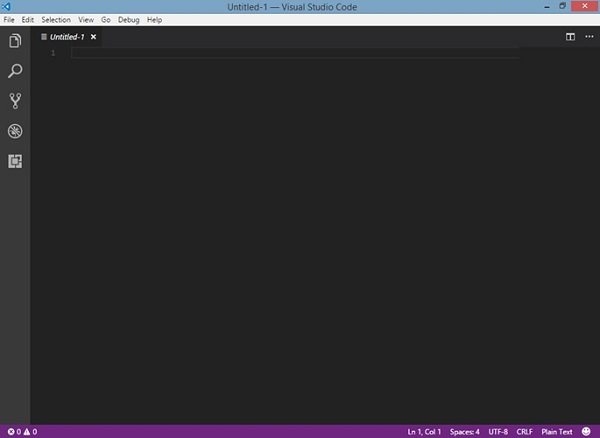
我們還沒有在其中啟動任何專案。現在讓我們使用 angular-cli 建立的專案。
現在我們有了專案的資料夾結構,讓我們使用以下命令編譯我們的專案:
ng serve
ng serve 命令構建應用程式並啟動 Web 伺服器。
** Angular Live Development Server is listening on localhost:4200, open your browser on https://:4200/ **
...
Date: 2018-08-18T11:17:54.745Z
Hash: 0ace6c8a055c58d1734c
Time: 20490ms
chunk {main} main.js, main.js.map (main) 10.7 kB [initial] [rendered]
chunk {polyfills} polyfills.js, polyfills.js.map (polyfills) 227 kB [initial] [rendered]
chunk {runtime} runtime.js, runtime.js.map (runtime) 5.22 kB [entry] [rendered]
chunk {styles} styles.js, styles.js.map (styles) 15.6 kB [initial] [rendered]
chunk {vendor} vendor.js, vendor.js.map (vendor) 3.27 MB [initial] [rendered]
i ?wdm?: Compiled successfully.
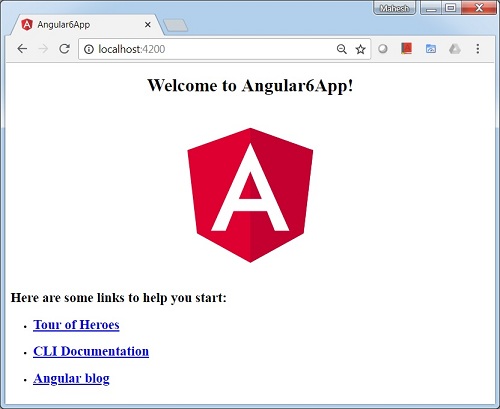
Web 伺服器在埠 4200 上啟動。在瀏覽器中輸入 URL https://:4200/ 並檢視輸出。您將被重定向到以下螢幕:
現在讓我們進行一些更改以顯示以下內容:
"歡迎使用 Angular 6 專案"
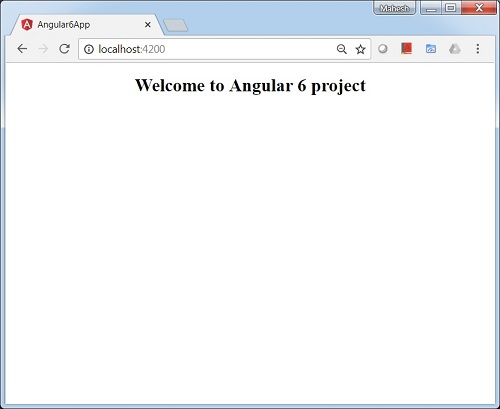
我們對 app.component.html 和 app.component.ts 檔案進行了更改。我們將在後續章節中詳細討論這一點。
讓我們完成專案設定。如果您看到我們使用了埠 4200,這是 angular-cli 在編譯時使用的預設埠。如果您願意,可以使用以下命令更改埠:
ng serve --host 0.0.0.0 -port 4205
Angular 6 應用程式資料夾具有以下 資料夾結構:
e2e - 端到端測試資料夾。主要用於整合測試,並有助於確保應用程式正常工作。
node_modules - 安裝的 npm 包位於 node_modules 中。您可以開啟資料夾並檢視可用的軟體包。
src - 我們將在其中使用 Angular 4 處理專案的資料夾。
Angular 6 應用程式資料夾具有以下 檔案結構:
.angular-cli.json - 它主要包含專案名稱、cli 版本等。
.editorconfig - 這是編輯器的配置檔案。
.gitignore - 應將 .gitignore 檔案提交到儲存庫中,以便與克隆儲存庫的任何其他使用者共享忽略規則。
karma.conf.js - 用於透過量角器進行單元測試。karma.conf.js 檔案中提供了專案所需的所有資訊。
package.json - package.json 檔案指示在執行 npm install 時將哪些庫安裝到 node_modules 中。
目前,如果您在編輯器中開啟該檔案,您將看到其中添加了以下模組。
"@angular/animations": "^6.1.0",
"@angular/common": "^6.1.0",
"@angular/compiler": "^6.1.0",
"@angular/core": "^6.1.0",
"@angular/forms": "^6.1.0",
"@angular/http": "^6.1.0",
"@angular/platform-browser": "^6.1.0",
"@angular/platform-browser-dynamic": "^6.1.0",
"@angular/router": "^6.1.0",
"core-js": "^2.5.4",
"rxjs": "^6.0.0",
"zone.js": "~0.8.26"
如果您需要新增更多庫,您可以在此處新增它們並執行 npm install 命令。
protractor.conf.js - 這是應用程式所需的測試配置。
tsconfig.json - 它主要包含編譯期間所需的編譯器選項。
tslint.json - 這是包含編譯時需要考慮的規則的配置檔案。
src 資料夾 是主資料夾,內部具有不同的檔案結構。
app
它包含以下檔案。這些檔案預設由 angular-cli 安裝。
app.module.ts - 如果您開啟該檔案,您將看到程式碼引用了匯入的不同庫。Angular-cli 使用這些預設庫進行匯入 - angular/core、platform-browser。名稱本身解釋了庫的用法。
它們被匯入並儲存到諸如 declarations、imports、providers 和 bootstrap 這樣的變數中。
import { BrowserModule } from '@angular/platform-browser';
import { NgModule } from '@angular/core';
import { AppComponent } from './app.component';
@NgModule({
   declarations: [
      AppComponent
   ],
   imports: [
      BrowserModule
   ],
   providers: [],
   bootstrap: [AppComponent]
})
export class AppModule { }
declarations - 在 declarations 中,儲存對元件的引用。Appcomponent 是在啟動新專案時建立的預設元件。我們將在另一節中學習如何建立新元件。
imports - 這將包含如上所示匯入的模組。目前,BrowserModule 是匯入的一部分,它從 @angular/platform-browser 匯入。
providers - 這將包含對建立的服務的引用。服務將在後續章節中討論。
bootstrap - 這包含對建立的預設元件的引用,即 AppComponent。
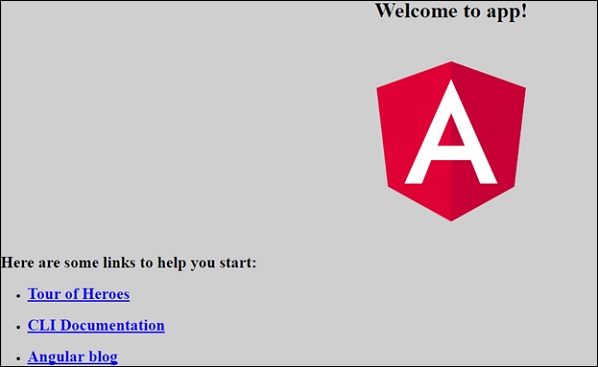
app.component.css - 您可以在此處編寫您的 css 結構。現在,我們已將背景顏色新增到 div 中,如下所示。
.divdetails{
   background-color: #ccc;
}
app.component.html - html 程式碼將在此檔案中可用。
<!--The content below is only a placeholder and can be replaced.-->
<div class = "divdetails">
   <div style = "text-align:center">
      <h1>
         Welcome to {{title}}!
      </h1>
      <img width = "300" src =    "data:image/svg+xml;base64,PD94bWwgdmVyc2lvbj0iMS4wIiBlbmNv
         ZGluZz0idXRmLTgiPz4NCjwhLS0gR2VuZXJhdG9yOiBBZG9iZSBJbGx1c3Ry
         YXRvciAxOS4xLjAsIFNWRyBFeHBvcnQgUGx1Zy1JbiAuIFNWRyBWZXJzaW9
         uOiA2LjAwIEJ1aWxkIDApICAtLT4NCjxzdmcgdmVyc2lvbj0iMS4xIiBpZD0i
         TGF5ZXJfMSIgeG1sbnM9Imh0dHA6Ly93d3cudzMub3JnLzIwMDAvc3ZnIiB4b
         Wxuczp4bGluaz0iaHR0cDovL3d3dy53My5vcmcvMTk5OS94bGluayIgeD0iMHB
         4IiB5PSIwcHgiDQoJIHZpZXdCb3g9IjAgMCAyNTAgMjUwIiBzdHlsZT0iZW5hY
         mxlLWJhY2tncm91bmQ6bmV3IDAgMCAyNTAgMjUwOyIgeG1sOnNwYWNlPSJwcmV
         zZXJ2ZSI+DQo8c3R5bGUgdHlwZT0idGV4dC9jc3MiPg0KCS5zdDB7ZmlsbDojR
         EQwMDMxO30NCgkuc3Qxe2ZpbGw6I0MzMDAyRjt9DQoJLnN0MntmaWxsOiNGRkZ
         GRkY7fQ0KPC9zdHlsZT4NCjxnPg0KCTxwb2x5Z29uIGNsYXNzPSJzdDAiIHBva
         W50cz0iMTI1LDMwIDEyNSwzMCAxMjUsMzAgMzEuOSw2My4yIDQ2LjEsMTg2LjM
         gMTI1LDIzMCAxMjUsMjMwIDEyNSwyMzAgMjAzLjksMTg2LjMgMjE4LjEsNjMuMi
         AJIi8+DQoJPHBvbHlnb24gY2xhc3M9InN0MSIgcG9pbnRzPSIxMjUsMzAgMTI1L
         DUyLjIgMTI1LDUyLjEgMTI1LDE1My40IDEyNSwxNTMuNCAxMjUsMjMwIDEyNSwy
         MzAgMjAzLjksMTg2LjMgMjE4LjEsNjMuMiAxMjUsMzAgCSIvPg0KCTxwYXRoIGN
         sYXNzPSJzdDIiIGQ9Ik0xMjUsNTIuMUw2Ni44LDE4Mi42aDBoMjEuN2gwbDExLj
         ctMjkuMmg0OS40bDExLjcsMjkuMmgwaDIxLjdoMEwxMjUsNTIuMUwxMjUsNTIuM
         UwxMjUsNTIuMUwxMjUsNTIuMQ0KCQlMMTI1LDUyLjF6IE0xNDIsMTM1LjRIMTA4b
         DE3LTQwLjlMMTQyLDEzNS40eiIvPg0KPC9nPg0KPC9zdmc+DQo=">
   </div>
   <h2>Here are some links to help you start: </h2>
   <ul>
      <li>
         <h2>
            <a target = "_blank" href="https://angular.io/tutorial">Tour of Heroes</a>
         </h2>
      </li>
      <li>
         <h2>
            <a target = "_blank" href = "https://github.com/angular/angular-cli/wiki">
               CLI Documentation
            </a>
         </h2>
      </li>
      <li>
         <h2>
            <a target = "_blank" href="http://angularjs.blogspot.ca/">Angular blog</a>
         </h2>
      </li>
   </ul>
</div>
這是專案建立時當前可用的預設 html 程式碼。
app.component.spec.ts - 這些是自動生成的包含源元件單元測試的檔案。
app.component.ts - 元件的類在此處定義。您可以在 .ts 檔案中處理 html 結構。處理將包括連線到資料庫、與其他元件互動、路由、服務等活動。
檔案的結構如下:
import { Component } from '@angular/core';
@Component({
   selector: 'app-root',
   templateUrl: './app.component.html',
   styleUrls: ['./app.component.css']
})
export class AppComponent {
   title = 'app';
}
Assets
您可以在此資料夾中儲存影像、js 檔案。
Environment
此資料夾包含生產或開發環境的詳細資訊。該資料夾包含兩個檔案。
- environment.prod.ts
- environment.ts
這兩個檔案都包含有關是否應在生產環境或開發環境中編譯最終檔案的詳細資訊。
Angular 4 應用程式資料夾的其他檔案結構包括以下內容:
favicon.ico
這是一個通常位於網站根目錄的檔案。
index.html
這是在瀏覽器中顯示的檔案。
<!doctype html>
<html lang = "en">
   <head>
      <meta charset = "utf-8">
      <title>HTTP Search Param</title>
      <base href = "/">
      <link href = "https://fonts.googleapis.com/icon?family=Material+Icons" rel = "stylesheet">
      <link href = "https://fonts.googleapis.com/css?family=Roboto|Roboto+Mono" rel = "stylesheet">
      <link href = "styles.c7c7b8bf22964ff954d3.bundle.css" rel = "stylesheet">
      <meta name = "viewport" content = "width = device-width, initial-scale = 1">
      <link rel = "icon" type = "image/x-icon" href = "favicon.ico">
   </head>
   <body>
      <app-root></app-root>
   </body>
</html>
主體包含 <app-root></app-root>。這是在 app.component.ts 檔案中使用的選擇器,並將顯示來自 app.component.html 檔案的詳細資訊。
main.ts
main.ts 是我們從哪裡開始專案開發的檔案。它從匯入我們需要的基本模組開始。現在,如果您看到 angular/core、angular/platform-browser-dynamic、app.module 和 environment 在 angular-cli 安裝和專案設定期間預設匯入。
import { enableProdMode } from '@angular/core';
import { platformBrowserDynamic } from '@angular/platform-browser-dynamic';
import { AppModule } from './app/app.module';
import { environment } from './environments/environment';
if (environment.production) {
   enableProdMode();
}
platformBrowserDynamic().bootstrapModule(AppModule);
platformBrowserDynamic().bootstrapModule(AppModule) 包含父模組引用 AppModule。因此,當它在瀏覽器中執行時,呼叫的檔案是 index.html。index.html 內部引用 main.ts,當以下程式碼執行時,main.ts 呼叫父模組,即 AppModule:
platformBrowserDynamic().bootstrapModule(AppModule);
當呼叫 AppModule 時,它會呼叫 app.module.ts,然後根據載入程式呼叫 AppComponent,如下所示:
bootstrap: [AppComponent]
在 app.component.ts 中,有一個 selector: app-root 用於 index.html 檔案中。這將顯示 app.component.html 中存在的內容。
瀏覽器將顯示以下內容:
polyfill.ts
這主要用於向後相容性。
styles.css
這是專案所需的樣式檔案。
test.ts
在這裡,將處理用於測試專案的單元測試用例。
tsconfig.app.json
這在編譯期間使用,它包含執行應用程式需要使用的配置詳細資訊。
tsconfig.spec.json
這有助於維護測試的詳細資訊。
typings.d.ts
它用於管理 TypeScript 定義。