- Struts 2 教程
- Struts2 - 首頁
- Struts2 - 基本 MVC 架構
- Struts2 - 概述
- Struts2 - 環境設定
- Struts2 - 架構
- Struts2 - 示例
- Struts2 - 配置
- Struts2 - Action
- Struts2 - 攔截器
- Struts2 - 結果型別
- Struts2 - 值棧/OGNL
- Struts2 - 檔案上傳
- Struts2 - 資料庫訪問
- Struts2 - 傳送電子郵件
- Struts2 - 驗證
- Struts2 - 國際化
- Struts2 - 型別轉換
- Struts2 - 主題/模板
- Struts2 - 異常處理
- Struts2 - 註解
- Struts 2 標籤
- Struts2 - 控制標籤
- Struts2 - 資料標籤
- Struts2 - 表單標籤
- Struts2 - Ajax 標籤
- Struts 2 整合
- Struts2 - Spring
- Struts2 - Tiles
- Struts2 - Hibernate
- Struts 2 有用資源
- Struts2 - 問題與解答
- Struts2 - 快速指南
- Struts2 - 有用資源
- Struts2 - 討論
Struts 2 - 傳送電子郵件
本章解釋瞭如何使用 Struts 2 應用程式傳送電子郵件。
對於此練習,您需要下載並安裝來自 JavaMail API 1.4.4 的 mail.jar,並將 mail.jar 檔案放置在您的 WEB-INF\lib 資料夾中,然後繼續按照建立 action、檢視和配置檔案的標準步驟操作。
建立 Action
下一步是建立一個負責傳送電子郵件的 Action 方法。讓我們建立一個名為 Emailer.java 的新類,內容如下。
package com.tutorialspoint.struts2;

import java.util.Properties;
import javax.mail.Message;
import javax.mail.PasswordAuthentication;
import javax.mail.Session;
import javax.mail.Transport;
import javax.mail.internet.InternetAddress;
import javax.mail.internet.MimeMessage;

import com.opensymphony.xwork2.ActionSupport;

public class Emailer extends ActionSupport {

   private String from;
   private String password;
   private String to;
   private String subject;
   private String body;

   static Properties properties = new Properties();
   static {
      properties.put("mail.smtp.host", "smtp.gmail.com");
      properties.put("mail.smtp.socketFactory.port", "465");
      properties.put("mail.smtp.socketFactory.class",
         "javax.net.ssl.SSLSocketFactory");
      properties.put("mail.smtp.auth", "true");
      properties.put("mail.smtp.port", "465");
   }

   public String execute() {
      String ret = SUCCESS;
      try {
         Session session = Session.getDefaultInstance(properties,
            new javax.mail.Authenticator() {
               protected PasswordAuthentication
               getPasswordAuthentication() {
                  return new
                  PasswordAuthentication(from, password);
               }
            }
         );

         Message message = new MimeMessage(session);
         message.setFrom(new InternetAddress(from));
         message.setRecipients(Message.RecipientType.TO,
            InternetAddress.parse(to));
         message.setSubject(subject);
         message.setText(body);
         Transport.send(message);
      } catch(Exception e) {
         ret = ERROR;
         e.printStackTrace();
      }
      return ret;
   }

   public String getFrom() {
      return from;
   }

   public void setFrom(String from) {
      this.from = from;
   }

   public String getPassword() {
      return password;
   }

   public void setPassword(String password) {
      this.password = password;
   }

   public String getTo() {
      return to;
   }

   public void setTo(String to) {
      this.to = to;
   }

   public String getSubject() {
      return subject;
   }

   public void setSubject(String subject) {
      this.subject = subject;
   }

   public String getBody() {
      return body;
   }

   public void setBody(String body) {
      this.body = body;
   }

   public static Properties getProperties() {
      return properties;
   }

   public static void setProperties(Properties properties) {
      Emailer.properties = properties;
   }
}
如上所示的原始碼中,Emailer.java 具有與下面給出的 email.jsp 頁面中的表單屬性相對應的屬性。這些屬性是 -
From - 發件人的電子郵件地址。由於我們使用的是 Google 的 SMTP,因此我們需要一個有效的 gtalk id
Password - 上述帳戶的密碼
To - 傳送電子郵件給誰?
Subject - 電子郵件的主題
Body - 實際的電子郵件正文
我們沒有考慮上述欄位的任何驗證,驗證將在下一章中新增。現在讓我們看一下 execute() 方法。execute() 方法使用 javax Mail 庫使用提供的引數傳送電子郵件。如果郵件傳送成功,則 action 返回 SUCCESS,否則返回 ERROR。
建立主頁
讓我們編寫主頁 JSP 檔案 index.jsp,它將用於收集上面提到的與電子郵件相關的資訊 -
<%@ page language = "java" contentType = "text/html; charset = ISO-8859-1"
   pageEncoding = "ISO-8859-1"%>
<%@ taglib prefix = "s" uri = "/struts-tags"%>
<!DOCTYPE html PUBLIC "-//W3C//DTD HTML 4.01 Transitional//EN"
   "http://www.w3.org/TR/html4/loose.dtd">

<html>
   <head>
   <title>Email Form</title>
   </head>

   <body>
      <em>The form below uses Google's SMTP server.
         So you need to enter a gmail username and password
      </em>

      <form action = "emailer" method = "post">
         <label for = "from">From</label><br/>
         <input type = "text" name = "from"/><br/>
         <label for = "password">Password</label><br/>
         <input type = "password" name = "password"/><br/>
         <label for = "to">To</label><br/>
         <input type = "text" name = "to"/><br/>
         <label for = "subject">Subject</label><br/>
         <input type = "text" name = "subject"/><br/>
         <label for = "body">Body</label><br/>
         <input type = "text" name = "body"/><br/>
         <input type = "submit" value = "Send Email"/>
      </form>
   </body>
</html>
建立檢視
我們將使用 JSP 檔案 success.jsp,如果 action 返回 SUCCESS,則將呼叫該檔案,但如果 action 返回 ERROR,我們還將擁有另一個檢視檔案。
<%@ page language = "java" contentType = "text/html; charset = ISO-8859-1"
   pageEncoding = "ISO-8859-1"%>
<%@ taglib prefix = "s" uri = "/struts-tags"%>
<!DOCTYPE html PUBLIC "-//W3C//DTD HTML 4.01 Transitional//EN"
   "http://www.w3.org/TR/html4/loose.dtd">

<html>
   <head>
      <title>Email Success</title>
   </head>

   <body>
      Your email to <s:property value = "to"/> was sent successfully.
   </body>
</html>
如果 action 返回 ERROR,則以下將是檢視檔案 error.jsp。
<%@ page language = "java" contentType = "text/html; charset = ISO-8859-1"
   pageEncoding = "ISO-8859-1"%>
<%@ taglib prefix = "s" uri = "/struts-tags"%>
<!DOCTYPE html PUBLIC "-//W3C//DTD HTML 4.01 Transitional//EN"
   "http://www.w3.org/TR/html4/loose.dtd">

<html>
   <head>
      <title>Email Error</title>
   </head>

   <body>
      There is a problem sending your email to <s:property value = "to"/>.
   </body>
</html>
配置檔案
現在讓我們使用 struts.xml 配置檔案將所有內容組合在一起,如下所示 -
<?xml version = "1.0" Encoding = "UTF-8"?>
<!DOCTYPE struts PUBLIC
   "-//Apache Software Foundation//DTD Struts Configuration 2.0//EN"
   "http://struts.apache.org/dtds/struts-2.0.dtd">

<struts>
   <constant name = "struts.devMode" value = "true" />
   <package name = "helloworld" extends = "struts-default">

      <action name = "emailer"
         class = "com.tutorialspoint.struts2.Emailer"
         method = "execute">
         <result name = "success">/success.jsp</result>
         <result name = "error">/error.jsp</result>
      </action>

   </package>
</struts>
以下是 web.xml 檔案的內容 -
<?xml version = "1.0" Encoding = "UTF-8"?>
<web-app xmlns:xsi = "http://www.w3.org/2001/XMLSchema-instance"
   xmlns = "http://java.sun.com/xml/ns/javaee"
   xmlns:web = "http://java.sun.com/xml/ns/javaee/web-app_2_5.xsd"
   xsi:schemaLocation = "http://java.sun.com/xml/ns/javaee
   http://java.sun.com/xml/ns/javaee/web-app_3_0.xsd"
   id = "WebApp_ID" version = "3.0">

   <display-name>Struts 2</display-name>

   <welcome-file-list>
      <welcome-file>index.jsp</welcome-file>
   </welcome-file-list>

   <filter>
      <filter-name>struts2</filter-name>
      <filter-class>
         org.apache.struts2.dispatcher.FilterDispatcher
      </filter-class>
   </filter>

   <filter-mapping>
      <filter-name>struts2</filter-name>
      <url-pattern>/*</url-pattern>
   </filter-mapping>
</web-app>
現在,右鍵單擊專案名稱,然後單擊 匯出 > WAR 檔案 以建立 WAR 檔案。然後將此 WAR 部署到 Tomcat 的 webapps 目錄中。最後,啟動 Tomcat 伺服器並嘗試訪問 URL https://:8080/HelloWorldStruts2/index.jsp。這將生成以下螢幕 -

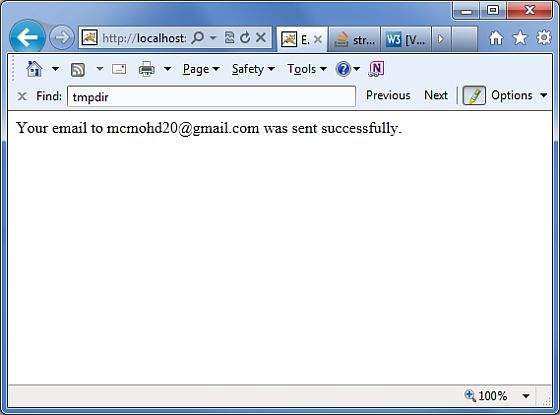
輸入所需的資訊並單擊 傳送電子郵件 按鈕。如果一切正常,您應該會看到以下頁面。