- Python Pillow 教程
- Python Pillow - 首頁
- Python Pillow - 概述
- Python Pillow - 環境配置
- 基本影像操作
- Python Pillow - 影像處理
- Python Pillow - 調整影像大小
- Python Pillow - 翻轉和旋轉影像
- Python Pillow - 裁剪影像
- Python Pillow - 為影像新增邊框
- Python Pillow - 識別影像檔案
- Python Pillow - 合併影像
- Python Pillow - 剪下和貼上影像
- Python Pillow - 影像滾動
- Python Pillow - 在影像上寫入文字
- Python Pillow - ImageDraw 模組
- Python Pillow - 合併兩張影像
- Python Pillow - 建立縮圖
- Python Pillow - 建立水印
- Python Pillow - 影像序列
- Python Pillow 顏色轉換
- Python Pillow - 影像顏色
- Python Pillow - 建立彩色影像
- Python Pillow - 將顏色字串轉換為 RGB 顏色值
- Python Pillow - 將顏色字串轉換為灰度值
- Python Pillow - 透過更改畫素值來更改顏色
- 影像處理
- Python Pillow - 降噪
- Python Pillow - 更改影像模式
- Python Pillow - 影像合成
- Python Pillow - 使用 Alpha 通道
- Python Pillow - 應用透視變換
- 影像濾鏡
- Python Pillow - 為影像新增濾鏡
- Python Pillow - 卷積濾鏡
- Python Pillow - 模糊影像
- Python Pillow - 邊緣檢測
- Python Pillow - 浮雕影像
- Python Pillow - 增強邊緣
- Python Pillow - 非銳化掩膜濾鏡
- 影像增強和校正
- Python Pillow - 增強對比度
- Python Pillow - 增強銳度
- Python Pillow - 增強顏色
- Python Pillow - 校正色彩平衡
- Python Pillow - 降噪
- 影像分析
- Python Pillow - 提取影像元資料
- Python Pillow - 識別顏色
- 高階主題
- Python Pillow - 建立動畫 GIF
- Python Pillow - 批次處理影像
- Python Pillow - 轉換影像檔案格式
- Python Pillow - 為影像新增填充
- Python Pillow - 顏色反轉
- Python Pillow 與 NumPy 的機器學習
- Python Pillow 與 Tkinter 的 BitmapImage 和 PhotoImage 物件
- Image 模組
- Python Pillow - 影像混合
- Python Pillow 有用資源
- Python Pillow - 快速指南
- Python Pillow - 函式參考
- Python Pillow - 有用資源
- Python Pillow - 討論
Python Pillow - 降噪
在 Pillow 中降噪是指應用各種技術和濾鏡來去除或減少影像中不希望出現的偽影或不規則性,這些偽影或不規則性會降低影像質量。影像噪聲是影像中亮度或顏色的隨機變化,通常是由低光照條件、電子干擾或影像感測器缺陷等因素造成的。降噪是影像處理中提高影像整體質量的重要步驟。
Pillow (PIL) 提供了幾個內建濾鏡和方法來減少影像噪聲。Pillow 中一些常見的降噪技術和濾鏡包括:
- 高斯模糊:應用高斯模糊濾鏡可以幫助平滑減少噪聲,方法是平均每個畫素周圍畫素的值。這會產生更平滑的外觀,並可以減少噪聲的影響。模糊程度可以調整以控制降噪的程度。
- 中值濾波器:中值濾波器用相鄰畫素的中值替換每個畫素的值。中值濾波器對於去除椒鹽噪聲(孤立畫素具有極值)非常有效。它用相鄰畫素的中值替換每個畫素的值。
- 雙邊濾波器:雙邊濾波器在平滑影像的同時保留邊緣。它可以有效地減少噪聲,同時保持影像細節。
- 降噪演算法:Pillow 支援各種降噪演算法,例如雙邊濾波器、全變差 (TV) 降噪演算法或非區域性均值 (NLMeans) 濾波器,這些演算法可以在保留影像細節的同時減少噪聲。
- 閾值化:我們可以對影像應用閾值來去除噪聲,方法是將低於某個閾值的畫素值轉換為黑色,將高於閾值的畫素值轉換為白色,從而有效地將影像二值化。
Python Pillow - Image.filter() 方法
Image.filter() 是 Python 影像庫 (PIL) 或其分支 Pillow 中用於將各種影像濾鏡和增強功能應用於影像的方法。濾鏡是影像處理操作,可用於以不同方式修改影像,例如模糊、銳化或增強某些特徵。此方法允許我們將各種預定義濾鏡應用於影像。
Pillow 提供了各種預定義濾鏡,我們可以與 Image.filter() 一起使用,包括:
ImageFilter.BLUR - 對影像應用簡單的模糊效果。
ImageFilter.CONTOUR - 增強影像中物件的輪廓。
ImageFilter.DETAIL - 增強影像的細節。
ImageFilter.EDGE_ENHANCE - 強調影像中的邊緣。
ImageFilter.EMBOSS - 為影像新增 3D 浮雕效果。
ImageFilter.SHARPEN - 銳化影像。
語法
使用 Image.filter() 的語法和引數如下:
output_image = input_image.filter(filter_name, filter_parameters)
其中,
input_image - 這是我們要應用濾鏡的源影像。
filter_name - 這是一個字串,指定我們要應用的濾鏡的名稱。Pillow 提供了各種內建濾鏡,我們可以使用這些濾鏡名稱之一作為字串。例如,“GaussianBlur”、“MedianFilter”、“Sharpen”等。我們也可以透過提供核心(一系列值)作為濾鏡來定義自定義濾鏡。
filter_parameters (可選) - 一些濾鏡可能接受控制濾鏡行為的附加引數。這些引數特定於正在使用的特定濾鏡。如果我們正在應用的濾鏡需要引數,我們將把它們作為引數傳遞給 filter_parameters 部分。
示例
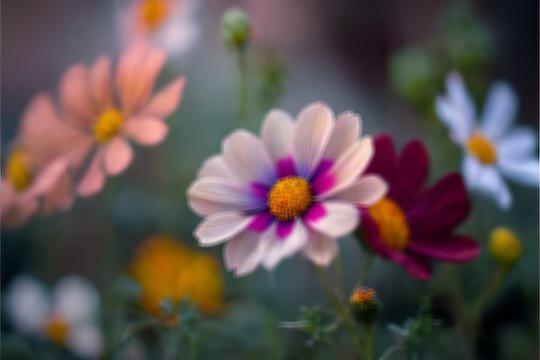
在這個示例中,我們嘗試透過將 ImageFilter.BLUR 作為輸入引數傳遞給 Image.filter() 方法來模糊影像。
from PIL import Image, ImageFilter

#Open an image
input_image = Image.open("Images/flowers.jpg")

#Apply Gaussian blur to the image
output_image = input_image.filter(ImageFilter.BLUR())

#Save the resulting image
output_image.save("output Image/blur.jpg")
output_image.show()
待處理影像

輸出
示例
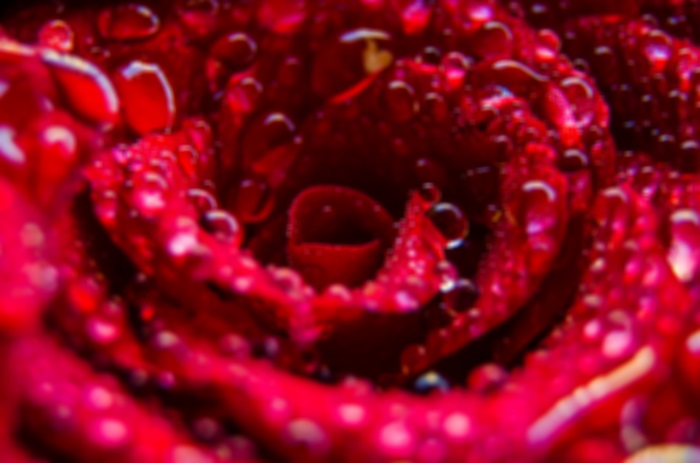
在這個例子中,我們使用 ImageFilter.BoxBlur() 方法模糊影像的特定部分。
from PIL import Image, ImageFilter

#Open an image
input_image = Image.open("Images/rose.jpg")

#Apply Gaussian blur to the image
output_image = input_image.filter(ImageFilter.BoxBlur(20))

#Save the resulting image
output_image.save("output Image/blur.jpg")
output_image.show()
待處理影像
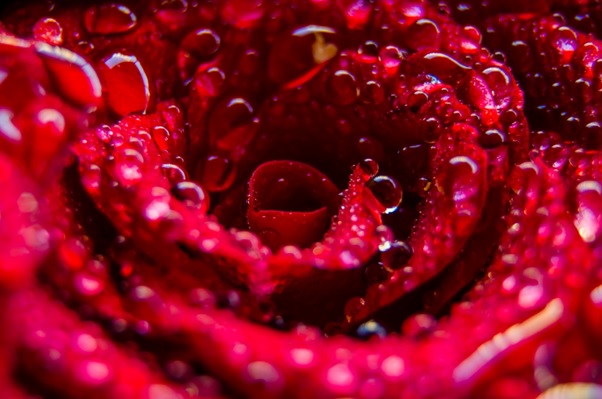
輸出