- BabylonJS 教程
- BabylonJS - 主頁
- BabylonJS - 介紹
- BabylonJS - 環境設定
- BabylonJS - 概述
- BabylonJS - 基本元素
- BabylonJS - 材質
- BabylonJS - 動畫
- BabylonJS - 攝像機
- BabylonJS - 光照
- BabylonJS - 引數化形狀
- BabylonJS - 網格
- VectorPosition 和 Rotation
- BabylonJS - 貼花
- BabylonJS - Curve3
- BabylonJS - 動態紋理
- BabylonJS - 視差貼圖
- BabylonJS - 鏡頭光暈
- BabylonJS - 建立螢幕截圖
- BabylonJS - 反射探頭
- 標準渲染管道
- BabylonJS - ShaderMaterial
- BabylonJS - 骨骼骨架
- BabylonJS - 物理引擎
- BabylonJS - 播放聲音和音樂
- BabylonJS 有用資源
- BabylonJS - 快速指南
- BabylonJS - 有用資源
- BabylonJS - 討論
BabylonJS - Mesh FacetData
小平面資料佔用大量記憶體,此功能預設未啟用。要啟用它,我們需要根據需要建立一個網格,並向其更新小平面資料。考慮以下示例來理解此操作 −
mesh.updateFacetData();
網格可以含有一些平面。例如,一個盒子有 6 個面,因此有 6 個平面的正方形面。它的每個面都在 WebGL 級別繪製,有 2 個三角形。
var positions = mesh.getFacetLocalPositions(); // returns the array of facet positions in the local space
var normals = mesh.getFacetLocalNormals(); // returns the array of facet normals in the local space
使用法線的座標,我們在球面上繪製出三角形法線的小平面。
演示
<!doctype html>
<html>
   <head>
      <meta charset = "utf-8">
      <title>BabylonJs - Basic Element-Creating Scene</title>
      <script src = "babylon.js"></script>
      <style>
         canvas {width: 100%; height: 100%;}
      </style>
   </head>

   <body>
      <canvas id = "renderCanvas"></canvas>
      <script type = "text/javascript">
         var canvas = document.getElementById("renderCanvas");
         var engine = new BABYLON.Engine(canvas, true);

         var createScene  = function() {
            var scene = new BABYLON.Scene(engine);
            scene.clearColor = new BABYLON.Color3(0.35, 0.35, 0.42);

            var camera = new BABYLON.ArcRotateCamera("Camera", 0, 0, 0, BABYLON.Vector3.Zero(), scene);
            camera.attachControl(canvas, true);
            camera.setPosition(new BABYLON.Vector3(0.0, 3.0, -8.0));

            var light = new BABYLON.HemisphericLight('light1', new BABYLON.Vector3(0, 1, 0), scene);
            light.intensity = 0.2;
            var pl = new BABYLON.PointLight('pl', camera.position, scene);
            pl.intensity = 0.9;

            var mesh = BABYLON.MeshBuilder.CreateIcoSphere("m", {radius: 2.0}, scene);
            mesh.updateFacetData();
            var positions = mesh.getFacetLocalPositions();
            var normals = mesh.getFacetLocalNormals();

            var cone = [];
            var matcone = [];
            var texture = [];
            for (var i = 0; i < positions.length; i++) {
               console.log(positions[i].add(normals[i]).x);
               matcone[i] = new BABYLON.StandardMaterial("mat1", scene);
               matcone[i].alpha = 1.0;
               matcone[i].diffuseColor = new BABYLON.Color3(0.9, 0, 2);
               texture[i] = new BABYLON.Texture("images/cone.jpg", scene);
               matcone[i].diffuseTexture = texture[i];

               cone[i] = BABYLON.MeshBuilder.CreateDisc("disc", {tessellation: 3}, scene);
               cone[i].position= new BABYLON.Vector3(positions[i].add(normals[i]).x,positions[i].add(normals[i]).y,positions[i].add(normals[i]).z);
               cone[i].material = matcone[i];
            }
            return scene
         };
         var scene = createScene();
         engine.runRenderLoop(function() {
            scene.render();
         });
      </script>
   </body>
</html>
輸出

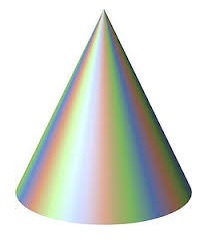
在此演示中,我們使用了圖片 cone.jpg。這些圖片會儲存在本地 images/ 資料夾中,下面也會貼上以供參考。你可以下載一張你選擇的圖片,並在演示連結中使用。
images/cone.jpg
babylonjs_mesh.htm
廣告