- RichFaces 教程
- RichFaces - 首頁
- RichFaces - 概述
- RichFaces - 環境設定
- RichFaces - 架構
- RichFaces - 基本概念
- RichFaces - Rich 皮膚
- RichFaces - 輸入元件
- RichFaces - 輸出元件
- RichFaces - 迭代元件
- RichFaces - 選擇元件
- RichFaces - 選單元件
- RichFaces - Rich 樹
- RichFaces - 錯誤處理
- RichFaces 有用資源
- RichFaces - 快速指南
- RichFaces - 有用資源
- RichFaces - 討論
RichFaces - 選單元件
RichFaces 提供了各種標籤,可用於建立選單型別的標記。在本章中,我們將學習一些新功能以及舊功能,使用這些功能,我們可以輕鬆地在瀏覽器中呈現選單。
<rich:dropDownMenu>
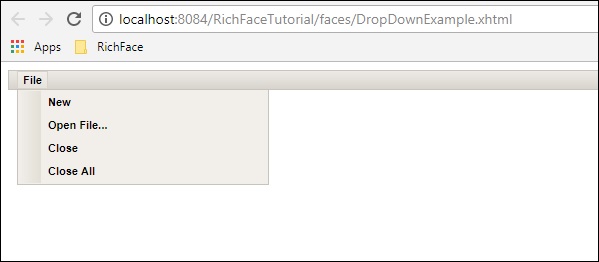
使用此標籤,開發人員可以建立下拉選單。此標籤對於建立網站的頁首很有用。在以下示例中,我們將學習如何在實際生活中使用此標籤。建立一個檔案並將其命名為“DropDownList.xhtml”。將以下程式碼放在其中。
<?xml version = "1.0" encoding = "UTF-8"?>
<!DOCTYPE html>
<html xmlns = "http://www.w3.org/1999/xhtml"
   xmlns:h = "http://java.sun.com/jsf/html"
   xmlns:f = "http://java.sun.com/jsf/core"
   xmlns:ui = "http://java.sun.com/jsf/facelets"
   xmlns:a4j = "http://richfaces.org/a4j"
   xmlns:rich = "http://richfaces.org/rich">

   <h:head></h:head>

   <h:body>
      <h:form>
         <rich:toolbar>
            <rich:dropDownMenu>
               <f:facet name = "label">
                  <h:outputText value = "File" />
               </f:facet>

               <rich:menuItem label = "New" />
               <rich:menuItem label = "Open File..." />
               <rich:menuItem label = "Close" />
               <rich:menuItem label = "Close All" />
            </rich:dropDownMenu>
         </rich:toolbar>
      </h:form>
   </h:body>

</html>
在上面的示例中,我們正在建立一個工具欄,並在該工具欄內建立一個下拉選單。可以建立任意數量的下拉選單。如果要插入任何基於操作的 JS 函式,則可以在 <menuItem> 標籤內實現該函式,並將其屬性設定為“action”。上述程式碼將在瀏覽器中生成以下輸出。
<rich:contextMenu>
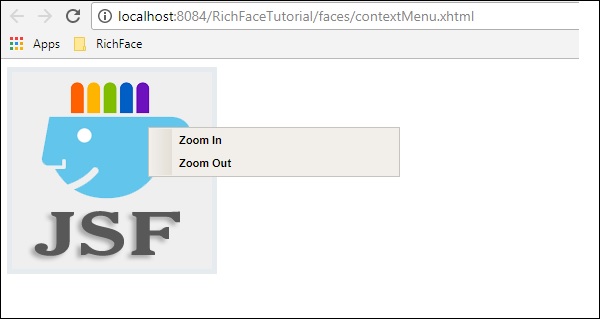
此標籤用於在客戶端生成基於事件的下拉選單。它不會自動工作。使用者需要建立 JS 事件,然後它才會相應地工作。在以下示例中,我們將建立渲染影像,然後根據使用者的響應建立 JS 事件。以下是 xhtml 檔案。
<?xml version = "1.0" encoding = "UTF-8"?>
<!DOCTYPE html>
<html xmlns = "http://www.w3.org/1999/xhtml"
   xmlns:h = "http://java.sun.com/jsf/html"
   xmlns:f = "http://java.sun.com/jsf/core"
   xmlns:ui = "http://java.sun.com/jsf/facelets"
   xmlns:a4j = "http://richfaces.org/a4j"
   xmlns:rich = "http://richfaces.org/rich">

   <h:head>
      <title>ContextMenu Example</title>
   </h:head>

   <h:body>
      <h:form id = "form">
         <h:outputScript>
            //<![CDATA[
               function resize(pic, coeff) {
                  var w  =  Math.round(pic.width * coeff);
                  var h  =  Math.round(pic.height * coeff);

                  if (w > 1 && h > 1 && h<1000 && w<1000) {
                     pic.width  =  w;
                     pic.heigth  =  h;
                  }
               }
               function enlarge(element){
                  resize(element, 1.1);
               }
               function decrease(element){
                  resize(element, 0.9);
               }
            //]]>
         </h:outputScript>
         <h:graphicImage value = "https://tutorialspoint.tw/images/jsf-minilogo.png"
            id = "pic" style = "border : 5px solid #E4EAEF"/>

         <rich:contextMenu target = "pic" mode = "client" showEvent = "click">
            <rich:menuItem label = "Zoom In" onclick =
               "enlarge(#{rich:element('pic')});" id = "zin"/>
            <rich:menuItem label = "Zoom Out"
               onclick = "decrease(#{rich:element('pic')});" id = "zout"/>

        </rich:contextMenu>
      </h:form>
   </h:body>

</html>
執行以上示例並選擇渲染的影像。“放大”和“縮小”選項將顯示。單擊相應的選項,影像將應用所需的功能。上述程式碼將在瀏覽器中生成以下輸出。
<rich:Component Control>
當我們想要從 RichFaces 環境中呼叫任何其他函式時,此元件非常友好。此標籤用於呼叫基於 JavaScript 的操作類。以下示例演示瞭如何使用此標籤。建立一個檔案並將其命名為“componentContent.xhtml”檔案。將以下程式碼段放在其中。
<?xml version = "1.0" encoding = "UTF-8"?>
<!--
   To change this license header, choose License Headers in Project Properties.
   To change this template file, choose Tools | Templates
   and open the template in the editor.
-->
<!DOCTYPE html>
<html xmlns = "http://www.w3.org/1999/xhtml"
   xmlns:h = "http://java.sun.com/jsf/html"
   xmlns:f = "http://java.sun.com/jsf/core"
   xmlns:ui = "http://java.sun.com/jsf/facelets"
   xmlns:a4j = "http://richfaces.org/a4j"
   xmlns:rich = "http://richfaces.org/rich">

   <h:head>
      <title>Component Control Example</title>
      <meta name = "viewport" content = "width = device-width, initial-scale = 1.0"/>
   </h:head>

   <h:body>
      <h:commandButton value = "Call the popup">
         <rich:componentControl target = "popup" operation = "show" />
      </h:commandButton>
      <rich:popupPanel id = "popup" modal = "false" autosized = "true" resizeable = "false">
         <f:facet name = "header">
            <h:outputText value = "Welcome mesage" />
         </f:facet>

         <f:facet name = "controls">
            <h:outputLink value = "#"
               onclick = "#{rich:component('popup')}.hide(); return false;"
               style = "color: inherit">

               X
            </h:outputLink>
         </f:facet>
         <p>Welcome to RICH FACE tutorial at tutorialspoint.com</p>
      </rich:popupPanel>
   </h:body>

</html>
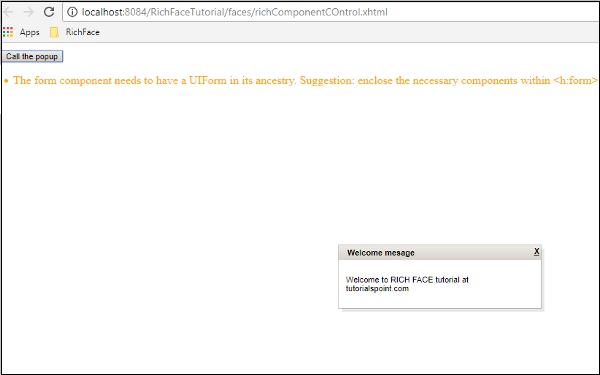
在上面的程式碼中,我們使用 id“popup”呼叫“onclick()”函式。執行後,它將顯示一個帶有“呼叫彈出視窗”的按鈕。單擊該按鈕後,RichFaces 在內部呼叫 JS 函式並在瀏覽器中提供以下輸出。
廣告