- RichFaces 教程
- RichFaces - 首頁
- RichFaces - 概述
- RichFaces - 環境設定
- RichFaces - 架構
- RichFaces - 基本概念
- RichFaces - Rich 皮膚
- RichFaces - 輸入元件
- RichFaces - 輸出元件
- RichFaces - 迭代元件
- RichFaces - 選擇元件
- RichFaces - 選單元件
- RichFaces - Rich 樹
- RichFaces - 錯誤處理
- RichFaces 有用資源
- RichFaces - 快速指南
- RichFaces - 有用資源
- RichFaces - 討論
RichFaces - 輸入元件
到目前為止,我們已經學習了大量關於 RichFaces 不同 AJAX 元件以及一個名為“Skin”的新功能的知識。在本章中,我們將學習 RichFaces 提供的不同“Rich”元件,以便開發現代 Web 應用程式。“RichFaces”提供的不同輸入元件如下所示。
<rich:inplaceInput>
Rich inplaceInput 提供了一個機會,可以建立一個可編輯的文字框,而不是普通的輸入文字框。在下面的示例中,我們將使用此元件建立一個可編輯的文字框。建立一個 xhtml 檔案並將其命名為“richinplaceInput.xhtml”。在該檔案中寫入以下程式碼。
<?xml version = "1.0" encoding = "UTF-8"?>
<!DOCTYPE html>
<html xmlns = "http://www.w3.org/1999/xhtml"
   xmlns:h = "http://java.sun.com/jsf/html"
   xmlns:f = "http://java.sun.com/jsf/core"
   xmlns:ui = "http://java.sun.com/jsf/facelets"
   xmlns:a4j = "http://richfaces.org/a4j"
   xmlns:rich = "http://richfaces.org/rich">

   <h:head>
      <title>TODO supply a title</title>
   </h:head>

   <h:body>
      <f:view></f:view>
      <h:form>
         <rich:inplaceInput  value = "#{managedBean.message}"
            defaultLabel = "Enter Your Name"/>
      </h:form>
   </h:body>

</html>
儲存此檔案並執行它。瀏覽器中將顯示以下輸出。
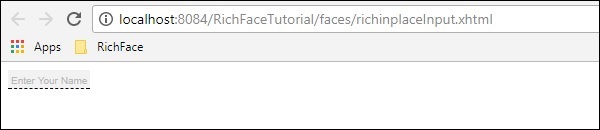
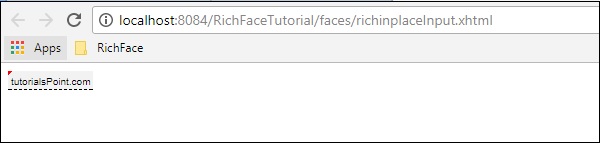
繼續並在該文字框中鍵入您選擇的任何內容,然後按 Enter 鍵。此標籤還提供內聯編輯選項。編輯後將顯示以下輸出。
<rich: inplaceSelect>
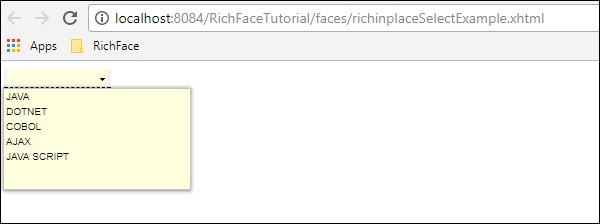
這是 RichFaces 提供的另一個輸入標記,使用者可以在其中從下拉列表中選擇一個輸入值,該下拉列表本質上也是內聯且可編輯的。我們需要從內部 bean 類填充下拉列表。請建立一個“xhtml”檔案並將其命名為“richinplaceSelectExample.xhtml”。將以下程式碼段放在該檔案中。
<?xml version = "1.0" encoding = "UTF-8"?>
<!DOCTYPE html>
<html xmlns = "http://www.w3.org/1999/xhtml"
   xmlns:h = "http://java.sun.com/jsf/html"
   xmlns:f = "http://java.sun.com/jsf/core"
   xmlns:ui = "http://java.sun.com/jsf/facelets"
   xmlns:a4j = "http://richfaces.org/a4j"
   xmlns:rich = "http://richfaces.org/rich">

   <h:head>
      <title>TODO supply a title</title>
   </h:head>

   <h:body>
      <h:form>
         <rich:inplaceSelect value = "#{subject.subjectName}" defaultLabel = "Click to Select Country">
            <f:selectItems value = "#{subject.SubJectList()}"></f:selectItems>
         </rich:inplaceSelect>
      </h:form>
   </h:body>

</html>
在上面的示例中,我們將從後端填充下拉選項。以下是名為“subject.java”的 bean 類。
import java.util.ArrayList;
import java.util.List;
import javax.faces.bean.ManagedBean;
import javax.faces.bean.ManagedProperty;
import javax.faces.bean.RequestScoped;

@ManagedBean
@RequestScoped

public class Subject {
   String SubjectName;
   public Subject() {
   }
   public Subject(String SubjectName) {
      this.SubjectName = SubjectName;
   }
   public List<String> SubJectList() {
      //this list to be rendered
      ArrayList<String> list = new ArrayList<>();

      list.add("JAVA");
      list.add("DOTNET");
      list.add("COBOL");
      list.add("AJAX");
      list.add("JAVA SCRIPT");
      return list;
   }
   public String getSubjectName() {
      return SubjectName;
   }
   public void setSubjectName(String SubjectName) {
      this.SubjectName = SubjectName;
   }
}
我們透過列表傳遞的所有科目名稱都將在下拉選單中顯示。執行此應用程式後將顯示以下輸出。
<rich:SuggestionBox>
<rich:SuggestionBox> 用於根據輸入文字框中提供的輸入向用戶提供建議。此標籤在內部建立一個 JS 事件並呼叫所需的監聽器類以從後端提供建議。不幸的是,此 suggestionBox 和 ComboBox 都合併到 RichFaces 4 中名為“<rich:autocomplete>”的單獨標籤中,但是,如果您使用的是 RichFaces 3,則可以使用如下所示的標籤。
<h:inputText id = "city" value = "#{capitalsBean.capital}" />
<rich:suggestionbox for = "city" var = "result"
   suggestionAction = "#{capitalsBean.autocomplete}">

   <h:column>
      <h:outputText value = "#{result.name}" />
   </h:column>
</rich:suggestionbox>
其中“capitalsBean”將是一個具有不同引數的 Java 類,而名為“autocomplete”的監聽器類將在執行時設定“capital”例項變數的值並提供所需的輸出選擇。強烈建議使用 RichFaces 4 的“autocomplete”而不是使用此標籤,因為設計人員不再支援此標籤。
<rich:comboBox>
<rich:comboBox> 的工作原理與 <rich:suggestionBox> 完全相同,但是,此標籤不是呼叫監聽器類,而是將一些建議預渲染到客戶端瀏覽器中,這些建議相互互動並提供所需的輸出。與 <rich:sugegstionBox> 一樣,此功能在新版本中也已棄用,並使用另一個名為“<rich:autocomplete>”的標籤,如下面的程式碼中所述。
建立一個單獨的檔案並將其命名為“richAutoComplete.xhtml”。將以下程式碼放在該檔案中。
<?xml version = "1.0" encoding = "UTF-8"?>
<!DOCTYPE html>
<html xmlns = "http://www.w3.org/1999/xhtml"
   xmlns:h = "http://java.sun.com/jsf/html"
   xmlns:f = "http://java.sun.com/jsf/core"
   xmlns:ui = "http://java.sun.com/jsf/facelets"
   xmlns:a4j = "http://richfaces.org/a4j"
   xmlns:rich = "http://richfaces.org/rich">

   <h:head></h:head>

   <h:body>
      <h:form id = "form">
         <h:form id = "form">
            <rich:autocomplete mode = "cachedAJAX" minChars = "2"
            autocompleteMethod = "#{autoComplete.SubJectList()}" />
         </h:form>
      </h:form>
   </h:body>

</html>
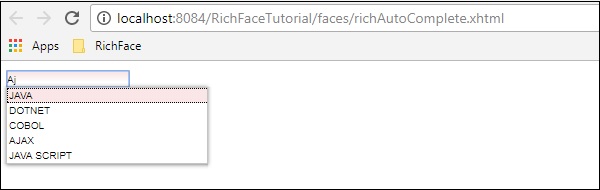
在上面的示例中,我們透過 RichFaces 的自動完成功能填充科目列表。建立另一個 Java 類並將其命名為“autoComplete.java”。
import java.util.ArrayList;
import java.util.List;
import javax.faces.bean.ManagedBean;
import javax.faces.bean.RequestScoped;

@ManagedBean
@RequestScoped

public class autoComplete {
   public autoComplete(){}
   private List<String> autoCompleteList=new ArrayList<>();

   public List<String> SubJectList() {
      //ArrayList<String> list = new ArrayList<>();
      autoCompleteList.add("JAVA");
      autoCompleteList.add("DOTNET");
      autoCompleteList.add("COBOL");
      autoCompleteList.add("AJAX");
      autoCompleteList.add("JAVA SCRIPT");
      return autoCompleteList;
   }
   public List<String> getAutoCompleteList() {
      return autoCompleteList;
   }
   public void setAutoCompleteList(List<String> autoCompleteList) {
      this.autoCompleteList = autoCompleteList;
   }
}
上述檔案充當 bean 類,而 SubjectList() 是實際將響應呈現到瀏覽器的方法。在 <SuggestionBox>、<ComboBox> 標籤中,我們需要實現監聽器類,但是,對於 <autocomplete> 標籤,此監聽器類的建立已自動化,這使得開發人員更容易操作。上面的程式碼段將在瀏覽器中產生以下輸出。
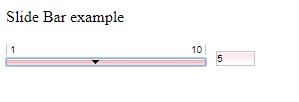
<rich:inputNumberSlider>
這是一個非常簡單的標籤,可以幫助開發人員根據數字間隔建立數字滑塊。建立“inputNumberSlider.xhtml”檔案並將以下程式碼放在其中。
<?xml version = "1.0" encoding = "UTF-8"?>
<!DOCTYPE html>
<html xmlns = "http://www.w3.org/1999/xhtml"
   xmlns:h = "http://java.sun.com/jsf/html"
   xmlns:f = "http://java.sun.com/jsf/core"
   xmlns:ui = "http://java.sun.com/jsf/facelets"
   xmlns:a4j = "http://richfaces.org/a4j"
   xmlns:rich = "http://richfaces.org/rich">

   <h:head></h:head>

   <h:body>
      <h:form>
         <h:outputText value = "Slide Bar example"></h:outputText>
         <rich:inputNumberSlider
            minValue = "1"
            maxValue = "10"
            showArrows = "false"
            showTooltip = "false"
            step = "1">
         </rich:inputNumberSlider>
      </h:form>
   </h:body>

</html>
在上面的示例中,屬性非常具有描述性。上面的程式碼段將在瀏覽器中產生以下輸出。
<rich:Calendar>
顧名思義,此標籤將幫助在瀏覽器中建立日曆。建立一個單獨的檔案並將其命名為“richCalendar.xhtml”。將以下程式碼放在其中。
<?xml version = "1.0" encoding = "UTF-8"?>
<!DOCTYPE html>
<html xmlns = "http://www.w3.org/1999/xhtml"
   xmlns:h = "http://java.sun.com/jsf/html"
   xmlns:f = "http://java.sun.com/jsf/core"
   xmlns:ui = "http://java.sun.com/jsf/facelets"
   xmlns:a4j = "http://richfaces.org/a4j"
   xmlns:rich = "http://richfaces.org/rich">

   <h:head></h:head>

   <h:body>
      <h:form>
         <h1>Calendar</h1>
         <rich:calendar value = "#{calendarBean.selectedDate}"
            locale = "#{calendarBean.locale}"
            popup = "#{calendarBean.popup}"
            datePattern = "#{calendar.pattern}"
            style = "width:200px">
         </rich:calendar>
      </h:form>
   </h:body>

</html>
我們需要建立另一個名為“calendarBean.java”的類來儲存所有日曆值,例如日期、區域設定、日期模式等。以下是“calendarBean.java”的程式碼。
import java.text.DateFormat;
import java.util.Date;
import java.util.Locale;

import javax.faces.event.ValueChangeEvent;

public class CalendarBean {
   private static final String[] WEEK_DAY_LABELS = new String[] {
      "Sun *", "Mon +", "Tue +", "Wed +", "Thu +", "Fri +", "Sat *" };

   private Locale locale;
   private boolean popup;
   private boolean readonly;
   private boolean showInput;
   private boolean enableManualInput;
   private String pattern;
   private Date currentDate;
   private Date selectedDate;
   private String jointPoint;
   private String direction;
   private String boundary;
   private boolean useCustomDayLabels;

   public Locale getLocale() {
      return locale;
   }
   public void setLocale(Locale locale) {
      this.locale = locale;
   }
   public boolean isPopup() {
      return popup;
   }
   public void setPopup(boolean popup) {
      this.popup = popup;
   }
   public String getPattern() {
      return pattern;
   }
   public void setPattern(String pattern) {
      this.pattern = pattern;
   }
   public CalendarBean() {
      locale = Locale.US;
      popup = true;
      pattern = "MMM d, yyyy";
      jointPoint = "bottomleft";
      direction = "bottomright";
      readonly = true;
      enableManualInput = false;
      showInput = true;
      boundary = "inactive";
   }
   public boolean isShowInput() {
      return showInput;
   }
   public void setShowInput(boolean showInput) {
      this.showInput = showInput;
   }
   public boolean isEnableManualInput() {
      return enableManualInput;
   }
   public void setEnableManualInput(boolean enableManualInput) {
      this.enableManualInput = enableManualInput;
   }
   public boolean isReadonly() {
      return readonly;
   }
   public void setReadonly(boolean readonly) {
      this.readonly = readonly;
   }
   public void selectLocale(ValueChangeEvent event) {
      String tLocale = (String) event.getNewValue();
      if (tLocale != null) {
         String lang = tLocale.substring(0, 2);
         String country = tLocale.substring(3);
         locale = new Locale(lang, country, "");
      }
   }
   public boolean isUseCustomDayLabels() {
      return useCustomDayLabels;
   }
   public void setUseCustomDayLabels(boolean useCustomDayLabels) {
      this.useCustomDayLabels = useCustomDayLabels;
   }
   public Object getWeekDayLabelsShort() {
      if (isUseCustomDayLabels()) {
         return WEEK_DAY_LABELS;
      } else {
         return null;
      }
   }
   public String getCurrentDateAsText() {
      Date currentDate = getCurrentDate();
      if (currentDate ! =  null) {
         return DateFormat.getDateInstance(DateFormat.FULL).format(currentDate);
      }
      return null;
   }
   public Date getCurrentDate() {
      return currentDate;
   }
   public void setCurrentDate(Date currentDate) {
      this.currentDate = currentDate;
   }
   public Date getSelectedDate() {
      return selectedDate;
   }
   public void setSelectedDate(Date selectedDate) {
      this.selectedDate = selectedDate;
   }
   public String getJointPoint() {
      return jointPoint;
   }
   public void setJointPoint(String jointPoint) {
      this.jointPoint = jointPoint;
   }
   public void selectJointPoint(ValueChangeEvent event) {
      jointPoint = (String) event.getNewValue();
   }
   public String getDirection() {
      return direction;
   }
   public void setDirection(String direction) {
      this.direction = direction;
   }
   public void selectDirection(ValueChangeEvent event) {
      direction = (String) event.getNewValue();
   }
   public String getBoundary() {
      return boundary;
   }
   public void setBoundary(String boundary) {
      this.boundary = boundary;
   }
}
上面的程式碼段將在瀏覽器中生成以下輸出。

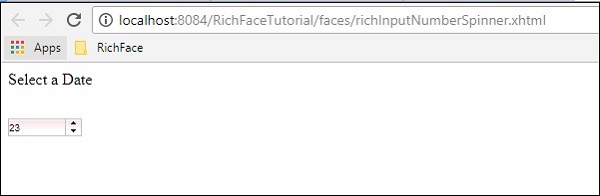
<rich:InputNumberSpinner>
此標籤可以幫助開發人員建立一個微調器來填充 bean 的例項。以下是一個示例,將幫助您詳細瞭解 Spinner 標籤。請建立一個單獨的 xhtml 檔案並將其命名為“InputNumberSpinner.xhtml”,並將以下程式碼放在其中。
<?xml version = "1.0" encoding = "UTF-8"?>
<!DOCTYPE html>
<html xmlns = "http://www.w3.org/1999/xhtml"
   xmlns:h = "http://java.sun.com/jsf/html"
   xmlns:f = "http://java.sun.com/jsf/core"
   xmlns:ui = "http://java.sun.com/jsf/facelets"
   xmlns:a4j = "http://richfaces.org/a4j"
   xmlns:rich = "http://richfaces.org/rich">

   <h:head>
      <title>Number Slider Example</title>
   </h:head>

   <h:body>
      <h:form>
         <h:outputText value = "Select a Date"></h:outputText>
         <br/>
         <br/>

         <rich:inputNumberSpinner
            minValue = "1"
            maxValue = "31"
            step = "1">
         </rich:inputNumberSpinner>
      </h:form>
   </h:body>

</html>
上面的程式碼段將在瀏覽器中產生以下輸出。