- Angular 8 教程
- Angular 8 - 首頁
- Angular 8 - 簡介
- Angular 8 - 安裝
- 建立第一個應用
- Angular 8 - 架構
- Angular 元件和模板
- Angular 8 - 資料繫結
- Angular 8 - 指令
- Angular 8 - 管道
- Angular 8 - 響應式程式設計
- 服務和依賴注入
- Angular 8 - Http 客戶端程式設計
- Angular 8 - Angular Material
- 路由和導航
- Angular 8 - 動畫
- Angular 8 - 表單
- Angular 8 - 表單驗證
- 身份驗證和授權
- Angular 8 - Web Workers
- Service Workers 和 PWA
- Angular 8 - 伺服器端渲染
- Angular 8 - 國際化 (i18n)
- Angular 8 - 可訪問性
- Angular 8 - CLI 命令
- Angular 8 - 測試
- Angular 8 - Ivy 編譯器
- Angular 8 - 使用 Bazel 構建
- Angular 8 - 向後相容性
- Angular 8 - 工作示例
- Angular 9 - 新特性?
- Angular 8 有用資源
- Angular 8 - 快速指南
- Angular 8 - 有用資源
- Angular 8 - 討論
Angular 8 - 國際化 (i18n)
國際化 (i18n) 是任何現代 Web 應用必不可少的功能。國際化使應用能夠面向世界上任何語言。本地化是國際化的一部分,它使應用能夠以目標本地語言呈現。Angular 提供了對國際化和本地化功能的全面支援。
讓我們學習如何在不同的語言中建立一個簡單的 Hello World 應用。
使用以下命令建立一個新的 Angular 應用:
cd /go/to/workspace
ng new i18n-sample
使用以下命令執行應用:
cd i18n-sample
npm run start
將AppComponent的模板更改為如下所示:
<h1>{{ title }}</h1>

<div>Hello</div>
<div>The Current time is {{ currentDate | date : 'medium' }}</div>
使用以下命令新增本地化模組:
ng add @angular/localize
重啟應用。
LOCALE_ID 是 Angular 變數,用於引用當前區域設定。預設情況下,它設定為 en_US。讓我們透過在 AppModule 中的 provider 中使用來更改區域設定。
import { BrowserModule } from '@angular/platform-browser';
import { LOCALE_ID, NgModule } from '@angular/core';

import { AppComponent } from './app.component';

@NgModule({
   declarations: [
      AppComponent
   ],
   imports: [
      BrowserModule
   ],
   providers: [ { provide: LOCALE_ID, useValue: 'hi' } ],

   bootstrap: [AppComponent]
})
export class AppModule { }
這裡,
- LOCALE_ID 從@angular/core匯入。
- LOCALE_ID 透過 provider 設定為 hi,以便 LOCALE_ID 在應用的任何地方都可用。
從 @angular/common/locales/hi 匯入區域設定資料,然後使用 registerLocaleData 方法註冊它,如下所示
import { Component } from '@angular/core';

import { registerLocaleData } from '@angular/common';
import localeHi from '@angular/common/locales/hi';

registerLocaleData(localeHi);

@Component({
   selector: 'app-root',
   templateUrl: './app.component.html',
   styleUrls: ['./app.component.css'],
})
export class AppComponent {
   title = 'Internationzation Sample';
}
建立一個區域性變數 CurrentDate 並使用 Date.now() 設定當前時間。
export class AppComponent {
   title = 'Internationzation Sample';

   currentDate: number = Date.now();
}
更改 AppComponent 的模板內容幷包含 currentDate,如下所示:
<h1>{{ title }}</h1>

<div>Hello</div>
<div>The Current time is {{ currentDate | date : 'medium' }}</div>
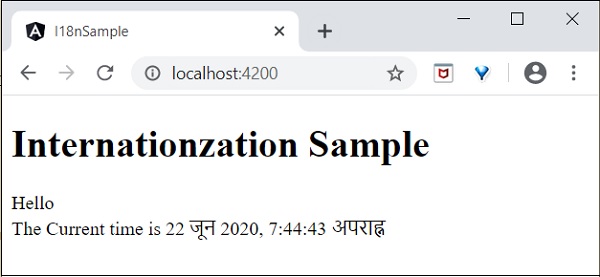
檢查結果,您將看到日期使用 hi 區域設定指定。
我們已將日期更改為當前區域設定。讓我們也更改其他內容。為此,在相關標籤中包含i18n屬性,格式為title|description@@id。
<h1>{{ title }}</h1>

<h1 i18n="greeting|Greeting a person@@greeting">Hello</h1>
<div>
   <span i18n="time|Specifiy the current time@@currentTime">
      The Current time is {{ currentDate | date : 'medium' }}
   </span>
</div>
這裡,
- hello 是簡單的翻譯格式,因為它包含要翻譯的完整文字。
- Time 稍微複雜一些,因為它也包含動態內容。文字的格式應遵循 ICU 訊息格式進行翻譯。
我們可以使用以下命令提取要翻譯的資料:
ng xi18n --output-path src/locale
命令生成messages.xlf檔案,內容如下:
<?xml version="1.0" encoding="UTF-8" ?>
<xliff version="1.2" xmlns="urn:oasis:names:tc:xliff:document:1.2">
   <file source-language="en" datatype="plaintext" original="ng2.template">
      <body>
         <trans-unit id="greeting" datatype="html">
            <source>Hello</source>
            <context-group purpose="location">
               <context context-type="sourcefile">src/app/app.component.html</context>
               <context context-type="linenumber">3</context>
            </context-group>
            <note priority="1" from="description">Greeting a person</note>
            <note priority="1" from="meaning">greeting</note>

         </trans-unit>
         <trans-unit id="currentTime" datatype="html">
            <source>
                        The Current time is <x id="INTERPOLATION" equiv-text="{{ currentDate | date : 'medium' }}"/>
            </source>
            <context-group purpose="location">
               <context context-type="sourcefile">src/app/app.component.html</context>
               <context context-type="linenumber">5</context>
            </context-group>
            <note priority="1" from="description">Specifiy the current time</note>
            <note priority="1" from="meaning">time</note>
         </trans-unit>
      </body>
   </file>
</xliff>
複製該檔案並將其重新命名為messages.hi.xlf
使用 Unicode 文字編輯器開啟該檔案。找到source標籤並使用target標籤複製它,然後將內容更改為hi區域設定。使用谷歌翻譯查詢匹配的文字。更改後的內容如下:


開啟angular.json並在build -> configuration下放置以下配置
"hi": {
   "aot": true,
   "outputPath": "dist/hi/",
   "i18nFile": "src/locale/messages.hi.xlf",
   "i18nFormat": "xlf",
   "i18nLocale": "hi",
   "i18nMissingTranslation": "error",
   "baseHref": "/hi/"
},
"en": {
   "aot": true,
   "outputPath": "dist/en/",
   "i18nFile": "src/locale/messages.xlf",
   "i18nFormat": "xlf",
   "i18nLocale": "en",
   "i18nMissingTranslation": "error",
   "baseHref": "/en/"
}
這裡,
我們對hi和en區域設定使用了單獨的設定。
在serve -> configuration下設定以下內容。
"hi": {
   "browserTarget": "i18n-sample:build:hi"
},
"en": {
   "browserTarget": "i18n-sample:build:en"
}
我們添加了必要的配置。停止應用並執行以下命令:
npm run start -- --configuration=hi
這裡,
我們指定了必須使用 hi 配置。
導航到 https://:4200/hi,您將看到印地語本地化內容。

最後,我們建立了一個 Angular 本地化應用。