- Angular 8 教程
- Angular 8 - 首頁
- Angular 8 - 簡介
- Angular 8 - 安裝
- 建立第一個應用程式
- Angular 8 - 架構
- Angular 元件和模板
- Angular 8 - 資料繫結
- Angular 8 - 指令
- Angular 8 - 管道
- Angular 8 - 響應式程式設計
- 服務和依賴注入
- Angular 8 - Http 客戶端程式設計
- Angular 8 - Angular Material
- 路由和導航
- Angular 8 - 動畫
- Angular 8 - 表單
- Angular 8 - 表單驗證
- 身份驗證和授權
- Angular 8 - Web Workers
- Service Workers 和 PWA
- Angular 8 - 伺服器端渲染
- Angular 8 - 國際化 (i18n)
- Angular 8 - 可訪問性
- Angular 8 - CLI 命令
- Angular 8 - 測試
- Angular 8 - Ivy 編譯器
- Angular 8 - 使用 Bazel 構建
- Angular 8 - 向後相容性
- Angular 8 - 工作示例
- Angular 9 - 新功能?
- Angular 8 有用資源
- Angular 8 - 快速指南
- Angular 8 - 有用資源
- Angular 8 - 討論
Angular 8 - 身份驗證和授權
身份驗證是將 Web 應用程式的訪問者與系統中預定義的使用者身份集進行匹配的過程。換句話說,它是識別使用者身份的過程。在系統安全方面,身份驗證是一個非常重要的過程。
授權是授予使用者訪問系統中某些資源的許可權的過程。只有經過身份驗證的使用者才能被授權訪問資源。
在本節中,讓我們學習如何在 Angular 應用程式中進行身份驗證和授權。
路由中的守衛
在 Web 應用程式中,資源由 URL 引用。系統中的每個使用者都將被允許訪問一組 URL。例如,管理員可以被分配管理部分下的所有 URL。
正如我們已經知道的,URL 由路由處理。Angular 路由使 URL 能夠根據程式設計邏輯進行保護和限制。因此,某個 URL 可能會被拒絕普通使用者訪問,而允許管理員訪問。
Angular 提供了一個名為路由守衛的概念,可用於透過路由阻止對應用程式某些部分的未授權訪問。Angular 提供了多種守衛,如下所示
CanActivate - 用於阻止訪問路由。
CanActivateChild - 用於阻止訪問子路由。
CanDeactivate - 用於阻止正在進行的過程獲取使用者的反饋。例如,如果使用者回覆否定,則可以停止刪除過程。
Resolve - 用於在導航到路由之前預取資料。
CanLoad - 用於載入資產。
工作示例
讓我們嘗試向我們的應用程式新增登入功能,並使用 CanActivate 守衛對其進行保護。
開啟命令提示符並轉到專案根資料夾。
cd /go/to/expense-manager
啟動應用程式。
ng serve
建立一個新的服務 AuthService 來驗證使用者。
ng generate service auth
CREATE src/app/auth.service.spec.ts (323 bytes)
CREATE src/app/auth.service.ts (133 bytes)
開啟AuthService 幷包含以下程式碼。
import { Injectable } from '@angular/core';

import { Observable, of } from 'rxjs';
import { tap, delay } from 'rxjs/operators';

@Injectable({
   providedIn: 'root'
})
export class AuthService {

   isUserLoggedIn: boolean = false;

   login(userName: string, password: string): Observable {
      console.log(userName);
      console.log(password);
      this.isUserLoggedIn = userName == 'admin' && password == 'admin';
      localStorage.setItem('isUserLoggedIn', this.isUserLoggedIn ? "true" : "false");

   return of(this.isUserLoggedIn).pipe(
      delay(1000),
      tap(val => {
         console.log("Is User Authentication is successful: " + val);
      })
   );
   }

   logout(): void {
   this.isUserLoggedIn = false;
      localStorage.removeItem('isUserLoggedIn');
   }

   constructor() { }
}
這裡,
我們編寫了兩個方法,login 和logout。
login 方法的目的是驗證使用者,如果使用者成功驗證,則將其資訊儲存在localStorage 中,然後返回 true。
身份驗證驗證是使用者名稱和密碼應為admin。
我們沒有使用任何後端。相反,我們使用 Observables 模擬了 1 秒的延遲。
logout 方法的目的是使使用者無效並刪除儲存在localStorage 中的資訊。
使用以下命令建立login 元件 -
ng generate component login
CREATE src/app/login/login.component.html (20 bytes)
CREATE src/app/login/login.component.spec.ts (621 bytes)
CREATE src/app/login/login.component.ts (265 bytes)
CREATE src/app/login/login.component.css (0 bytes)
UPDATE src/app/app.module.ts (1207 bytes)
開啟LoginComponent 幷包含以下程式碼 -
import { Component, OnInit } from '@angular/core';

import { FormGroup, FormControl } from '@angular/forms';
import { AuthService } from '../auth.service';
import { Router } from '@angular/router';

@Component({
   selector: 'app-login',
   templateUrl: './login.component.html',
   styleUrls: ['./login.component.css']
})
export class LoginComponent implements OnInit {

   userName: string;
   password: string;
   formData: FormGroup;

   constructor(private authService : AuthService, private router : Router) { }

   ngOnInit() {
      this.formData = new FormGroup({
         userName: new FormControl("admin"),
         password: new FormControl("admin"),
      });
   }

   onClickSubmit(data: any) {
      this.userName = data.userName;
      this.password = data.password;

      console.log("Login page: " + this.userName);
      console.log("Login page: " + this.password);

      this.authService.login(this.userName, this.password)
         .subscribe( data => {
            console.log("Is Login Success: " + data);

           if(data) this.router.navigate(['/expenses']);
      });
   }
}
這裡,
使用響應式表單。
匯入 AuthService 和 Router,並在建構函式中進行配置。
建立 FormGroup 的例項,幷包含兩個 FormControl 的例項,一個用於使用者名稱,另一個用於密碼。
建立 onClickSubmit 來使用 authService 驗證使用者,如果成功,則導航到費用列表。
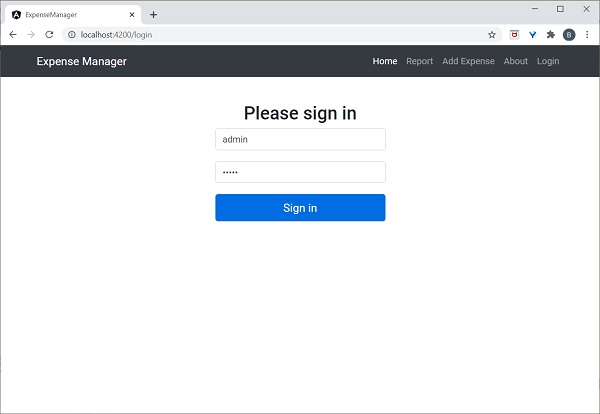
開啟LoginComponent 模板幷包含以下模板程式碼。
<!-- Page Content -->
<div class="container">
   <div class="row">
      <div class="col-lg-12 text-center" style="padding-top: 20px;">
         <div class="container box" style="margin-top: 10px; padding-left: 0px; padding-right: 0px;">
            <div class="row">
               <div class="col-12" style="text-align: center;">
                                    <form [formGroup]="formData" (ngSubmit)="onClickSubmit(formData.value)"
                                          class="form-signin">
                                    <h2 class="form-signin-heading">Please sign in</h2>
                                    <label for="inputEmail" class="sr-only">Email address</label>
                                    <input type="text" id="username" class="form-control"
                                          formControlName="userName" placeholder="Username" required autofocus>
                                    <label for="inputPassword" class="sr-only">Password</label>
                                    <input type="password" id="inputPassword" class="form-control"
                                          formControlName="password" placeholder="Password" required>
                                    <button class="btn btn-lg btn-primary btn-block" type="submit">Sign in</button>
                                    </form>
               </div>
            </div>
         </div>
      </div>
   </div>
</div>
這裡,
建立響應式表單並設計登入表單。
將onClickSubmit 方法附加到表單提交操作。
開啟LoginComponent 樣式幷包含以下 CSS 程式碼。
.form-signin {
   max-width: 330px;

   padding: 15px;
   margin: 0 auto;
}

input {
   margin-bottom: 20px;
}
這裡,添加了一些樣式來設計登入表單。
使用以下命令建立登出元件 -
ng generate component logout
CREATE src/app/logout/logout.component.html (21 bytes)
CREATE src/app/logout/logout.component.spec.ts (628 bytes)
CREATE src/app/logout/logout.component.ts (269 bytes)
CREATE src/app/logout/logout.component.css (0 bytes)
UPDATE src/app/app.module.ts (1368 bytes)
開啟LogoutComponent 幷包含以下程式碼。
import { Component, OnInit } from '@angular/core';

import { AuthService } from '../auth.service';
import { Router } from '@angular/router';

@Component({
   selector: 'app-logout',
   templateUrl: './logout.component.html',
   styleUrls: ['./logout.component.css']
})
export class LogoutComponent implements OnInit {

   constructor(private authService : AuthService, private router: Router) { }

   ngOnInit() {
      this.authService.logout();
      this.router.navigate(['/']);
   }

}
這裡,
- 使用 AuthService 的 logout 方法。
- 使用者登出後,頁面將重定向到主頁(/)。
使用以下命令建立守衛 -
ng generate guard expense
CREATE src/app/expense.guard.spec.ts (364 bytes)
CREATE src/app/expense.guard.ts (459 bytes)
開啟 ExpenseGuard 幷包含以下程式碼 -
import { Injectable } from '@angular/core';
import { CanActivate, ActivatedRouteSnapshot, RouterStateSnapshot, Router, UrlTree } from '@angular/router';
import { Observable } from 'rxjs';

import { AuthService } from './auth.service';

@Injectable({
   providedIn: 'root'
})
export class ExpenseGuard implements CanActivate {

   constructor(private authService: AuthService, private router: Router) {}

   canActivate(
   next: ActivatedRouteSnapshot,
   state: RouterStateSnapshot): boolean | UrlTree {
      let url: string = state.url;

          return this.checkLogin(url);
      }

      checkLogin(url: string): true | UrlTree {
         console.log("Url: " + url)
         let val: string = localStorage.getItem('isUserLoggedIn');

         if(val != null && val == "true"){
            if(url == "/login")
               this.router.parseUrl('/expenses');
            else
               return true;
         } else {
            return this.router.parseUrl('/login');
         }
      }
}
這裡,
- checkLogin 將檢查 localStorage 是否包含使用者資訊,如果可用,則返回 true。
- 如果使用者已登入並轉到登入頁面,它將把使用者重定向到費用頁面
- 如果使用者未登入,則使用者將被重定向到登入頁面。
開啟AppRoutingModule (src/app/app-routing.module.ts) 並更新以下程式碼 -
import { NgModule } from '@angular/core';
import { Routes, RouterModule } from '@angular/router';
import { ExpenseEntryComponent } from './expense-entry/expense-entry.component';
import { ExpenseEntryListComponent } from './expense-entry-list/expense-entry-list.component';
import { LoginComponent } from './login/login.component';
import { LogoutComponent } from './logout/logout.component';

import { ExpenseGuard } from './expense.guard';

const routes: Routes = [
   { path: 'login', component: LoginComponent },
   { path: 'logout', component: LogoutComponent },
   { path: 'expenses', component: ExpenseEntryListComponent, canActivate: [ExpenseGuard]},
   { path: 'expenses/detail/:id', component: ExpenseEntryComponent, canActivate: [ExpenseGuard]},
   { path: '', redirectTo: 'expenses', pathMatch: 'full' }
];

@NgModule({
  imports: [RouterModule.forRoot(routes)],
  exports: [RouterModule]
})
export class AppRoutingModule { }
這裡,
- 匯入 LoginComponent 和 LogoutComponent。
- 匯入 ExpenseGuard。
- 建立兩個新路由,login 和 logout,分別訪問 LoginComponent 和 LogoutComponent。
- 為 ExpenseEntryComponent 和 ExpenseEntryListComponent 新增新的選項 canActivate。
開啟AppComponent 模板並新增兩個登入和登出連結。
<div class="collapse navbar-collapse" id="navbarResponsive">
   <ul class="navbar-nav ml-auto">
      <li class="nav-item active">
         <a class="nav-link" href="#">Home
            <span class="sr-only" routerLink="/">(current)</span>

         </a>
      </li>
      <li class="nav-item">
         <a class="nav-link" routerLink="/expenses">Report</a>
      </li>
      <li class="nav-item">
         <a class="nav-link" href="#">Add Expense</a>
      </li>
      <li class="nav-item">

         <a class="nav-link" href="#">About</a>
      </li>
      <li class="nav-item">
                  <div *ngIf="isUserLoggedIn; else isLogOut">
                        <a class="nav-link" routerLink="/logout">Logout</a>
                  </div>

                  <ng-template #isLogOut>
                              <a class="nav-link" routerLink="/login">Login</a>
                  </ng-template>
      </li>
   </ul>
</div>
開啟AppComponent 並更新以下程式碼 -
import { Component } from '@angular/core';

import { AuthService } from './auth.service';

@Component({
   selector: 'app-root',
   templateUrl: './app.component.html',
   styleUrls: ['./app.component.css']
})
export class AppComponent {

   title = 'Expense Manager';
   isUserLoggedIn = false;

   constructor(private authService: AuthService) {}

   ngOnInit() {
      let storeData = localStorage.getItem("isUserLoggedIn");
      console.log("StoreData: " + storeData);

      if( storeData != null && storeData == "true")
         this.isUserLoggedIn = true;
      else


         this.isUserLoggedIn = false;
   }
}
這裡,我們添加了識別使用者狀態的邏輯,以便我們可以顯示登入/登出功能。
開啟AppModule (src/app/app.module.ts) 並配置ReactiveFormsModule
import { ReactiveFormsModule } from '@angular/forms';
imports: [
   ReactiveFormsModule
]
現在,執行應用程式,應用程式將開啟登入頁面。
輸入 admin 和 admin 作為使用者名稱和密碼,然後單擊提交。應用程式處理登入並將使用者重定向到費用列表頁面,如下所示 -
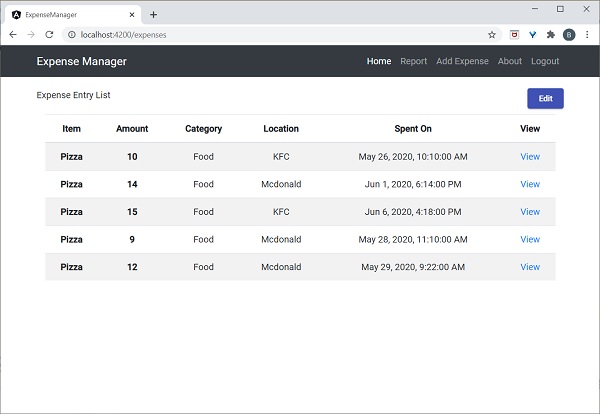
最後,您可以單擊登出並退出應用程式。