- GWT 教程
- GWT - 首頁
- GWT - 概述
- GWT - 環境設定
- GWT - 應用程式
- GWT - 建立應用程式
- GWT - 部署應用程式
- GWT - 使用 CSS 樣式
- GWT - 基本部件
- GWT - 表單部件
- GWT - 複雜部件
- GWT - 佈局面板
- GWT - 事件處理
- GWT - 自定義部件
- GWT - UIBinder
- GWT - RPC 通訊
- GWT - JUnit 整合
- GWT - 除錯應用程式
- GWT - 國際化
- GWT - 歷史類
- GWT - 書籤支援
- GWT - 日誌框架
- GWT 有用資源
- GWT - 問答
- GWT - 快速指南
- GWT - 有用資源
- GWT - 討論
GWT - 除錯應用程式
GWT 提供了除錯客戶端和伺服器端程式碼的強大功能。
在開發模式下,GWT 應用程式基於 Java 程式碼,不會被轉換為 JavaScript。
當應用程式在開發模式下執行時,Java 虛擬機器 (JVM) 實際上正在執行應用程式程式碼作為已編譯的 Java 位元組碼,使用 GWT 功能連線到瀏覽器視窗。
GWT 使用基於瀏覽器的外掛連線到 JVM。
因此,開發人員可以自由地使用任何基於 Java 的 IDE 來除錯客戶端 GWT 程式碼和伺服器端程式碼。
在本文中,我們將演示如何使用 Eclipse 除錯 GWT 客戶端程式碼。我們將執行以下任務:
- 在程式碼中設定斷點並在斷點資源管理器中檢視它們。
- 在除錯期間逐行單步執行程式碼。
- 檢視變數的值。
- 檢查所有變數的值。
- 檢查表示式的值。
- 顯示掛起執行緒的堆疊幀。
除錯示例
此示例將引導您完成簡單的步驟,以演示如何除錯 GWT 應用程式。請按照以下步驟更新我們在“GWT - 建立應用程式”章節中建立的 GWT 應用程式:
| 步驟 | 描述 |
|---|---|
| 1 | 建立一個名為 HelloWorld 的專案,放在 com.tutorialspoint 包下,如“GWT - 建立應用程式”章節中所述。 |
| 2 | 修改 HelloWorld.gwt.xml、HelloWorld.css、HelloWorld.html 和 HelloWorld.java,如下所述。保持其餘檔案不變。 |
| 3 | 編譯並執行應用程式以驗證已實現邏輯的結果。 |
以下是修改後的模組描述符 src/com.tutorialspoint/HelloWorld.gwt.xml 的內容。
<?xml version = "1.0" encoding = "UTF-8"?>
<module rename-to = 'helloworld'>
   <!-- Inherit the core Web Toolkit stuff.                        -->
   <inherits name = 'com.google.gwt.user.User'/>

   <!-- Inherit the default GWT style sheet.                       -->
   <inherits name = 'com.google.gwt.user.theme.clean.Clean'/>

   <!-- Specify the app entry point class.                         -->
   <entry-point class = 'com.tutorialspoint.client.HelloWorld'/>

   <!-- Specify the paths for translatable code                    -->
   <source path = 'client'/>
   <source path = 'shared'/>

</module>
以下是修改後的樣式表文件 war/HelloWorld.css 的內容。
body {
   text-align: center;
   font-family: verdana, sans-serif;
}

h1 {
   font-size: 2em;
   font-weight: bold;
   color: #777777;
   margin: 40px 0px 70px;
   text-align: center;
}

.gwt-Label{
   font-size: 150%;
   font-weight: bold;
   color:red;
   padding:5px;
   margin:5px;
}
以下是修改後的 HTML 主機檔案 war/HelloWorld.html 的內容,以容納兩個按鈕。
<html>
   <head>
      <title>Hello World</title>
      <link rel = "stylesheet" href = "HelloWorld.css"/>
      <script language = "javascript" src = "helloworld/helloworld.nocache.js">
      </script>
   </head>

   <body>
      <h1>Debugging Application Demonstration</h1>
      <div id = "gwtContainer"></div>
   </body>
</html>
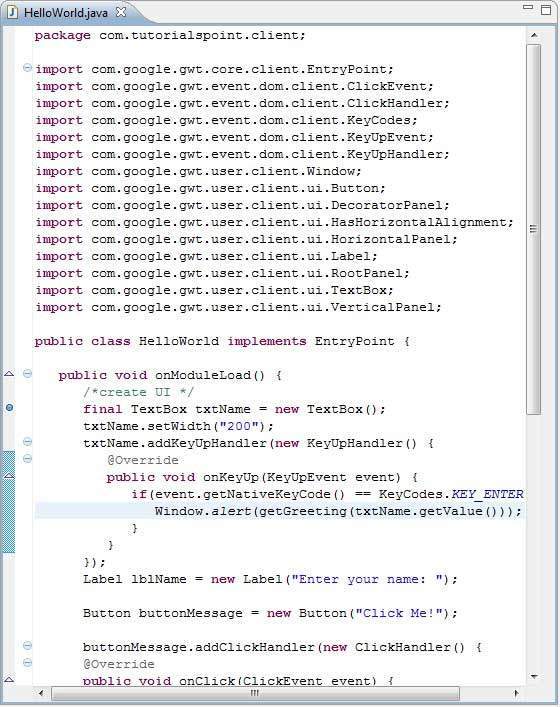
讓我們使用以下 Java 檔案 src/com.tutorialspoint/HelloWorld.java 的內容,我們將透過它演示 GWT 程式碼的除錯功能。
package com.tutorialspoint.client;

import com.google.gwt.core.client.EntryPoint;
import com.google.gwt.event.dom.client.ClickEvent;
import com.google.gwt.event.dom.client.ClickHandler;
import com.google.gwt.event.dom.client.KeyCodes;
import com.google.gwt.event.dom.client.KeyUpEvent;
import com.google.gwt.event.dom.client.KeyUpHandler;
import com.google.gwt.user.client.Window;
import com.google.gwt.user.client.ui.Button;
import com.google.gwt.user.client.ui.DecoratorPanel;
import com.google.gwt.user.client.ui.HasHorizontalAlignment;
import com.google.gwt.user.client.ui.HorizontalPanel;
import com.google.gwt.user.client.ui.Label;
import com.google.gwt.user.client.ui.RootPanel;
import com.google.gwt.user.client.ui.TextBox;
import com.google.gwt.user.client.ui.VerticalPanel;

public class HelloWorld implements EntryPoint {

   public void onModuleLoad() {
      /*create UI */
      final TextBox txtName = new TextBox();
      txtName.setWidth("200");
      txtName.addKeyUpHandler(new KeyUpHandler() {
         @Override
         public void onKeyUp(KeyUpEvent event) {
            if(event.getNativeKeyCode() == KeyCodes.KEY_ENTER){
               Window.alert(getGreeting(txtName.getValue()));
            }
         }
      });
      Label lblName = new Label("Enter your name: ");

      Button buttonMessage = new Button("Click Me!");

      buttonMessage.addClickHandler(new ClickHandler() {
      @Override
      public void onClick(ClickEvent event) {
         Window.alert(getGreeting(txtName.getValue()));
      }});

      HorizontalPanel hPanel = new HorizontalPanel();
      hPanel.add(lblName);
      hPanel.add(txtName);
      hPanel.setCellWidth(lblName, "130");

      VerticalPanel vPanel = new VerticalPanel();
      vPanel.setSpacing(10);
      vPanel.add(hPanel);
      vPanel.add(buttonMessage);
      vPanel.setCellHorizontalAlignment(buttonMessage,
      HasHorizontalAlignment.ALIGN_RIGHT);

      DecoratorPanel panel = new DecoratorPanel();
      panel.add(vPanel);

      // Add widgets to the root panel.
      RootPanel.get("gwtContainer").add(panel);
   }

   public String getGreeting(String name){
      return "Hello "+name+"!";
   }
}
步驟 1 - 放置斷點
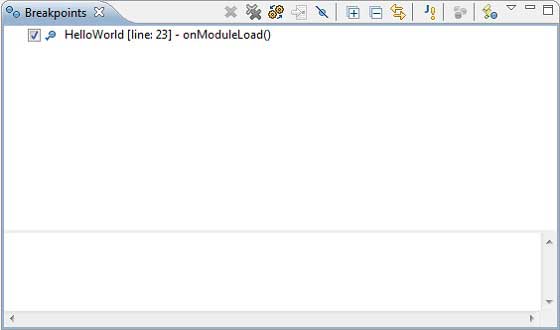
在 HelloWorld.java 的 onModuleLoad() 的第一行放置一個斷點。
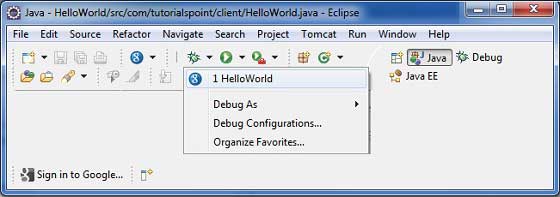
步驟 2 - 除錯應用程式
現在點選 ![]() 除錯應用程式選單,並選擇 HelloWorld 應用程式來除錯應用程式。
除錯應用程式選單,並選擇 HelloWorld 應用程式來除錯應用程式。
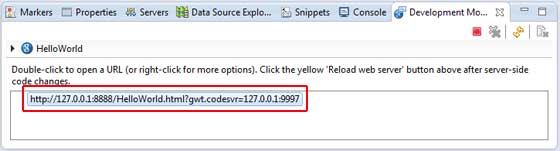
如果一切正常,您應該會看到 Eclipse 中啟用的 GWT 開發模式,其中包含如下所示的 URL。雙擊 URL 以開啟 GWT 應用程式。
應用程式啟動後,您將在 Eclipse 斷點上看到焦點,因為我們已在入口點方法的第一行放置了斷點。
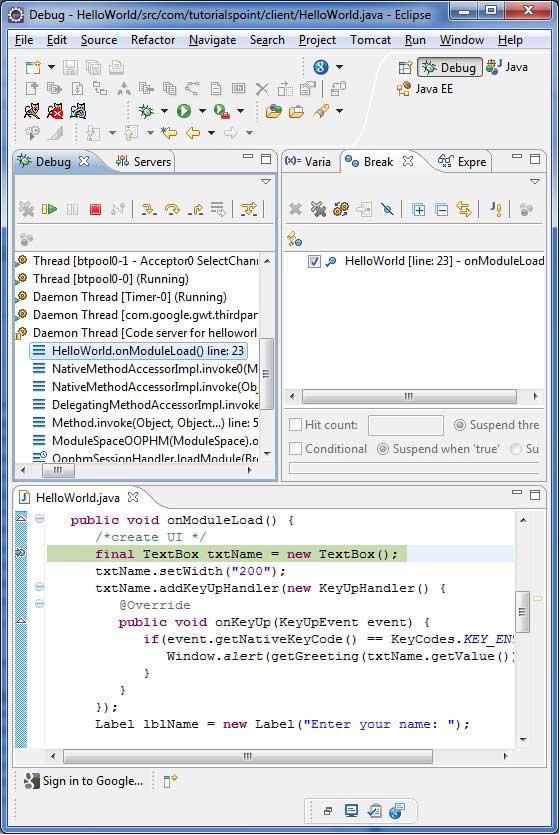
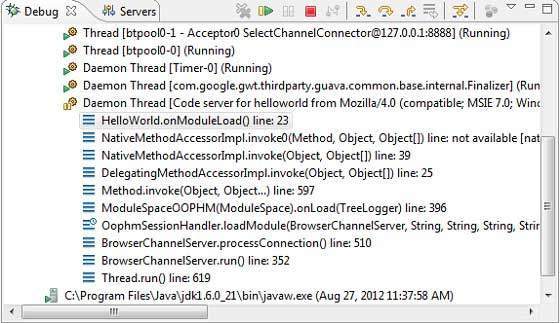
您可以檢視掛起執行緒的堆疊跟蹤。
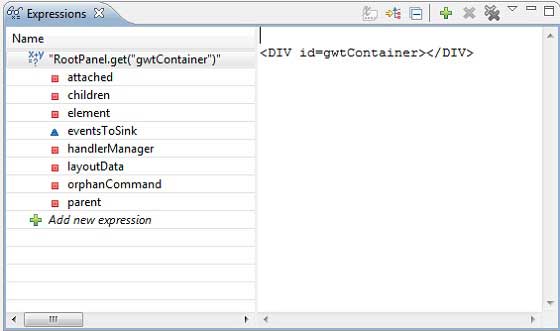
您可以查看錶達式的值。
您可以檢視已放置的斷點列表。
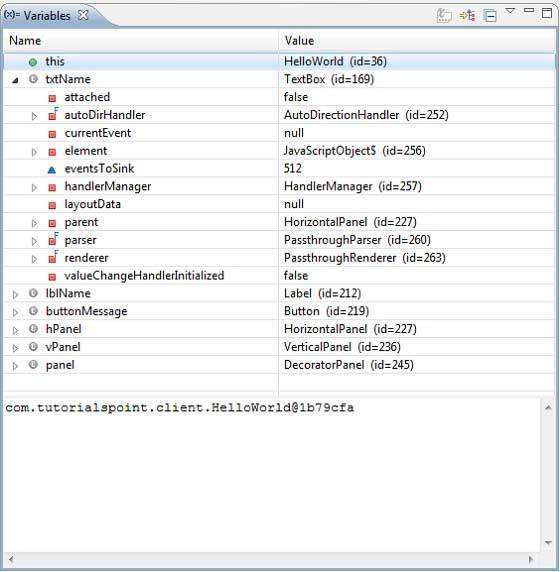
現在一直按 F6 直到到達 onModuleLoad() 方法的最後一行。作為功能鍵的參考,F6 逐行檢查程式碼,F5 進一步進入內部,F8 將恢復應用程式。現在您可以看到 onModuleLoad() 方法所有變數的值列表。
GWT 客戶端程式碼可以像除錯 Java 應用程式一樣進行除錯。在任何一行放置斷點,並使用 GWT 的除錯功能。