- ASP.NET MVC 教程
- ASP.NET MVC - 首頁
- ASP.NET MVC - 概述
- ASP.NET MVC - 模式
- ASP.NET MVC - 環境設定
- ASP.NET MVC - 快速入門
- ASP.NET MVC - 生命週期
- ASP.NET MVC - 路由
- ASP.NET MVC - 控制器
- ASP.NET MVC - 操作
- ASP.NET MVC - 過濾器
- ASP.NET MVC - 選擇器
- ASP.NET MVC - 檢視
- ASP.NET MVC - 資料模型
- ASP.NET MVC - 輔助方法
- ASP.NET MVC - 模型繫結
- ASP.NET MVC - 資料庫
- ASP.NET MVC - 驗證
- ASP.NET MVC - 安全性
- ASP.NET MVC - 快取
- ASP.NET MVC - Razor
- ASP.NET MVC - 資料註解
- Nuget 包管理
- ASP.NET MVC - Web API
- ASP.NET MVC - 腳手架
- ASP.NET MVC - Bootstrap
- ASP.NET MVC - 單元測試
- ASP.NET MVC - 部署
- ASP.NET MVC - 自託管
- ASP.NET MVC 有用資源
- ASP.NET MVC - 快速指南
- ASP.NET MVC - 有用資源
- ASP.NET MVC - 討論
ASP.NET MVC - 資料模型
本章將討論在 ASP.NET MVC 框架應用程式中構建模型。一個模型儲存根據控制器命令檢索到的資料,並在檢視中顯示。
模型是一組類,您將在其中處理資料和業務邏輯。因此,模型基本上是特定於業務領域的容器。它用於與資料庫互動。它還可以用於操作資料以實現業務邏輯。
讓我們透過建立一個新的 ASP.Net MVC 專案來檢視模型的一個簡單示例。
步驟 1 - 開啟 Visual Studio。單擊“檔案”→“新建”→“專案”選單選項。
將開啟一個新的專案對話方塊。

步驟 2 - 從左側窗格中,選擇“模板”→“Visual C#”→“Web”。
步驟 3 - 在中間窗格中,選擇“ASP.NET Web 應用程式”。
步驟 4 - 在“名稱”欄位中輸入專案名稱“MVCSimpleApp”,然後單擊“確定”繼續。您將看到以下對話方塊,要求您設定 ASP.NET 專案的初始內容。
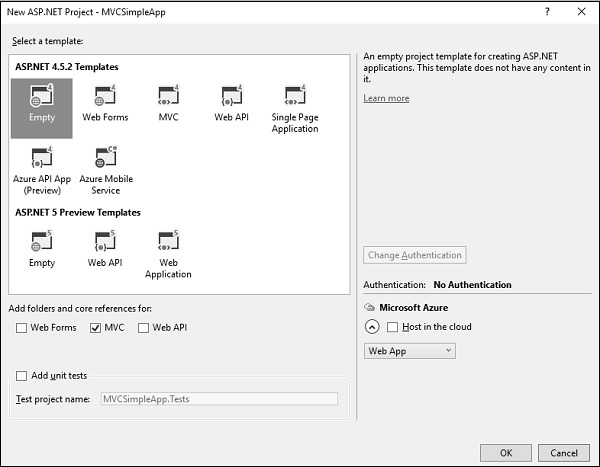
步驟 5 - 為簡單起見,選擇“空”選項,並在“新增用於”部分中選中“MVC”複選框,然後單擊“確定”。
它將建立一個具有最少預定義內容的基本 MVC 專案。
現在我們需要新增一個控制器。
步驟 6 - 右鍵單擊解決方案資源管理器中的控制器資料夾,然後選擇“新增”→“控制器”。
它將顯示“新增腳手架”對話方塊。
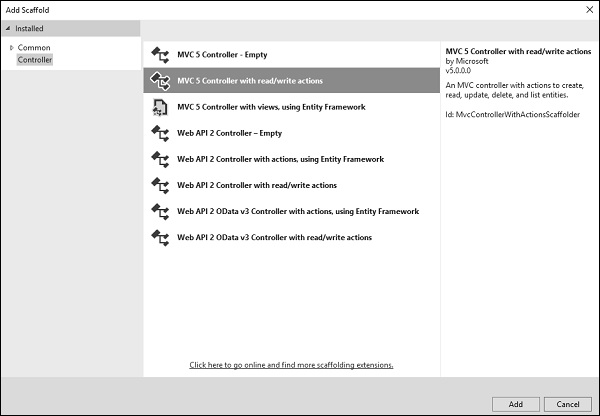
步驟 7 - 選擇“MVC 5 控制器 – 帶讀/寫操作”選項。此模板將建立一個帶有控制器預設操作的 Index 方法。這也將列出其他方法,例如 Edit/Delete/Create。
步驟 8 - 單擊“新增”按鈕,將出現“新增控制器”對話方塊。

步驟 9 - 將名稱設定為 EmployeeController 並單擊“新增”按鈕。
步驟 10 - 您將在 Controllers 資料夾中看到一個新的 C# 檔案“EmployeeController.cs”,它在 Visual Studio 中開啟以進行編輯,其中包含一些預設操作。
using System;
using System.Collections.Generic;
using System.Linq;

using System.Web;
using System.Web.Mvc;

namespace MVCSimpleApp.Controllers {
   public class EmployeeController : Controller{
      // GET: Employee
      public ActionResult Index(){
         return View();
      }

      // GET: Employee/Details/5
      public ActionResult Details(int id){
         return View();
      }

      // GET: Employee/Create
      public ActionResult Create(){
         return View();
      }

      // POST: Employee/Create
      [HttpPost]
      public ActionResult Create(FormCollection collection){
         try{
            // TODO: Add insert logic here
            return RedirectToAction("Index");
         }catch{
            return View();
         }
      }

      // GET: Employee/Edit/5
      public ActionResult Edit(int id){
         return View();
      }

      // POST: Employee/Edit/5
      [HttpPost]
      public ActionResult Edit(int id, FormCollection collection){
         try{
            // TODO: Add update logic here
            return RedirectToAction("Index");
         }catch{
            return View();
         }
      }

      // GET: Employee/Delete/5
      public ActionResult Delete(int id){
         return View();
      }

      // POST: Employee/Delete/5
      [HttpPost]
      public ActionResult Delete(int id, FormCollection collection){
         try{
            // TODO: Add delete logic here
            return RedirectToAction("Index");
         }catch{
            return View();
         }
      }
   }
}
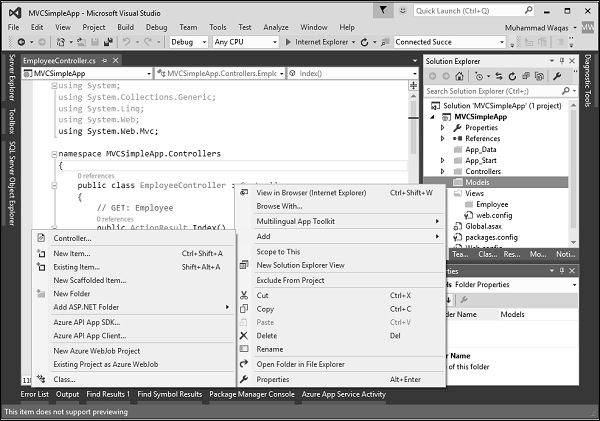
讓我們新增一個模型。
步驟 11 - 右鍵單擊解決方案資源管理器中的 Models 資料夾,然後選擇“新增”→“類”。
您將看到“新增新項”對話方塊。

步驟 12 - 在中間窗格中選擇“類”,並在名稱欄位中輸入 Employee.cs。
步驟 13 - 使用以下程式碼向 Employee 類新增一些屬性。
using System;
using System.Collections.Generic;
using System.Linq;
using System.Web;

namespace MVCSimpleApp.Models {
   public class Employee{
      public int ID { get; set; }
      public string Name { get; set; }
      public DateTime JoiningDate { get; set; }
      public int Age { get; set; }
   }
}
讓我們透過新增另一個方法來更新 EmployeeController.cs 檔案,該方法將返回員工列表。
[NonAction]
public List<Employee> GetEmployeeList(){
   return new List<Employee>{
      new Employee{
         ID = 1,
         Name = "Allan",
         JoiningDate = DateTime.Parse(DateTime.Today.ToString()),
         Age = 23
      },

      new Employee{
         ID = 2,
         Name = "Carson",
         JoiningDate = DateTime.Parse(DateTime.Today.ToString()),
         Age = 45
      },

      new Employee{
         ID = 3,
         Name = "Carson",
         JoiningDate = DateTime.Parse(DateTime.Today.ToString()),
         Age = 37
      },

      new Employee{
         ID = 4,
         Name = "Laura",
         JoiningDate = DateTime.Parse(DateTime.Today.ToString()),
         Age = 26
      },
   };
}
步驟 14 - 按以下程式碼所示更新 index 操作方法。
public ActionResult Index(){
   var employees = from e in GetEmployeeList()
   orderby e.ID
   select e;
   return View(employees);
}
步驟 15 - 執行此應用程式並在瀏覽器中將 /employee 附加到 URL,然後按 Enter。您將看到以下輸出。

如上面的螢幕截圖所示,出現錯誤,此錯誤實際上非常具有描述性,它告訴我們找不到 Index 檢視。
步驟 16 - 因此,要新增檢視,請右鍵單擊 Index 操作內部並選擇“新增檢視”。
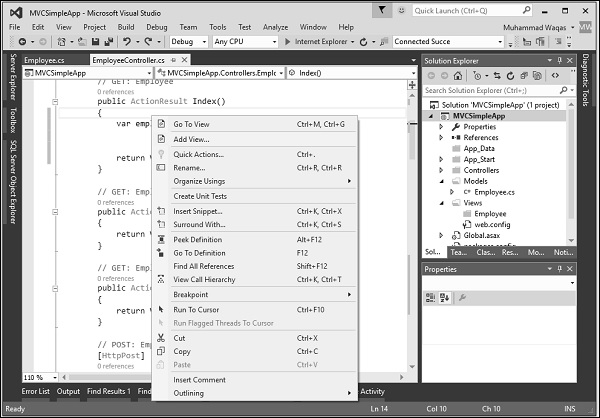
它將顯示“新增檢視”對話方塊,並將新增預設名稱。

步驟 17 - 從“模板”下拉列表中選擇“列表”,從“模型類”下拉列表中選擇“Employee”,並取消選中“使用佈局頁”複選框,然後單擊“新增”按鈕。
它將在此檢視中為您新增一些預設程式碼。
@model IEnumerable<MVCSimpleApp.Models.Employee>
@{
   Layout = null;
}

<!DOCTYPE html>
<html>
   <head>
      <meta name = "viewport" content = "width = device-width" />
      <title>Index</title>
   </head>

   <body>
      <p>@Html.ActionLink("Create New", "Create")</p>
         <table class = "table">
         <tr>
            <th>
               @Html.DisplayNameFor(model => model.Name)
            </th>

            <th>
               @Html.DisplayNameFor(model => model.JoiningDate)
            </th>

            <th>
               @Html.DisplayNameFor(model => model.Age)
            </th>

            <th></th>
         </tr>

         @foreach (var item in Model) {
            <tr>
               <td>
                  @Html.DisplayFor(modelItem => item.Name)
               </td>

               <td>
                  @Html.DisplayFor(modelItem => item.JoiningDate)
               </td>

               <td>
                  @Html.DisplayFor(modelItem => item.Age)
               </td>

               <td>
                  @Html.ActionLink("Edit", "Edit", new { id = item.ID }) |
                  @Html.ActionLink("Details", "Details", new { id = item.ID }) |
                  @Html.ActionLink("Delete", "Delete", new { id = item.ID })
               </td>

            </tr>
         }

      </table>
   </body>
</html>
步驟 18 - 執行此應用程式,您將收到以下輸出。
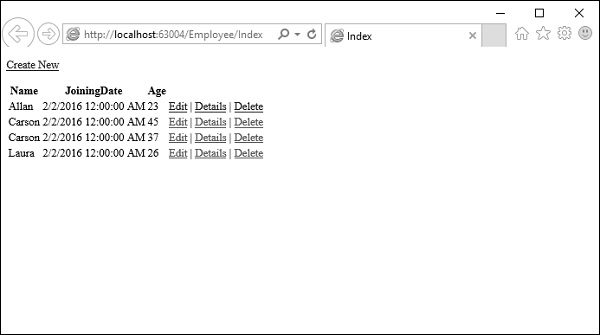
將顯示員工列表。