- Angular 4 教程
- Angular 4 - 首頁
- Angular 4 – 概述
- Angular 4 – 環境設定
- Angular 4 – 專案設定
- Angular 4 – 元件
- Angular 4 – 模組
- Angular 4 - 資料繫結
- Angular 4 – 事件繫結
- Angular 4 – 模板
- Angular 4 – 指令
- Angular 4 – 管道
- Angular 4 – 路由
- Angular 4 – 服務
- Angular 4 – Http 服務
- Angular 4 – 表單
- Angular 4 – 動畫
- Angular 4 – 材料
- Angular 4 – CLI
- Angular 4 – 示例
- Angular 4 有用資源
- Angular 4 - 快速指南
- Angular 4 - 有用資源
- Angular 4 - 討論
Angular 4 - 資料繫結
資料繫結從 AngularJS、Angular 2 開始就可用,現在 Angular 4 也可用。我們使用花括號進行資料繫結 - {{}}; 此過程稱為插值。我們已經在之前的示例中看到如何將值宣告為變數 title,並在瀏覽器中列印相同的值。
app.component.html 檔案中的變數被稱為 {{title}},title 的值在 app.component.ts 檔案中初始化,在 app.component.html 中顯示其值。
現在讓我們在瀏覽器中建立一個月份下拉列表。為此,我們在 app.component.ts 中建立了一個月份陣列,如下所示:
import { Component } from '@angular/core';

@Component({
   selector: 'app-root',
   templateUrl: './app.component.html',
   styleUrls: ['./app.component.css']
})
export class AppComponent {
   title = 'Angular 4 Project!';
   // declared array of months.
   months = ["January", "Feburary", "March", "April", "May",
            "June", "July", "August", "September",
            "October", "November", "December"];
}
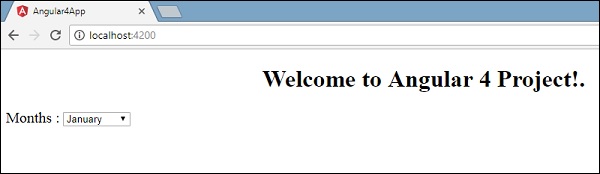
上面顯示的月份陣列需要在瀏覽器中的下拉列表中顯示。為此,我們將使用以下程式碼行:
<!--The content below is only a placeholder and can be replaced. -->
<div style="text-align:center">
   <h1>
      Welcome to {{title}}.
   </h1>
</div>

<div> Months :
   <select>
      <option *ngFor="let i of months">{{i}}</option>
   </select>
</div>
我們建立了帶有選項的普通選擇標籤。在選項中,我們使用了for迴圈。for迴圈用於迭代月份陣列,這將依次建立帶有月份中存在的值的選項標籤。
Angular 中的語法for是*ngFor = “let I of months”,要獲取月份的值,我們將其顯示在 {{i}} 中。
兩個花括號有助於資料繫結。您在app.component.ts檔案中宣告變數,然後使用花括號替換它們。
讓我們看看上面月份陣列在瀏覽器中的輸出
在app.component.ts中設定的變數可以使用花括號與app.component.html繫結;例如,{{}}。
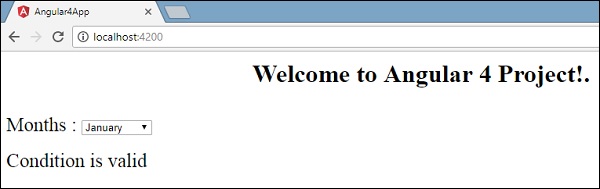
現在讓我們根據條件在瀏覽器中顯示資料。在這裡,我們添加了一個變數並將值設定為 true。使用 if 語句,我們可以隱藏/顯示要顯示的內容。
示例
import { Component } from '@angular/core';

@Component({
   selector: 'app-root',
   templateUrl: './app.component.html',
   styleUrls: ['./app.component.css']
})

export class AppComponent {
   title = 'Angular 4 Project!';
   //array of months.
   months = ["January", "February", "March", "April",
            "May", "June", "July", "August", "September",
            "October", "November", "December"];
   isavailable = true;   //variable is set to true
}
<!--The content below is only a placeholder and can be replaced.-->
<div style = "text-align:center">
   <h1>
      Welcome to {{title}}.
   </h1>
</div>

<div> Months :
   <select>
      <option *ngFor = "let i of months">{{i}}</option>
   </select>
</div>
<br/>

<div>
   <span *ngIf = "isavailable">Condition is valid.</span>
   //over here based on if condition the text condition is valid is displayed.
   If the value of isavailable is set to false it will not display the text.
</div>
輸出
讓我們使用IF THEN ELSE條件嘗試上述示例。
示例
import { Component } from '@angular/core';

@Component({
   selector: 'app-root',
   templateUrl: './app.component.html',
   styleUrls: ['./app.component.css']
})

export class AppComponent {
   title = 'Angular 4 Project!';
   //array of months.
   months = ["January", "February", "March", "April",
            "May", "June", "July", "August", "September",
            "October", "November", "December"];
   isavailable = false;
}
在這種情況下,我們將isavailable變數設定為 false。要列印else條件,我們將必須建立ng-template,如下所示:
<ng-template #condition1>Condition is invalid</ng-template>
完整的程式碼如下:
<!--The content below is only a placeholder and can be replaced.-->
<div style="text-align:center">
   <h1>
      Welcome to {{title}}.
   </h1>
</div>

<div> Months :
   <select>
      <option *ngFor="let i of months">{{i}}</option>
   </select>
</div>
<br/>

<div>
   <span *ngIf="isavailable; else condition1">Condition is valid.</span>
   <ng-template #condition1>Condition is invalid</ng-template>
</div>
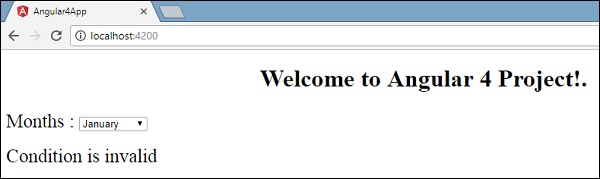
If 用於 else 條件,使用的變數是condition1。將其作為id分配給ng-template,當 available 變數設定為 false 時,將顯示文字Condition is invalid。
下面的螢幕截圖顯示了瀏覽器中的顯示。
現在讓我們使用if then else條件。
import { Component } from '@angular/core';

@Component({
   selector: 'app-root',
   templateUrl: './app.component.html',
   styleUrls: ['./app.component.css']
})

export class AppComponent {
   title = 'Angular 4 Project!';
   //array of months.
   months = ["January", "February", "March", "April",
            "May", "June", "July", "August", "September",
            "October", "November", "December"];
   isavailable = true;
}
現在,我們將isavailable變數設定為 true。在 html 中,條件按以下方式編寫:
<!--The content below is only a placeholder and can be replaced.-->
<div style="text-align:center">
   <h1>
   Welcome to {{title}}.
   </h1>
</div>

<div> Months :
   <select>
      <option *ngFor="let i of months">{{i}}</option>
   </select>
</div>
<br/>

<div>
   <span *ngIf="isavailable; then condition1 else condition2">Condition is valid.</span>
   <ng-template #condition1>Condition is valid</ng-template>
   <ng-template #condition2>Condition is invalid</ng-template>
</div>
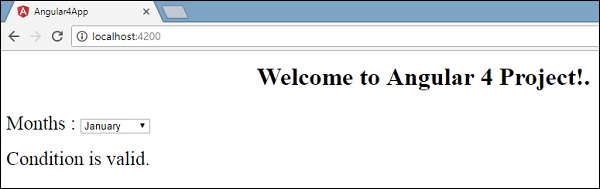
如果變數為 true,則為condition1,否則為condition2。現在,建立了兩個帶有 id #condition1 和 #condition2 的模板。
瀏覽器中的顯示如下: