- WebRTC 教程
- WebRTC - 首頁
- WebRTC - 概覽
- WebRTC - 架構
- WebRTC - 環境
- WebRTC - MediaStream APIs
- WebRTC - RTCPeerConnection APIs
- WebRTC - RTCDataChannel APIs
- WebRTC - 傳送訊息
- WebRTC - 信令
- WebRTC - 瀏覽器支援
- WebRTC - 移動裝置支援
- WebRTC - 影片演示
- WebRTC - 語音演示
- WebRTC - 文字演示
- WebRTC - 安全性
- WebRTC 資源
- WebRTC 快速指南
- WebRTC - 有用資源
- WebRTC - 討論
WebRTC 快速指南
WebRTC - 概覽
隨著WebRTC(Web 即時通訊)的出現,Web 對於即時通訊不再陌生。儘管它於 2011 年 5 月釋出,但仍在不斷發展,其標準也在不斷變化。一組協議由http://tools.ietf.org/wg/rtcweb/的IETF(網際網路工程任務組)中的WEB 瀏覽器即時通訊工作組標準化,而新的一組 API 則由http://www.w3.org/2011/04/webrtc/的W3C(全球資訊網聯盟)中的Web 即時通訊工作組標準化。WebRTC 的出現使得現代 Web 應用程式能夠輕鬆地將音訊和影片內容流式傳輸到數百萬人。
基本方案
WebRTC 允許您快速輕鬆地建立與其他 Web 瀏覽器的對等連線。要從頭開始構建這樣的應用程式,您需要大量的框架和庫來處理諸如資料丟失、連線斷開和 NAT 穿越等典型問題。使用 WebRTC,所有這些都內建在瀏覽器中,開箱即用。這項技術不需要任何外掛或第三方軟體。它是開源的,其原始碼可在http://www.webrtc.org/.免費獲取。
WebRTC API 包括媒體捕獲、音訊和影片的編碼和解碼、傳輸層和會話管理。
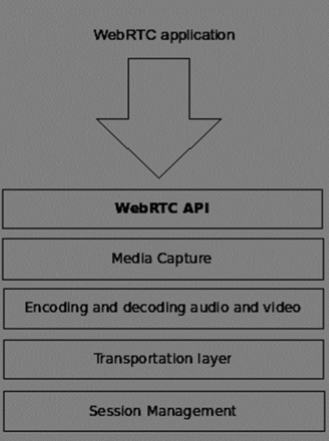
媒體捕獲
第一步是訪問使用者裝置的攝像頭和麥克風。我們檢測可用裝置的型別,獲取使用者訪問這些裝置的許可權並管理流。
音訊和影片的編碼和解碼
透過網際網路傳送音訊和影片資料流並非易事。這就是編碼和解碼發揮作用的地方。這是將影片幀和音訊波分解成更小的塊並壓縮它們的過程。此演算法稱為編解碼器。有大量的不同編解碼器,由不同的公司維護,並具有不同的業務目標。WebRTC 內部也有許多編解碼器,例如 H.264、iSAC、Opus 和 VP8。當兩個瀏覽器連線在一起時,它們會在兩個使用者之間選擇最優的支援的編解碼器。幸運的是,WebRTC 在後臺完成了大部分編碼工作。
傳輸層
傳輸層管理資料包的順序,處理資料包丟失和連線到其他使用者。同樣,WebRTC API 使我們能夠輕鬆訪問告訴我們連接出現問題的事件。
會話管理
會話管理負責管理、開啟和組織連線。這通常稱為信令。如果您將音訊和影片流傳輸到使用者,那麼傳輸輔助資料也是有意義的。這是透過RTCDataChannel API完成的。
來自 Google、Mozilla、Opera 等公司的工程師已經做了大量工作,將這種即時體驗帶到 Web 上。
瀏覽器相容性
WebRTC 標準是 Web 上發展最快的標準之一,因此並不意味著每個瀏覽器都同時支援所有相同的特性。要檢查您的瀏覽器是否支援 WebRTC,您可以訪問http://caniuse.com/#feat=rtcpeerconnection。在所有教程中,我建議您對所有示例使用 Chrome。
試用 WebRTC
讓我們立即開始使用 WebRTC。
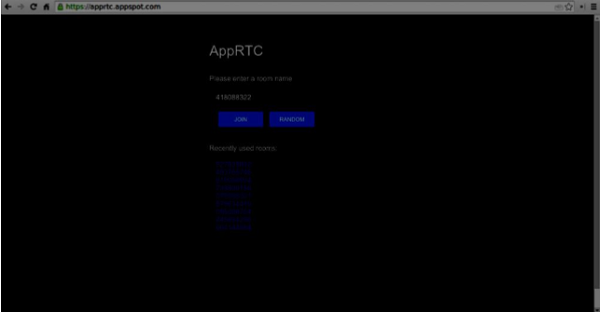
單擊“加入”按鈕。您應該會看到一個下拉通知。
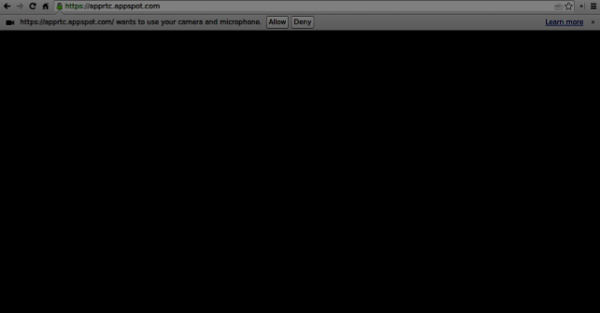
單擊“允許”按鈕開始將您的影片和音訊流式傳輸到網頁。您應該會看到您自己的影片流。
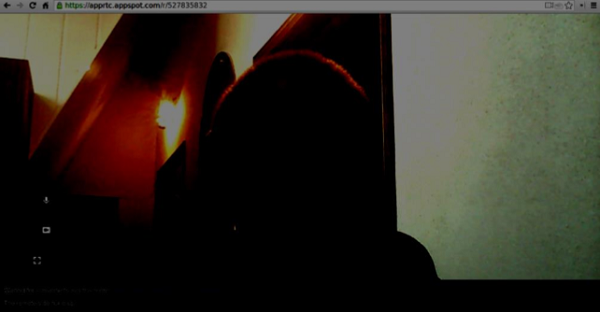
現在在新的瀏覽器選項卡中開啟您當前所在的 URL,然後單擊“加入”。您應該會看到兩個影片流 - 一個來自您的第一個客戶端,另一個來自第二個客戶端。
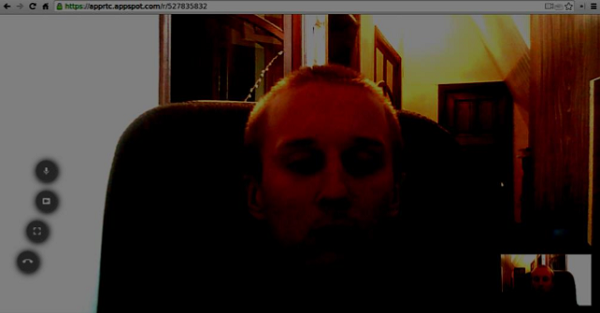
現在您應該理解為什麼 WebRTC 是一款強大的工具。
用例
即時 Web 為各種全新的應用程式打開了大門,包括基於文字的聊天、螢幕和檔案共享、遊戲、影片聊天等等。除了通訊之外,您還可以將 WebRTC 用於其他目的,例如 -
- 即時營銷
- 即時廣告
- 後臺通訊(CRM、ERP、SCM、FFM)
- 人力資源管理
- 社交網路
- 約會服務
- 線上醫療諮詢
- 金融服務
- 監控
- 多人遊戲
- 直播
- 電子學習
總結
現在您應該清楚地瞭解 WebRTC 這個術語。您還應該瞭解可以使用 WebRTC 構建哪種型別的應用程式,因為您已經在瀏覽器中嘗試過它。總而言之,WebRTC 是一項非常有用的技術。
WebRTC - 架構
WebRTC 的整體架構具有很高的複雜性。

在這裡您可以找到三個不同的層 -
Web 開發人員的 API - 此層包含 Web 開發人員所需的所有 API,包括 RTCPeerConnection、RTCDataChannel 和 MediaStrean 物件。
瀏覽器製造商的 API
可覆蓋的 API,瀏覽器製造商可以掛鉤。
傳輸元件允許跨各種型別的網路建立連線,而語音和影片引擎是負責將音訊和影片流從音效卡和攝像頭傳輸到網路的框架。對於 Web 開發人員來說,最重要的部分是 WebRTC API。
如果我們從客戶端-伺服器端檢視 WebRTC 架構,我們可以看到最常用的模型之一是受 SIP(會話發起協議)梯形啟發。
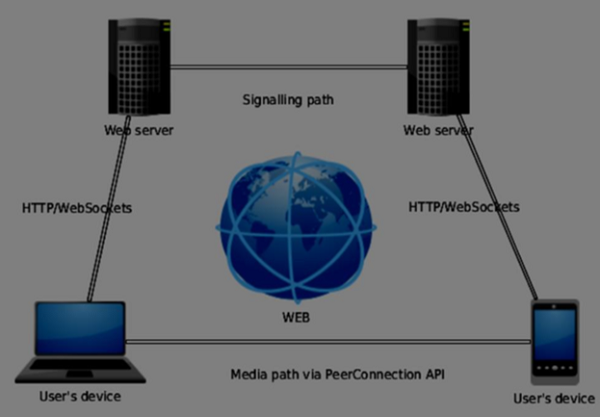
在此模型中,兩個裝置都從不同的伺服器執行 Web 應用程式。RTCPeerConnection 物件配置流,以便它們可以彼此對等連線。此信令是透過 HTTP 或 WebSockets 完成的。
但最常用的模型是三角形 -

在此模型中,兩個裝置都使用相同的 Web 應用程式。它在管理使用者連線時為 Web 開發人員提供了更大的靈活性。
WebRTC API
它包含一些主要的 JavaScript 物件 -
- RTCPeerConnection
- MediaStream
- RTCDataChannel
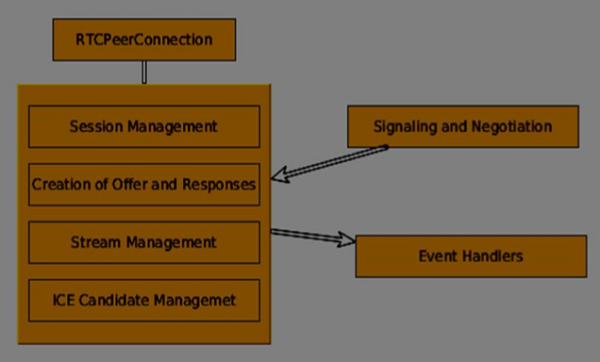
RTCPeerConnection 物件
此物件是 WebRTC API 的主要入口點。它幫助我們連線到對等節點、初始化連線並附加媒體流。它還管理與另一個使用者的 UDP 連線。
RTCPeerConnection 物件的主要任務是設定和建立對等連線。我們可以輕鬆地掛鉤連線的關鍵點,因為此物件在出現時會觸發一組事件。這些事件使您可以訪問我們連線的配置 -
RTCPeerConnection 是一個簡單的 JavaScript 物件,您可以透過以下方式建立它 -
[code]
var conn = new RTCPeerConnection(conf);

conn.onaddstream = function(stream) {
   // use stream here
};

[/code]
RTCPeerConnection 物件接受一個conf引數,我們將在後面的教程中介紹。當遠端使用者向其對等連線新增影片或音訊流時,會觸發onaddstream事件。
MediaStream API
現代瀏覽器使開發人員能夠訪問getUserMedia API,也稱為MediaStream API。它有三個關鍵功能點 -
它使開發人員能夠訪問表示影片和音訊流的stream物件
它管理在使用者裝置上有多個攝像頭或麥克風的情況下輸入使用者裝置的選擇
它提供了一個安全級別,每次使用者想要獲取流時都會詢問使用者
要測試此 API,讓我們建立一個簡單的 HTML 頁面。它將顯示一個單獨的<video>元素,請求使用者使用攝像頭的許可權,並在頁面上顯示來自攝像頭的即時流。建立一個index.html檔案並新增 -
[code]
<html>

   <head>
      <meta charset = "utf-8">
   </head>

   <body>
      <video autoplay></video>
      <script src = "client.js"></script>
   </body>

</html>
[/code]
然後新增一個client.js檔案 -
[code]
//checks if the browser supports WebRTC

function hasUserMedia() {
   navigator.getUserMedia = navigator.getUserMedia || navigator.webkitGetUserMedia
      || navigator.mozGetUserMedia || navigator.msGetUserMedia;
   return !!navigator.getUserMedia;
}

if (hasUserMedia()) {
   navigator.getUserMedia = navigator.getUserMedia || navigator.webkitGetUserMedia
      || navigator.mozGetUserMedia || navigator.msGetUserMedia;

   //get both video and audio streams from user's camera
   navigator.getUserMedia({ video: true, audio: true }, function (stream) {
      var video = document.querySelector('video');

      //insert stream into the video tag
      video.src = window.URL.createObjectURL(stream);
   }, function (err) {});

}else {
   alert("Error. WebRTC is not supported!");
}
[/code]
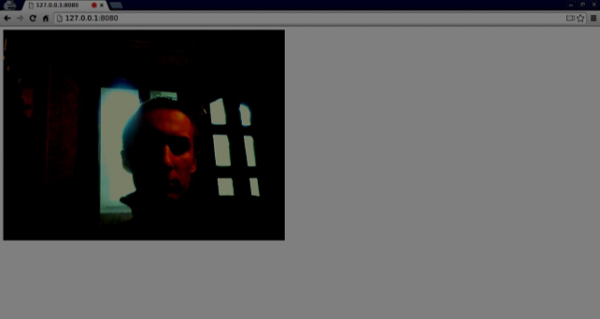
現在開啟index.html,您應該會看到顯示您面部的影片流。
但請注意,因為 WebRTC 僅在伺服器端有效。如果您只是用瀏覽器開啟此頁面,它將無法工作。您需要將這些檔案託管在 Apache 或 Node 伺服器上,或者您喜歡的任何伺服器上。
RTCDataChannel 物件
除了在對等節點之間傳送媒體流外,您還可以使用DataChannel API 傳送其他資料。此 API 與 MediaStream API 一樣簡單。主要工作是從現有的 RTCPeerConnection 物件建立通道 -
[code]
var peerConn = new RTCPeerConnection();

//establishing peer connection
//...
//end of establishing peer connection
var dataChannel = peerConnection.createDataChannel("myChannel", dataChannelOptions);

// here we can start sending direct messages to another peer
[/code]
這就是您需要做的全部,只需兩行程式碼。其他所有操作都在瀏覽器的內部層完成。您可以在任何對等連線上建立通道,直到RTCPeerConnectionobject關閉。
總結
現在您應該對 WebRTC 架構有了牢固的掌握。我們還介紹了 MediaStream、RTCPeerConnection 和 RTCDataChannel API。WebRTC API 是一個不斷變化的目標,因此請始終關注最新的規範。
WebRTC - 環境
在我們開始構建 WebRTC 應用程式之前,我們應該設定我們的編碼環境。首先,您應該擁有一個文字編輯器或 IDE,可以在其中編輯 HTML 和 Javascript。由於您正在閱讀本教程,因此您可能已經選擇了首選的編輯器。對我來說,我使用的是 WebStorm IDE。您可以在https://www.jetbrains.com/webstorm/下載其試用版。我還在使用 Linux Mint 作為我的首選作業系統。
常見 WebRTC 應用程式的另一個要求是擁有一個伺服器來託管 HTML 和 Javascript 檔案。程式碼不會僅僅透過雙擊檔案就能工作,因為除非檔案由實際伺服器提供服務,否則瀏覽器不允許連線到攝像頭和麥克風。這顯然是為了安全問題而設計的。
有很多不同的 Web 伺服器,但在本教程中,我們將使用帶有 node-static 的 Node.js -
訪問https://nodejs.com.tw/en/並下載最新的 Node.js 版本。
將其解壓縮到 /usr/local/nodejs 目錄。
開啟 /home/YOUR_USERNAME/.profile 檔案,並在末尾新增以下行 - export PATH=$PATH:/usr/local/nodejs/bin
然後您可以重新啟動計算機或執行 source /home/YOUR_USERNAME/.profile
現在node命令應該可以透過命令列使用。npm命令也可以使用。NMP 是 Node.js 的包管理器。您可以在https://www.npmjs.com/瞭解更多資訊。
開啟終端並執行sudo npm install -g node-static。這將為 Node.js 安裝靜態 Web 伺服器。
現在導航到包含 HTML 檔案的任何目錄,並在目錄內執行static命令以啟動您的 Web 伺服器。
您可以導航到https://:8080以檢視您的檔案。
還有另一種安裝 nodejs 的方法。只需在終端視窗中執行sudo apt-get install nodejs即可。
要測試您的 Node.js 安裝,請開啟您的終端並執行node命令。鍵入一些命令以檢查其工作方式 -
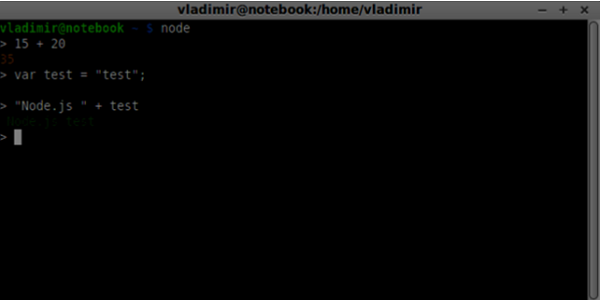
Node.js 執行 Javascript 檔案以及在終端中鍵入的命令。建立一個index.js檔案,內容如下 -
console.log(“Testing Node.js”);
然後執行node index命令。您將看到以下內容 -
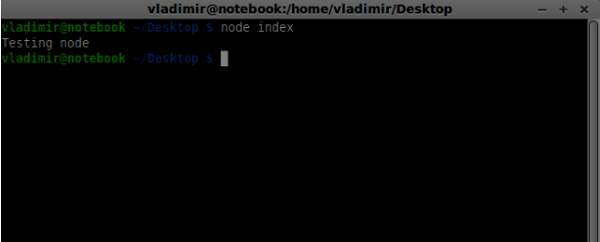
在構建我們的信令伺服器時,我們將使用 Node.js 的 WebSockets 庫。要在終端中安裝它,請執行npm install ws。
為了測試我們的信令伺服器,我們將使用 wscat 實用程式。要安裝它,請在您的終端視窗中執行npm install -g wscat。
| 序號 | 協議及描述 |
|---|---|
| 1 | WebRTC 協議
WebRTC 應用程式使用 UDP(使用者資料報協議)作為傳輸協議。如今,大多數 Web 應用程式都是使用 TCP(傳輸控制協議)構建的。 |
| 2 | 會話描述協議
SDP 是 WebRTC 的重要組成部分。它是一種旨在描述媒體通訊會話的協議。 |
| 3 | 查詢路由
為了連線到另一個使用者,您應該找到自己網路和另一個使用者網路周圍的清晰路徑。但是,您正在使用的網路可能存在多個級別的訪問控制,以避免安全問題。 |
| 4 | 流控制傳輸協議
透過對等連線,我們可以快速傳送影片和音訊資料。在使用 RTCDataChannel 物件時,SCTP 協議如今用於在當前設定的對等連線之上傳送 Blob 資料。 |
總結
在本章中,我們介紹了幾種支援對等連線的技術,例如 UDP、TCP、STUN、TURN、ICE 和 SCTP。您現在應該對 SDP 的工作原理及其用例有一個初步的瞭解。
WebRTC - MediaStream APIs
MediaStream API 旨在輕鬆訪問本地攝像頭和麥克風的媒體流。getUserMedia() 方法是訪問本地輸入裝置的主要方式。
該 API 有幾個關鍵點:
即時媒體流以影片或音訊形式的stream物件表示。
它透過使用者許可權提供安全級別,在 Web 應用程式開始獲取流之前詢問使用者。
輸入裝置的選擇由 MediaStream API 處理(例如,當有兩個攝像頭或麥克風連線到裝置時)。
每個 MediaStream 物件包含多個 MediaStreamTrack 物件。它們代表來自不同輸入裝置的影片和音訊。
每個 MediaStreamTrack 物件可能包含多個通道(左右音訊通道)。這些是由 MediaStream API 定義的最小部分。
有兩種方法可以輸出 MediaStream 物件。首先,我們可以將輸出呈現到影片或音訊元素中。其次,我們可以將輸出傳送到 RTCPeerConnection 物件,然後將其傳送到遠端對等方。
使用 MediaStream API
讓我們建立一個簡單的 WebRTC 應用程式。它將在螢幕上顯示一個影片元素,詢問使用者是否允許使用攝像頭,並在瀏覽器中顯示即時影片流。建立一個index.html檔案:
<!DOCTYPE html>
<html lang = "en">

   <head>
      <meta charset = "utf-8" />
   </head>

   <body>
      <video autoplay></video>
      <script src = "client.js"></script>
   </body>

</html>
然後建立client.js 檔案並新增以下內容:
function hasUserMedia() {
   //check if the browser supports the WebRTC
   return !!(navigator.getUserMedia || navigator.webkitGetUserMedia ||
      navigator.mozGetUserMedia);
}

if (hasUserMedia()) {
   navigator.getUserMedia = navigator.getUserMedia || navigator.webkitGetUserMedia
      || navigator.mozGetUserMedia;

   //enabling video and audio channels
   navigator.getUserMedia({ video: true, audio: true }, function (stream) {
      var video = document.querySelector('video');

      //inserting our stream to the video tag
      video.src = window.URL.createObjectURL(stream);
   }, function (err) {});
} else {
   alert("WebRTC is not supported");
}
在這裡,我們建立了hasUserMedia()函式,該函式檢查 WebRTC 是否受支援。然後我們訪問getUserMedia函式,其中第二個引數是一個回撥函式,它接受來自使用者裝置的流。然後我們使用window.URL.createObjectURL將我們的流載入到video元素中,該函式建立表示引數中給定物件的 URL。
現在重新整理您的頁面,點選允許,您應該會在螢幕上看到您的臉。
請記住,使用 Web 伺服器執行所有指令碼。我們已經在 WebRTC 環境教程中安裝了一個。
MediaStream API
屬性
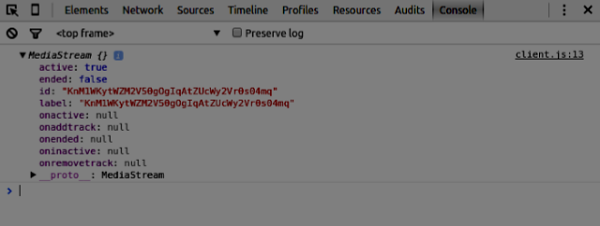
MediaStream.active(只讀) - 如果 MediaStream 處於活動狀態,則返回 true,否則返回 false。
MediaStream.ended(只讀,已棄用) - 如果已在物件上觸發 ended 事件,則返回 true,這意味著流已完全讀取,或者如果尚未到達流的末尾,則返回 false。
MediaStream.id(只讀) - 物件的唯一識別符號。
MediaStream.label(只讀,已棄用) - 由使用者代理分配的唯一識別符號。
您可以在我的瀏覽器中看到上述屬性的外觀:
事件處理程式
MediaStream.onactive - 當 MediaStream 物件變為活動狀態時觸發的active事件的處理程式。
MediaStream.onaddtrack - 當新增新的MediaStreamTrack物件時觸發的addtrack事件的處理程式。
MediaStream.onended(已棄用) - 當流終止時觸發的ended事件的處理程式。
MediaStream.oninactive - 當MediaStream物件變為非活動狀態時觸發的inactive事件的處理程式。
MediaStream.onremovetrack - 當從MediaStreamTrack物件中刪除MediaStreamTrack物件時觸發的removetrack事件的處理程式。
方法
MediaStream.addTrack() - 將作為引數給出的MediaStreamTrack物件新增到 MediaStream。如果該軌道已新增,則不會發生任何事情。
MediaStream.clone() - 返回具有新 ID 的 MediaStream 物件的克隆。
MediaStream.getAudioTracks() - 返回MediaStream物件中的音訊MediaStreamTrack物件的列表。
MediaStream.getTrackById() - 透過 ID 返回軌道。如果引數為空或未找到 ID,則返回 null。如果多個軌道具有相同的 ID,則返回第一個軌道。
MediaStream.getTracks() - 返回MediaStream物件中的所有MediaStreamTrack物件的列表。
MediaStream.getVideoTracks() - 返回MediaStream物件中的影片MediaStreamTrack物件的列表。
MediaStream.removeTrack() - 從 MediaStream 中刪除作為引數給出的MediaStreamTrack物件。如果該軌道已刪除,則不會發生任何事情。
要測試上述 API,請以下列方式更改index.html:
<!DOCTYPE html>
<html lang = "en">

   <head>
      <meta charset = "utf-8" />
   </head>

   <body>
      <video autoplay></video>
      <div><button id = "btnGetAudioTracks">getAudioTracks()
         </button></div>
      <div><button id = "btnGetTrackById">getTrackById()
         </button></div>
      <div><button id = "btnGetTracks">getTracks()</button></div>
      <div><button id = "btnGetVideoTracks">getVideoTracks()
         </button></div>
      <div><button id = "btnRemoveAudioTrack">removeTrack() - audio
         </button></div>
      <div><button id = "btnRemoveVideoTrack">removeTrack() - video
         </button></div>
      <script src = "client.js"></script>
   </body>

</html>
我們添加了一些按鈕來試用幾個 MediaStream API。然後我們應該為我們新建立的按鈕新增事件處理程式。以這種方式修改client.js檔案:
var stream;

function hasUserMedia() {
   //check if the browser supports the WebRTC
   return !!(navigator.getUserMedia || navigator.webkitGetUserMedia ||
      navigator.mozGetUserMedia);
}

if (hasUserMedia()) {
   navigator.getUserMedia = navigator.getUserMedia || navigator.webkitGetUserMedia
      || navigator.mozGetUserMedia;

   //enabling video and audio channels
   navigator.getUserMedia({ video: true, audio: true }, function (s) {
      stream = s;
      var video = document.querySelector('video');

      //inserting our stream to the video tag
      video.src = window.URL.createObjectURL(stream);
   }, function (err) {});
} else {
   alert("WebRTC is not supported");
}

btnGetAudioTracks.addEventListener("click", function(){
   console.log("getAudioTracks");
   console.log(stream.getAudioTracks());
});

btnGetTrackById.addEventListener("click", function(){
   console.log("getTrackById");
   console.log(stream.getTrackById(stream.getAudioTracks()[0].id));
});

btnGetTracks.addEventListener("click", function(){
   console.log("getTracks()");
   console.log(stream.getTracks());
});

btnGetVideoTracks.addEventListener("click", function(){
   console.log("getVideoTracks()");
   console.log(stream.getVideoTracks());
});

btnRemoveAudioTrack.addEventListener("click", function(){
   console.log("removeAudioTrack()");
   stream.removeTrack(stream.getAudioTracks()[0]);
});

btnRemoveVideoTrack.addEventListener("click", function(){
   console.log("removeVideoTrack()");
   stream.removeTrack(stream.getVideoTracks()[0]);
});
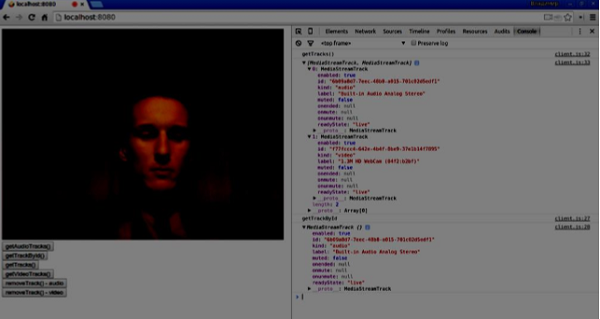
現在重新整理您的頁面。點選getAudioTracks()按鈕,然後點選removeTrack() - audio按鈕。音訊軌道現在應該被刪除。然後對影片軌道執行相同的操作。

如果您點選getTracks()按鈕,您應該會看到所有MediaStreamTracks(所有連線的影片和音訊輸入)。然後點選getTrackById()以獲取音訊 MediaStreamTrack。
總結
在本章中,我們使用 MediaStream API 建立了一個簡單的 WebRTC 應用程式。現在您應該清楚地瞭解使 WebRTC 工作的各種 MediaStream API。
WebRTC - RTCPeerConnection APIs
RTCPeerConnection API 是每個瀏覽器之間對等連線的核心。要建立 RTCPeerConnection 物件,只需編寫
var pc = RTCPeerConnection(config);
其中config引數至少包含一個鍵 iceServers。它是一個 URL 物件陣列,包含有關 STUN 和 TURN 伺服器的資訊,在查詢 ICE 候選者期間使用。您可以在code.google.com找到可用公共 STUN 伺服器的列表。
根據您是呼叫方還是被呼叫方,RTCPeerConnection 物件在連線的每一側的使用方式略有不同。
這是一個使用者流程示例:
註冊onicecandidate處理程式。它在接收到 ICE 候選者時將其傳送到另一個對等方。
註冊onaddstream處理程式。它在從遠端對等方接收到影片流後處理影片流的顯示。
註冊message處理程式。您的信令伺服器也應該有一個處理程式來處理從另一個對等方接收到的訊息。如果訊息包含RTCSessionDescription物件,則應使用setRemoteDescription()方法將其新增到RTCPeerConnection物件中。如果訊息包含RTCIceCandidate物件,則應使用addIceCandidate()方法將其新增到RTCPeerConnection物件中。
利用getUserMedia()設定您的本地媒體流,並使用addStream()方法將其新增到RTCPeerConnection物件中。
啟動 offer/answer 協商過程。這是呼叫方的流程與被呼叫方的流程唯一不同的步驟。呼叫方使用createOffer()方法啟動協商,並註冊一個接收RTCSessionDescription物件的回撥函式。然後,此回撥函式應使用setLocalDescription()將此RTCSessionDescription物件新增到您的RTCPeerConnection物件中。最後,呼叫方應使用信令伺服器將此RTCSessionDescription傳送到遠端對等方。另一方面,被呼叫方註冊相同的回撥函式,但在createAnswer()方法中。請注意,只有在從呼叫方接收到 offer 後,被呼叫方的流程才會啟動。
RTCPeerConnection API
屬性
RTCPeerConnection.iceConnectionState(只讀) - 返回一個 RTCIceConnectionState 列舉,該列舉描述連線的狀態。當此值更改時會觸發 iceconnectionstatechange 事件。可能的值:
new - ICE 代理正在等待遠端候選者或收集地址。
checking - ICE 代理有遠端候選者,但尚未找到連線。
connected - ICE 代理已找到可用的連線,但仍在檢查更多遠端候選者以獲得更好的連線。
completed - ICE 代理已找到可用的連線並停止測試遠端候選者。
failed - ICE 代理已檢查所有遠端候選者,但至少沒有一個元件找到匹配項。
disconnected - 至少有一個元件不再活動。
closed - ICE 代理已關閉。
RTCPeerConnection.iceGatheringState(只讀) - 返回一個 RTCIceGatheringState 列舉,該列舉描述連線的 ICE 收集狀態:
new - 物件剛剛建立。
gathering - ICE 代理正在收集候選者。
complete ICE 代理已完成收集。
RTCPeerConnection.localDescription(只讀) - 返回描述本地會話的 RTCSessionDescription。如果尚未設定,它可能為 null。
RTCPeerConnection.peerIdentity(只讀) - 返回一個 RTCIdentityAssertion。它由一個 idp(域名)和一個表示遠端對等方身份的名稱組成。
RTCPeerConnection.remoteDescription(只讀) - 返回描述遠端會話的 RTCSessionDescription。如果尚未設定,它可能為 null。
RTCPeerConnection.signalingState(只讀) - 返回一個 RTCSignalingState 列舉,該列舉描述本地連線的信令狀態。此狀態描述 SDP offer。當此值更改時會觸發 signalingstatechange 事件。可能的值:
stable - 初始狀態。沒有 SDP offer/answer 交換正在進行。
have-local-offer - 連線的本地端已在本地應用了 SDP offer。
have-remote-offer - 連線的遠端端已在本地應用了 SDP offer。
have-local-pranswer - 已應用遠端 SDP offer,並且已在本地應用 SDP pranswer。
have-remote-pranswer − 本地 SDP 已應用,並且遠端應用了 SDP pranswer。
closed − 連線已關閉。
事件處理程式
| 序號 | 事件處理程式 & 描述 |
|---|---|
| 1 | RTCPeerConnection.onaddstream 當觸發 addstream 事件時呼叫此處理程式。當遠端對等端向此連線新增 MediaStream 時傳送此事件。 |
| 2 | RTCPeerConnection.ondatachannel 當觸發 datachannel 事件時呼叫此處理程式。當向此連線新增 RTCDataChannel 時傳送此事件。 |
| 3 | RTCPeerConnection.onicecandidate 當觸發 icecandidate 事件時呼叫此處理程式。當向指令碼新增 RTCIceCandidate 物件時傳送此事件。 |
| 4 | RTCPeerConnection.oniceconnectionstatechange 當觸發 iceconnectionstatechange 事件時呼叫此處理程式。當 iceConnectionState 的值發生變化時傳送此事件。 |
| 5 | RTCPeerConnection.onidentityresult 當觸發 identityresult 事件時呼叫此處理程式。在建立 offer 或 answer 的過程中(透過 getIdentityAssertion()),當生成身份斷言時傳送此事件。 |
| 6 | RTCPeerConnection.onidpassertionerror 當觸發 idpassertionerror 事件時呼叫此處理程式。當 IdP(身份提供者)在生成身份斷言時發現錯誤時傳送此事件。 |
| 7 | RTCPeerConnection.onidpvalidation 當觸發 idpvalidationerror 事件時呼叫此處理程式。當 IdP(身份提供者)在驗證身份斷言時發現錯誤時傳送此事件。 |
| 8 | RTCPeerConnection.onnegotiationneeded 當觸發 negotiationneeded 事件時呼叫此處理程式。瀏覽器傳送此事件以通知將來某個時間點需要協商。 |
| 9 | RTCPeerConnection.onpeeridentity 當觸發 peeridentity 事件時呼叫此處理程式。當在此連線上設定並驗證了對等身份時傳送此事件。 |
| 10 | RTCPeerConnection.onremovestream 當觸發 signalingstatechange 事件時呼叫此處理程式。當 signalingState 的值發生變化時傳送此事件。 |
| 11 | RTCPeerConnection.onsignalingstatechange 當觸發 removestream 事件時呼叫此處理程式。當從此連線中刪除 MediaStream 時傳送此事件。 |
方法
| 序號 | 方法 & 描述 |
|---|---|
| 1 | RTCPeerConnection() 返回一個新的 RTCPeerConnection 物件。 |
| 2 | RTCPeerConnection.createOffer() 建立 offer(請求)以查詢遠端對等端。此方法的前兩個引數是成功和錯誤回撥。可選的第三個引數是選項,例如啟用音訊或影片流。 |
| 3 | RTCPeerConnection.createAnswer() 在 offer/answer 協商過程中,對遠端對等端收到的 offer 建立 answer。此方法的前兩個引數是成功和錯誤回撥。可選的第三個引數是建立 answer 的選項。 |
| 4 | RTCPeerConnection.setLocalDescription() 更改本地連線描述。描述定義了連線的屬性。連線必須能夠支援舊的和新的描述。該方法接受三個引數,RTCSessionDescription 物件,如果描述更改成功則回撥,如果描述更改失敗則回撥。 |
| 5 | RTCPeerConnection.setRemoteDescription() 更改遠端連線描述。描述定義了連線的屬性。連線必須能夠支援舊的和新的描述。該方法接受三個引數,RTCSessionDescription 物件,如果描述更改成功則回撥,如果描述更改失敗則回撥。 |
| 6 | RTCPeerConnection.updateIce() 更新 ICE 代理程序,以 ping 遠端候選者並收集本地候選者。 |
| 7 | RTCPeerConnection.addIceCandidate() 向 ICE 代理提供遠端候選者。 |
| 8 | RTCPeerConnection.getConfiguration() 返回一個 RTCConfiguration 物件。它表示 RTCPeerConnection 物件的配置。 |
| 9 | RTCPeerConnection.getLocalStreams() 返回本地 MediaStream 連線的陣列。 |
| 10 | RTCPeerConnection.getRemoteStreams() 返回遠端 MediaStream 連線的陣列。 |
| 11 | RTCPeerConnection.getStreamById() 根據給定的 ID 返回本地或遠端 MediaStream。 |
| 12 | RTCPeerConnection.addStream() 新增 MediaStream 作為影片或音訊的本地源。 |
| 13 | RTCPeerConnection.removeStream() 刪除 MediaStream 作為影片或音訊的本地源。 |
| 14 | RTCPeerConnection.close() 關閉連線。 |
| 15 | RTCPeerConnection.createDataChannel() 建立一個新的 RTCDataChannel。 |
| 16 | RTCPeerConnection.createDTMFSender() 建立一個新的 RTCDTMFSender,與特定的 MediaStreamTrack 關聯。允許透過連線傳送 DTMF(雙音多頻)電話訊號。 |
| 17 | RTCPeerConnection.getStats() 建立一個新的 RTCStatsReport,其中包含有關連線的統計資訊。 |
| 18 | RTCPeerConnection.setIdentityProvider() 設定 IdP。接受三個引數 - 名稱、用於通訊的協議和可選的使用者名稱。 |
| 19 | RTCPeerConnection.getIdentityAssertion() 收集身份斷言。應用程式不需要處理此方法。因此,您可能僅在預期需要時才顯式呼叫它。 |
建立連線
現在讓我們建立一個示例應用程式。首先,透過“node server”執行我們在“信令伺服器”教程中建立的信令伺服器。
頁面上將有兩個文字輸入框,一個用於登入,一個用於我們想要連線到的使用者名稱。建立一個 index.html 檔案並新增以下程式碼 -
<html lang = "en">
   <head>
      <meta charset = "utf-8" />
   </head>

   <body>

      <div>
         <input type = "text" id = "loginInput" />
         <button id = "loginBtn">Login</button>
      </div>

      <div>
         <input type = "text" id = "otherUsernameInput" />
         <button id = "connectToOtherUsernameBtn">Establish connection</button>
      </div>

      <script src = "client2.js"></script>

   </body>

</html>
您可以看到我們添加了登入的文字輸入框、登入按鈕、其他對等使用者名稱文字輸入框以及連線到他的按鈕。現在建立一個 client.js 檔案並新增以下程式碼 -
var connection = new WebSocket('ws://:9090');
var name = "";

var loginInput = document.querySelector('#loginInput');
var loginBtn = document.querySelector('#loginBtn');
var otherUsernameInput = document.querySelector('#otherUsernameInput');
var connectToOtherUsernameBtn = document.querySelector('#connectToOtherUsernameBtn');
var connectedUser, myConnection;

//when a user clicks the login button
loginBtn.addEventListener("click", function(event){
   name = loginInput.value;

   if(name.length > 0){
      send({
         type: "login",
         name: name
      });
   }

});

//handle messages from the server
connection.onmessage = function (message) {
   console.log("Got message", message.data);
   var data = JSON.parse(message.data);

   switch(data.type) {
      case "login":
         onLogin(data.success);
         break;
      case "offer":
         onOffer(data.offer, data.name);
         break;
      case "answer":
         onAnswer(data.answer);
         break;
      case "candidate":
         onCandidate(data.candidate);
         break;
      default:
         break;
   }
};

//when a user logs in
function onLogin(success) {

   if (success === false) {
      alert("oops...try a different username");
   } else {
      //creating our RTCPeerConnection object

      var configuration = {
         "iceServers": [{ "url": "stun:stun.1.google.com:19302" }]
      };

      myConnection = new webkitRTCPeerConnection(configuration);
      console.log("RTCPeerConnection object was created");
      console.log(myConnection);

      //setup ice handling
      //when the browser finds an ice candidate we send it to another peer
      myConnection.onicecandidate = function (event) {

         if (event.candidate) {
            send({
               type: "candidate",
               candidate: event.candidate
            });
         }
      };
   }
};

connection.onopen = function () {
   console.log("Connected");
};

connection.onerror = function (err) {
   console.log("Got error", err);
};

// Alias for sending messages in JSON format
function send(message) {

   if (connectedUser) {
      message.name = connectedUser;
   }

   connection.send(JSON.stringify(message));
};
您可以看到我們建立了與信令伺服器的套接字連線。當用戶點選登入按鈕時,應用程式會將其使用者名稱傳送到伺服器。如果登入成功,應用程式將建立 RTCPeerConnection 物件並設定 onicecandidate 處理程式,該處理程式將所有找到的 icecandidate 傳送到另一個對等端。現在開啟頁面並嘗試登入。您應該看到以下控制檯輸出 -

下一步是向另一個對等端建立 offer。將以下程式碼新增到您的 client.js 檔案中 -
//setup a peer connection with another user
connectToOtherUsernameBtn.addEventListener("click", function () {

   var otherUsername = otherUsernameInput.value;
   connectedUser = otherUsername;

   if (otherUsername.length > 0) {
      //make an offer
      myConnection.createOffer(function (offer) {
         console.log();
         send({
            type: "offer",
            offer: offer
         });

         myConnection.setLocalDescription(offer);
      }, function (error) {
         alert("An error has occurred.");
      });
   }
});

//when somebody wants to call us
function onOffer(offer, name) {
   connectedUser = name;
   myConnection.setRemoteDescription(new RTCSessionDescription(offer));

   myConnection.createAnswer(function (answer) {
      myConnection.setLocalDescription(answer);
      send({
         type: "answer",
         answer: answer
      });

   }, function (error) {
      alert("oops...error");
   });
}

//when another user answers to our offer
function onAnswer(answer) {
   myConnection.setRemoteDescription(new RTCSessionDescription(answer));
}

//when we got ice candidate from another user
function onCandidate(candidate) {
   myConnection.addIceCandidate(new RTCIceCandidate(candidate));
}
您可以看到,當用戶點選“建立連線”按鈕時,應用程式會向另一個對等端發出 SDP offer。我們還設定了 onAnswer 和 onCandidate 處理程式。重新載入您的頁面,在兩個選項卡中開啟它,使用兩個使用者登入並嘗試在它們之間建立連線。您應該看到以下控制檯輸出 -

現在對等連線已建立。在接下來的教程中,我們將新增影片和音訊流以及文字聊天支援。
WebRTC - RTCDataChannel APIs
WebRTC 不僅擅長傳輸音訊和影片流,還可以傳輸我們可能擁有的任何任意資料。這就是 RTCDataChannel 物件發揮作用的地方。
RTCDataChannel API
屬性
RTCDataChannel.label (只讀) − 返回包含資料通道名稱的字串。
RTCDataChannel.ordered (只讀) − 如果保證訊息的傳遞順序則返回 true,否則返回 false。
RTCDataChannel.protocol (只讀) − 返回包含此通道使用的子協議名稱的字串。
RTCDataChannel.id (只讀) − 返回通道的唯一 ID,該 ID 在建立 RTCDataChannel 物件時設定。
RTCDataChannel.readyState (只讀) − 返回表示連線狀態的 RTCDataChannelState 列舉。可能的值 -
connecting − 表示連線尚未啟用。這是初始狀態。
open − 表示連線正在執行。
closing − 表示連線正在關閉過程中。快取的訊息正在傳送或接收過程中,但沒有新建立的任務正在接受。
closed − 表示連線無法建立或已被關閉。
RTCDataChannel.bufferedAmount (只讀) − 返回已排隊等待發送的位元組數。這是尚未透過 RTCDataChannel.send() 傳送的資料量。
RTCDataChannel.bufferedAmountLowThreshold − 返回 RTCDataChannel.bufferedAmount 被視為低的位元組數。當 RTCDataChannel.bufferedAmount 減少到低於此閾值時,將觸發 bufferedamountlow 事件。
RTCDataChannel.binaryType − 返回連線傳輸的二進位制資料的型別。可以是“blob”或“arraybuffer”。
RTCDataChannel.maxPacketLifeType (只讀) − 返回一個無符號短整型,指示訊息以不可靠模式進行時視窗的長度(以毫秒為單位)。
RTCDataChannel.maxRetransmits (只讀) − 返回一個無符號短整型,指示如果資料未交付,通道將重新傳輸資料的最大次數。
RTCDataChannel.negotiated (只讀) − 返回一個布林值,指示通道是由使用者代理還是由應用程式協商的。
RTCDataChannel.reliable (只讀) − 返回一個布林值,指示連線是否可以以不可靠模式傳送訊息。
RTCDataChannel.stream (只讀) − RTCDataChannel.id 的同義詞
事件處理程式
RTCDataChannel.onopen − 當觸發 open 事件時呼叫此事件處理程式。當資料連線已建立時傳送此事件。
RTCDataChannel.onmessage − 當觸發 message 事件時呼叫此事件處理程式。當資料通道上有訊息可用時傳送此事件。
RTCDataChannel.onbufferedamountlow − 當觸發 bufferedamoutlow 事件時呼叫此事件處理程式。當 RTCDataChannel.bufferedAmount 減少到低於 RTCDataChannel.bufferedAmountLowThreshold 屬性時傳送此事件。
RTCDataChannel.onclose − 當觸發 close 事件時呼叫此事件處理程式。當資料連線已關閉時傳送此事件。
RTCDataChannel.onerror − 當觸發 error 事件時呼叫此事件處理程式。當遇到錯誤時傳送此事件。
方法
RTCDataChannel.close() − 關閉資料通道。
RTCDataChannel.send() − 透過通道傳送引數中的資料。資料可以是 blob、字串、ArrayBuffer 或 ArrayBufferView。
WebRTC - 傳送訊息
現在讓我們建立一個簡單的例子。首先,透過“node server”執行我們在“信令伺服器”教程中建立的信令伺服器。
頁面上將有三個文字輸入框,一個用於登入,一個用於使用者名稱,還有一個用於我們想要傳送給另一個對等節點的訊息。建立一個index.html檔案並新增以下程式碼 -
<html lang = "en">
   <head>
      <meta charset = "utf-8" />
   </head>

   <body>
      <div>
         <input type = "text" id = "loginInput" />
         <button id = "loginBtn">Login</button>
      </div>

      <div>
         <input type = "text" id = "otherUsernameInput" />
         <button id = "connectToOtherUsernameBtn">Establish connection</button>
      </div>

      <div>
         <input type = "text" id = "msgInput" />
         <button id = "sendMsgBtn">Send text message</button>
      </div>

      <script src = "client.js"></script>
   </body>

</html>
我們還添加了三個按鈕,分別用於登入、建立連線和傳送訊息。現在建立一個client.js檔案並新增以下程式碼 -
var connection = new WebSocket('ws://:9090');
var name = "";

var loginInput = document.querySelector('#loginInput');
var loginBtn = document.querySelector('#loginBtn');

var otherUsernameInput = document.querySelector('#otherUsernameInput');
var connectToOtherUsernameBtn = document.querySelector('#connectToOtherUsernameBtn');
var msgInput = document.querySelector('#msgInput');
var sendMsgBtn = document.querySelector('#sendMsgBtn');
var connectedUser, myConnection, dataChannel;

//when a user clicks the login button
loginBtn.addEventListener("click", function(event) {
   name = loginInput.value;

   if(name.length > 0) {
      send({
         type: "login",
         name: name
      });
   }
});

//handle messages from the server
connection.onmessage = function (message) {
   console.log("Got message", message.data);
   var data = JSON.parse(message.data);

   switch(data.type) {
      case "login":
         onLogin(data.success);
         break;
      case "offer":
         onOffer(data.offer, data.name);
         break;
      case "answer":
         onAnswer(data.answer);
         break;
      case "candidate":
         onCandidate(data.candidate);
         break;
      default:
         break;
   }
};

//when a user logs in
function onLogin(success) {

   if (success === false) {
      alert("oops...try a different username");
   } else {
      //creating our RTCPeerConnection object
      var configuration = {
         "iceServers": [{ "url": "stun:stun.1.google.com:19302" }]
      };

      myConnection = new webkitRTCPeerConnection(configuration, {
         optional: [{RtpDataChannels: true}]
      });

      console.log("RTCPeerConnection object was created");
      console.log(myConnection);

      //setup ice handling
      //when the browser finds an ice candidate we send it to another peer
      myConnection.onicecandidate = function (event) {

         if (event.candidate) {
            send({
               type: "candidate",
               candidate: event.candidate
            });
         }
      };

      openDataChannel();

   }
};

connection.onopen = function () {
   console.log("Connected");
};

connection.onerror = function (err) {
   console.log("Got error", err);
};

// Alias for sending messages in JSON format
function send(message) {
   if (connectedUser) {
      message.name = connectedUser;
   }

   connection.send(JSON.stringify(message));
};
您可以看到我們建立了與信令伺服器的套接字連線。當用戶點選登入按鈕時,應用程式會將他的使用者名稱傳送到伺服器。如果登入成功,應用程式將建立RTCPeerConnection物件並設定onicecandidate處理程式,該處理程式將所有找到的icecandidates傳送到另一個對等節點。它還會執行openDataChannel()函式,該函式建立一個dataChannel。請注意,在建立RTCPeerConnection物件時,建構函式中的第二個引數是可選的:[{RtpDataChannels: true}],如果您使用的是Chrome或Opera,則此引數是必需的。下一步是向另一個對等節點建立offer。將以下程式碼新增到您的client.js檔案中 -
//setup a peer connection with another user
connectToOtherUsernameBtn.addEventListener("click", function () {

   var otherUsername = otherUsernameInput.value;
   connectedUser = otherUsername;

   if (otherUsername.length > 0) {
      //make an offer
      myConnection.createOffer(function (offer) {
         console.log();
         send({
            type: "offer",
            offer: offer
         });

         myConnection.setLocalDescription(offer);
      }, function (error) {
         alert("An error has occurred.");
      });
   }
});

//when somebody wants to call us
function onOffer(offer, name) {
   connectedUser = name;
   myConnection.setRemoteDescription(new RTCSessionDescription(offer));

   myConnection.createAnswer(function (answer) {
      myConnection.setLocalDescription(answer);

      send({
         type: "answer",
         answer: answer
      });

   }, function (error) {
      alert("oops...error");
   });
}

//when another user answers to our offer
function onAnswer(answer) {
   myConnection.setRemoteDescription(new RTCSessionDescription(answer));
}

//when we got ice candidate from another user
function onCandidate(candidate) {
   myConnection.addIceCandidate(new RTCIceCandidate(candidate));
}
您可以看到,當用戶點選“建立連線”按鈕時,應用程式會向另一個對等節點發出SDP offer。我們還設定了onAnswer和onCandidate處理程式。最後,讓我們實現openDataChannel()函式,該函式建立我們的dataChannel。將以下程式碼新增到您的client.js檔案中 -
//creating data channel
function openDataChannel() {

   var dataChannelOptions = {
      reliable:true
   };

   dataChannel = myConnection.createDataChannel("myDataChannel", dataChannelOptions);

   dataChannel.onerror = function (error) {
      console.log("Error:", error);
   };

   dataChannel.onmessage = function (event) {
      console.log("Got message:", event.data);
   };
}

//when a user clicks the send message button
sendMsgBtn.addEventListener("click", function (event) {
   console.log("send message");
   var val = msgInput.value;
   dataChannel.send(val);
});
在這裡,我們為我們的連線建立dataChannel,併為“傳送訊息”按鈕新增事件處理程式。現在在兩個標籤頁中開啟此頁面,使用兩個使用者登入,建立連線,並嘗試傳送訊息。您應該在控制檯輸出中看到它們。請注意,以上示例在Opera中進行了測試。

現在您可能會看到RTCDataChannel是WebRTC API中極其強大的部分。此物件還有許多其他用例,例如點對點遊戲或基於 torrent 的檔案共享。
WebRTC - 信令
大多數WebRTC應用程式不僅僅能夠透過影片和音訊進行通訊。它們需要許多其他功能。在本章中,我們將構建一個基本的信令伺服器。
信令和協商
要連線到另一個使用者,您應該知道他在網路上的位置。您的裝置的IP地址允許啟用Internet的裝置彼此之間直接傳送資料。RTCPeerConnection物件負責此操作。一旦裝置知道如何在網際網路上找到彼此,它們就開始交換有關每個裝置支援哪些協議和編解碼器的資料。
要與另一個使用者通訊,您只需交換聯絡資訊,其餘部分將由WebRTC完成。連線到另一個使用者的過程也稱為信令和協商。它包括以下幾個步驟 -
建立對等連線的潛在候選者列表。
使用者或應用程式選擇一個使用者進行連線。
信令層通知另一個使用者有人想要連線到他。他可以接受或拒絕。
第一個使用者收到offer被接受的通知。
第一個使用者使用另一個使用者啟動RTCPeerConnection。
兩個使用者透過信令伺服器交換軟體和硬體資訊。
兩個使用者交換位置資訊。
連線成功或失敗。
WebRTC規範不包含任何關於交換資訊的標準。因此請記住,以上只是信令可能發生方式的一個示例。您可以使用任何您喜歡的協議或技術。
構建伺服器
我們將要構建的伺服器能夠將兩個不在同一臺計算機上的使用者連線在一起。我們將建立自己的信令機制。我們的信令伺服器將允許一個使用者呼叫另一個使用者。一旦一個使用者呼叫了另一個使用者,伺服器就會在它們之間傳遞offer、answer、ICE候選者,並建立WebRTC連線。

上圖是使用信令伺服器時使用者之間的訊息流。首先,每個使用者都向伺服器註冊。在我們的例子中,這將是一個簡單的字串使用者名稱。使用者註冊後,他們就可以互相呼叫了。使用者1使用他想要呼叫的使用者識別符號發出offer。另一個使用者應該進行answer。最後,ICE候選者在使用者之間傳送,直到他們能夠建立連線。
為了建立WebRTC連線,客戶端必須能夠在不使用WebRTC對等連線的情況下傳輸訊息。這就是我們將使用HTML5 WebSockets的地方——兩個端點(Web伺服器和Web瀏覽器)之間的雙向套接字連線。現在讓我們開始使用WebSocket庫。建立server.js檔案並插入以下程式碼 -
//require our websocket library
var WebSocketServer = require('ws').Server;

//creating a websocket server at port 9090
var wss = new WebSocketServer({port: 9090});

//when a user connects to our sever
wss.on('connection', function(connection) {
   console.log("user connected");

   //when server gets a message from a connected user
   connection.on('message', function(message){
      console.log("Got message from a user:", message);
   });

   connection.send("Hello from server");
});
第一行需要我們已經安裝的WebSocket庫。然後我們在埠9090上建立一個socket伺服器。接下來,我們監聽connection事件。當用戶與伺服器建立WebSocket連線時,將執行此程式碼。然後我們監聽使用者傳送的任何訊息。最後,我們向已連線的使用者傳送一個“Hello from server”的響應。
現在執行node server,伺服器應該開始監聽套接字連線。
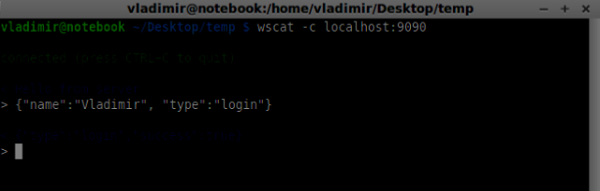
為了測試我們的伺服器,我們將使用我們也已經安裝的wscat實用程式。此工具有助於直接連線到WebSocket伺服器並測試命令。在一個終端視窗中執行我們的伺服器,然後開啟另一個視窗並執行wscat -c ws://:9090命令。您應該在客戶端看到以下內容 -

伺服器還應該記錄已連線的使用者 -

使用者註冊
在我們的信令伺服器中,我們將為每個連線使用基於字串的使用者名稱,以便我們知道將訊息傳送到哪裡。讓我們稍微更改一下我們的connection處理程式 -
connection.on('message', function(message) {
   var data;

   //accepting only JSON messages
   try {
      data = JSON.parse(message);
   } catch (e) {
      console.log("Invalid JSON");
      data = {};
   }

});
這樣我們只接受JSON訊息。接下來,我們需要將所有已連線的使用者儲存在某個地方。我們將為此使用一個簡單的Javascript物件。更改我們檔案的最頂部 -
//require our websocket library
var WebSocketServer = require('ws').Server;

//creating a websocket server at port 9090
var wss = new WebSocketServer({port: 9090});

//all connected to the server users
var users = {};
我們將為來自客戶端的每條訊息新增一個type欄位。例如,如果使用者想要登入,他將傳送login型別的訊息。讓我們定義它 -
connection.on('message', function(message){
   var data;

   //accepting only JSON messages
   try {
      data = JSON.parse(message);
   } catch (e) {
      console.log("Invalid JSON");
      data = {};
   }

   //switching type of the user message
   switch (data.type) {
      //when a user tries to login
      case "login":
         console.log("User logged:", data.name);

         //if anyone is logged in with this username then refuse
         if(users[data.name]) {
            sendTo(connection, {
               type: "login",
               success: false
            });
         } else {
            //save user connection on the server
            users[data.name] = connection;
            connection.name = data.name;

            sendTo(connection, {
               type: "login",
               success: true
            });

         }

         break;

      default:
         sendTo(connection, {
            type: "error",
            message: "Command no found: " + data.type
         });

         break;
   }

});
如果使用者傳送一條型別為login的訊息,我們將 -
檢查是否有人已經使用此使用者名稱登入
如果是,則告訴使用者他登入未成功
如果沒有人使用此使用者名稱,我們將使用者名稱作為鍵新增到connection物件中。
如果未識別命令,我們將傳送錯誤。
以下程式碼是用於向連線傳送訊息的輔助函式。將其新增到server.js檔案中 -
function sendTo(connection, message) {
   connection.send(JSON.stringify(message));
}
上述函式確保所有訊息都以JSON格式傳送。
當用戶斷開連線時,我們應該清理其連線。當close事件觸發時,我們可以刪除使用者。將以下程式碼新增到connection處理程式中 -
connection.on("close", function() {
   if(connection.name) {
      delete users[connection.name];
    }
});
現在讓我們使用登入命令測試我們的伺服器。請記住,所有訊息都必須以JSON格式編碼。執行我們的伺服器並嘗試登入。您應該看到類似以下內容 -
撥打電話
成功登入後,使用者想要呼叫另一個使用者。他應該向另一個使用者發出offer來實現它。新增offer處理程式 -
case "offer":
   //for ex. UserA wants to call UserB
   console.log("Sending offer to: ", data.name);

   //if UserB exists then send him offer details
   var conn = users[data.name];

   if(conn != null){
      //setting that UserA connected with UserB
      connection.otherName = data.name;

      sendTo(conn, {
         type: "offer",
         offer: data.offer,
         name: connection.name
      });
   }

   break;
首先,我們獲取我們嘗試呼叫的使用者connection。如果存在,我們將向他傳送offer詳細資訊。我們還在connection物件中添加了otherName。這是為了方便以後查詢。
回答
對響應的回答與我們在offer處理程式中使用的模式類似。我們的伺服器只是將所有訊息作為answer傳遞給另一個使用者。在offer處理程式之後新增以下程式碼 -
case "answer":
   console.log("Sending answer to: ", data.name);

   //for ex. UserB answers UserA
   var conn = users[data.name];

   if(conn != null) {
      connection.otherName = data.name;
      sendTo(conn, {
         type: "answer",
         answer: data.answer
      });
   }

   break;
您可以看到這與offer處理程式如何相似。請注意,此程式碼遵循RTCPeerConnection物件上的createOffer和createAnswer函式。
現在我們可以測試我們的offer/answer機制了。同時連線兩個客戶端,並嘗試發出offer和answer。您應該看到以下內容 -
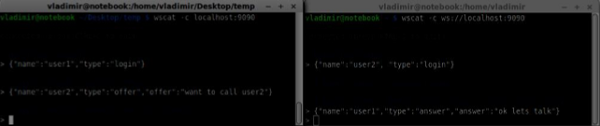
在此示例中,offer和answer是簡單的字串,但在實際應用程式中,它們將填充SDP資料。
ICE候選者
最後一部分是在使用者之間處理ICE候選者。我們使用相同的技術,只是在使用者之間傳遞訊息。主要區別在於,候選者訊息可能每個使用者多次發生,並且可以按任何順序發生。新增candidate處理程式 -
case "candidate":
   console.log("Sending candidate to:",data.name);
   var conn = users[data.name];

   if(conn != null) {
      sendTo(conn, {
         type: "candidate",
         candidate: data.candidate
      });
   }

   break;
它應該與offer和answer處理程式類似地工作。
離開連線
為了允許我們的使用者斷開與另一個使用者的連線,我們應該實現結束通話功能。它還會告訴伺服器刪除所有使用者引用。新增leave處理程式 -
case "leave":
   console.log("Disconnecting from", data.name);
   var conn = users[data.name];
   conn.otherName = null;

   //notify the other user so he can disconnect his peer connection
   if(conn != null) {
      sendTo(conn, {
         type: "leave"
      });
   }

   break;
這也會向另一個使用者傳送leave事件,以便他可以相應地斷開其對等連線。我們還應該處理使用者從信令伺服器斷開連線的情況。讓我們修改我們的close處理程式 -
connection.on("close", function() {

   if(connection.name) {
      delete users[connection.name];

      if(connection.otherName) {
         console.log("Disconnecting from ", connection.otherName);
         var conn = users[connection.otherName];
         conn.otherName = null;

         if(conn != null) {
            sendTo(conn, {
               type: "leave"
            });
         }
      }
   }
});
現在,如果連線終止,我們的使用者將斷開連線。當用戶在offer、answer或candidate狀態下關閉瀏覽器視窗時,將觸發close事件。
完整的信令伺服器
以下是信令伺服器的完整程式碼 -
//require our websocket library
var WebSocketServer = require('ws').Server;

//creating a websocket server at port 9090
var wss = new WebSocketServer({port: 9090});

//all connected to the server users
var users = {};

//when a user connects to our sever
wss.on('connection', function(connection) {

   console.log("User connected");

   //when server gets a message from a connected user
   connection.on('message', function(message) {

      var data;
      //accepting only JSON messages
      try {
         data = JSON.parse(message);
      } catch (e) {
         console.log("Invalid JSON");
         data = {};
      }

      //switching type of the user message
      switch (data.type) {
         //when a user tries to login

         case "login":
            console.log("User logged", data.name);

            //if anyone is logged in with this username then refuse
            if(users[data.name]) {
               sendTo(connection, {
                  type: "login",
                  success: false
               });
            } else {
               //save user connection on the server
               users[data.name] = connection;
               connection.name = data.name;
               sendTo(connection, {
                  type: "login",
                  success: true
               });
            }

            break;

         case "offer":
            //for ex. UserA wants to call UserB
            console.log("Sending offer to: ", data.name);

            //if UserB exists then send him offer details
            var conn = users[data.name];

            if(conn != null) {
               //setting that UserA connected with UserB
               connection.otherName = data.name;

               sendTo(conn, {
                  type: "offer",
                  offer: data.offer,
                  name: connection.name
               });
            }

            break;

         case "answer":
            console.log("Sending answer to: ", data.name);
            //for ex. UserB answers UserA
            var conn = users[data.name];

            if(conn != null) {
               connection.otherName = data.name;
               sendTo(conn, {
                  type: "answer",
                  answer: data.answer
               });
            }

            break;

         case "candidate":
            console.log("Sending candidate to:",data.name);
            var conn = users[data.name];

            if(conn != null) {
               sendTo(conn, {
                  type: "candidate",
                  candidate: data.candidate
               });
            }

            break;

         case "leave":
            console.log("Disconnecting from", data.name);
            var conn = users[data.name];
            conn.otherName = null;

            //notify the other user so he can disconnect his peer connection
            if(conn != null) {
               sendTo(conn, {
                  type: "leave"
               });
            }

            break;

         default:
            sendTo(connection, {
               type: "error",
               message: "Command not found: " + data.type
            });

            break;
      }
   });

   //when user exits, for example closes a browser window
   //this may help if we are still in "offer","answer" or "candidate" state
   connection.on("close", function() {

      if(connection.name) {
      delete users[connection.name];

         if(connection.otherName) {
            console.log("Disconnecting from ", connection.otherName);
            var conn = users[connection.otherName];
            conn.otherName = null;

            if(conn != null) {
               sendTo(conn, {
                  type: "leave"
               });
            }
         }
      }
   });

   connection.send("Hello world");

});

function sendTo(connection, message) {
   connection.send(JSON.stringify(message));
}
所以工作已經完成,我們的信令伺服器已準備就緒。請記住,在建立WebRTC連線時,如果操作順序錯誤可能會導致問題。
總結
在本章中,我們構建了一個簡單而直接的信令伺服器。我們介紹了信令過程、使用者註冊和offer/answer機制。我們還實現了在使用者之間傳送候選者。
WebRTC - 瀏覽器支援
網路發展迅速,並且不斷改進。每天都會建立新的標準。瀏覽器允許在使用者不知情的情況下安裝更新,因此您應該瞭解網路和WebRTC領域正在發生的事情。以下是目前為止的概述。
瀏覽器支援
並非每個瀏覽器都同時擁有所有相同的WebRTC功能。不同的瀏覽器可能領先於曲線,這使得某些WebRTC功能在一個瀏覽器中有效而在另一個瀏覽器中無效。瀏覽器當前對WebRTC的支援如下面的圖片所示。

您可以在http://caniuse.com/#feat=rtcpeerconnection上檢視最新的WebRTC支援狀態。
Chrome、Firefox和Opera
主流PC作業系統(如Mac OS X、Windows和Linux)上的最新版Chrome、Firefox和Opera都開箱即用地支援WebRTC。最重要的是,來自Chrome和Firefox開發團隊的工程師一直在合作修復問題,以便這兩個瀏覽器可以輕鬆地相互通訊。
Android作業系統
在Android作業系統上,Chrome和Firefox的WebRTC應用程式應該開箱即用。在Android冰淇淋三明治版本(4.0)之後,它們能夠與其他瀏覽器一起工作。這是由於桌面版和移動版之間共享程式碼造成的。
蘋果
Apple尚未宣佈其在OS X上支援Safari中WebRTC的計劃。混合原生iOS應用程式的一種可能的解決方法是將WebRTC程式碼直接嵌入到應用程式中,並將此應用程式載入到WebView中。
Internet Explorer
微軟並不支援桌面端的 WebRTC。但他們已經正式確認將在未來版本的 IE(Edge)中實現 ORTC(物件即時通訊)。他們不打算支援 WebRTC 1.0。他們將他們的 ORTC 標記為 WebRTC 1.1,儘管它只是一個社群增強功能,而不是官方標準。最近,他們已將 ORTC 支援新增到最新的 Microsoft Edge 版本中。您可以在 https://blogs.windows.com/msedgedev/2015/09/18/ortc-api-is-now-available-in-microsoftedge/. 瞭解更多資訊。
總結
請注意,WebRTC 是一組 API 和協議的集合,而不是單個 API。這些 API 在不同的瀏覽器和作業系統上的支援程度不同。一個瞭解最新支援程度的好方法是透過 http://canisue.com. 它跟蹤了多個瀏覽器中現代 API 的採用情況。您還可以在 http://www.webrtc.org, 上找到有關瀏覽器支援以及 WebRTC 演示的最新資訊,該網站由 Mozilla、Google 和 Opera 支援。
WebRTC - 移動裝置支援
在移動領域,WebRTC 的支援程度與桌面端不同。移動裝置有自己的方式,因此 WebRTC 在移動平臺上也略有不同。

在為桌面開發 WebRTC 應用程式時,我們考慮使用 Chrome、Firefox 或 Opera。它們都開箱即用地支援 WebRTC。通常,您只需要一個瀏覽器,而無需擔心桌面的硬體。
在移動領域,WebRTC 目前有三種可能的模式:
- 原生應用程式
- 瀏覽器應用程式
- 原生瀏覽器
Android
2013 年,推出了支援 WebRTC 的 Firefox Android 版網路瀏覽器。現在,您可以使用 Firefox 移動瀏覽器在 Android 裝置上進行視訊通話。
它有三個主要的 WebRTC 元件:
PeerConnection - 支援瀏覽器之間的通話
getUserMedia - 提供對攝像頭和麥克風的訪問
DataChannels - 提供點對點資料傳輸
Android 版 Google Chrome 也提供 WebRTC 支援。正如您已經注意到的,最有趣的功能通常首先出現在 Chrome 中。
在過去的一年中,Opera 移動瀏覽器也出現了 WebRTC 支援。因此,對於 Android,您可以選擇 Chrome、Firefox 和 Opera。其他瀏覽器不支援 WebRTC。
iOS
不幸的是,iOS 目前不支援 WebRTC。儘管在使用 Firefox、Opera 或 Chrome 的 Mac 上 WebRTC 工作良好,但它在 iOS 上不受支援。
如今,您的 WebRTC 應用程式無法在 Apple 移動裝置上開箱即用。但是有一個瀏覽器 - Bowser。它是由愛立信開發的網路瀏覽器,並且開箱即用地支援 WebRTC。您可以在 http://www.openwebrtc.org/bowser/. 檢視其主頁。
如今,這是在 iOS 上支援您的 WebRTC 應用程式的唯一友好方式。另一種方法是自己開發一個原生應用程式。
Windows Phone
微軟不支援移動平臺上的 WebRTC。但他們已經正式確認將在未來版本的 IE 中實現 ORTC(物件即時通訊)。他們不打算支援 WebRTC 1.0。他們將他們的 ORTC 標記為 WebRTC 1.1,儘管它只是一個社群增強功能,而不是官方標準。
因此,今天 Windows Phone 使用者無法使用 WebRTC 應用程式,也沒有辦法解決這種情況。
Blackberry
WebRTC 應用程式在 Blackberry 上也不受支援,無論以何種方式。
使用 WebRTC 原生瀏覽器
使用者利用 WebRTC 最方便、最舒適的情況是使用裝置的原生瀏覽器。在這種情況下,裝置已準備好進行任何其他配置。
目前只有 Android 4.0 及更高版本的裝置提供此功能。Apple 仍然沒有顯示任何與 WebRTC 支援相關的活動。因此,Safari 使用者無法使用 WebRTC 應用程式。微軟也沒有在 Windows Phone 8 中引入它。
透過瀏覽器應用程式使用 WebRTC
這意味著使用第三方應用程式(非原生網路瀏覽器)來提供 WebRTC 功能。目前,有兩個這樣的第三方應用程式。Bowser 是將 WebRTC 功能引入 iOS 裝置的唯一方法,而 Opera 是 Android 平臺的一個不錯的替代方案。其餘可用的移動瀏覽器都不支援 WebRTC。
原生移動應用程式
如您所見,WebRTC 在移動領域還沒有得到廣泛的支援。因此,可能的解決方案之一是開發利用 WebRTC API 的原生應用程式。但這並不是更好的選擇,因為 WebRTC 的主要功能是跨平臺解決方案。無論如何,在某些情況下這是唯一的方法,因為原生應用程式可以利用 HTML5 瀏覽器不支援的特定於裝置的功能或特性。
限制移動裝置和桌面裝置的影片流
getUserMedia API 的第一個引數期望一個鍵值對物件,告訴瀏覽器如何處理流。您可以在 https://tools.ietf.org/html/draft-alvestrand-constraints-resolution-03. 檢查完整的約束集。您可以設定影片縱橫比、幀率和其他可選引數。
支援移動裝置是一件非常頭疼的事情,因為移動裝置的螢幕空間和資源都比較有限。您可能希望移動裝置僅捕獲 480x320 或更小的影片流解析度,以節省電量和頻寬。在瀏覽器中使用使用者代理字串是測試使用者是否在移動裝置上的一種好方法。讓我們看一個例子。建立 index.html 檔案:
<!DOCTYPE html>
<html lang = "en">

   <head>
      <meta charset = "utf-8" />
   </head>

   <body>
      <video autoplay></video>
      <script src = "client.js"></script>
   </body>

</html>
然後建立以下 client.js 檔案:
//constraints for desktop browser
var desktopConstraints = {

   video: {
      mandatory: {
         maxWidth:800,
         maxHeight:600
      }
   },

   audio: true
};

//constraints for mobile browser
var mobileConstraints = {

   video: {
      mandatory: {
         maxWidth: 480,
         maxHeight: 320,
      }
   },

   audio: true
}

//if a user is using a mobile browser
if(/Android|iPhone|iPad/i.test(navigator.userAgent)) {
   var constraints = mobileConstraints;
} else {
   var constraints = desktopConstraints;
}

function hasUserMedia() {
   //check if the browser supports the WebRTC
   return !!(navigator.getUserMedia || navigator.webkitGetUserMedia ||
      navigator.mozGetUserMedia);
}

if (hasUserMedia()) {

   navigator.getUserMedia = navigator.getUserMedia || navigator.webkitGetUserMedia ||
      navigator.mozGetUserMedia;

   //enabling video and audio channels
   navigator.getUserMedia(constraints, function (stream) {
      var video = document.querySelector('video');

      //inserting our stream to the video tag
      video.src = window.URL.createObjectURL(stream);

   }, function (err) {});
} else {
   alert("WebRTC is not supported");
}
使用 static 命令執行 Web 伺服器並開啟頁面。您應該看到它是 800x600。然後使用 Chrome 工具在移動視口中開啟此頁面並檢查解析度。它應該是 480x320。
約束是提高 WebRTC 應用程式效能最簡單的方法。
總結
在本章中,我們瞭解了在為移動裝置開發 WebRTC 應用程式時可能出現的難題。我們發現了在移動平臺上支援 WebRTC API 的不同限制。我們還啟動了一個演示應用程式,在其中為桌面和移動瀏覽器設定了不同的約束。
WebRTC - 影片演示
在本章中,我們將構建一個客戶端應用程式,允許兩個在不同裝置上的使用者使用 WebRTC 進行通訊。我們的應用程式將有兩個頁面。一個用於登入,另一個用於呼叫其他使用者。
這兩個頁面將是 div 標籤。大多數輸入都是透過簡單的事件處理程式完成的。
信令伺服器
要建立 WebRTC 連線,客戶端必須能夠在不使用 WebRTC 對等連線的情況下傳輸訊息。這正是我們將使用 HTML5 WebSockets 的地方 - 兩個端點(Web 伺服器和 Web 瀏覽器)之間的雙向套接字連線。現在讓我們開始使用 WebSocket 庫。建立 server.js 檔案並插入以下程式碼:
//require our websocket library
var WebSocketServer = require('ws').Server;

//creating a websocket server at port 9090
var wss = new WebSocketServer({port: 9090});

//when a user connects to our sever
wss.on('connection', function(connection) {
   console.log("user connected");

   //when server gets a message from a connected user
   connection.on('message', function(message) {
      console.log("Got message from a user:", message);
   });

   connection.send("Hello from server");
});
第一行需要我們已經安裝的WebSocket庫。然後我們在埠9090上建立一個socket伺服器。接下來,我們監聽connection事件。當用戶與伺服器建立WebSocket連線時,將執行此程式碼。然後我們監聽使用者傳送的任何訊息。最後,我們向已連線的使用者傳送一個“Hello from server”的響應。
在我們的信令伺服器中,我們將為每個連線使用基於字串的使用者名稱,以便我們知道將訊息傳送到哪裡。讓我們稍微更改一下我們的連線 handler:
connection.on('message', function(message) {
   var data;

   //accepting only JSON messages
   try {
      data = JSON.parse(message);
   } catch (e) {
      console.log("Invalid JSON");
      data = {};
   }
});
這樣我們只接受JSON訊息。接下來,我們需要將所有已連線的使用者儲存在某個地方。我們將為此使用一個簡單的Javascript物件。更改我們檔案的最頂部 -
//require our websocket library
var WebSocketServer = require('ws').Server;

//creating a websocket server at port 9090
var wss = new WebSocketServer({port: 9090});

//all connected to the server users
var users = {};
我們將為來自客戶端的每條訊息新增一個type欄位。例如,如果使用者想要登入,他將傳送login型別的訊息。讓我們定義它 -
connection.on('message', function(message) {
   var data;

   //accepting only JSON messages
   try {
      data = JSON.parse(message);
   } catch (e) {
      console.log("Invalid JSON");
      data = {};
   }

   //switching type of the user message
   switch (data.type) {
      //when a user tries to login
      case "login":
         console.log("User logged:", data.name);

         //if anyone is logged in with this username then refuse
         if(users[data.name]) {
            sendTo(connection, {
               type: "login",
               success: false
            });
         } else {
            //save user connection on the server
            users[data.name] = connection;
            connection.name = data.name;

            sendTo(connection, {
               type: "login",
               success: true
            });
         }

         break;

      default:
         sendTo(connection, {
            type: "error",
            message: "Command no found: " + data.type
         });

         break;
   }
});
如果使用者傳送一條型別為login的訊息,我們將 -
檢查是否有人已經使用此使用者名稱登入
如果是,則告訴使用者他登入未成功
如果沒有人使用此使用者名稱,我們將使用者名稱作為鍵新增到connection物件中。
如果未識別命令,我們將傳送錯誤。
以下程式碼是用於向連線傳送訊息的輔助函式。將其新增到server.js檔案中 -
function sendTo(connection, message) {
   connection.send(JSON.stringify(message));
}
當用戶斷開連線時,我們應該清理其連線。當close事件觸發時,我們可以刪除使用者。將以下程式碼新增到connection處理程式中 -
connection.on("close", function() {
   if(connection.name) {
      delete users[connection.name];
   }
});
成功登入後,使用者想要呼叫另一個使用者。他應該向另一個使用者發出offer來實現它。新增offer處理程式 -
case "offer":
   //for ex. UserA wants to call UserB
   console.log("Sending offer to: ", data.name);

   //if UserB exists then send him offer details
   var conn = users[data.name];

   if(conn != null) {
      //setting that UserA connected with UserB
      connection.otherName = data.name;

      sendTo(conn, {
         type: "offer",
         offer: data.offer,
         name: connection.name
      });

   }

   break;
首先,我們獲取我們嘗試呼叫的使用者connection。如果存在,我們將向他傳送offer詳細資訊。我們還在connection物件中添加了otherName。這是為了方便以後查詢。
對響應的回覆具有與我們在 offer 處理程式中使用的類似模式。我們的伺服器只是將所有訊息作為 answer 傳遞給另一個使用者。在 offer 處理程式之後新增以下程式碼:
case "answer":
   console.log("Sending answer to: ", data.name);

   //for ex. UserB answers UserA
   var conn = users[data.name];

   if(conn != null) {
      connection.otherName = data.name;

      sendTo(conn, {
         type: "answer",
         answer: data.answer
      });
   }

   break;
最後一部分是在使用者之間處理ICE候選者。我們使用相同的技術,只是在使用者之間傳遞訊息。主要區別在於,候選者訊息可能每個使用者多次發生,並且可以按任何順序發生。新增candidate處理程式 -
case "candidate":
   console.log("Sending candidate to:",data.name);
   var conn = users[data.name];

   if(conn != null) {
      sendTo(conn, {
         type: "candidate",
         candidate: data.candidate
      });
   }

   break;
為了允許我們的使用者斷開與另一個使用者的連線,我們應該實現結束通話功能。它還會告訴伺服器刪除所有使用者引用。新增 leave 處理程式:
case "leave":
   console.log("Disconnecting from", data.name);
   var conn = users[data.name];
   conn.otherName = null;

   //notify the other user so he can disconnect his peer connection
   if(conn != null) {
      sendTo(conn, {
         type: "leave"
      });
   }

   break;
這也會向另一個使用者傳送leave事件,以便他可以相應地斷開其對等連線。我們還應該處理使用者從信令伺服器斷開連線的情況。讓我們修改我們的close處理程式 -
connection.on("close", function() {

   if(connection.name) {
      delete users[connection.name];

      if(connection.otherName) {
         console.log("Disconnecting from ", connection.otherName);
         var conn = users[connection.otherName];
         conn.otherName = null;

         if(conn != null) {
            sendTo(conn, {
               type: "leave"
            });
         }

      }
   }
});
以下是我們的信令伺服器的完整程式碼:
//require our websocket library
var WebSocketServer = require('ws').Server;

//creating a websocket server at port 9090
var wss = new WebSocketServer({port: 9090});

//all connected to the server users
var users = {};

//when a user connects to our sever
wss.on('connection', function(connection) {

   console.log("User connected");

   //when server gets a message from a connected user
   connection.on('message', function(message) {

      var data;

      //accepting only JSON messages
      try {
         data = JSON.parse(message);
      } catch (e) {
         console.log("Invalid JSON");
         data = {};
      }

      //switching type of the user message
      switch (data.type) {
         //when a user tries to login
         case "login":
            console.log("User logged", data.name);

            //if anyone is logged in with this username then refuse
            if(users[data.name]) {
               sendTo(connection, {
                  type: "login",
                  success: false
               });
            } else {
               //save user connection on the server
               users[data.name] = connection;
               connection.name = data.name;

               sendTo(connection, {
                  type: "login",
                  success: true
               });
            }

            break;

         case "offer":
            //for ex. UserA wants to call UserB
            console.log("Sending offer to: ", data.name);

            //if UserB exists then send him offer details
            var conn = users[data.name];

            if(conn != null) {
               //setting that UserA connected with UserB
               connection.otherName = data.name;

               sendTo(conn, {
                  type: "offer",
                  offer: data.offer,
                  name: connection.name
               });
            }

            break;

         case "answer":
            console.log("Sending answer to: ", data.name);
            //for ex. UserB answers UserA
            var conn = users[data.name];

            if(conn != null) {
               connection.otherName = data.name;
               sendTo(conn, {
                  type: "answer",
                  answer: data.answer
               });
            }

            break;

         case "candidate":
            console.log("Sending candidate to:",data.name);
            var conn = users[data.name];

            if(conn != null) {
               sendTo(conn, {
                  type: "candidate",
                  candidate: data.candidate
               });
            }

            break;

         case "leave":
            console.log("Disconnecting from", data.name);
            var conn = users[data.name];
            conn.otherName = null;

            //notify the other user so he can disconnect his peer connection
            if(conn != null) {
               sendTo(conn, {
                  type: "leave"
              });
            }

            break;

         default:
            sendTo(connection, {
               type: "error",
               message: "Command not found: " + data.type
            });

            break;
      }

   });

   //when user exits, for example closes a browser window
   //this may help if we are still in "offer","answer" or "candidate" state
   connection.on("close", function() {

      if(connection.name) {
         delete users[connection.name];

         if(connection.otherName) {
            console.log("Disconnecting from ", connection.otherName);
            var conn = users[connection.otherName];
            conn.otherName = null;

            if(conn != null) {
               sendTo(conn, {
                  type: "leave"
               });
            }
         }
      }

   });

   connection.send("Hello world");
});

function sendTo(connection, message) {
   connection.send(JSON.stringify(message));
}
客戶端應用程式
測試此應用程式的一種方法是開啟兩個瀏覽器標籤頁並嘗試互相呼叫。
首先,我們需要安裝 bootstrap 庫。Bootstrap 是一個用於開發 Web 應用程式的前端框架。您可以在 https://bootstrap.tw/. 瞭解更多資訊。建立一個名為“videochat”的資料夾。這將是我們的根應用程式資料夾。在此資料夾內建立一個 package.json 檔案(它對於管理 npm 依賴項是必需的)並新增以下內容:
{
   "name": "webrtc-videochat",
   "version": "0.1.0",
   "description": "webrtc-videochat",
   "author": "Author",
   "license": "BSD-2-Clause"
}
然後執行 npm install bootstrap。這將在 videochat/node_modules 資料夾中安裝 bootstrap 庫。
現在我們需要建立一個基本的 HTML 頁面。在根資料夾中建立一個 index.html 檔案,其中包含以下程式碼:
<html>
<head>
<title>WebRTC Video Demo</title>
<link rel = "stylesheet" href = "node_modules/bootstrap/dist/css/bootstrap.min.css"/>
</head>
<style>
body {
background: #eee;
padding: 5% 0;
}
video {
background: black;
border: 1px solid gray;
}
.call-page {
position: relative;
display: block;
margin: 0 auto;
width: 500px;
height: 500px;
}
#localVideo {
width: 150px;
height: 150px;
position: absolute;
top: 15px;
right: 15px;
}
#remoteVideo {
width: 500px;
height: 500px;
}
</style>
<body>
<div id = "loginPage" class = "container text-center">
<div class = "row">
<div class = "col-md-4 col-md-offset-4">
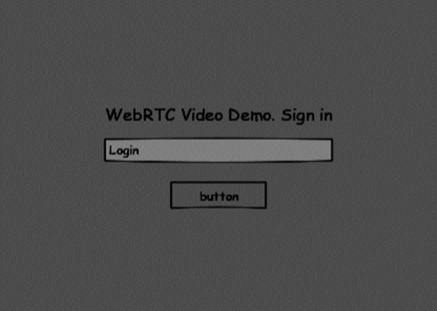
<h2>WebRTC Video Demo. Please sign in</h2>
<label for = "usernameInput" class = "sr-only">Login</label>
<input type = "email" id = "usernameInput" c
lass = "form-control formgroup" placeholder = "Login"
required = "" autofocus = "">
<button id = "loginBtn" class = "btn btn-lg btn-primary btnblock">
Sign in</button>
</div>
</div>
</div>
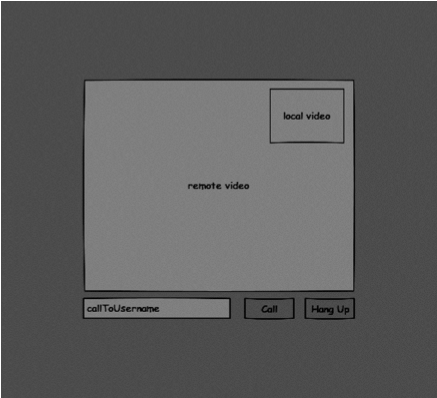
<div id = "callPage" class = "call-page">
<video id = "localVideo" autoplay></video>
<video id = "remoteVideo" autoplay></video>
<div class = "row text-center">
<div class = "col-md-12">
<input id = "callToUsernameInput" type = "text"
placeholder = "username to call" />
<button id = "callBtn" class = "btn-success btn">Call</button>
<button id = "hangUpBtn" class = "btn-danger btn">Hang Up</button>
</div>
</div>
</div>
<script src = "client.js"></script>
</body>
</html>
此頁面應該很熟悉。我們添加了 bootstrap css 檔案。我們還定義了兩個頁面。最後,我們建立了幾個文字欄位和按鈕來獲取使用者的資訊。您應該看到用於本地和遠端影片流的兩個影片元素。請注意,我們添加了指向 client.js 檔案的連結。
現在我們需要與我們的信令伺服器建立連線。在根資料夾中建立 client.js 檔案,其中包含以下程式碼:
//our username
var name;
var connectedUser;

//connecting to our signaling server
var conn = new WebSocket('ws://:9090');

conn.onopen = function () {
   console.log("Connected to the signaling server");
};

//when we got a message from a signaling server
conn.onmessage = function (msg) {
   console.log("Got message", msg.data);

   var data = JSON.parse(msg.data);

   switch(data.type) {
      case "login":
         handleLogin(data.success);
         break;
      //when somebody wants to call us
      case "offer":
         handleOffer(data.offer, data.name);
         break;
      case "answer":
         handleAnswer(data.answer);
         break;
      //when a remote peer sends an ice candidate to us
      case "candidate":
         handleCandidate(data.candidate);
         break;
      case "leave":
         handleLeave();
         break;
      default:
         break;
   }
};

conn.onerror = function (err) {
   console.log("Got error", err);
};

//alias for sending JSON encoded messages
function send(message) {
   //attach the other peer username to our messages
   if (connectedUser) {
      message.name = connectedUser;
   }

   conn.send(JSON.stringify(message));
};
現在透過 node server 執行我們的信令伺服器。然後,在根資料夾中執行 static 命令並在瀏覽器中開啟頁面。您應該看到以下控制檯輸出:
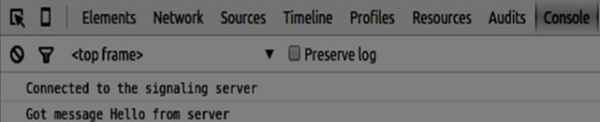
下一步是實現具有唯一使用者名稱的使用者登入。我們只需將使用者名稱傳送到伺服器,伺服器隨後會告訴我們它是否已被佔用。將以下程式碼新增到您的 client.js 檔案中:
//******
//UI selectors block
//******

var loginPage = document.querySelector('#loginPage');
var usernameInput = document.querySelector('#usernameInput');
var loginBtn = document.querySelector('#loginBtn');

var callPage = document.querySelector('#callPage');
var callToUsernameInput = document.querySelector('#callToUsernameInput');
var callBtn = document.querySelector('#callBtn');

var hangUpBtn = document.querySelector('#hangUpBtn');

//hide call page
callPage.style.display = "none";

// Login when the user clicks the button
loginBtn.addEventListener("click", function (event) {
   name = usernameInput.value;

   if (name.length > 0) {
      send({
         type: "login",
         name: name
      });
   }

});

function handleLogin(success) {

   if (success === false) {
      alert("Ooops...try a different username");
   } else {
      //display the call page if login is successful
      loginPage.style.display = "none";
      callPage.style.display = "block";
      //start peer connection
   }
};
首先,我們選擇頁面上一些元素的引用。然後,我們隱藏呼叫頁面。然後,我們在登入按鈕上新增一個事件監聽器。當用戶點選它時,我們將他的使用者名稱傳送到伺服器。最後,我們實現了 handleLogin 回撥。如果登入成功,我們將顯示呼叫頁面並開始設定對等連線。
要啟動對等連線,我們需要:
- 從網路攝像頭獲取流。
- 建立 RTCPeerConnection 物件。
將以下程式碼新增到“UI 選擇器塊”中:
var localVideo = document.querySelector('#localVideo');
var remoteVideo = document.querySelector('#remoteVideo');

var yourConn;
var stream;
修改 handleLogin 函式:
function handleLogin(success) {

   if (success === false) {
      alert("Ooops...try a different username");
   } else {
      loginPage.style.display = "none";
      callPage.style.display = "block";

      //**********************
      //Starting a peer connection
      //**********************

      //getting local video stream
      navigator.webkitGetUserMedia({ video: true, audio: true }, function (myStream) {
         stream = myStream;

         //displaying local video stream on the page
         localVideo.src = window.URL.createObjectURL(stream);

         //using Google public stun server
         var configuration = {
            "iceServers": [{ "url": "stun:stun2.1.google.com:19302" }]
         };

         yourConn = new webkitRTCPeerConnection(configuration);

         // setup stream listening
         yourConn.addStream(stream);

         //when a remote user adds stream to the peer connection, we display it
         yourConn.onaddstream = function (e) {
            remoteVideo.src = window.URL.createObjectURL(e.stream);
         };

         // Setup ice handling
         yourConn.onicecandidate = function (event) {

            if (event.candidate) {
               send({
                  type: "candidate",
                  candidate: event.candidate
               });
            }

         };

      }, function (error) {
         console.log(error);
      });
   }
};
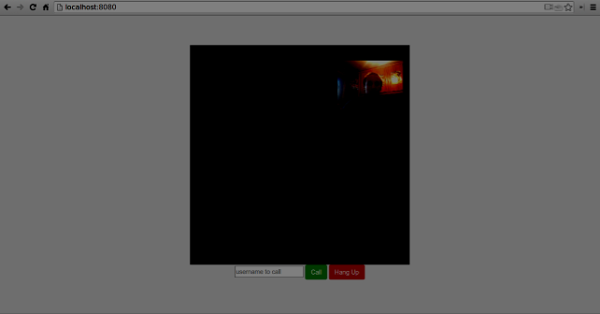
現在,如果您執行程式碼,頁面應該允許您登入並在頁面上顯示您的本地影片流。
現在我們準備發起呼叫。首先,我們向另一個使用者傳送一個 offer。一旦使用者收到 offer,他就會建立一個 answer 並開始交換 ICE 候選者。將以下程式碼新增到 client.js 檔案中:
//initiating a call
callBtn.addEventListener("click", function () {
   var callToUsername = callToUsernameInput.value;

   if (callToUsername.length > 0) {

      connectedUser = callToUsername;

      // create an offer
      yourConn.createOffer(function (offer) {
         send({
            type: "offer",
            offer: offer
         });

         yourConn.setLocalDescription(offer);

      }, function (error) {
         alert("Error when creating an offer");
      });
   }
});

//when somebody sends us an offer
function handleOffer(offer, name) {
   connectedUser = name;
   yourConn.setRemoteDescription(new RTCSessionDescription(offer));

   //create an answer to an offer
   yourConn.createAnswer(function (answer) {
      yourConn.setLocalDescription(answer);

      send({
         type: "answer",
         answer: answer
      });

   }, function (error) {
      alert("Error when creating an answer");
   });
};

//when we got an answer from a remote user
function handleAnswer(answer) {
   yourConn.setRemoteDescription(new RTCSessionDescription(answer));
};

//when we got an ice candidate from a remote user
function handleCandidate(candidate) {
   yourConn.addIceCandidate(new RTCIceCandidate(candidate));
};
我們在 Call 按鈕上添加了一個 click 處理程式,它會發起一個 offer。然後,我們實現了 onmessage 處理程式期望的幾個處理程式。它們將非同步處理,直到兩個使用者都建立連線。
最後一步是實現結束通話功能。這將停止資料傳輸並告訴另一個使用者關閉呼叫。新增以下程式碼:
//hang up
hangUpBtn.addEventListener("click", function () {

   send({
      type: "leave"
   });

   handleLeave();
});

function handleLeave() {
   connectedUser = null;
   remoteVideo.src = null;

   yourConn.close();
   yourConn.onicecandidate = null;
   yourConn.onaddstream = null;
};
當用戶點選 Hang Up 按鈕時:
- 它將向另一個使用者傳送“leave”訊息
- 它將關閉 RTCPeerConnection 並本地銷燬連線
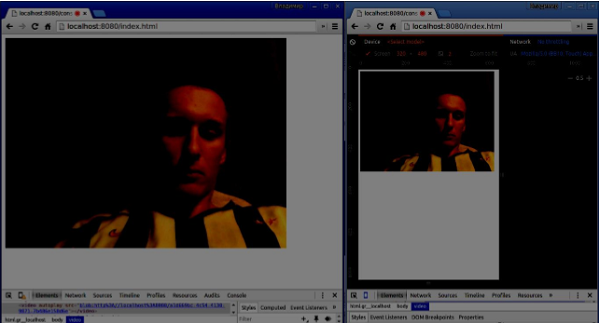
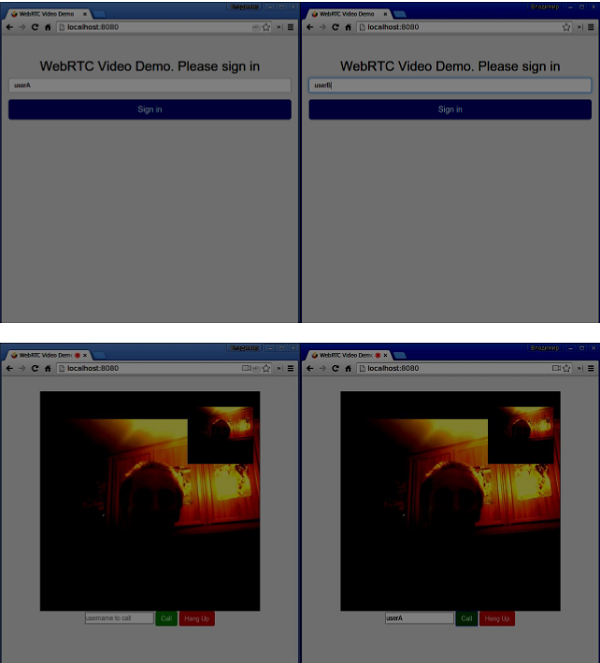
現在執行程式碼。您應該能夠使用兩個瀏覽器標籤頁登入到伺服器。然後,您可以呼叫該標籤頁並結束通話呼叫。
以下是完整的 client.js 檔案:
//our username
var name;
var connectedUser;

//connecting to our signaling server
var conn = new WebSocket('ws://:9090');

conn.onopen = function () {
   console.log("Connected to the signaling server");
};

//when we got a message from a signaling server
conn.onmessage = function (msg) {
   console.log("Got message", msg.data);

   var data = JSON.parse(msg.data);

   switch(data.type) {
      case "login":
         handleLogin(data.success);
         break;
      //when somebody wants to call us
      case "offer":
         handleOffer(data.offer, data.name);
         break;
      case "answer":
         handleAnswer(data.answer);
         break;
      //when a remote peer sends an ice candidate to us
      case "candidate":
         handleCandidate(data.candidate);
         break;
      case "leave":
         handleLeave();
         break;
      default:
         break;
   }
};

conn.onerror = function (err) {
   console.log("Got error", err);
};

//alias for sending JSON encoded messages
function send(message) {
   //attach the other peer username to our messages
   if (connectedUser) {
      message.name = connectedUser;
   }

   conn.send(JSON.stringify(message));
};

//******
//UI selectors block
//******

var loginPage = document.querySelector('#loginPage');
var usernameInput = document.querySelector('#usernameInput');
var loginBtn = document.querySelector('#loginBtn');

var callPage = document.querySelector('#callPage');
var callToUsernameInput = document.querySelector('#callToUsernameInput');
var callBtn = document.querySelector('#callBtn');

var hangUpBtn = document.querySelector('#hangUpBtn');

var localVideo = document.querySelector('#localVideo');
var remoteVideo = document.querySelector('#remoteVideo');

var yourConn;
var stream;

callPage.style.display = "none";

// Login when the user clicks the button
loginBtn.addEventListener("click", function (event) {
   name = usernameInput.value;

   if (name.length > 0) {
      send({
         type: "login",
         name: name
      });
   }

});

function handleLogin(success) {
   if (success === false) {
      alert("Ooops...try a different username");
   } else {
      loginPage.style.display = "none";
      callPage.style.display = "block";

      //**********************
      //Starting a peer connection
      //**********************

      //getting local video stream
      navigator.webkitGetUserMedia({ video: true, audio: true }, function (myStream) {
         stream = myStream;

         //displaying local video stream on the page
         localVideo.src = window.URL.createObjectURL(stream);

         //using Google public stun server
         var configuration = {
            "iceServers": [{ "url": "stun:stun2.1.google.com:19302" }]
         };

         yourConn = new webkitRTCPeerConnection(configuration);

         // setup stream listening
         yourConn.addStream(stream);

         //when a remote user adds stream to the peer connection, we display it
         yourConn.onaddstream = function (e) {
            remoteVideo.src = window.URL.createObjectURL(e.stream);
         };

         // Setup ice handling
         yourConn.onicecandidate = function (event) {
            if (event.candidate) {
               send({
                  type: "candidate",
                  candidate: event.candidate
               });
            }
         };

      }, function (error) {
         console.log(error);
      });

   }
};

//initiating a call
callBtn.addEventListener("click", function () {
   var callToUsername = callToUsernameInput.value;

   if (callToUsername.length > 0) {

      connectedUser = callToUsername;

      // create an offer
      yourConn.createOffer(function (offer) {
         send({
            type: "offer",
            offer: offer
         });

         yourConn.setLocalDescription(offer);
      }, function (error) {
         alert("Error when creating an offer");
      });

   }
});

//when somebody sends us an offer
function handleOffer(offer, name) {
   connectedUser = name;
   yourConn.setRemoteDescription(new RTCSessionDescription(offer));

   //create an answer to an offer
   yourConn.createAnswer(function (answer) {
      yourConn.setLocalDescription(answer);

      send({
         type: "answer",
         answer: answer
      });

   }, function (error) {
      alert("Error when creating an answer");
   });
};

//when we got an answer from a remote user
function handleAnswer(answer) {
   yourConn.setRemoteDescription(new RTCSessionDescription(answer));
};

//when we got an ice candidate from a remote user
function handleCandidate(candidate) {
   yourConn.addIceCandidate(new RTCIceCandidate(candidate));
};

//hang up
hangUpBtn.addEventListener("click", function () {

   send({
      type: "leave"
   });

   handleLeave();
});

function handleLeave() {
   connectedUser = null;
   remoteVideo.src = null;

   yourConn.close();
   yourConn.onicecandidate = null;
   yourConn.onaddstream = null;
};
總結
此演示提供了每個 WebRTC 應用程式所需的基線功能。要改進此演示,您可以透過 Facebook 或 Google 等平臺新增使用者身份識別,處理使用者輸入無效資料。此外,WebRTC 連線可能會由於多種原因而失敗,例如不支援該技術或無法穿越防火牆。為了使任何 WebRTC 應用程式穩定,已經付出了很多努力。
WebRTC - 語音演示
在本章中,我們將構建一個客戶端應用程式,允許兩個在不同裝置上的使用者使用 WebRTC 音訊流進行通訊。我們的應用程式將有兩個頁面。一個用於登入,另一個用於向另一個使用者發起音訊呼叫。
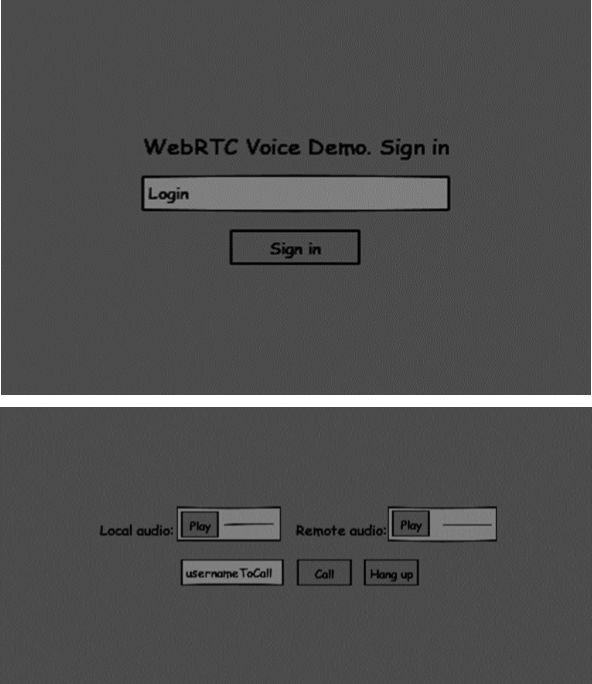
這兩個頁面將是 div 標籤。大多數輸入都是透過簡單的事件處理程式完成的。
信令伺服器
要建立 WebRTC 連線,客戶端必須能夠在不使用 WebRTC 對等連線的情況下傳輸訊息。這正是我們將使用 HTML5 WebSockets 的地方 - 兩個端點(Web 伺服器和 Web 瀏覽器)之間的雙向套接字連線。現在讓我們開始使用 WebSocket 庫。建立 server.js 檔案並插入以下程式碼:
//require our websocket library
var WebSocketServer = require('ws').Server;

//creating a websocket server at port 9090
var wss = new WebSocketServer({port: 9090});

//when a user connects to our sever
wss.on('connection', function(connection) {
   console.log("user connected");

   //when server gets a message from a connected user
   connection.on('message', function(message) {
      console.log("Got message from a user:", message);
   });

   connection.send("Hello from server");
});
第一行需要我們已經安裝的WebSocket庫。然後我們在埠9090上建立一個socket伺服器。接下來,我們監聽connection事件。當用戶與伺服器建立WebSocket連線時,將執行此程式碼。然後我們監聽使用者傳送的任何訊息。最後,我們向已連線的使用者傳送一個“Hello from server”的響應。
在我們的信令伺服器中,我們將為每個連線使用基於字串的使用者名稱,以便我們知道將訊息傳送到哪裡。讓我們稍微更改一下我們的connection處理程式 -
connection.on('message', function(message) {
   var data;

   //accepting only JSON messages
   try {
      data = JSON.parse(message);
   } catch (e) {
      console.log("Invalid JSON");
      data = {};
   }
});
這樣我們只接受JSON訊息。接下來,我們需要將所有已連線的使用者儲存在某個地方。我們將為此使用一個簡單的Javascript物件。更改我們檔案的最頂部 -
//require our websocket library
var WebSocketServer = require('ws').Server;

//creating a websocket server at port 9090
var wss = new WebSocketServer({port: 9090});

//all connected to the server users
var users = {};
我們將為來自客戶端的每條訊息新增一個type欄位。例如,如果使用者想要登入,他將傳送login型別的訊息。讓我們定義它 -
connection.on('message', function(message) {

   var data;
   //accepting only JSON messages
   try {
      data = JSON.parse(message);
   } catch (e) {
      console.log("Invalid JSON");
      data = {};
   }

   //switching type of the user message
   switch (data.type) {
      //when a user tries to login
      case "login":
         console.log("User logged:", data.name);

         //if anyone is logged in with this username then refuse
         if(users[data.name]) {
            sendTo(connection, {
               type: "login",
               success: false
            });
         } else {
            //save user connection on the server
            users[data.name] = connection;
            connection.name = data.name;

            sendTo(connection, {
               type: "login",
               success: true
            });
         }

         break;

      default:
         sendTo(connection, {
            type: "error",
            message: "Command no found: " + data.type
         });

         break;
   }
});
如果使用者傳送一條型別為login的訊息,我們將 -
- 檢查是否有人已使用此使用者名稱登入。
- 如果是,則告訴使用者他登入未成功。
- 如果沒有人使用此使用者名稱,我們將使用者名稱作為鍵新增到connection物件中。
- 如果未識別命令,我們將傳送錯誤。
以下程式碼是用於向連線傳送訊息的輔助函式。將其新增到server.js檔案中 -
function sendTo(connection, message) {
   connection.send(JSON.stringify(message));
}
當用戶斷開連線時,我們應該清理其連線。當 close 事件觸發時,我們可以刪除使用者。將以下程式碼新增到 connection 處理程式中:
connection.on("close", function() {
   if(connection.name) {
      delete users[connection.name];
   }
});
成功登入後,使用者想要呼叫另一個使用者。他應該向另一個使用者發出offer來實現它。新增offer處理程式 -
case "offer":
   //for ex. UserA wants to call UserB
   console.log("Sending offer to: ", data.name);

   //if UserB exists then send him offer details
   var conn = users[data.name];

   if(conn != null) {
      //setting that UserA connected with UserB
      connection.otherName = data.name;
      sendTo(conn, {
         type: "offer",
         offer: data.offer,
         name: connection.name
      });
   }

   break;
首先,我們獲取我們嘗試呼叫的使用者connection。如果存在,我們將向他傳送offer詳細資訊。我們還在connection物件中添加了otherName。這是為了方便以後查詢。
對響應的回覆具有與我們在 offer 處理程式中使用的類似模式。我們的伺服器只是將所有訊息作為 answer 傳遞給另一個使用者。在 offer 處理程式之後新增以下程式碼:
case "answer":
   console.log("Sending answer to: ", data.name);
   //for ex. UserB answers UserA
   var conn = users[data.name];

   if(conn != null) {
      connection.otherName = data.name;

      sendTo(conn, {
         type: "answer",
         answer: data.answer
      });
   }

   break;
最後一部分是在使用者之間處理ICE候選者。我們使用相同的技術,只是在使用者之間傳遞訊息。主要區別在於,候選者訊息可能每個使用者多次發生,並且可以按任何順序發生。新增candidate處理程式 -
case "candidate":
   console.log("Sending candidate to:",data.name);
   var conn = users[data.name];

   if(conn != null) {
      sendTo(conn, {
         type: "candidate",
         candidate: data.candidate
      });
   }

   break;
為了允許我們的使用者斷開與另一個使用者的連線,我們應該實現結束通話功能。它還會告訴伺服器刪除所有使用者引用。新增 leave 處理程式:
case "leave":
   console.log("Disconnecting from", data.name);
   var conn = users[data.name];
   conn.otherName = null;

   //notify the other user so he can disconnect his peer connection
   if(conn != null) {
      sendTo(conn, {
         type: "leave"
      });
   }

   break;
這也會向另一個使用者傳送leave事件,以便他可以相應地斷開其對等連線。我們還應該處理使用者從信令伺服器斷開連線的情況。讓我們修改我們的close處理程式 -
connection.on("close", function() {

   if(connection.name) {
      delete users[connection.name];

      if(connection.otherName) {
         console.log("Disconnecting from ", connection.otherName);
         var conn = users[connection.otherName];
         conn.otherName = null;

         if(conn != null) {
            sendTo(conn, {
               type: "leave"
            });
         }

      }
   }
});
以下是我們的信令伺服器的完整程式碼:
//require our websocket library
var WebSocketServer = require('ws').Server;

//creating a websocket server at port 9090
var wss = new WebSocketServer({port: 9090});

//all connected to the server users
var users = {};

//when a user connects to our sever
wss.on('connection', function(connection) {

   console.log("User connected");

   //when server gets a message from a connected user
   connection.on('message', function(message) {

      var data;

      //accepting only JSON messages
      try {
         data = JSON.parse(message);
      } catch (e) {
         console.log("Invalid JSON");
         data = {};
      }

      //switching type of the user message
      switch (data.type) {
         //when a user tries to login
         case "login":
            console.log("User logged", data.name);

            //if anyone is logged in with this username then refuse
            if(users[data.name]) {
               sendTo(connection, {
                  type: "login",
                  success: false
               });
            } else {
               //save user connection on the server
               users[data.name] = connection;
               connection.name = data.name;
               sendTo(connection, {
                  type: "login",
                  success: true
               });
            }

            break;

         case "offer":
            //for ex. UserA wants to call UserB
            console.log("Sending offer to: ", data.name);

            //if UserB exists then send him offer details
            var conn = users[data.name];

            if(conn != null) {
               //setting that UserA connected with UserB
               connection.otherName = data.name;
               sendTo(conn, {
                  type: "offer",
                  offer: data.offer,
                  name: connection.name
               });
            }

            break;

         case "answer":
            console.log("Sending answer to: ", data.name);
            //for ex. UserB answers UserA
            var conn = users[data.name];

            if(conn != null) {
               connection.otherName = data.name;
               sendTo(conn, {
                  type: "answer",
                  answer: data.answer
               });
            }

            break;

         case "candidate":
            console.log("Sending candidate to:",data.name);
            var conn = users[data.name];

            if(conn != null) {
               sendTo(conn, {
                  type: "candidate",
                  candidate: data.candidate
               });
            }

            break;

         case "leave":
            console.log("Disconnecting from", data.name);
            var conn = users[data.name];
            conn.otherName = null;

            //notify the other user so he can disconnect his peer connection
            if(conn != null) {
               sendTo(conn, {
                  type: "leave"
               });
            }

            break;

         default:
            sendTo(connection, {
               type: "error",
               message: "Command not found: " + data.type
            });

            break;
      }
   });

   //when user exits, for example closes a browser window
   //this may help if we are still in "offer","answer" or "candidate" state
   connection.on("close", function() {

      if(connection.name) {
         delete users[connection.name];

         if(connection.otherName) {
            console.log("Disconnecting from ", connection.otherName);
            var conn = users[connection.otherName];
            conn.otherName = null;

            if(conn != null) {
               sendTo(conn, {
                  type: "leave"
              });
            }
         }
      }
   });

   connection.send("Hello world");
});

function sendTo(connection, message) {
   connection.send(JSON.stringify(message));
}
客戶端應用程式
測試此應用程式的一種方法是開啟兩個瀏覽器選項卡,並嘗試相互進行音訊通話。
首先,我們需要安裝bootstrap庫。Bootstrap是一個用於開發 Web 應用程式的前端框架。您可以在https://bootstrap.tw/.瞭解更多資訊。建立一個資料夾,例如“audiochat”。這將是我們的根應用程式資料夾。在此資料夾內建立一個檔案package.json(它對於管理 npm 依賴項是必要的)並新增以下內容:
{
   "name": "webrtc-audiochat",
   "version": "0.1.0",
   "description": "webrtc-audiochat",
   "author": "Author",
   "license": "BSD-2-Clause"
}
然後執行npm install bootstrap。這將在audiochat/node_modules資料夾中安裝bootstrap庫。
現在我們需要建立一個基本的 HTML 頁面。在根資料夾中建立一個 index.html 檔案,其中包含以下程式碼:
<html>

   <head>
      <title>WebRTC Voice Demo</title>
      <link rel = "stylesheet" href = "node_modules/bootstrap/dist/css/bootstrap.min.css"/>
   </head>

   <style>
      body {
         background: #eee;
         padding: 5% 0;
      }
   </style>

   <body>
      <div id = "loginPage" class = "container text-center">

         <div class = "row">
            <div class = "col-md-4 col-md-offset-4">

               <h2>WebRTC Voice Demo. Please sign in</h2>

               <label for = "usernameInput" class = "sr-only">Login</label>
               <input type = "email" id = "usernameInput"
                  class = "form-control formgroup"
                  placeholder = "Login" required = "" autofocus = "">
               <button id = "loginBtn" class = "btn btn-lg btn-primary btnblock">
                  Sign in</button>
            </div>
         </div>

      </div>

      <div id = "callPage" class = "call-page">

         <div class = "row">

            <div class = "col-md-6 text-right">
               Local audio: <audio id = "localAudio"
               controls autoplay></audio>
            </div>

            <div class = "col-md-6 text-left">
               Remote audio: <audio id = "remoteAudio"
                  controls autoplay></audio>
            </div>

         </div>

         <div class = "row text-center">
            <div class = "col-md-12">
               <input id = "callToUsernameInput"
                  type = "text" placeholder = "username to call" />
               <button id = "callBtn" class = "btn-success btn">Call</button>
               <button id = "hangUpBtn" class = "btn-danger btn">Hang Up</button>
            </div>
         </div>

      </div>

      <script src = "client.js"></script>

   </body>

</html>
此頁面應該很熟悉。我們添加了bootstrap css 檔案。我們還定義了兩個頁面。最後,我們建立了幾個文字欄位和按鈕來獲取使用者的資訊。您應該看到用於本地和遠端音訊流的兩個音訊元素。請注意,我們添加了到client.js檔案的連結。
現在我們需要與我們的信令伺服器建立連線。在根資料夾中建立 client.js 檔案,其中包含以下程式碼:
//our username
var name;
var connectedUser;

//connecting to our signaling server
var conn = new WebSocket('ws://:9090');

conn.onopen = function () {
   console.log("Connected to the signaling server");
};

//when we got a message from a signaling server
conn.onmessage = function (msg) {
   console.log("Got message", msg.data);
   var data = JSON.parse(msg.data);

   switch(data.type) {
      case "login":
         handleLogin(data.success);
         break;
      //when somebody wants to call us
      case "offer":
         handleOffer(data.offer, data.name);
         break;
      case "answer":
         handleAnswer(data.answer);
         break;
      //when a remote peer sends an ice candidate to us
      case "candidate":
         handleCandidate(data.candidate);
         break;
      case "leave":
         handleLeave();
         break;
      default:
         break;
   }
};

conn.onerror = function (err) {
   console.log("Got error", err);
};

//alias for sending JSON encoded messages
function send(message) {
   //attach the other peer username to our messages
   if (connectedUser) {
      message.name = connectedUser;
   }

   conn.send(JSON.stringify(message));
};
現在透過 node server 執行我們的信令伺服器。然後,在根資料夾中執行 static 命令並在瀏覽器中開啟頁面。您應該看到以下控制檯輸出:
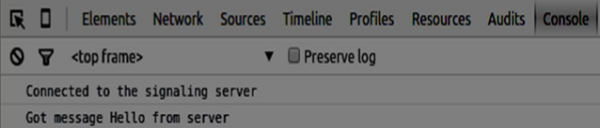
下一步是實現具有唯一使用者名稱的使用者登入。我們只需將使用者名稱傳送到伺服器,伺服器隨後會告訴我們它是否已被佔用。將以下程式碼新增到您的 client.js 檔案中:
//******
//UI selectors block
//******

var loginPage = document.querySelector('#loginPage');
var usernameInput = document.querySelector('#usernameInput');
var loginBtn = document.querySelector('#loginBtn');

var callPage = document.querySelector('#callPage');
var callToUsernameInput = document.querySelector('#callToUsernameInput');
var callBtn = document.querySelector('#callBtn');

var hangUpBtn = document.querySelector('#hangUpBtn');

callPage.style.display = "none";

// Login when the user clicks the button
loginBtn.addEventListener("click", function (event) {
   name = usernameInput.value;

   if (name.length > 0) {
      send({
         type: "login",
         name: name
      });
   }

});

function handleLogin(success) {
   if (success === false) {
      alert("Ooops...try a different username");
   } else {
      loginPage.style.display = "none";
      callPage.style.display = "block";

      //**********************
      //Starting a peer connection
      //**********************

   }

};
首先,我們選擇頁面上一些元素的引用。然後,我們隱藏呼叫頁面。然後,我們在登入按鈕上新增一個事件監聽器。當用戶點選它時,我們將他的使用者名稱傳送到伺服器。最後,我們實現了 handleLogin 回撥。如果登入成功,我們將顯示呼叫頁面並開始設定對等連線。
要啟動對等連線,我們需要:
- 從麥克風獲取音訊流
- 建立RTCPeerConnection物件
將以下程式碼新增到“UI 選擇器塊”中:
var localAudio = document.querySelector('#localAudio');
var remoteAudio = document.querySelector('#remoteAudio');

var yourConn;
var stream;
修改 handleLogin 函式:
function handleLogin(success) {
   if (success === false) {
      alert("Ooops...try a different username");
   } else {
      loginPage.style.display = "none";
      callPage.style.display = "block";

      //**********************
      //Starting a peer connection
      //**********************

      //getting local audio stream
      navigator.webkitGetUserMedia({ video: false, audio: true }, function (myStream) {
         stream = myStream;

         //displaying local audio stream on the page
         localAudio.src = window.URL.createObjectURL(stream);

         //using Google public stun server
         var configuration = {
            "iceServers": [{ "url": "stun:stun2.1.google.com:19302" }]
         };

         yourConn = new webkitRTCPeerConnection(configuration);

         // setup stream listening
         yourConn.addStream(stream);

         //when a remote user adds stream to the peer connection, we display it
         yourConn.onaddstream = function (e) {
            remoteAudio.src = window.URL.createObjectURL(e.stream);
         };

         // Setup ice handling
         yourConn.onicecandidate = function (event) {
            if (event.candidate) {
               send({
                  type: "candidate",
               });
            }
         };

      }, function (error) {
         console.log(error);
      });

   }
};
現在,如果您執行程式碼,該頁面應該允許您登入並在頁面上顯示您的本地音訊流。

現在我們準備發起呼叫。首先,我們向另一個使用者傳送一個 offer。一旦使用者收到 offer,他就會建立一個 answer 並開始交換 ICE 候選者。將以下程式碼新增到 client.js 檔案中:
//initiating a call
callBtn.addEventListener("click", function () {
   var callToUsername = callToUsernameInput.value;

   if (callToUsername.length > 0) {
      connectedUser = callToUsername;

      // create an offer
      yourConn.createOffer(function (offer) {
         send({
            type: "offer",
            offer: offer
         });

         yourConn.setLocalDescription(offer);

      }, function (error) {
         alert("Error when creating an offer");
      });
   }

});

//when somebody sends us an offer
function handleOffer(offer, name) {
   connectedUser = name;
   yourConn.setRemoteDescription(new RTCSessionDescription(offer));

   //create an answer to an offer
   yourConn.createAnswer(function (answer) {
      yourConn.setLocalDescription(answer);

      send({
         type: "answer",
         answer: answer
      });

   }, function (error) {
      alert("Error when creating an answer");
   });

};

//when we got an answer from a remote user
function handleAnswer(answer) {
   yourConn.setRemoteDescription(new RTCSessionDescription(answer));
};

//when we got an ice candidate from a remote user
function handleCandidate(candidate) {
   yourConn.addIceCandidate(new RTCIceCandidate(candidate));
};
我們在 Call 按鈕上添加了一個 click 處理程式,它會發起一個 offer。然後,我們實現了 onmessage 處理程式期望的幾個處理程式。它們將非同步處理,直到兩個使用者都建立連線。
最後一步是實現結束通話功能。這將停止資料傳輸並告訴另一個使用者關閉呼叫。新增以下程式碼:
//hang up
hangUpBtn.addEventListener("click", function () {
   send({
      type: "leave"
   });

   handleLeave();
});

function handleLeave() {
   connectedUser = null;
   remoteAudio.src = null;

   yourConn.close();
   yourConn.onicecandidate = null;
   yourConn.onaddstream = null;
};
當用戶點選 Hang Up 按鈕時:
- 它將向另一個使用者傳送“leave”訊息
- 它將關閉 RTCPeerConnection 並本地銷燬連線
現在執行程式碼。您應該能夠使用兩個瀏覽器選項卡登入伺服器。然後,您可以向選項卡進行音訊呼叫並結束通話呼叫。

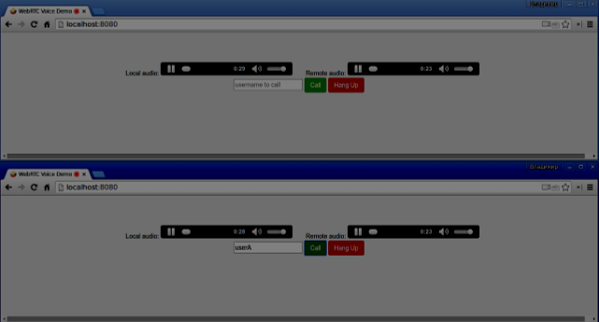
以下是完整的 client.js 檔案:
//our username
var name;
var connectedUser;

//connecting to our signaling server
var conn = new WebSocket('ws://:9090');

conn.onopen = function () {
   console.log("Connected to the signaling server");
};

//when we got a message from a signaling server
conn.onmessage = function (msg) {
   console.log("Got message", msg.data);
   var data = JSON.parse(msg.data);

   switch(data.type) {
      case "login":
         handleLogin(data.success);
         break;
      //when somebody wants to call us
      case "offer":
         handleOffer(data.offer, data.name);
         break;
      case "answer":
         handleAnswer(data.answer);
         break;
      //when a remote peer sends an ice candidate to us
      case "candidate":
         handleCandidate(data.candidate);
         break;
      case "leave":
         handleLeave();
         break;
      default:
         break;
   }
};

conn.onerror = function (err) {
   console.log("Got error", err);
};

//alias for sending JSON encoded messages
function send(message) {
   //attach the other peer username to our messages
   if (connectedUser) {
      message.name = connectedUser;
   }

   conn.send(JSON.stringify(message));
};

//******
//UI selectors block
//******

var loginPage = document.querySelector('#loginPage');
var usernameInput = document.querySelector('#usernameInput');
var loginBtn = document.querySelector('#loginBtn');

var callPage = document.querySelector('#callPage');
var callToUsernameInput = document.querySelector('#callToUsernameInput');
var callBtn = document.querySelector('#callBtn');

var hangUpBtn = document.querySelector('#hangUpBtn');
var localAudio = document.querySelector('#localAudio');
var remoteAudio = document.querySelector('#remoteAudio');

var yourConn;
var stream;

callPage.style.display = "none";

// Login when the user clicks the button
loginBtn.addEventListener("click", function (event) {
   name = usernameInput.value;

   if (name.length > 0) {
      send({
         type: "login",
         name: name
      });
   }

});

function handleLogin(success) {
   if (success === false) {
      alert("Ooops...try a different username");
   } else {
      loginPage.style.display = "none";
      callPage.style.display = "block";

      //**********************
      //Starting a peer connection
      //**********************

      //getting local audio stream
      navigator.webkitGetUserMedia({ video: false, audio: true }, function (myStream) {
         stream = myStream;

         //displaying local audio stream on the page
         localAudio.src = window.URL.createObjectURL(stream);

         //using Google public stun server
         var configuration = {
            "iceServers": [{ "url": "stun:stun2.1.google.com:19302" }]
         };

         yourConn = new webkitRTCPeerConnection(configuration);

         // setup stream listening
         yourConn.addStream(stream);

         //when a remote user adds stream to the peer connection, we display it
         yourConn.onaddstream = function (e) {
            remoteAudio.src = window.URL.createObjectURL(e.stream);
         };

         // Setup ice handling
         yourConn.onicecandidate = function (event) {
            if (event.candidate) {
               send({
                  type: "candidate",
                  candidate: event.candidate
               });
            }
         };

      }, function (error) {
         console.log(error);
      });

   }
};

//initiating a call
callBtn.addEventListener("click", function () {
   var callToUsername = callToUsernameInput.value;

   if (callToUsername.length > 0) {
      connectedUser = callToUsername;

      // create an offer
      yourConn.createOffer(function (offer) {
         send({
            type: "offer",
            offer: offer
         });

         yourConn.setLocalDescription(offer);
      }, function (error) {
         alert("Error when creating an offer");
      });
   }
});

//when somebody sends us an offer
function handleOffer(offer, name) {
   connectedUser = name;
   yourConn.setRemoteDescription(new RTCSessionDescription(offer));

   //create an answer to an offer
   yourConn.createAnswer(function (answer) {
      yourConn.setLocalDescription(answer);

      send({
         type: "answer",
         answer: answer
      });

   }, function (error) {
      alert("Error when creating an answer");
   });

};

//when we got an answer from a remote user
function handleAnswer(answer) {
   yourConn.setRemoteDescription(new RTCSessionDescription(answer));
};

//when we got an ice candidate from a remote user
function handleCandidate(candidate) {
   yourConn.addIceCandidate(new RTCIceCandidate(candidate));
};

//hang up
hangUpBtn.addEventListener("click", function () {
   send({
      type: "leave"
   });

   handleLeave();
});

function handleLeave() {
   connectedUser = null;
   remoteAudio.src = null;

   yourConn.close();
   yourConn.onicecandidate = null;
   yourConn.onaddstream = null;
};
WebRTC - 文字演示
在本章中,我們將構建一個客戶端應用程式,允許兩個在不同裝置上的使用者使用WebRTC相互發送訊息。我們的應用程式將有兩個頁面。一個用於登入,另一個用於向另一個使用者傳送訊息。
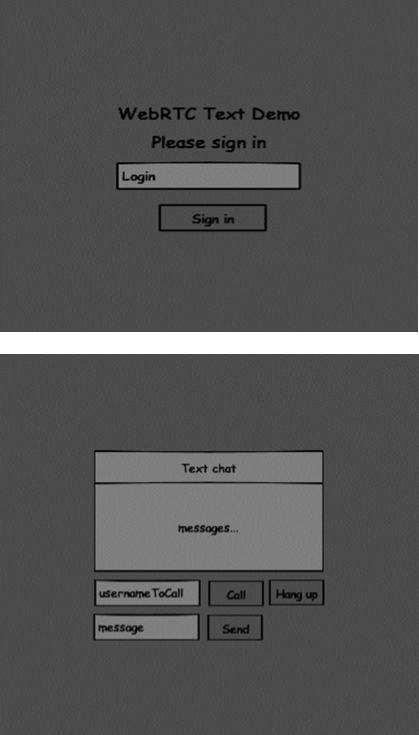
這兩個頁面將是 div 標籤。大多數輸入都是透過簡單的事件處理程式完成的。
信令伺服器
要建立 WebRTC 連線,客戶端必須能夠在不使用 WebRTC 對等連線的情況下傳輸訊息。這正是我們將使用 HTML5 WebSockets 的地方 - 兩個端點(Web 伺服器和 Web 瀏覽器)之間的雙向套接字連線。現在讓我們開始使用 WebSocket 庫。建立 server.js 檔案並插入以下程式碼:
//require our websocket library
var WebSocketServer = require('ws').Server;

//creating a websocket server at port 9090
var wss = new WebSocketServer({port: 9090});

//when a user connects to our sever
wss.on('connection', function(connection) {
   console.log("user connected");

   //when server gets a message from a connected user
   connection.on('message', function(message) {
      console.log("Got message from a user:", message);
   });

   connection.send("Hello from server");
});
第一行需要我們已經安裝的WebSocket庫。然後我們在埠9090上建立一個socket伺服器。接下來,我們監聽connection事件。當用戶與伺服器建立WebSocket連線時,將執行此程式碼。然後我們監聽使用者傳送的任何訊息。最後,我們向已連線的使用者傳送一個“Hello from server”的響應。
在我們的信令伺服器中,我們將為每個連線使用基於字串的使用者名稱,以便我們知道將訊息傳送到哪裡。讓我們稍微更改一下我們的connection處理程式 -
connection.on('message', function(message) {
   var data;

   //accepting only JSON messages
   try {
      data = JSON.parse(message);
   } catch (e) {
      console.log("Invalid JSON");
      data = {};
   }
});
這樣我們只接受JSON訊息。接下來,我們需要將所有已連線的使用者儲存在某個地方。我們將為此使用一個簡單的Javascript物件。更改我們檔案的最頂部 -
//require our websocket library
var WebSocketServer = require('ws').Server;

//creating a websocket server at port 9090
var wss = new WebSocketServer({port: 9090});

//all connected to the server users
var users = {};
我們將為來自客戶端的每條訊息新增一個type欄位。例如,如果使用者想要登入,他將傳送login型別的訊息。讓我們定義它 -
connection.on('message', function(message) {
   var data;

   //accepting only JSON messages
   try {
      data = JSON.parse(message);
   } catch (e) {
      console.log("Invalid JSON");
      data = {};
   }

   //switching type of the user message
   switch (data.type) {
      //when a user tries to login
      case "login":
         console.log("User logged:", data.name);

         //if anyone is logged in with this username then refuse
         if(users[data.name]) {
            sendTo(connection, {
               type: "login",
               success: false
            });
         } else {
            //save user connection on the server
            users[data.name] = connection;
            connection.name = data.name;

            sendTo(connection, {
               type: "login",
               success: true
            });
         }

         break;

      default:
         sendTo(connection, {
            type: "error",
            message: "Command no found: " + data.type
         });

         break;
   }
});
如果使用者傳送一條型別為login的訊息,我們將 -
- 檢查是否有人已使用此使用者名稱登入。
- 如果是,則告訴使用者他登入未成功。
- 如果沒有人使用此使用者名稱,我們將使用者名稱作為鍵新增到connection物件中。
- 如果未識別命令,我們將傳送錯誤。
以下程式碼是用於向連線傳送訊息的輔助函式。將其新增到server.js檔案中 -
function sendTo(connection, message) {
   connection.send(JSON.stringify(message));
}
當用戶斷開連線時,我們應該清理其連線。當close事件觸發時,我們可以刪除使用者。將以下程式碼新增到connection處理程式中 -
connection.on("close", function() {
   if(connection.name) {
      delete users[connection.name];
   }
});
成功登入後,使用者想要呼叫另一個使用者。他應該向另一個使用者發出offer來實現它。新增offer處理程式 -
case "offer":
   //for ex. UserA wants to call UserB
   console.log("Sending offer to: ", data.name);

   //if UserB exists then send him offer details
   var conn = users[data.name];

   if(conn != null){
   //setting that UserA connected with UserB
   connection.otherName = data.name;

      sendTo(conn, {
         type: "offer",
         offer: data.offer,
         name: connection.name
      });

   break;
首先,我們獲取我們嘗試呼叫的使用者connection。如果存在,我們將向他傳送offer詳細資訊。我們還在connection物件中添加了otherName。這是為了方便以後查詢。
對響應的回覆具有與我們在 offer 處理程式中使用的類似模式。我們的伺服器只是將所有訊息作為 answer 傳遞給另一個使用者。在 offer 處理程式之後新增以下程式碼:
case "answer":
   console.log("Sending answer to: ", data.name);

   //for ex. UserB answers UserA
   var conn = users[data.name];

   if(conn != null) {
      connection.otherName = data.name;
      sendTo(conn, {
         type: "answer",
         answer: data.answer
      });
   }

   break;
最後一部分是在使用者之間處理ICE候選者。我們使用相同的技術,只是在使用者之間傳遞訊息。主要區別在於,候選者訊息可能每個使用者多次發生,並且可以按任何順序發生。新增candidate處理程式 -
case "candidate":
   console.log("Sending candidate to:",data.name);
   var conn = users[data.name];

   if(conn != null) {
      sendTo(conn, {
         type: "candidate",
         candidate: data.candidate
      });
   }

   break;
為了允許我們的使用者斷開與另一個使用者的連線,我們應該實現結束通話功能。它還會告訴伺服器刪除所有使用者引用。新增 leave 處理程式:
case "leave":
   console.log("Disconnecting from", data.name);
   var conn = users[data.name];
   conn.otherName = null;

   //notify the other user so he can disconnect his peer connection
   if(conn != null) {
      sendTo(conn, {
         type: "leave"
      });
   }

   break;
這也會向另一個使用者傳送leave事件,以便他可以相應地斷開其對等連線。我們還應該處理使用者從信令伺服器斷開連線的情況。讓我們修改我們的close處理程式 -
connection.on("close", function() {

   if(connection.name) {
      delete users[connection.name];

      if(connection.otherName) {
         console.log("Disconnecting from ", connection.otherName);
         var conn = users[connection.otherName];
         conn.otherName = null;

         if(conn != null) {
            sendTo(conn, {
               type: "leave"
            });
         }
      }
   }
});
以下是我們的信令伺服器的完整程式碼:
//require our websocket library
var WebSocketServer = require('ws').Server;

//creating a websocket server at port 9090
var wss = new WebSocketServer({port: 9090});

//all connected to the server users
var users = {};

//when a user connects to our sever
wss.on('connection', function(connection) {

   console.log("User connected");

   //when server gets a message from a connected user
   connection.on('message', function(message) {

      var data;
      //accepting only JSON messages
      try {
         data = JSON.parse(message);
      } catch (e) {
         console.log("Invalid JSON");
         data = {};
      }

      //switching type of the user message
      switch (data.type) {
         //when a user tries to login
         case "login":
            console.log("User logged", data.name);
            //if anyone is logged in with this username then refuse
            if(users[data.name]) {
               sendTo(connection, {
                  type: "login",
                  success: false
               });
            } else {
               //save user connection on the server
               users[data.name] = connection;
               connection.name = data.name;

                  sendTo(connection, {
                     type: "login",
                     success: true
                  });
            }

            break;

         case "offer":
            //for ex. UserA wants to call UserB
            console.log("Sending offer to: ", data.name);

            //if UserB exists then send him offer details
            var conn = users[data.name];

            if(conn != null) {
               //setting that UserA connected with UserB
               connection.otherName = data.name;

               sendTo(conn, {
                  type: "offer",
                  offer: data.offer,
                  name: connection.name
               });
            }

            break;

         case "answer":
            console.log("Sending answer to: ", data.name);
            //for ex. UserB answers UserA
            var conn = users[data.name];

            if(conn != null) {
               connection.otherName = data.name;
               sendTo(conn, {
                  type: "answer",
                  answer: data.answer
               });
            }

            break;

         case "candidate":
            console.log("Sending candidate to:",data.name);
            var conn = users[data.name];

            if(conn != null) {
               sendTo(conn, {
                  type: "candidate",
                  candidate: data.candidate
               });
            }

            break;

         case "leave":
            console.log("Disconnecting from", data.name);
            var conn = users[data.name];
            conn.otherName = null;

            //notify the other user so he can disconnect his peer connection
            if(conn != null) {
               sendTo(conn, {
                  type: "leave"
               });
            }

            break;

         default:
            sendTo(connection, {
               type: "error",
               message: "Command not found: " + data.type
            });

            break;

      }
   });

   //when user exits, for example closes a browser window
   //this may help if we are still in "offer","answer" or "candidate" state
   connection.on("close", function() {

      if(connection.name) {
         delete users[connection.name];

         if(connection.otherName) {
            console.log("Disconnecting from ", connection.otherName);
            var conn = users[connection.otherName];
            conn.otherName = null;

            if(conn != null) {
               sendTo(conn, {
                  type: "leave"
               });
            }
         }
      }
   });

   connection.send("Hello world");

});

function sendTo(connection, message) {
   connection.send(JSON.stringify(message));
}
客戶端應用程式
測試此應用程式的一種方法是開啟兩個瀏覽器選項卡,並嘗試相互發送訊息。
首先,我們需要安裝bootstrap庫。Bootstrap是一個用於開發 Web 應用程式的前端框架。您可以在https://bootstrap.tw/.瞭解更多資訊。建立一個資料夾,例如“textchat”。這將是我們的根應用程式資料夾。在此資料夾內建立一個檔案package.json(它對於管理 npm 依賴項是必要的)並新增以下內容:
{
   "name": "webrtc-textochat",
   "version": "0.1.0",
   "description": "webrtc-textchat",
   "author": "Author",
   "license": "BSD-2-Clause"
}
然後執行npm install bootstrap。這將在textchat/node_modules資料夾中安裝bootstrap庫。
現在我們需要建立一個基本的 HTML 頁面。在根資料夾中建立一個 index.html 檔案,其中包含以下程式碼:
<html>

   <head>
      <title>WebRTC Text Demo</title>
      <link rel = "stylesheet" href = "node_modules/bootstrap/dist/css/bootstrap.min.css"/>
   </head>

   <style>
      body {
         background: #eee;
         padding: 5% 0;
      }
   </style>

   <body>
      <div id = "loginPage" class = "container text-center">

         <div class = "row">
            <div class = "col-md-4 col-md-offset-4">
               <h2>WebRTC Text Demo. Please sign in</h2>
               <label for = "usernameInput" class = "sr-only">Login</label>
               <input type = "email" id = "usernameInput"
                  class = "form-control formgroup" placeholder = "Login"
                  required = "" autofocus = "">
               <button id = "loginBtn" class = "btn btn-lg btn-primary btnblock">
                  Sign in</button>
            </div>
         </div>

      </div>

      <div id = "callPage" class = "call-page container">

         <div class = "row">
            <div class = "col-md-4 col-md-offset-4 text-center">
               <div class = "panel panel-primary">
                  <div class = "panel-heading">Text chat</div>
                  <div id = "chatarea" class = "panel-body text-left"></div>
               </div>
            </div>
         </div>

         <div class = "row text-center form-group">
            <div class = "col-md-12">
               <input id = "callToUsernameInput" type = "text"
                  placeholder = "username to call" />
               <button id = "callBtn" class = "btn-success btn">Call</button>
               <button id = "hangUpBtn" class = "btn-danger btn">Hang Up</button>
            </div>
         </div>

         <div class = "row text-center">
            <div class = "col-md-12">
               <input id = "msgInput" type = "text" placeholder = "message" />
               <button id = "sendMsgBtn" class = "btn-success btn">Send</button>
            </div>
         </div>

      </div>

      <script src = "client.js"></script>

   </body>

</html>
此頁面應該很熟悉。我們添加了bootstrap css 檔案。我們還定義了兩個頁面。最後,我們建立了幾個文字欄位和按鈕來獲取使用者的資訊。在“聊天”頁面上,您應該看到帶有“chatarea”ID的div標籤,所有我們的訊息都將顯示在其中。請注意,我們添加了到client.js檔案的連結。
現在我們需要與我們的信令伺服器建立連線。在根資料夾中建立 client.js 檔案,其中包含以下程式碼:
//our username
var name;
var connectedUser;

//connecting to our signaling server
var conn = new WebSocket('ws://:9090');

conn.onopen = function () {
   console.log("Connected to the signaling server");
};

//when we got a message from a signaling server
conn.onmessage = function (msg) {
   console.log("Got message", msg.data);

   var data = JSON.parse(msg.data);

   switch(data.type) {
      case "login":
         handleLogin(data.success);
         break;
      //when somebody wants to call us
      case "offer":
         handleOffer(data.offer, data.name);
         break;
      case "answer":
         handleAnswer(data.answer);
         break;
      //when a remote peer sends an ice candidate to us
      case "candidate":
         handleCandidate(data.candidate);
         break;
      case "leave":
         handleLeave();
         break;
      default:
         break;
   }
};

conn.onerror = function (err) {
   console.log("Got error", err);
};

//alias for sending JSON encoded messages
function send(message) {
   //attach the other peer username to our messages
   if (connectedUser) {
      message.name = connectedUser;
   }

   conn.send(JSON.stringify(message));
};
現在透過 node server 執行我們的信令伺服器。然後,在根資料夾中執行 static 命令並在瀏覽器中開啟頁面。您應該看到以下控制檯輸出:

下一步是實現具有唯一使用者名稱的使用者登入。我們只需將使用者名稱傳送到伺服器,伺服器隨後會告訴我們它是否已被佔用。將以下程式碼新增到您的 client.js 檔案中:
//******
//UI selectors block
//******

var loginPage = document.querySelector('#loginPage');
var usernameInput = document.querySelector('#usernameInput');
var loginBtn = document.querySelector('#loginBtn');

var callPage = document.querySelector('#callPage');
var callToUsernameInput = document.querySelector('#callToUsernameInput');
var callBtn = document.querySelector('#callBtn');

var hangUpBtn = document.querySelector('#hangUpBtn');
callPage.style.display = "none";

// Login when the user clicks the button
loginBtn.addEventListener("click", function (event) {
   name = usernameInput.value;

   if (name.length > 0) {
      send({
         type: "login",
         name: name
      });
   }

});

function handleLogin(success) {

   if (success === false) {
      alert("Ooops...try a different username");
   } else {
      loginPage.style.display = "none";
      callPage.style.display = "block";

      //**********************
      //Starting a peer connection
      //**********************
   }

};
首先,我們選擇頁面上一些元素的引用。然後,我們隱藏呼叫頁面。然後,我們在登入按鈕上新增一個事件監聽器。當用戶點選它時,我們將他的使用者名稱傳送到伺服器。最後,我們實現了handleLogin回撥。如果登入成功,我們將顯示呼叫頁面,設定對等連線,並建立一個數據通道。
要使用資料通道啟動對等連線,我們需要:
- 建立RTCPeerConnection物件
- 在我們的RTCPeerConnection物件中建立一個數據通道
將以下程式碼新增到“UI 選擇器塊”中:
var msgInput = document.querySelector('#msgInput');
var sendMsgBtn = document.querySelector('#sendMsgBtn');
var chatArea = document.querySelector('#chatarea');

var yourConn;
var dataChannel;
修改 handleLogin 函式:
function handleLogin(success) {
   if (success === false) {
      alert("Ooops...try a different username");
   } else {
      loginPage.style.display = "none";
      callPage.style.display = "block";

      //**********************
      //Starting a peer connection
      //**********************

      //using Google public stun server
      var configuration = {
         "iceServers": [{ "url": "stun:stun2.1.google.com:19302" }]
      };

      yourConn = new webkitRTCPeerConnection(configuration, {optional: [{RtpDataChannels: true}]});

      // Setup ice handling
      yourConn.onicecandidate = function (event) {
         if (event.candidate) {
            send({
               type: "candidate",
               candidate: event.candidate
            });
         }
      };

      //creating data channel
      dataChannel = yourConn.createDataChannel("channel1", {reliable:true});

      dataChannel.onerror = function (error) {
         console.log("Ooops...error:", error);
      };

      //when we receive a message from the other peer, display it on the screen
      dataChannel.onmessage = function (event) {
         chatArea.innerHTML += connectedUser + ": " + event.data + "<br />";
      };

      dataChannel.onclose = function () {
         console.log("data channel is closed");
      };
   }
};
如果登入成功,應用程式將建立RTCPeerConnection物件並設定onicecandidate處理程式,該處理程式將所有找到的icecandidate傳送到另一個對等方。它還建立一個dataChannel。請注意,在建立RTCPeerConnection物件時,建構函式中的第二個引數是可選的:[{RtpDataChannels: true}] 如果您使用的是Chrome或Opera,則該引數是必需的。下一步是向另一個對等方建立要約。一旦使用者收到要約,他就會建立一個答案並開始交換ICE候選。將以下程式碼新增到client.js檔案中:
//initiating a call
callBtn.addEventListener("click", function () {
   var callToUsername = callToUsernameInput.value;

   if (callToUsername.length > 0) {

      connectedUser = callToUsername;

      // create an offer
      yourConn.createOffer(function (offer) {

         send({
            type: "offer",
            offer: offer
         });

         yourConn.setLocalDescription(offer);

      }, function (error) {
         alert("Error when creating an offer");
      });
   }
});

//when somebody sends us an offer
function handleOffer(offer, name) {
   connectedUser = name;
   yourConn.setRemoteDescription(new RTCSessionDescription(offer));

   //create an answer to an offer
   yourConn.createAnswer(function (answer) {
      yourConn.setLocalDescription(answer);

      send({
         type: "answer",
         answer: answer
      });

   }, function (error) {
      alert("Error when creating an answer");
   });
};

//when we got an answer from a remote user
function handleAnswer(answer) {
   yourConn.setRemoteDescription(new RTCSessionDescription(answer));
};

//when we got an ice candidate from a remote user
function handleCandidate(candidate) {
   yourConn.addIceCandidate(new RTCIceCandidate(candidate));
};
我們在 Call 按鈕上添加了一個 click 處理程式,它會發起一個 offer。然後,我們實現了 onmessage 處理程式期望的幾個處理程式。它們將非同步處理,直到兩個使用者都建立連線。
下一步是實現結束通話功能。這將停止資料傳輸並告訴另一個使用者關閉資料通道。新增以下程式碼:
//hang up
hangUpBtn.addEventListener("click", function () {
   send({
      type: "leave"
   });

   handleLeave();
});

function handleLeave() {
   connectedUser = null;
   yourConn.close();
   yourConn.onicecandidate = null;
};
當用戶點選 Hang Up 按鈕時:
- 它將向另一個使用者傳送“離開”訊息。
- 它將關閉RTCPeerConnection以及資料通道。
最後一步是向另一個對等方傳送訊息。將“點選”處理程式新增到“傳送訊息”按鈕:
//when user clicks the "send message" button
sendMsgBtn.addEventListener("click", function (event) {
   var val = msgInput.value;
   chatArea.innerHTML += name + ": " + val + "<br />";

   //sending a message to a connected peer
   dataChannel.send(val);
   msgInput.value = "";
});
現在執行程式碼。您應該能夠使用兩個瀏覽器選項卡登入伺服器。然後,您可以向另一個使用者設定對等連線並向他傳送訊息,以及透過點選“結束通話”按鈕關閉資料通道。

以下是完整的 client.js 檔案:
//our username
var name;
var connectedUser;

//connecting to our signaling server
var conn = new WebSocket('ws://:9090');

conn.onopen = function () {
   console.log("Connected to the signaling server");
};

//when we got a message from a signaling server
conn.onmessage = function (msg) {
   console.log("Got message", msg.data);
   var data = JSON.parse(msg.data);

   switch(data.type) {
      case "login":
         handleLogin(data.success);
         break;
      //when somebody wants to call us
      case "offer":
         handleOffer(data.offer, data.name);
         break;
      case "answer":
         handleAnswer(data.answer);
         break;
      //when a remote peer sends an ice candidate to us
      case "candidate":
         handleCandidate(data.candidate);
         break;
      case "leave":
         handleLeave();
         break;
      default:
         break;
   }
};

conn.onerror = function (err) {
   console.log("Got error", err);
};

//alias for sending JSON encoded messages
function send(message) {

   //attach the other peer username to our messages
   if (connectedUser) {
      message.name = connectedUser;
   }

   conn.send(JSON.stringify(message));
};

//******
//UI selectors block
//******

var loginPage = document.querySelector('#loginPage');
var usernameInput = document.querySelector('#usernameInput');
var loginBtn = document.querySelector('#loginBtn');

var callPage = document.querySelector('#callPage');
var callToUsernameInput = document.querySelector('#callToUsernameInput');
var callBtn = document.querySelector('#callBtn');

var hangUpBtn = document.querySelector('#hangUpBtn');
var msgInput = document.querySelector('#msgInput');
var sendMsgBtn = document.querySelector('#sendMsgBtn');

var chatArea = document.querySelector('#chatarea');
var yourConn;
var dataChannel;
callPage.style.display = "none";

// Login when the user clicks the button
loginBtn.addEventListener("click", function (event) {
   name = usernameInput.value;

   if (name.length > 0) {
      send({
         type: "login",
         name: name
      });
   }

});

function handleLogin(success) {

   if (success === false) {
      alert("Ooops...try a different username");
   } else {
      loginPage.style.display = "none";
      callPage.style.display = "block";

      //**********************
      //Starting a peer connection
      //**********************

      //using Google public stun server
      var configuration = {
         "iceServers": [{ "url": "stun:stun2.1.google.com:19302" }]
      };

      yourConn = new webkitRTCPeerConnection(configuration, {optional: [{RtpDataChannels: true}]});

      // Setup ice handling
      yourConn.onicecandidate = function (event) {
         if (event.candidate) {
            send({
               type: "candidate",
               candidate: event.candidate
            });
         }
      };

      //creating data channel
      dataChannel = yourConn.createDataChannel("channel1", {reliable:true});

      dataChannel.onerror = function (error) {
         console.log("Ooops...error:", error);
      };

      //when we receive a message from the other peer, display it on the screen
      dataChannel.onmessage = function (event) {
         chatArea.innerHTML += connectedUser + ": " + event.data + "<br />";
      };

      dataChannel.onclose = function () {
         console.log("data channel is closed");
      };

   }
};

//initiating a call
callBtn.addEventListener("click", function () {
   var callToUsername = callToUsernameInput.value;

   if (callToUsername.length > 0) {
      connectedUser = callToUsername;
      // create an offer
      yourConn.createOffer(function (offer) {
         send({
            type: "offer",
            offer: offer
         });
         yourConn.setLocalDescription(offer);
      }, function (error) {
         alert("Error when creating an offer");
      });
   }

});

//when somebody sends us an offer
function handleOffer(offer, name) {
   connectedUser = name;
   yourConn.setRemoteDescription(new RTCSessionDescription(offer));

   //create an answer to an offer
   yourConn.createAnswer(function (answer) {
      yourConn.setLocalDescription(answer);
      send({
         type: "answer",
         answer: answer
      });
   }, function (error) {
      alert("Error when creating an answer");
   });

};

//when we got an answer from a remote user
function handleAnswer(answer) {
   yourConn.setRemoteDescription(new RTCSessionDescription(answer));
};

//when we got an ice candidate from a remote user
function handleCandidate(candidate) {
   yourConn.addIceCandidate(new RTCIceCandidate(candidate));
};

//hang up
hangUpBtn.addEventListener("click", function () {
   send({
      type: "leave"
   });

   handleLeave();
});

function handleLeave() {
   connectedUser = null;
   yourConn.close();
   yourConn.onicecandidate = null;
};

//when user clicks the "send message" button
sendMsgBtn.addEventListener("click", function (event) {
   var val = msgInput.value;
   chatArea.innerHTML += name + ": " + val + "<br />";

   //sending a message to a connected peer
   dataChannel.send(val);
   msgInput.value = "";
});
WebRTC - 安全性
在本章中,我們將向我們在“WebRTC信令”章節中建立的信令伺服器新增安全功能。將有兩個增強功能:
- 使用Redis資料庫進行使用者身份驗證
- 啟用安全套接字連線
首先,您應該安裝Redis。
從http://redis.io/download下載最新的穩定版本(在我的情況下為3.05)
解壓縮它
在下載的資料夾內執行sudo make install
安裝完成後,執行make test以檢查一切是否正常工作。
Redis有兩個可執行命令:
redis-cli - Redis的命令列介面(客戶端部分)
redis-server - Redis資料儲存
要執行Redis伺服器,請在終端控制檯中鍵入redis-server。您應該看到以下內容:

現在開啟一個新的終端視窗並執行redis-cli以開啟客戶端應用程式。

基本上,Redis是一個鍵值資料庫。要使用字串值建立鍵,您應該使用SET命令。要讀取鍵值,您應該使用GET命令。讓我們為他們新增兩個使用者和密碼。鍵將是使用者名稱,這些鍵的值將是相應的密碼。
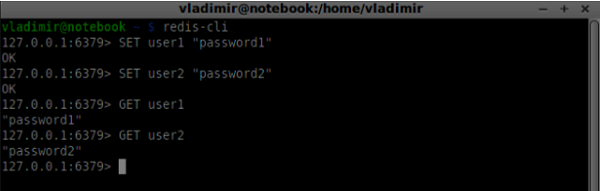
現在我們應該修改我們的信令伺服器以新增使用者身份驗證。將以下程式碼新增到server.js檔案的頂部:
//require the redis library in Node.js
var redis = require("redis");

//creating the redis client object
var redisClient = redis.createClient();
在上面的程式碼中,我們要求Node.js使用Redis庫併為我們的伺服器建立Redis客戶端。
要新增身份驗證,請修改連線物件上的message處理程式:
//when a user connects to our sever
wss.on('connection', function(connection) {
   console.log("user connected");

   //when server gets a message from a connected user
   connection.on('message', function(message) {

      var data;
      //accepting only JSON messages
      try {
         data = JSON.parse(message);
      } catch (e) {
         console.log("Invalid JSON");
         data = {};
      }

      //check whether a user is authenticated
      if(data.type != "login") {

         //if user is not authenticated
         if(!connection.isAuth) {
            sendTo(connection, {
               type: "error",
               message: "You are not authenticated"
            });
            return;
         }
      }

      //switching type of the user message
      switch (data.type) {
         //when a user tries to login
         case "login":
            console.log("User logged:", data.name);
            //get password for this username from redis database

            redisClient.get(data.name, function(err, reply) {
               //check if password matches with the one stored in redis
               var loginSuccess = reply === data.password;

               //if anyone is logged in with this username or incorrect password
                  then refuse
               if(users[data.name] || !loginSuccess) {
                  sendTo(connection, {
                     type: "login",
                     success: false
                  });
               } else {
                  //save user connection on the server
                  users[data.name] = connection;
                  connection.name = data.name;
                  connection.isAuth = true;

                  sendTo(connection, {
                     type: "login",
                     success: true
                  });
               }
            });

            break;
      }
   });

}

//...
//*****other handlers*******
在上面的程式碼中,如果使用者嘗試登入,我們從Redis獲取他的密碼,檢查它是否與儲存的密碼匹配,如果成功,我們將他的使用者名稱儲存在伺服器上。我們還將isAuth標誌新增到連線中以檢查使用者是否已透過身份驗證。請注意此程式碼:
//check whether a user is authenticated
if(data.type != "login") {

   //if user is not authenticated
   if(!connection.isAuth) {
      sendTo(connection, {
         type: "error",
         message: "You are not authenticated"
      });

      return;
   }
}
如果未經身份驗證的使用者嘗試傳送要約或離開連線,我們只需傳送錯誤訊息。
下一步是啟用安全套接字連線。強烈建議用於WebRTC應用程式。PKI(公鑰基礎設施)是CA(證書頒發機構)的數字簽名。然後,使用者檢查用於簽署證書的私鑰是否與CA證書的公鑰匹配。出於開發目的,我們將使用自簽名安全證書。
我們將使用openssl。它是一個開源工具,實現了SSL(安全套接字層)和TLS(傳輸層安全)協議。它通常在Unix系統上預設安裝。執行openssl version -a以檢查它是否已安裝。
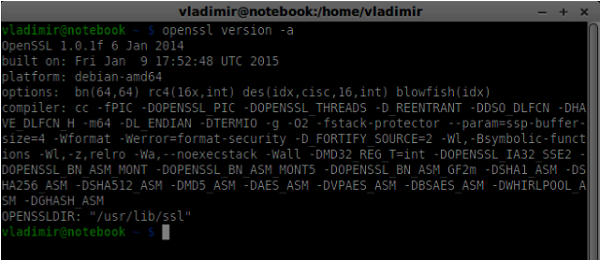
要生成公鑰和私鑰安全證書,您應該按照以下步驟操作:
生成一個臨時的伺服器密碼金鑰
openssl genrsa -des3 -passout pass:x -out server.pass.key 2048

生成伺服器私鑰
openssl rsa -passin pass:12345 -in server.pass.key -out server.key

生成簽名請求。系統會詢問您有關您公司的一些其他問題。一直按“Enter”鍵即可。
openssl req -new -key server.key -out server.csr
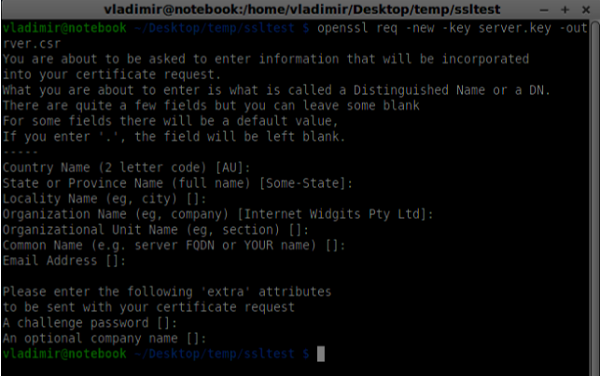
生成證書
openssl x509 -req -days 1095 -in server.csr -signkey server.key -out server.crt

現在您有兩個檔案,證書(server.crt)和私鑰(server.key)。將它們複製到信令伺服器根資料夾中。
要啟用安全套接字連線,請修改我們的信令伺服器。
//require file system module
var fs = require('fs');
var httpServ = require('https');

//https://github.com/visionmedia/superagent/issues/205
process.env.NODE_TLS_REJECT_UNAUTHORIZED = "0";

//out secure server will bind to the port 9090
var cfg = {
   port: 9090,
   ssl_key: 'server.key',
   ssl_cert: 'server.crt'
};

//in case of http request just send back "OK"
var processRequest = function(req, res) {
   res.writeHead(200);
   res.end("OK");
};

//create our server with SSL enabled
var app = httpServ.createServer({
   key: fs.readFileSync(cfg.ssl_key),
   cert: fs.readFileSync(cfg.ssl_cert)
}, processRequest).listen(cfg.port);

//require our websocket library
var WebSocketServer = require('ws').Server;

//creating a websocket server at port 9090
var wss = new WebSocketServer({server: app});

//all connected to the server users
var users = {};

//require the redis library in Node.js
var redis = require("redis");

//creating the redis client object
var redisClient = redis.createClient();

//when a user connects to our sever
wss.on('connection', function(connection){
//...other code
在上面的程式碼中,我們要求fs庫讀取私鑰和證書,使用繫結埠和私鑰和證書路徑建立cfg物件。然後,我們使用我們的金鑰以及埠9090上的WebSocket伺服器建立一個HTTPS伺服器。
現在在Opera中開啟https://:9090。您應該看到以下內容:
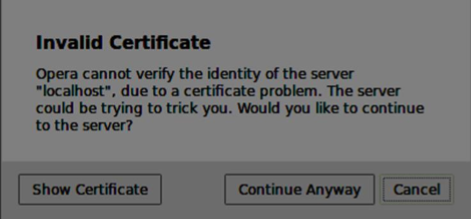
點選“繼續”按鈕。您應該看到“確定”訊息。
要測試我們的安全信令伺服器,我們將修改我們在“WebRTC文字演示”教程中建立的聊天應用程式。我們只需要新增一個密碼欄位。以下是完整的index.html檔案:
<html>

   <head>
      <title>WebRTC Text Demo</title>
      <link rel = "stylesheet" href = "node_modules/bootstrap/dist/css/bootstrap.min.css"/>
   </head>

   <style>
      body {
         background: #eee;
         padding: 5% 0;
      }
   </style>

   <body>
      <div id = "loginPage" class = "container text-center">

         <div class = "row">
            <div class = "col-md-4 col-md-offset-4">
               <h2>WebRTC Text Demo. Please sign in</h2>
               <label for = "usernameInput" class = "sr-only">Login</label>
               <input type = "email" id = "usernameInput"
                  class = "form-control formgroup" placeholder = "Login"
                  required = "" autofocus = "">
               <input type = "text" id = "passwordInput"
                  class = "form-control form-group" placeholder = "Password"
                  required = "" autofocus = "">
               <button id = "loginBtn" class = "btn btn-lg btn-primary btnblock"
                  >Sign in</button>
            </div>
         </div>

      </div>

      <div id = "callPage" class = "call-page container">

         <div class = "row">
            <div class = "col-md-4 col-md-offset-4 text-center">
               <div class = "panel panel-primary">
                  <div class = "panel-heading">Text chat</div>
                  <div id = "chatarea" class = "panel-body text-left"></div>
               </div>
            </div>
         </div>

         <div class = "row text-center form-group">
            <div class = "col-md-12">
               <input id = "callToUsernameInput" type = "text"
                  placeholder = "username to call" />
               <button id = "callBtn" class = "btn-success btn">Call</button>
               <button id = "hangUpBtn" class = "btn-danger btn">Hang Up</button>
            </div>
         </div>

         <div class = "row text-center">
            <div class = "col-md-12">
               <input id = "msgInput" type = "text" placeholder = "message" />
               <button id = "sendMsgBtn" class = "btn-success btn">Send</button>
            </div>
         </div>

      </div>

      <script src = "client.js"></script>

   </body>

</html>
我們還需要透過此行var conn = new WebSocket('wss://:9090');在client.js檔案中啟用安全套接字連線。請注意wss協議。然後,必須修改登入按鈕處理程式以與使用者名稱一起傳送密碼:
loginBtn.addEventListener("click", function (event) {
   name = usernameInput.value;
   var pwd = passwordInput.value;

   if (name.length > 0) {
      send({
         type: "login",
         name: name,
         password: pwd
      });
   }

});
以下是完整的 client.js 檔案:
//our username
var name;
var connectedUser;

//connecting to our signaling server
var conn = new WebSocket('wss://:9090');

conn.onopen = function () {
   console.log("Connected to the signaling server");
};

//when we got a message from a signaling server
conn.onmessage = function (msg) {
   console.log("Got message", msg.data);

   var data = JSON.parse(msg.data);

   switch(data.type) {
      case "login":
         handleLogin(data.success);
         break;
      //when somebody wants to call us
      case "offer":
         handleOffer(data.offer, data.name);
         break;
      case "answer":
         handleAnswer(data.answer);
         break;
      //when a remote peer sends an ice candidate to us
      case "candidate":
         handleCandidate(data.candidate);
         break;
      case "leave":
         handleLeave();
         break;
      default:
         break;
   }
};

conn.onerror = function (err) {
   console.log("Got error", err);
};

//alias for sending JSON encoded messages
function send(message) {
   //attach the other peer username to our messages
   if (connectedUser) {
      message.name = connectedUser;
   }

   conn.send(JSON.stringify(message));
};

//******
//UI selectors block
//******

var loginPage = document.querySelector('#loginPage');
var usernameInput = document.querySelector('#usernameInput');
var passwordInput = document.querySelector('#passwordInput');
var loginBtn = document.querySelector('#loginBtn');

var callPage = document.querySelector('#callPage');
var callToUsernameInput = document.querySelector('#callToUsernameInput');
var callBtn = document.querySelector('#callBtn');
var hangUpBtn = document.querySelector('#hangUpBtn');

var msgInput = document.querySelector('#msgInput');
var sendMsgBtn = document.querySelector('#sendMsgBtn');
var chatArea = document.querySelector('#chatarea');

var yourConn;
var dataChannel;

callPage.style.display = "none";

// Login when the user clicks the button
loginBtn.addEventListener("click", function (event) {
   name = usernameInput.value;
   var pwd = passwordInput.value;

   if (name.length > 0) {
      send({
         type: "login",
         name: name,
         password: pwd
      });
   }

});

function handleLogin(success) {
   if (success === false) {
      alert("Ooops...incorrect username or password");
   } else {
      loginPage.style.display = "none";
      callPage.style.display = "block";

      //**********************
      //Starting a peer connection
      //**********************

      //using Google public stun server
      var configuration = {
         "iceServers": [{ "url": "stun:stun2.1.google.com:19302" }]
      };

      yourConn = new webkitRTCPeerConnection(configuration, {optional: [{RtpDataChannels: true}]});

      // Setup ice handling
      yourConn.onicecandidate = function (event) {
         if (event.candidate) {
            send({
               type: "candidate",
               candidate: event.candidate
            });
         }
      };

      //creating data channel
      dataChannel = yourConn.createDataChannel("channel1", {reliable:true});

      dataChannel.onerror = function (error) {
         console.log("Ooops...error:", error);
      };

      //when we receive a message from the other peer, display it on the screen
      dataChannel.onmessage = function (event) {
         chatArea.innerHTML += connectedUser + ": " + event.data + "<br />";
      };
      dataChannel.onclose = function () {
         console.log("data channel is closed");
      };
   }

};

//initiating a call
callBtn.addEventListener("click", function () {
   var callToUsername = callToUsernameInput.value;

   if (callToUsername.length > 0) {

      connectedUser = callToUsername;

      // create an offer
      yourConn.createOffer(function (offer) {
         send({
            type: "offer",
            offer: offer
         });

         yourConn.setLocalDescription(offer);

      }, function (error) {
         alert("Error when creating an offer");
      });
   }
});

//when somebody sends us an offer
function handleOffer(offer, name) {
   connectedUser = name;
   yourConn.setRemoteDescription(new RTCSessionDescription(offer));

   //create an answer to an offer
   yourConn.createAnswer(function (answer) {
      yourConn.setLocalDescription(answer);

      send({
         type: "answer",
         answer: answer
      });

   }, function (error) {
      alert("Error when creating an answer");
   });

};

//when we got an answer from a remote user
function handleAnswer(answer) {
   yourConn.setRemoteDescription(new RTCSessionDescription(answer));
};

//when we got an ice candidate from a remote user
function handleCandidate(candidate) {
   yourConn.addIceCandidate(new RTCIceCandidate(candidate));
};

//hang up
hangUpBtn.addEventListener("click", function () {

   send({
      type: "leave"
   });

   handleLeave();
});

function handleLeave() {
   connectedUser = null;
   yourConn.close();
   yourConn.onicecandidate = null;
};

//when user clicks the "send message" button
sendMsgBtn.addEventListener("click", function (event) {
   var val = msgInput.value;
   chatArea.innerHTML += name + ": " + val + "<br />";

   //sending a message to a connected peer
   dataChannel.send(val);
   msgInput.value = "";
});
現在透過node server執行我們的安全信令伺服器。在修改後的聊天演示資料夾中執行node static。在兩個瀏覽器選項卡中開啟localhost:8080。嘗試登入。請記住,只有“user1”和“password1”以及“user2”和“password2”才能登入。然後建立RTCPeerConnection(呼叫另一個使用者)並嘗試傳送訊息。

以下是我們安全信令伺服器的完整程式碼:
//require file system module
var fs = require('fs');
var httpServ = require('https');

//https://github.com/visionmedia/superagent/issues/205
process.env.NODE_TLS_REJECT_UNAUTHORIZED = "0";

//out secure server will bind to the port 9090
var cfg = {
   port: 9090,
   ssl_key: 'server.key',
   ssl_cert: 'server.crt'
};

//in case of http request just send back "OK"
var processRequest = function(req, res){
   res.writeHead(200);
   res.end("OK");
};

//create our server with SSL enabled
var app = httpServ.createServer({
   key: fs.readFileSync(cfg.ssl_key),
   cert: fs.readFileSync(cfg.ssl_cert)
}, processRequest).listen(cfg.port);

//require our websocket library
var WebSocketServer = require('ws').Server;

//creating a websocket server at port 9090
var wss = new WebSocketServer({server: app});

//all connected to the server users
var users = {};

//require the redis library in Node.js
var redis = require("redis");

//creating the redis client object
var redisClient = redis.createClient();

//when a user connects to our sever
wss.on('connection', function(connection) {
   console.log("user connected");

   //when server gets a message from a connected user
   connection.on('message', function(message) {

      var data;
      //accepting only JSON messages
      try {
         data = JSON.parse(message);
      } catch (e) {
         console.log("Invalid JSON");
         data = {};
      }

      //check whether a user is authenticated
      if(data.type != "login") {
         //if user is not authenticated
         if(!connection.isAuth) {
            sendTo(connection, {
               type: "error",
               message: "You are not authenticated"
            });

            return;
         }
      }

      //switching type of the user message
      switch (data.type) {
         //when a user tries to login
         case "login":
            console.log("User logged:", data.name);
            //get password for this username from redis database
            redisClient.get(data.name, function(err, reply) {

               //check if password matches with the one stored in redis
               var loginSuccess = reply === data.password;

               //if anyone is logged in with this username or incorrect password
                  then refuse
               if(users[data.name] || !loginSuccess) {
                  sendTo(connection, {
                     type: "login",
                     success: false
                  });
               } else {
                  //save user connection on the server
                  users[data.name] = connection;
                  connection.name = data.name;
                  connection.isAuth = true;

                  sendTo(connection, {
                     type: "login",
                     success: true
                  });
               }
            });

            break;

         case "offer":
            //for ex. UserA wants to call UserB
            console.log("Sending offer to: ", data.name);

            //if UserB exists then send him offer details
            var conn = users[data.name];

            if(conn != null) {
               //setting that UserA connected with UserB
               connection.otherName = data.name;

               sendTo(conn, {
                  type: "offer",
                  offer: data.offer,
                  name: connection.name
               });
            }

            break;

         case "answer":
            console.log("Sending answer to: ", data.name);
            //for ex. UserB answers UserA
            var conn = users[data.name];

            if(conn != null) {
               connection.otherName = data.name;

               sendTo(conn, {
                  type: "answer",
                  answer: data.answer
               });
            }

            break;

         case "candidate":
            console.log("Sending candidate to:",data.name);
            var conn = users[data.name];

            if(conn != null) {
               sendTo(conn, {
                  type: "candidate",
                  candidate: data.candidate
               });
            }

            break;

         case "leave":
            console.log("Disconnecting from", data.name);
            var conn = users[data.name];
            conn.otherName = null;

            //notify the other user so he can disconnect his peer connection
            if(conn != null) {
               sendTo(conn, {
                  type: "leave"
               });
            }

            break;

         connection.on("close", function() {

            if(connection.name) {
               delete users[connection.name];

               if(connection.otherName) {
                  console.log("Disconnecting from ", connection.otherName);
                  var conn = users[connection.otherName];
                  conn.otherName = null;

                  if(conn != null) {
                     sendTo(conn, {
                        type: "leave"
                    });
                  }

               }
            }
         });

         default:
            sendTo(connection, {
               type: "error",
               message: "Command no found: " + data.type
            });

            break;
      }
   });

   //when user exits, for example closes a browser window
   //this may help if we are still in "offer","answer" or "candidate" state
   connection.on("close", function() {
      if(connection.name) {
         delete users[connection.name];
      }
   });

   connection.send("Hello from server");
});

function sendTo(connection, message) {
   connection.send(JSON.stringify(message));
}
總結
在本章中,我們向我們的信令伺服器添加了使用者身份驗證。我們還學習瞭如何在WebRTC應用程式的範圍內建立自簽名SSL證書並在其中使用它們。