- Pygame 教程
- Pygame - 首頁
- Pygame - 概述
- Pygame - Hello World
- Pygame - 顯示模式
- Pygame - Locals 模組
- Pygame - 顏色物件
- Pygame - 事件物件
- Pygame - 鍵盤事件
- Pygame - 滑鼠事件
- Pygame - 繪製圖形
- Pygame - 載入影像
- Pygame - 在視窗中顯示文字
- Pygame - 移動影像
- Pygame - 使用數字鍵盤移動
- Pygame - 使用滑鼠移動
- Pygame - 移動矩形物體
- Pygame - 使用文字作為按鈕
- Pygame - 影像變換
- Pygame - 音效物件
- Pygame - 混音器通道
- Pygame - 播放音樂
- Pygame - 播放影片
- Pygame - 使用攝像頭模組
- Pygame - 載入游標
- Pygame - 訪問 CDROM
- Pygame - 精靈模組
- Pygame - PyOpenGL
- Pygame - 錯誤和異常
- Pygame 有用資源
- Pygame 快速指南
- Pygame - 有用資源
- Pygame - 討論
Pygame 快速指南
Pygame - 概述
Pygame 是一個流行的 Python 庫,用於開發影片遊戲。它是一個免費、開源且跨平臺的 Simple DirectMedia Library (SDL) 封裝庫。Pygame 提供的 SDL 函式抽象使得使用 Python 開發多媒體應用程式變得非常容易。
Pygame 最初由 Peter Shinners、Lenard Lindstrom、René Dudfield 和其他人於 2000 年 10 月開發,最新版本為 2.0.1,於 2020 年 12 月釋出。除了 SDL 功能外,Pygame 還提供其他功能,例如向量數學、碰撞檢測、攝像頭和 MIDI 支援等。Pygame 應用程式也可以在基於 Android 的手機上使用。
環境設定
在任何機器上安裝 Pygame 最簡單的方法是使用標準 Python 發行版附帶的 PIP 安裝程式。確保您擁有最新版本的 pip。建議使用以下命令在新虛擬環境中安裝 Pygame:
pip3 install pygame
對於樹莓派,Pygame 在 Raspbian Linux 發行版中預安裝。至於在 MacOS 上的安裝,較新的版本需要 Pygame 2.0。許多 Linux 版本都提供了預構建的二進位制軟體包。可以使用相應的包管理器實用程式安裝它們。
對於 Ubuntu,命令如下:
sudo apt-get install pygame
對於 Fedora,命令如下:
sudo yum install pygame
也可以編譯 Pygame 的原始碼(可在 https://github.com/pygame/pygame) 上找到)並在目標作業系統上安裝,方法是使用相應的 C/C++ 編譯器和 Python 的 setuptools 庫。
要驗證 Pygame 是否已成功安裝,請嘗試匯入 pygame 包並檢查其版本。
(pygmenv) C:\pygmenv>python
Python 3.7.4 (tags/v3.7.4:e09359112e, Jul 8 2019, 20:34:20) [MSC v.1916 64 bit (AMD64)] on win32
Type "help", "copyright", "credits" or "license" for more information.
>>> import pygame
pygame 2.0.1 (SDL 2.0.14, Python 3.7.4)
Hello from the pygame community. https://www.pygame.org/contribute.html
Pygame 庫包含以下模組:
| pygame._sdl2.touch | 用於處理觸控輸入 |
| pygame.camera | 攝像頭使用 |
| pygame.cdrom | 音訊 CDROM 控制 |
| pygame.cursors | 游標資源 |
| pygame.display | 控制顯示視窗和螢幕 |
| pygame.draw | 繪製圖形 |
| pygame.event | 與事件和佇列互動 |
| pygame.examples | 示例程式模組 |
| pygame.fastevent | 從多個執行緒與事件和佇列互動。 |
| pygame.font | 載入和渲染字型 |
| pygame.freetype | 載入和渲染計算機字型 |
| pygame.gfxdraw | 繪製圖形 |
| pygame.image | 影像傳輸 |
| pygame.joystick | 與操縱桿、遊戲手柄和軌跡球互動。 |
| pygame.key | 用於處理鍵盤 |
| pygame.locals | Pygame 常量 |
| pygame.mask | 影像蒙版。 |
| pygame.math | 向量類 |
| pygame.midi | 與 MIDI 輸入和輸出互動。 |
| pygame.mixer | 載入和播放聲音 |
| pygame.mixer.music | 控制流式音訊 |
| pygame.mouse | 用於處理滑鼠 |
| pygame.pixelcopy | 通用畫素陣列複製 |
| pygame.scrap | 剪貼簿支援。 |
| pygame.sndarray | 訪問聲音樣本資料 |
| pygame.sprite | 基本遊戲物件類 |
| pygame.surfarray | 使用陣列介面訪問表面畫素資料 |
| pygame.tests | 單元測試套件包 |
| pygame.time | 監控時間 |
| pygame.transform | 變換表面 |
Pygame - Hello World
第一步是使用 init() 函式匯入並初始化 pygame 模組。
import pygame
pygame.init()
現在我們設定首選大小的 Pygame 顯示視窗,併為其提供標題。
screen = pygame.display.set_mode((640, 480))
pygame.display.set_caption("Hello World")
這將呈現一個遊戲視窗,需要將其置於無限事件迴圈中。使用者互動(如滑鼠移動和點選等)生成的所有事件物件都儲存在事件佇列中。當攔截到 pygame.QUIT 時,我們將終止事件迴圈。當用戶點選標題欄上的關閉按鈕時,會生成此事件。
while True:
   for event in pygame.event.get():
      if event.type == pygame.QUIT:
         pygame.quit()
顯示帶有 Hello World 標題的 Pygame 視窗的完整程式碼如下:
import pygame, sys

pygame.init()
screen = pygame.display.set_mode((640, 480))
pygame.display.set_caption("Hello World")
while True:
   for event in pygame.event.get():
      if event.type == pygame.QUIT:
         pygame.quit()
         sys.exit()
將以上指令碼儲存為 hello.py 並執行,以獲得以下輸出:
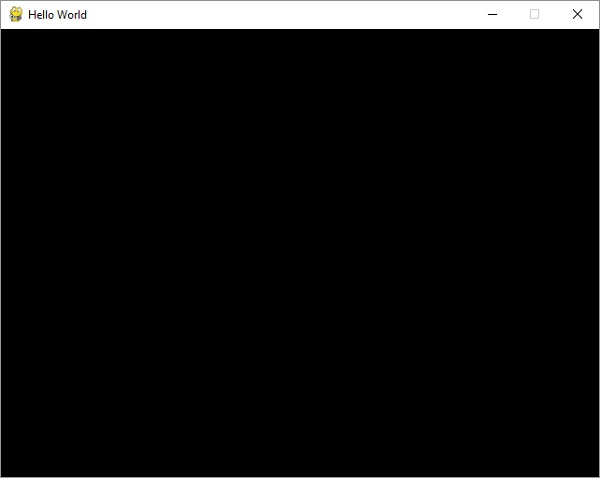
只有當點選關閉 (X) 按鈕時,此窗口才會關閉。
Pygame - 顯示模式
如上例所示,顯示錶面由 pygame.display 模組中定義的 set_mode() 函式建立。
pygame.display.set_mode(size, flags, depth, display, vsync)
size 引數是以畫素為單位的寬度和高度的元組。如果未設定大小,則表面將具有當前解析度的大小。
flags 引數控制以下預定義常量表示的顯示型別:
| pygame.FULLSCREEN | 建立全屏顯示 |
| pygame.DOUBLEBUF | 推薦用於 HWSURFACE 或 OPENGL |
| pygame.HWSURFACE | 硬體加速,僅在 FULLSCREEN 中 |
| pygame.OPENGL | 建立可渲染 OpenGL 的顯示 |
| pygame.RESIZABLE | 顯示視窗應可調整大小 |
| pygame.NOFRAME | 顯示視窗將沒有邊框或控制元件 |
| pygame.SCALED | 解析度取決於桌面大小並縮放圖形 |
| pygame.SHOWN | 視窗以可見模式開啟(預設) |
| pygame.HIDDEN | 視窗以隱藏模式開啟 |
如果將 vsync 引數設定為 1,則可以獲得具有垂直同步的顯示,但不能保證一定能獲得。該請求僅對使用 pygame.OPENGL 或 pygame.SCALED 標誌呼叫 set_mode() 時才有效。
顯示索引 0 表示使用預設顯示。Depth 引數將預設為系統最佳和最快的顏色深度。對於給定的寬度和高度,Pygame 將從 list_modes() 中選擇可用的最佳模式。
>>> print (pygame.display.list_modes())
[(1366, 768), (1360, 768), (1280, 768), (1280, 720), (1024, 768), (800, 600), (640, 480)]
pygame.display.mode_ok()
此函式選擇顯示模式的最佳顏色深度。它用於確定請求的顯示模式是否可用。如果無法設定顯示模式,它將返回 0。否則,它將返回與請求的顯示最匹配的畫素深度。
pygame.display.update()
此函式將更新整個顯示的內容。
Pygame - Locals 模組
此模組包含 Pygame 應用程式中經常使用的各種常量的定義。雖然這些常量在各自的模組中定義,但從 locals 模組使用它們會更容易。
例如,鍵盤或滑鼠事件(如 KEYDOWN 或 MOUSEBUTTONDOWN)分別定義為 pygame.key.KEYDOWN 或 pygame.mouse.MOUSEBUTTON,透過從 locals 模組匯入,可以使用這些常量而不限定模組名稱。
在這裡,我們使用 locals 模組中的 QUIT 事件。
import pygame,sys
from pygame.locals import *
pygame.init()
canvas=pygame.display.set_mode((400,300))
pygame.display.set_caption("Hello")
canvas.fill((0,0,0))
while True:
   for event in pygame.event.get():
      if(event.type == QUIT):
         pygame.quit()
            sys.exit(1)
Pygame - 顏色物件
Pygame 中的 Color 類用於表示螢幕背景、文字、圖形和所有其他 Pygame 物件的顏色。它透過傳遞紅色、綠色、藍色顏色的顏色值以及可選的表示不透明值的 alpha 值來構造。這些值中的每一個都在 0 到 255 之間。
color = pygame.Color(r, g, b, a=255)
alpha 的預設值為 255,表示完全不透明。可以訪問各個屬性並進行設定。
| pygame.Color.r | 獲取或設定顏色的紅色值。 |
| pygame.Color.g | 獲取或設定顏色的綠色值。 |
| pygame.Color.b | 獲取或設定顏色的藍色值。 |
| pygame.Color.a | 獲取或設定顏色的 alpha 值。 |
也可以使用 CMY、HSVA、HSLA 和 i1i2i3 等替代顏色模型。
| pygame.Color.cmy | 獲取或設定顏色的 CMY 表示形式。青色、品紅色、黃色 |
| pygame.Color.hsva | 獲取或設定顏色的 HSVA 表示形式。色相、飽和度、明度 |
| pygame.Color.hsla | 獲取或設定顏色的 HSLA 表示形式。色相、飽和度、亮度 |
| pygame.Color.i1i2i3 | 獲取或設定顏色的 I1I2I3 表示形式。 |
我們可以使用預定義的字串常量來表示 RGBA 顏色組合。一些預定義的顏色列在下面:
- 'black': (0, 0, 0, 255)
- 'blue': (0, 0, 255, 255),
- 'cyan': (0, 255, 255, 255),
- 'gold': (255, 215, 0, 255),
- 'gray': (190, 190, 190, 255),
- 'green': (0, 255, 0, 255),
- 'orange': (255, 165, 0, 255),
- 'purple': (160, 32, 240, 255),
- 'red': (255, 0, 0, 255),
- 'violet': (238, 130, 238, 255)
- 'yellow': (255, 255, 0, 255),
- 'white': (255, 255, 255, 255)
要列出所有預定義的顏色,請執行以下 for 迴圈:
for k, v in THECOLORS.items():
   THECOLORS[unicode_(k)] = v
Pygame - 事件物件
所有事件都是 pygame.event.EventType 類的例項。Pygame 識別以下事件型別:
| 事件型別 | 屬性 |
|---|---|
| QUIT | 無 |
| ACTIVEEVENT | gain, state |
| KEYDOWN | unicode, key, mod |
| KEYUP | key, mod |
| MOUSEMOTION | pos, rel, buttons |
| MOUSEBUTTONUP | pos, button |
| MOUSEBUTTONDOWN | pos, button |
| JOYAXISMOTION | joy, axis, value |
| JOYBALLMOTION | joy, ball, rel |
| JOYHATMOTION | joy, hat, value |
| JOYBUTTONUP | joy, button |
| JOYBUTTONDOWN | joy, button |
| VIDEORESIZE | size, w, h |
| VIDEOEXPOSE | 無 |
| USEREVENT | Code |
Pygame - 鍵盤事件
Pygame 識別 KEYUP 和 KEYDOWN 事件。pygame.key 模組定義了用於處理鍵盤互動的有用函式。當按鍵按下和釋放時,pygame.KEYDOWN 和 pygame.KEYUP 事件會被插入事件佇列。key 屬性是一個整數 ID,表示鍵盤上的每個按鍵。
import pygame, sys
pygame.init()
screen = pygame.display.set_mode((640, 480))
pygame.display.set_caption("Hello World")
while True:
   for event in pygame.event.get():
      if event.type == pygame.QUIT:
         pygame.quit()
         sys.exit()
      if event.type == pygame.KEYDOWN:
         key=pygame.key.name(event.key)
         print (key, "Key is pressed")
      if event.type == pygame.KEYUP:
         key=pygame.key.name(event.key)
         print (key, "Key is released")
執行上述程式碼,並在 Pygame 視窗處於活動狀態時按下各種按鍵。以下是 Python 控制檯上的示例輸出。
q Key is pressed
q Key is released
right shift Key is released
1 Key is pressed
1 Key is released
enter Key is pressed
enter Key is released
backspace Key is pressed
backspace Key is released
x Key is pressed
x Key is released
home Key is pressed
home Key is released
f1 Key is pressed
f1 Key is released
left Key is pressed
left Key is released
right Key is pressed
right Key is released
up Key is pressed
up Key is released
down Key is pressed
down Key is released
如我們所見,event.key 屬性返回與每個按鍵關聯的唯一識別符號。在遊戲場景中,左右、上下箭頭鍵經常被使用。如果檢測到特定的按鍵按下,我們可以編寫相應的邏輯。
pygame.key 模組中其他有用的屬性如下所示:
| pygame.key.get_pressed | 獲取所有鍵盤按鈕的狀態 |
| pygame.key.get_mods | 確定哪些修飾鍵被按下 |
| pygame.key.set_repeat | 控制按住的按鍵如何重複 |
| pygame.key.get_repeat | 檢視按住的按鍵如何重複 |
| pygame.key.name | 獲取按鍵識別符號的名稱 |
| pygame.key.key_code | 根據按鍵名稱獲取按鍵識別符號 |
| pygame.key.start_text_input | 開始處理 Unicode 文字輸入事件 |
| pygame.key.stop_text_input | 停止處理 Unicode 文字輸入事件 |
Pygame - 滑鼠事件
Pygame 識別三種滑鼠事件,即 MOUSEMOTION、MOUSEBUTTONUP 和 MOUSEBUTTONDOWN。相應的事件物件返回滑鼠按下/釋放時位置的座標和按鈕編號。
例如,MOUSEBUTTONDOWN 事件物件將顯示以下結果:
<Event(1025-MouseButtonDown {'pos': (398, 328), 'button': 1, 'window': None})>
示例
要獲取按鈕按下位置的座標,我們可以使用與事件物件關聯的 get_pos() 函式。
import pygame, sys

pygame.init()
screen = pygame.display.set_mode((640, 480))
pygame.display.set_caption("Hello World")
while True:
   for event in pygame.event.get():
      if event.type == pygame.QUIT:
         pygame.quit()
         sys.exit()
      if event.type == pygame.MOUSEBUTTONDOWN:
         pos=pygame.mouse.get_pos()
         btn=pygame.mouse
         print ("x = {}, y = {}".format(pos[0], pos[1]))
輸出
執行上述程式碼,並在遊戲視窗的隨機位置按下滑鼠按鈕。
x = 192, y = 160
x = 419, y = 245
x = 204, y = 405
x = 449, y = 17
x = 12, y = 15
MOUSEMOTION 事件物件捕獲移動滑鼠位置的瞬時位置。
if event.type == pygame.MOUSEMOTION:
   pos=event.pos
   print ("x = {}, y = {}".format(pos[0], pos[1]))
pygame.mouse 模組中其他重要的函式和屬性如下所示:
| pygame.key.get_pressed | 獲取滑鼠按鈕的狀態 |
| pygame.mouse.get_pos | 獲取滑鼠游標位置 |
| pygame.mouse.get_rel | 獲取滑鼠移動量 |
| pygame.mouse.set_pos | 設定滑鼠游標位置 |
| pygame.mouse.set_visible | 隱藏或顯示滑鼠游標 |
| pygame.mouse.get_visible | 獲取滑鼠游標的當前可見性狀態 |
| pygame.mouse.get_focused | 檢查顯示器是否正在接收滑鼠輸入 |
| pygame.mouse.set_cursor | 設定滑鼠游標的影像 |
| pygame.mouse.set_system_cursor | 將滑鼠游標設定為系統變體 |
Pygame 定義了以下系統游標:
| pygame.SYSTEM_CURSOR_ARROW | 箭頭 |
| pygame.SYSTEM_CURSOR_IBEAM | I 形游標 |
| pygame.SYSTEM_CURSOR_WAIT | 等待 |
| pygame.SYSTEM_CURSOR_CROSSHAIR | 十字準星 |
| pygame.SYSTEM_CURSOR_SIZENWSE | 指向西北和東南的雙箭頭 |
| pygame.SYSTEM_CURSOR_SIZENESW | 指向東北和西南的雙箭頭 |
| pygame.SYSTEM_CURSOR_SIZEWE | 指向西和東的雙箭頭 |
| pygame.SYSTEM_CURSOR_SIZENS | 指向北和南的雙箭頭 |
| pygame.SYSTEM_CURSOR_SIZEALL | 四角箭頭 |
| pygame.SYSTEM_CURSOR_NO | 斜線圓圈或骷髏標誌 |
| pygame.SYSTEM_CURSOR_HAND | 手 |
以下語句將遊戲視窗游標設定為十字準星。
pygame.mouse.set_system_cursor(pygame.SYSTEM_CURSOR_CROSSHAIR)
Pygame - 繪製形狀
可以使用 pygame.draw 模組中的函式在遊戲視窗上繪製不同的形狀,例如矩形、圓形、橢圓形、多邊形和線條:
| 繪製矩形 | rect(surface, color, rect) |
| 繪製多邊形 | polygon(surface, color, points) |
| 繪製圓形 | circle(surface, color, center, radius) |
| 繪製橢圓形 | ellipse(surface, color, rect) |
| 繪製橢圓弧 | arc(surface, color, rect, start_angle, stop_angle) |
| 繪製直線 | line(surface, color, start_pos, end_pos, width) |
示例
以下示例使用這些函式來繪製不同的形狀:
import pygame
pygame.init()
screen = pygame.display.set_mode((400, 300))
done = False
red = (255,0,0)
green = (0,255,0)
blue = (0,0,255)
white = (255,255,255)
while not done:
for event in pygame.event.get():
if event.type == pygame.QUIT:
done = True
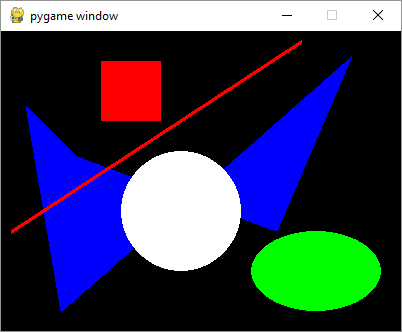
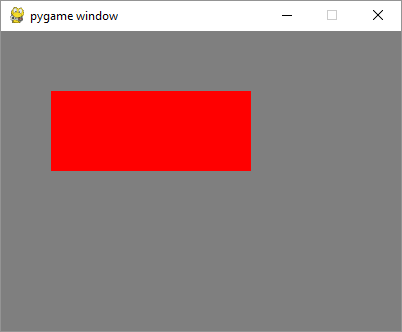
pygame.draw.rect(screen, red, pygame.Rect(100, 30, 60, 60))
pygame.draw.polygon(screen, blue, ((25,75),(76,125),(275,200),(350,25),(60,280)))
pygame.draw.circle(screen, white, (180,180), 60)
pygame.draw.line(screen, red, (10,200), (300,10), 4)
pygame.draw.ellipse(screen, green, (250, 200, 130, 80))
pygame.display.update()
輸出
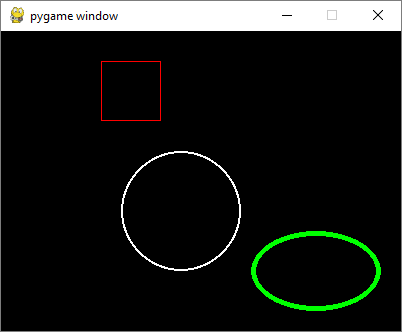
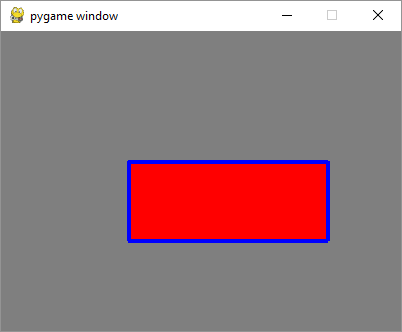
如果向函式新增可選的整數引數,則形狀將以指定的顏色作為輪廓顏色繪製。數字對應於輪廓的厚度和形狀內部的背景顏色。
pygame.draw.rect(screen, red, pygame.Rect(100, 30, 60, 60),1)
pygame.draw.circle(screen, white, (180,180), 60,2)
pygame.draw.ellipse(screen, green, (250, 200, 130, 80),5)
輸出
Pygame - 載入影像
pygame.image 模組包含用於從檔案或類檔案物件載入和儲存影像的函式。影像被載入為 Surface 物件,最終渲染在 Pygame 顯示視窗上。
首先,我們透過 load() 函式獲取一個 Surface 物件。
img = pygame.image.load('pygame.png')
接下來,我們從該 Surface 中獲取一個 rect 物件,然後使用 Surface.blit() 函式渲染影像:
rect = img.get_rect()
rect.center = 200, 150
screen.blit(img, rect)
示例
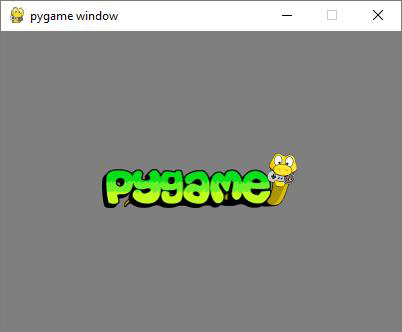
在顯示視窗上顯示 Pygame 徽標的完整程式如下所示:
import pygame

pygame.init()
screen = pygame.display.set_mode((400, 300))
img = pygame.image.load('pygame.png')
done = False
bg = (127,127,127)
while not done:
   for event in pygame.event.get():
      screen.fill(bg)
      rect = img.get_rect()
      rect.center = 200, 150
      screen.blit(img, rect)
      if event.type == pygame.QUIT:
      done = True
   pygame.display.update()
輸出
上述程式碼的輸出如下所示:
blit() 函式可以帶有一個可選的特殊標誌引數,該引數具有以下值之一:
BLEND_RGBA_ADD
BLEND_RGBA_SUB
BLEND_RGBA_MULT
BLEND_RGBA_MIN
BLEND_RGBA_MAX
BLEND_RGB_ADD
BLEND_RGB_SUB
BLEND_RGB_MULT
BLEND_RGB_MIN
BLEND_RGB_MAX
pygame.Surface 模組還有一個 convert() 函式,它可以最佳化影像格式並使繪製速度更快。
pygame.image 模組有一個 save() 函式,可以將 Surface 物件的內容儲存到影像檔案。Pygame 支援以下影像格式:
| 載入影像格式 | 儲存影像格式 |
|---|---|
|
JPG PNG GIF(非動畫) BMP PCX TGA(未壓縮) TIF LBM(和 PBM) PBM(和 PGM、PPM) XPM |
BMP TGA PNG JPEG |
示例
以下程式在顯示曲面上繪製三個圓圈,並使用 image.save() 函式將其儲存為 circles.png 檔案。
import pygame

pygame.init()
screen = pygame.display.set_mode((400, 300))
done = False
white=(255,255,255)
red = (255,0,0)
green = (0,255,0)
blue = (0,0,255)

bg = (127,127,127)
while not done:
   for event in pygame.event.get():
      screen.fill(bg)
      if event.type == pygame.QUIT:
         done = True
      pygame.draw.circle(screen, red, (200,150), 60,2)
      pygame.draw.circle(screen, green, (200,150), 80,2)
      pygame.draw.circle(screen, blue, (200,150), 100,2)
   pygame.display.update()
   pygame.image.save(screen, "circles.png")
輸出

Pygame - 在視窗中顯示文字
要在 Pygame 視窗上顯示文字,我們需要首先獲取一個字型物件,藉助於 pygame.font 模組中定義的 SysFont() 函式。
Fnt= SysFont(name, size, bold=False, italic=False)
當前機器上安裝的字型列表可以透過 get_fonts() 函式獲取。
fonts = pygame.font.get_fonts()
for f in fonts:
   print(f)
讓我們定義一個表示 36 點大小的 Arial 字型的字型物件。
font = pygame.font.SysFont("Arial", 36)
接下來,我們使用 Font 物件的 render() 方法,為在新建字型中渲染“Hello World”文字獲取一個新的 Surface 物件。
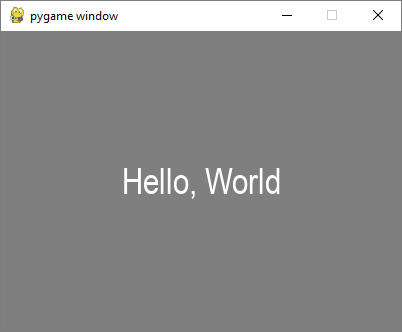
txtsurf = font.render("Hello, World", True, white)
第一個引數是一個單行字串,第二個引數表示抗鋸齒。如果將其設定為 False,則渲染的影像是 8 點陣圖像,如果為 True,則為 24 點陣圖像。還可以使用可選的背景顏色引數。
現在我們需要將文字 Surface 貼在螢幕視窗的中心。
screen.blit(txtsurf,(200 - txtsurf.get_width() // 2, 150 - txtsurf.get_height() // 2))
示例
完整的程式碼如下所示:
import pygame

pygame.init()
screen = pygame.display.set_mode((400, 300))
done = False
white=(255,255,255)
red = (255,0,0)
green = (0,255,0)
blue = (0,0,255)

bg = (127,127,127)
while not done:
   for event in pygame.event.get():
      screen.fill(bg)
      if event.type == pygame.QUIT:
         done = True
      font = pygame.font.SysFont("Arial", 36)
   txtsurf = font.render("Hello, World", True, white)
   screen.blit(txtsurf,(200 - txtsurf.get_width() // 2, 150 - txtsurf.get_height() // 2))
pygame.display.update()
輸出
除了 SysFont() 方法外,還可以從字型檔案(具有 .ttf 副檔名)或指向 ttf 檔案的 Python 檔案物件獲取 Font 物件。也可以使用 .ttc 檔案構造字型物件。font 類定義了以下方法:
| bold() | 獲取或設定字型是否應以粗體渲染。 |
| italic() | 獲取或設定字型是否應以斜體渲染。 |
| underline() | 獲取或設定字型是否應帶下劃線渲染。 |
| render() | 在新的 Surface 上繪製文字 |
| size() | 計算渲染文字所需的尺寸 |
| set_underline() | 控制文字是否帶下劃線渲染 |
| get_underline() | 檢查文字是否將帶下劃線渲染 |
| set_bold() | 啟用粗體文字的偽渲染 |
| get_bold() | 檢查文字是否將以粗體渲染 |
| set_italic() | 啟用斜體文字的偽渲染 |
| metrics() | 獲取每個字元的度量 |
| get_italic() | 檢查文字是否將以斜體渲染 |
| get_linesize() | 獲取字型的行間距 |
| get_height() | 獲取字型的的高度 |
| get_ascent() | 獲取字型的上行高度 |
| get_descent() | 獲取字型的下行高度 |
下面是使用 ttf 和 ttc 檔案渲染文字的示例。
font1 = pygame.font.SysFont('chalkduster.ttf', 72)
img1 = font1.render('Hello World', True, BLUE)
font2 = pygame.font.SysFont('didot.ttc', 72)
img2 = font2.render('Hello Pygame', True, GREEN)

screen.blit(img1, (20, 50))
screen.blit(img2, (20, 120))
pygame.display.update()
在上面的示例中,預定義的字串已被渲染為 Surface 物件。但是,可以讀取 KEYDOWN 事件的鍵值以互動式地輸入字串並顯示它。
首先,我們渲染一個空字串。接下來,我們定義邊界矩形,然後定義一個游標矩形,該矩形放置在覆蓋文字邊界矩形的位置。在 KEYDOWN 事件中識別的每個擊鍵都附加到原始空字串中並重復渲染。
示例
以下程式碼最初顯示一個空白視窗。按下的每個字母都將彼此並排顯示。
import pygame

pygame.init()
screen = pygame.display.set_mode((400, 300))
done = False
white=(255,255,255)
red = (255,0,0)
green = (0,255,0)
blue = (0,0,255)

bg = (127,127,127)
text=""
while not done:
   for event in pygame.event.get():
      screen.fill(bg)
      if event.type == pygame.QUIT:
         done = True
      if event.type == pygame.KEYDOWN:
         text=text+event.unicode
      font = pygame.font.SysFont("Arial", 36)
      img = font.render(text, True, white)
      rect = img.get_rect()
      cursor = pygame.Rect(rect.topright, (3, rect.height))
      img = font.render(text, True, white)
      rect.size=img.get_size()
      cursor.topleft = rect.topright
      screen.blit(img,(200 - img.get_width() // 2, 150 - img.get_height() // 2))
   pygame.display.update()
輸出
執行上述程式碼並輸入一些文字。示例輸出如下所示:
Pygame - 移動影像
物件移動是任何電腦遊戲的關鍵方面。電腦遊戲透過在增量位置繪製和擦除物件來產生移動的錯覺。以下程式碼透過在事件迴圈中遞增 x 座標位置來繪製圖像,並用背景顏色擦除它。
示例
image_filename = 'pygame.png'
import pygame
from pygame.locals import *
from sys import exit
pygame.init()
screen = pygame.display.set_mode((400,300), 0, 32)
pygame.display.set_caption("Moving Image")
img = pygame.image.load(image_filename)
x = 0
while True:
   screen.fill((255,255,255))
   for event in pygame.event.get():
      if event.type == QUIT:
         exit()
   screen.blit(img, (x, 100))
   x= x+0.5

   if x > 400:
      x = x-400
   pygame.display.update()
輸出
Pygame 徽標影像開始顯示在左側邊框處,並重復向右移動。如果它到達右側邊框,則其位置將重置為左側。

在以下程式中,影像最初顯示在 (0,150) 位置。當用戶按下箭頭鍵(左、右、上、下)時,影像的位置會改變 5 畫素。如果發生 KEYDOWN 事件,程式會檢查鍵值是否為 K_LEFT、K_RIGHT、K_UP 或 K_DOWN。如果為 K_LEFT 或 K_RIGHT,則 x 座標會改變 +5 或 -5。如果鍵值為 K_UP 或 K_DOWN,則 y 座標的值會改變 -5 或 +5。
image_filename = 'pygame.png'
import pygame
from pygame.locals import *
from sys import exit
pygame.init()
screen = pygame.display.set_mode((400,300))
pygame.display.set_caption("Moving with arrows")
img = pygame.image.load(image_filename)
x = 0
y= 150
while True:
   screen.fill((255,255,255))
   screen.blit(img, (x, y))
   for event in pygame.event.get():
      if event.type == QUIT:
         exit()

      if event.type == KEYDOWN:
         if event.key == K_RIGHT:
            x= x+5
         if event.key == K_LEFT:
            x=x-5
         if event.key == K_UP:
            y=y-5
         if event.key == K_DOWN:
            y=y+5
         pygame.display.update()
Pygame - 使用數字鍵盤按鍵移動
如果我們想影響遊戲視窗上物件的斜向移動,我們需要使用數字鍵盤按鍵。雖然按鍵 4、6、8 和 2 分別對應於左、右、上和下箭頭,但數字鍵 7、9、3 和 1 可用於使物件進行左上、右上、右下和左下斜向移動。這些按鍵由 Pygame 使用以下值識別:
K_KP1       keypad 1
K_KP2       keypad 2
K_KP3       keypad 3
K_KP4       keypad 4
K_KP5       keypad 5
K_KP6       keypad 6
K_KP7       keypad 7
K_KP8       keypad 8
K_KP9       keypad 9
示例
對於左右、上下箭頭鍵按下,x 和 y 座標像以前一樣遞增/遞減。對於斜向移動,兩個座標都根據方向更改。例如,對於 K_KP7 按鍵按下,x 和 y 都遞減 5,對於 K_KP9,x 遞增,y 遞減。
image_filename = 'pygame.png'
import pygame
from pygame.locals import *
from sys import exit
pygame.init()
screen = pygame.display.set_mode((400,300))
pygame.display.set_caption("Moving with arrows")
img = pygame.image.load(image_filename)
x = 0
y= 150
while True:
   screen.fill((255,255,255))
   screen.blit(img, (x, y))
   for event in pygame.event.get():
      if event.type == QUIT:
         exit()
      if event.type == KEYDOWN:
         if event.key == K_KP6:
            x= x+5
         if event.key == K_KP4:
            x=x-5
         if event.key == K_KP8:
            y=y-5
         if event.key == K_KP2:
            y=y+5
         if event.key == K_KP7:
            x=x-5
            y=y-5
         if event.key == K_KP9:
            x=x+5
            y=y-5
         if event.key == K_KP3:
            x=x+5
            y=y+5
         if event.key == K_KP1:
            x=x-5
            y=y+5
   pygame.display.update()
Pygame - 使用滑鼠移動
根據滑鼠指標的移動來移動物件很容易。pygame.mouse 模組定義了 get_pos() 方法。它返回一個包含兩個專案的元組,分別對應於滑鼠當前位置的 x 和 y 座標。
(mx,my) = pygame.mouse.get_pos()
捕獲 mx 和 my 位置後,使用 bilt() 函式在這些座標處將影像渲染到 Surface 物件上。
示例
以下程式連續在移動的滑鼠游標位置渲染給定的影像。
filename = 'pygame.png'
import pygame
from pygame.locals import *
from sys import exit
pygame.init()
screen = pygame.display.set_mode((400,300))
pygame.display.set_caption("Moving with mouse")
img = pygame.image.load(filename)
x = 0
y= 150
while True:
   mx,my=pygame.mouse.get_pos()
   screen.fill((255,255,255))
   screen.blit(img, (mx, my))
   for event in pygame.event.get():
      if event.type == QUIT:
         exit()
pygame.display.update()
Pygame - 移動矩形物件
Pygame.Rect 類具有儲存和操作矩形區域的功能。可以透過左、上、寬和高值構造 Rect 物件。Rect 類中的函式能夠複製、移動和調整 Rect 物件的大小。
Rect 物件具有以下虛擬屬性:

除了移動外,Rect 類還有用於測試矩形之間碰撞的方法。
| copy() | 返回一個新的矩形,該矩形具有與原始矩形相同的位置和大小。 |
| move() | 返回一個新的矩形,該矩形已根據給定的偏移量移動。x 和 y 引數可以是任何整數,正數或負數。 |
| move_ip() | 與 Rect.move() 方法相同,但就地操作。 |
| inflate(x,y) | 返回一個新的矩形,其大小已根據給定的偏移量更改。負值將縮小矩形。 |
| inflate_ip(x, y) | 與 Rect.inflate() 方法相同,但就地操作。 |
| clamp(Rect) | 返回一個新的矩形,該矩形已移動到完全位於引數 Rect 內部。 |
| clip(Rect) | 返回一個新的矩形,該矩形已裁剪為完全位於引數 Rect 內部。 |
| union(Rect) | 返回一個新的矩形,該矩形完全覆蓋兩個提供的矩形的區域。 |
| union_ip(Rect) | 與 Rect.union() 方法相同,但就地操作。 |
| contains(Rect) | 當引數完全位於 Rect 內部時返回 true。 |
| collidepoint((x,y)) | 如果給定的點位於矩形內部,則返回 true。 |
| colliderect(Rect) | 如果兩個矩形的任何一部分重疊,則返回 True |
示例
在下面的程式中,一個 Rect 物件以紅色輪廓繪製。使用 copy() 方法建立它的克隆以進行移動。移動由 move_ip() 方法實現。箭頭鍵透過將 x/y 座標增加/減少 + 或 -5 畫素來移動複製矩形的位置。
import pygame
from pygame.locals import *
from sys import exit
pygame.init()
screen = pygame.display.set_mode((400,300))
rect1 = Rect(50, 60, 200, 80)
rect2=rect1.copy()
running = True
x=0
y=0
while running:
   for event in pygame.event.get():
      if event.type == QUIT:
         running = False
      if event.type == KEYDOWN:
         if event.key==K_LEFT:
            x= -5
            y=0
         if event.key == K_RIGHT:
            x=5
            y=0
         if event.key == K_UP:
            x = 0
            y = -5
         if event.key == K_DOWN:
            x = 0
            y = 5
   rect2.move_ip(x,y)
   screen.fill((127,127,127))
   pygame.draw.rect(screen, (255,0,0), rect1, 1)
   pygame.draw.rect(screen, (0,0,255), rect2, 5)
   pygame.display.update()
   pygame.quit()
輸出
以下輸出顯示帶紅色輪廓的矩形是原始矩形。它的副本不斷響應箭頭鍵移動,並具有藍色輪廓

示例
將 move_ip() 方法更改為 inflate_ip() 方法,以根據按下的箭頭增大/縮小矩形。
while running:
   for event in pygame.event.get():
      if event.type == QUIT:
         running = False
      if event.type == KEYDOWN:
         if event.key==K_LEFT:
            x= -5
            y=0
         if event.key == K_RIGHT:
            x=5
            y=0
         if event.key == K_UP:
            x = 0
            y = -5
         if event.key == K_DOWN:
            x = 0
            y = 5
      rect2.inflate_ip(x,y)
   screen.fill((127,127,127))
   pygame.draw.rect(screen, (255,0,0), rect1, 1)
   pygame.draw.rect(screen, (0,0,255), rect2, 5)
   pygame.display.update()
輸出
以下是箭頭鍵按下活動的螢幕截圖 -

示例
為了透過檢測 MOUSEMOTION 事件使矩形移動,我們需要首先按下原始矩形內的滑鼠。為了驗證滑鼠位置是否在矩形內,我們使用 Rect 物件的 collidepoint() 方法。當滑鼠移動時,矩形物件透過 move_ip() 方法在適當位置移動。當釋放滑鼠時,移動將停止。
import pygame
from pygame.locals import *
from sys import exit
pygame.init()
screen = pygame.display.set_mode((400,300))
rect = Rect(50, 60, 200, 80)
moving = False
running = True
while running:
   for event in pygame.event.get():
      if event.type == QUIT:
         running = False
      elif event.type == MOUSEBUTTONDOWN:
         if rect.collidepoint(event.pos):
            moving = True
      elif event.type == MOUSEBUTTONUP:
         moving = False
      elif event.type == MOUSEMOTION and moving:
         rect.move_ip(event.rel)
   screen.fill((127,127,127))
   pygame.draw.rect(screen, (255,0,0), rect)
   if moving:
      pygame.draw.rect(screen, (0,0,255), rect, 4)
   pygame.display.flip()
pygame.quit()
輸出
示例
要透過滑鼠繪製矩形,請在 MOUSEBUTTONDOWN 和 MOUSEBUTTONUP 事件中捕獲滑鼠指標座標,計算左上角座標、寬度和高度,然後呼叫 rect() 函式。
import pygame
from pygame.locals import *
from sys import exit
pygame.init()
screen = pygame.display.set_mode((400,300))
pygame.display.set_caption("Draw Rectangle with Mouse")
screen.fill((127,127,127))
x=0
y=0
w=0
h=0
drawmode=True
running = True
while running:
   for event in pygame.event.get():
      if event.type == QUIT:
         running = False
      if event.type == MOUSEBUTTONDOWN:
         x,y = pygame.mouse.get_pos()
         drawmode = True
      if event.type == MOUSEBUTTONUP:
         x1,y1 = pygame.mouse.get_pos()
         w=x1-x
         h=y1-y
         drawmode= False

   rect = pygame.Rect(x,y,w,h)
   if drawmode == False:
      pygame.draw.rect(screen, (255,0,0), rect)
   pygame.display.flip()
pygame.quit()
輸出

Pygame - 使用文字作為按鈕
按鈕是典型遊戲視窗中的一個重要元素。我們可以使用文字或影像表面物件作為按鈕,以便在單擊時可以觸發某個操作。
讓我們嘗試顯示三個帶有文字標題的按鈕。
text1=font.render(" START ", True, white)
text2=font.render(" PLAY ", True, white)
text3=font.render(" STOP ", True, white)
為了在這些按鈕周圍繪製邊框,請獲取它們的 Rect 物件。
rect1 = text1.get_rect(topleft=(10,10))
rect2 = text2.get_rect(topleft= (100,10))
rect3 = text3.get_rect(topleft= (200,10))
在事件迴圈內,使用紅色邊框繪製文字按鈕。
screen.blit(text1, rect1)
pygame.draw.rect(screen, (255,0,0),rect1,2)
screen.blit(text2, rect2)
pygame.draw.rect(screen, (255,0,0),rect2,2)
pygame.draw.rect(screen, (255,0,0),rect3,2)
screen.blit(text3, rect3)
使用 Rect 物件的 collidepoint() 函式來識別哪個按鈕被單擊。
if event.type == pygame.MOUSEBUTTONDOWN:
   if rect1.collidepoint(event.pos):
      msg = "START Button was pressed"
   if rect2.collidepoint(event.pos):
      msg = "PLAY Button was pressed"
   if rect3.collidepoint(event.pos):
      msg = "STOP Button was pressed"
顯示相應的文字表面訊息 -
img=font.render(msg, True, (0,0,255))
imgrect=img.get_rect()
imgrect.center = (200 , 150 )
pygame.draw.rect(screen, bg, imgrect)
screen.blit(img, imgrect)
示例
完整的程式碼如下所示:
import pygame

pygame.init()
screen = pygame.display.set_mode((400, 300))
done = False

font = pygame.font.SysFont("Arial", 14)
text1=font.render(" START ", True, white)
text2=font.render(" PLAY ", True, white)
text3=font.render(" STOP ", True, white)

rect1 = text1.get_rect(topleft=(10,10))
rect2 = text2.get_rect(topleft= (100,10))
rect3 = text3.get_rect(topleft= (200,10))
bg = (127,127,127)
msg=" "
screen = pygame.display.set_mode((400,300))
screen.fill(bg)
while not done:
   for event in pygame.event.get():
      screen.blit(text1, rect1)
      pygame.draw.rect(screen, (255,0,0),rect1,2)
      screen.blit(text2, rect2)
      pygame.draw.rect(screen, (255,0,0),rect2,2)
      pygame.draw.rect(screen, (255,0,0),rect3,2)
      screen.blit(text3, rect3)

      if event.type == pygame.QUIT:
         done = True
      if event.type == pygame.MOUSEBUTTONDOWN:
         if rect1.collidepoint(event.pos):
            msg = "START Button was pressed"
         if rect2.collidepoint(event.pos):
            msg = "PLAY Button was pressed"
         if rect3.collidepoint(event.pos):
            msg = "STOP Button was pressed"
      img=font.render(msg, True, (0,0,255))
      imgrect=img.get_rect()
      imgrect.center = (200 , 150 )
      pygame.draw.rect(screen, bg, imgrect)
      screen.blit(img, imgrect)

   pygame.display.update()
輸出
單擊每個按鈕時,顯示視窗將顯示以下輸出 -


Pygame - 影像變換
pygame.ransform 模組包含許多用於操作從影像或文字塊獲得的 Surface 物件的函式的定義。對錶面的操作包括翻轉、旋轉、縮放、調整大小和縮放物件。
以下函式在 pygame.transform 模組中找到。
| flip() | 垂直和水平翻轉 |
| scale() | 調整到新的解析度 |
| rotate() | 旋轉影像 |
| rotozoom() | 過濾後的縮放和旋轉 |
| scale2x() | 專門的影像加倍器 |
| smoothscale() | 將表面平滑地縮放至任意大小 |
| get_smoothscale_backend() | 返回正在使用的 smoothscale 過濾器版本 - 'GENERIC'、'MMX' 或 'SSE' |
| set_smoothscale_backend() | 將 smoothscale 過濾器版本設定為 - 'GENERIC'、'MMX' 或 'SSE' 中的一個 |
| chop() | 獲取影像的副本,其中去除了內部區域 |
| laplacian() | 在表面上查詢邊緣 |
| average_surfaces() | 從多個表面中找到平均表面。 |
| average_color() | 查詢表面的平均顏色 |
| threshold() | 查詢表面中哪些畫素以及有多少畫素在 'search_color' 或 'search_surf' 的閾值內。 |
讓我們首先使用 flip() 函式,其語法如下 -
flip(Surface, xbool, ybool)
此函式可以水平、垂直或同時翻轉表面物件。方向由兩個布林引數決定。
要水平翻轉影像,請使用以下命令 -
pygame.transform.flip(img2,True, False)
要垂直翻轉,請使用以下命令 -
pygame.transform.flip(img2,False, True)
在以下示例中,pygame 徽標影像正常顯示並在兩個方向上翻轉。首先從原始影像物件獲取翻轉後的表面,獲取其 Rect 物件,然後構建它。要渲染水平翻轉的影像,
img1 = pygame.image.load('pygame.png')
img2=img1
img2=pygame.transform.flip(img2,True, False)
#inside event loop
rect2 = img2.get_rect()
   rect2.center = 200, 150
   screen.blit(img2, rect2)
示例
渲染原始 Pygame 徽標及其翻轉影像的完整程式碼如下 -
import pygame

pygame.init()
screen = pygame.display.set_mode((400, 300))
pygame.display.set_caption("Flip image")
img1 = pygame.image.load('pygame.png')
img2=img1
img3=img1
img2=pygame.transform.flip(img2,True, False)
img3=pygame.transform.flip(img3, False, True)
done = False
bg = (127,127,127)
while not done:
   for event in pygame.event.get():
      screen.fill(bg)
      rect1 = img1.get_rect()
      rect1.center = 200, 50
      screen.blit(img1, rect1)
      rect2 = img2.get_rect()
      rect2.center = 200, 150
      screen.blit(img2, rect2)
      rect3 = img3.get_rect()
      rect3.center = 200, 250
      screen.blit(img3, rect3)
      if event.type == pygame.QUIT:
         done = True
   pygame.display.update()
輸出

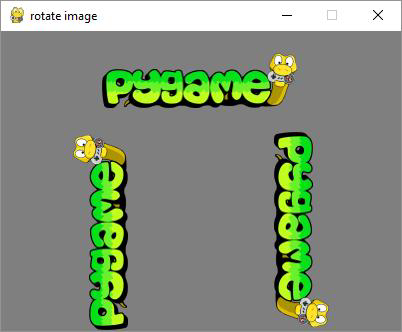
rotate() 函式採用以下引數 -
rotate(Surface, angle)
示例
角度的負值使表面順時針旋轉。
import pygame

pygame.init()
screen = pygame.display.set_mode((400, 300))
pygame.display.set_caption("rotate image")
img1 = pygame.image.load('pygame.png')
img2=img1
img3=img1
img2=pygame.transform.rotate(img2,90)
img3=pygame.transform.rotate(img3, -90)
done = False
bg = (127,127,127)
while not done:
   for event in pygame.event.get():
      screen.fill(bg)
      rect1 = img1.get_rect()
      rect1.center = 200, 50
      screen.blit(img1, rect1)
      rect2 = img2.get_rect()
      rect2.center = 100, 200
      screen.blit(img2, rect2)
      rect3 = img3.get_rect()
      rect3.center = 300,200
      screen.blit(img3, rect3)
      if event.type == pygame.QUIT:
         done = True
   pygame.display.update()
輸出
示例
laplacian() 函式提取表面物件的輪廓。該函式只接受一個引數,即影像物件本身。
import pygame
pygame.init()
screen = pygame.display.set_mode((400, 300))
pygame.display.set_caption("Laplacian of image")
img1 = pygame.image.load('pygame.png')
img2=img1
img2=pygame.transform.laplacian(img2)
done = False
bg = (127,127,127)
while not done:
   for event in pygame.event.get():
      screen.fill(bg)
      rect1 = img1.get_rect()
      rect1.center = 200, 50
      screen.blit(img1, rect1)
      rect2 = img2.get_rect()
      rect2.center = 200, 200
      screen.blit(img2, rect2)

      if event.type == pygame.QUIT:
         done = True
   pygame.display.update()
輸出

為了使 Surface 物件隨滑鼠移動而移動,請從影像的中心計算 x、y 座標。我們還計算中心滑鼠距離 d。atan2(y, x) 數學函式允許查詢旋轉角度。我們需要將弧度轉換為度數。從滑鼠中心距離,我們計算縮放參數。
mouse = event.pos
Pygame
54
x = mouse[0] - 200
y = mouse[1] - 150
d = math.sqrt(x ** 2 + y ** 2)
angle = math.degrees(-math.atan2(y, x))
scale = abs(5 * d / 400)
最後,我們使用 rotzoom() 函式,該函式執行組合旋轉和縮放變換。
rotozoom(Surface, angle, scale)
示例
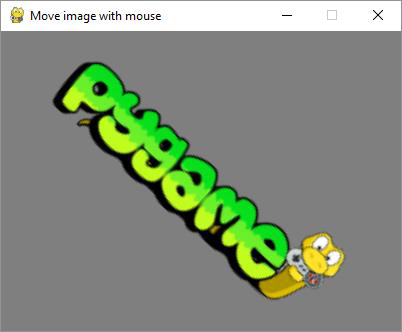
以下程式碼渲染可以根據滑鼠移動旋轉的 Pygame 徽標影像。
import pygame , math
from pygame.locals import *
pygame.init()
screen = pygame.display.set_mode((400, 300))
pygame.display.set_caption("Move image with mouse")
img1 = pygame.image.load('pygame.png')
done = False
bg = (127,127,127)
while not done:
   for event in pygame.event.get():
      screen.fill(bg)

      if event.type == pygame.QUIT:
         done = True
      if event.type == MOUSEMOTION:
         mouse = event.pos
         x = mouse[0] - 200
         y = mouse[1] - 150
         d = math.sqrt(x ** 2 + y ** 2)
         angle = math.degrees(-math.atan2(y, x))
         scale = abs(5 * d / 400)
         img2 = pygame.transform.rotozoom(img1, angle, scale)
         rect = img2.get_rect()
         rect.center = (200,150)
         screen.blit(img2, rect)
   pygame.display.update()
輸出
執行以上程式碼,嘗試將滑鼠游標沿顯示視窗移動。影像將相應地旋轉並縮小或增大。
Pygame - 聲音物件
使用音樂和聲音使任何電腦遊戲更具吸引力。Pygame 庫透過 pygame.mixer 模組支援此功能。此模組包含 Sound 類,用於載入 Sound 物件和控制播放。所有聲音播放都在後臺執行緒中混合。為了減少延遲,請使用較小的緩衝區大小。
要從聲音檔案或檔案物件獲取 Sound 物件,請使用以下建構函式 -
pygame.mixer.Sound(filename or file object)
Sound 類定義了以下方法來控制播放 -
| play(loops=0, maxtime=0, fade_ms=0) | 在可用的 Channel 上開始播放聲音(即在電腦的揚聲器上)。Loops 引數用於重複播放。 |
| stop() | 這將停止在任何活動 Channel 上播放此聲音。 |
| fadeout(time) | 這將在以毫秒為單位的時間引數內淡出後停止播放聲音。 |
| set_volume(value) | 這將設定此聲音的播放音量,如果聲音正在播放,則會立即影響聲音,以及此聲音的任何未來播放。音量範圍為 0.0 到 1.0 |
| get_length() | 返回此聲音的長度(以秒為單位)。 |
在以下示例中,一個文字按鈕渲染在顯示視窗的底部。空格鍵會向上發射一個箭頭,並伴隨播放聲音。
font = pygame.font.SysFont("Arial", 14)
text1=font.render(" SHOOT ", True, bg)
rect1 = text1.get_rect(midbottom=(200,300))
img=pygame.image.load("arrow.png")
rect2=img.get_rect(midtop=(200, 270))
在遊戲事件迴圈內,對於檢測到的空格鍵,一個箭頭物件放置在 SHOOT 按鈕上方,並以遞減的 y 座標重複渲染。同時也會播放射擊聲音。
sound=pygame.mixer.Sound("sound.wav")img=pygame.image.load("arrow.png")
rect2=img.get_rect(midtop=(200, 270))

if event.type == pygame.KEYDOWN:
   if event.key == pygame.K_SPACE: 18. Pygame — Sound objects
      print ("space")
      if kup==0:
         screen.blit(img, (190,y))
         kup=1
   if kup==1:
      y=y-1
      screen.blit(img, (190,y))
      sound.play()
      if y<=0:
         kup=0
         y=265
示例
以下列表演示了 Sound 物件的使用。
import pygame
from pygame.locals import *
pygame.init()
screen = pygame.display.set_mode((400, 300))
done = False
white = (255,255,255)
bg = (127,127,127)
sound=pygame.mixer.Sound("sound.wav")
font = pygame.font.SysFont("Arial", 14)
text1=font.render(" SHOOT ", True, bg)
rect1 = text1.get_rect(midbottom=(200,300))
img=pygame.image.load("arrow.png")
rect2=img.get_rect(midtop=(200, 270))
kup=0
psmode=True
screen = pygame.display.set_mode((400,300))
screen.fill(white)
y=265
while not done:

   for event in pygame.event.get():
      screen.blit(text1, rect1)
      pygame.draw.rect(screen, (255,0,0),rect1,2)
      if event.type == pygame.QUIT:
         sound.stop()
         done = True
      if event.type == pygame.KEYDOWN:
         if event.key == pygame.K_SPACE:
            print ("space")
            if kup==0:
               screen.blit(img, (190,y))
               kup=1
   if kup==1:
      y=y-1
      screen.blit(img, (190,y))
      sound.play()
      if y<=0:
         kup=0
         y=265
   pygame.display.update()
Pygame - Mixer 通道
Sound 物件可以在特定通道上播放,而不是自動選擇的預設通道。首先使用以下命令建立一個通道物件 -
pygame.mixer.Channel(id)
以下函式在 mixer.channel 類中定義 -
| play(Sound, loops=0, maxtime=0, fade_ms=0) | 這將在特定 Channel 上開始播放聲音。 |
| stop() | 停止通道上的聲音播放。播放停止後,通道將可用於在其上播放新的聲音 |
| pause() | 暫時停止通道上的聲音播放。 |
| unpause() | 恢復暫停通道上的播放。 |
| set_volume(value) | 設定正在播放的聲音的音量(響度)。value 引數介於 0.0 和 1.0 之間。 |
| queue(Sound) | 當聲音在 Channel 上排隊時,它將在當前聲音完成後立即開始播放。 |
Pygame - 播放音樂
混音器還有一個用於音樂播放的特殊流通道,可以透過 pygame.mixer.musicpygame 模組訪問,用於控制流式音訊模組。音樂播放和常規聲音播放之間的區別在於音樂是流式傳輸的,並且從未一次全部載入。混音器系統一次只支援一個音樂流。
首先,我們需要從音樂檔案載入音樂。Pygame 可以載入 WAV、MP3 或 OGG 檔案。
pygame.mixer.music.load(filename or object)
這將載入音樂檔名/檔案物件並準備播放。如果音樂流正在播放,它將被停止。這不會開始播放音樂。播放由以下函式控制 -
play(loops=0, start=0.0, fade_ms = 0)
這將播放載入的音樂流。如果音樂正在播放,它將重新啟動。loops 引數表示重複音樂的次數。如果此引數設定為 -1,則音樂無限期重複。start 表示音樂從哪裡開始播放。位置以秒為單位的時間。fade_ms 引數使音樂以 0 音量開始播放,並在給定時間內逐漸增大到最大音量。
其他有用的函式如下 -
| rewind() | 將當前音樂的播放重置到開頭。 |
| stop() | 如果當前音樂正在播放,則停止音樂播放。它不會解除安裝音樂。 |
| pause() | 暫時停止音樂流的播放。 |
| unpause() | 這將在音樂流暫停後恢復播放。 |
| fadeout(time) | 淡出並停止當前正在播放的音樂。 |
| set_volume(volume) | 設定音樂播放的音量。 |
| set_pos(pos) | 這將設定音樂檔案中播放將開始的位置。 |
在以下程式中,音樂檔案在單擊播放按鈕時開始播放。暫停按鈕充當切換以暫停/取消暫停播放。單擊停止停止播放。
import pygame
pygame.init()
screen = pygame.display.set_mode((400, 300)) 20. Pygame — Playing music
done = False
white = (255,255,255)
pygame.mixer.music.load("mario_theme.wav")
font = pygame.font.SysFont("Arial", 14)
text1=font.render(" PLAY ", True, white)
text2=font.render(" PAUSE ", True, white)
text3=font.render(" STOP ", True, white)
rect1 = text1.get_rect(topleft=(10,10))
rect2 = text2.get_rect(topleft= (100,10))
rect3 = text3.get_rect(topleft= (200,10))
bg = (127,127,127)
psmode=True
screen = pygame.display.set_mode((400,300))
screen.fill(bg)
while not done:
   for event in pygame.event.get():
      screen.blit(text1, rect1)
      pygame.draw.rect(screen, (255,0,0),rect1,2)
      screen.blit(text2, rect2)
      pygame.draw.rect(screen, (255,0,0),rect2,2)
      pygame.draw.rect(screen, (255,0,0),rect3,2)
      screen.blit(text3, rect3)

      if event.type == pygame.QUIT:
         done = True
      if event.type == pygame.MOUSEBUTTONDOWN:
         if rect1.collidepoint(event.pos):
            pygame.mixer.music.play()
         if rect2.collidepoint(event.pos):
            if psmode==True:
               pygame.mixer.music.pause()
               psmode=False
            else:
               if psmode==False:
                  pygame.mixer.music.unpause()
                  psmode=True
            if rect3.collidepoint(event.pos):
               pygame.mixer.music.stop()
   pygame.display.update()
Pygame - 播放影片
Pygame 在其最新版本中已停止支援影片檔案。但是,在 Python 2.7 發行版的早期版本中,它仍然可以使用。對於本節,已使用 Pygame 1.9.2 和 Python 2.7.18。
pygame.movie 模組支援從基本編碼的 MPEG-1 影片檔案中播放影片和音訊。影片播放發生在後臺執行緒中,這使得播放易於管理。pygame.mixerpygame 模組用於載入和播放聲音模組,如果要播放電影的聲音,則必須將其取消初始化。
首先透過以下語法獲取 Movie 物件 -
movie = pygame.movie.Movie('sample.mpg')
Movie 類提供以下方法來控制播放。
| pygame.movie.Movie.play | 開始播放電影 |
| pygame.movie.Movie.stop | 停止電影播放 |
| pygame.movie.Movie.pause | 暫時停止和恢復播放 |
| pygame.movie.Movie.skip | 提前電影播放位置 |
| pygame.movie.Movie.rewind | 重新開始電影播放 |
| pygame.movie.Movie.get_time | 獲取當前影片播放時間 |
| pygame.movie.Movie.get_length | 電影的總長度(以秒為單位) |
| pygame.movie.Movie.get_size | 獲取影片的解析度 |
| pygame.movie.Movie.has_audio | 檢查電影檔案是否包含音訊 |
| pygame.movie.Movie.set_volume | 設定音訊播放音量 |
| pygame.movie.Movie.set_display | 設定影片目標 Surface |
以下程式碼在 Pygame 顯示視窗上播放 .MPG 檔案。 -
import pygame

FPS = 60
pygame.init()
clock = pygame.time.Clock()
movie = pygame.movie.Movie('sample_640x360.mpg')
screen = pygame.display.set_mode(movie.get_size())
movie_screen = pygame.Surface(movie.get_size()).convert()

movie.set_display(movie_screen)
movie.play()

playing = True
while playing:
   for event in pygame.event.get():
      if event.type == pygame.QUIT:
         movie.stop()
         playing = False

   screen.blit(movie_screen,(0,0))
   pygame.display.update()
   clock.tick(FPS)
pygame.quit()
Pygame - 使用攝像頭模組
Pygame 1.9.6 及之前版本包含 pygame.camera 模組。此模組包含在遊戲視窗上捕獲攝像頭影片流並從中抓取影像的功能。系統可用的攝像頭裝置列在 list_cameras() 方法返回的列表中。
pygame.camera.list_cameras()
要初始化攝像頭物件,請使用攝像頭 ID、解析度和格式引數。
pygame.camera.Camera(device, (width, height), format)
預設格式為 RGB。寬度和高度引數預設為 640x480。
camera 模組在 Camera 類中定義了以下方法。
| pygame.camera.Camera.start() | 開啟、初始化並開始捕獲 |
| pygame.camera.Camera.stop() | 停止、取消初始化並關閉攝像頭 |
| pygame.camera.Camera.get_controls() | 獲取使用者控制元件的當前值 |
| pygame.camera.Camera.set_controls() | 如果攝像頭支援,則更改攝像頭設定 |
| pygame.camera.Camera.get_size() | 返回正在錄製影像的尺寸 |
| pygame.camera.Camera.query_image() | 檢查幀是否已準備好 |
| pygame.camera.Camera.get_image() | 將影像捕獲為 Surface |
| pygame.camera.Camera.get_raw() | 以字串形式返回未修改的影像 |
示例
以下程式捕獲計算機預設網路攝像頭的即時影片流。
import pygame
import pygame.camera

pygame.init()

gameDisplay = pygame.display.set_mode((640,480))

pygame.camera.init()
print (pygame.camera.list_cameras())
cam = pygame.camera.Camera(0)
cam.start()
while True:
   img = cam.get_image()
   gameDisplay.blit(img,(0,0))
   pygame.display.update()
   for event in pygame.event.get() :
      if event.type == pygame.QUIT :
         cam.stop()
         pygame.quit()
         exit()
請注意,在 Windows 作業系統上,您可能需要安裝 Videocapture 模組。
pip3 install VideoCapture
輸出

Pygame - 載入游標
Pygame 允許您控制系統游標。Pygame 中只能使用黑白游標。pygame.cursors 模組定義包含預定義的游標列舉。
- pygame.cursors.arrow
- pygame.cursors.diamond
- pygame.cursors.broken_x
- pygame.cursors.tri_left
- pygame.cursors.tri_right
箭頭游標是預設選擇。要使用其他游標,我們使用 pygame.mouse 模組中的 set_cursor() 函式。
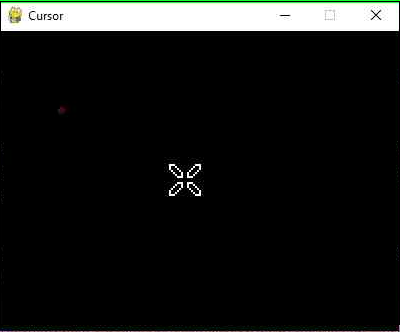
pygame.mouse.set_cursor(pygame.cursors.broken_x)
示例
在以下示例中,此游標可以在顯示視窗上看到。
import pygame,sys
from pygame.locals import *
pygame.init()
pygame.mouse.set_cursor(pygame.cursors.broken_x)
canvas=pygame.display.set_mode((400,300))
pygame.display.set_caption("Cursor")
while True:
for event in pygame.event.get():
   if(event.type == QUIT):
      pygame.quit()
      sys.exit(1)
輸出
此模組還包含一些格式化字串形式的游標。要使用它們,請使用 pygame.cursors.compile() 函式。
- pygame.cursors.thickarrow_strings
- pygame.cursors.sizer_x_strings
- pygame.cursors.sizer_y_strings
- pygame.cursors.sizer_xy_strings
- pygame.cursor.textmarker_strings
cursor = pygame.cursors.compile(pygame.cursors.textmarker_strings)
pygame.mouse.set_cursor((10,10), (0, 0), *cursor)
Pygame - 訪問 CDROM
pygame 庫具有 pygame.cdrom 模組,該模組使程式能夠管理來自音訊 CD 和 DVD 的播放。我們需要顯式初始化此模組才能使用它。
>>> import pygame
>>> pygame.cdrom.init()
該模組定義了所有重要的 CD 類來表示 CDROM 裝置。建構函式需要可用的 CDROM 驅動器的 ID,從 0 開始。
>>> obj=pygame.cdrom.CD(0)
CDROM 物件可以訪問以下有用的函式來控制播放。
| init() | 初始化 CDROM 驅動器以供使用 |
| quit() | 取消初始化 CDROM 驅動器以供使用 |
| play() | 開始播放音訊 |
| stop() | 停止音訊播放 |
| pause() | 臨時停止音訊播放 |
| resume() | 恢復音訊播放 |
| eject() | 彈出或開啟 CDROM 驅動器 |
| get_busy() | 如果驅動器正在播放音訊,則為真 |
| get_paused() | 如果驅動器已暫停,則為真 |
| get_empty() | 如果驅動器中有 CDROM,則為假 |
| get_numtracks() | CDROM 上的軌道數 |
| get_track_audio() | 如果 CDROM 軌道具有音訊資料,則為真 |
| get_track_start() | CDROM 軌道的開始時間 |
| get_track_length() | CDROM 軌道的長度 |
首先,初始化物件。
>>> obj.init()
要找出當前 CD 中有多少個軌道 -
>>> obj.get_numtracks()
8
要開始播放所需的軌道,請將其編號傳遞給 play() 函式。
>>> obj.play(4)
要暫停、恢復和停止播放,我們可以使用上面列出的相關函式。

Pygame - 精靈模組
在遊戲視窗中繪製並可以四處移動的任何點陣圖都稱為精靈。pygame.sprite 模組包含在遊戲開發中很有用的類和功能。除了用於建立精靈物件集合的 Sprite 類之外,還有使精靈物件發生碰撞的函式。
Sprite 類充當遊戲中不同物件的基類。您可能需要將一個或多個物件放入組中。為此,也提供了組類。
讓我們首先透過繼承 sprite.Sprite 類來開發一個 Sprite 類。此 Block 類的每個物件都是一個填充黑色顏色的矩形塊。
class Block(pygame.sprite.Sprite):

   def __init__(self, color, width, height):
      super().__init__()

      self.image = pygame.Surface([width, height])
      self.image.fill(color)

      self.rect = self.image.get_rect()
我們將建立 50 個塊物件並將它們放入列表中。
for i in range(50):
   block = Block(BLACK, 20, 15)

   # Set a random location for the block
   block.rect.x = random.randrange(screen_width)
   block.rect.y = random.randrange(screen_height)

   # Add the block to the list of objects
   block_list.add(block)
   all_sprites_list.add(block)
我們建立一個紅色塊,將其稱為 player,並將其也新增到列表中。
# Create a RED player block
player = Block(RED, 20, 15)
all_sprites_list.add(player)
在遊戲的事件迴圈內,檢測紅色塊(player)在隨滑鼠移動以及黑色塊移動時發生的碰撞,並計算碰撞次數。
示例
事件迴圈程式碼如下 -
while not done:
   for event in pygame.event.get():
      if event.type == pygame.QUIT:
         done = True

   # Clear the screen
   screen.fill(WHITE)

   # Get the current mouse position. This returns the position
   # as a list of two numbers.
   pos = pygame.mouse.get_pos()

   # Fetch the x and y out of the list,
      # just like we'd fetch letters out of a string.
   # Set the player object to the mouse location
   player.rect.x = pos[0]
   player.rect.y = pos[1]

   # See if the player block has collided with anything.
   blocks_hit_list = pygame.sprite.spritecollide(player, block_list, True)

   # Check the list of collisions.
   for block in blocks_hit_list:
      score += 1
      print(score)

   # Draw all the spites
   all_sprites_list.draw(screen)

   # Go ahead and update the screen with what we've drawn.
   pygame.display.flip()

   # Limit to 60 frames per second
   clock.tick(60)

pygame.quit()
輸出
執行上述程式碼。移動 player 塊以捕獲儘可能多的黑色塊。分數將回顯在控制檯上。
Pygame - PyOpenGL
OpenGL 是一種跨語言、跨平臺的 API,用於渲染 2D 和 3D 向量圖形。透過與圖形處理單元 (GPU) 互動,它實現了硬體加速渲染。PyOpenGL 庫是 Python 的 OpenGL 繫結。
我們需要使用 pip 實用程式安裝它 -
pip3 install pyopengl
首先,我們將從 OpenGL.GL 和 OpenGL.GLU(實用程式函式)模組匯入函式。
OpenGL 透過定義頂點或節點來指定空間內的物件。頂點之間的線稱為邊。OpenGL 程式碼編寫在 glBegin 和 glEnd 之間。
在我們的示例中,我們將使用以下頂點和邊繪製一個立方體 -
verticies = (
   (1, -1, -1),
   (1, 1, -1),
   (-1, 1, -1),
   (-1, -1, -1),
   (1, -1, 1),
   (1, 1, 1),
   (-1, -1, 1),
   (-1, 1, 1)
)
edges = (
   (0,1),
   (0,3),
   (0,4),
   (2,1),
   (2,3),
   (2,7),
   (6,3),
   (6,4),
   (6,7),
   (5,1),
   (5,4),
   (5,7)
)
cube() 函式執行 OpenGL 繪製 -
def Cube():
   glBegin(GL_LINES)
   for edge in edges:
      for vertex in edge:
         glVertex3fv(verticies[vertex])
   glEnd()
傳遞給 glBegin() 的 GL_LINES 屬性表示要繪製線條。
我們需要在 set_mode() 函式中指定 OPENGL 和 DOUBLEBUF 標誌,該函式設定顯示。
pygame.display.set_mode(display, DOUBLEBUF|OPENGL)
然後呼叫 gluPerspective() 來確定透視。第一個引數是視野的度數。第二個值是縱橫比。接下來的兩個值分別是 znear 和 zfar,它們是近裁剪平面和遠裁剪平面。
gluPerspective(45, (display[0]/display[1]), 0.1, 50.0)
glTranslatef(0.0,0.0, -5)
在 Pygame 事件迴圈內,首先旋轉當前矩陣,清除顏色緩衝區和深度緩衝區,然後呼叫 cube() 函式。最後,我們更新顯示視窗。
while True:
   for event in pygame.event.get():
      if event.type == pygame.QUIT:
         pygame.quit()
         quit()

   glRotatef(1, 3, 1, 1)
   glClear(GL_COLOR_BUFFER_BIT|GL_DEPTH_BUFFER_BIT)
   Cube()
   pygame.display.flip()
   pygame.time.wait(10)
示例
示例的完整程式碼如下 -
import pygame

from pygame.locals import *

from OpenGL.GL import *
from OpenGL.GLU import *

verticies = (
   (1, -1, -1),
   (1, 1, -1),
   (-1, 1, -1),
   (-1, -1, -1),
   (1, -1, 1),
   (1, 1, 1),
   (-1, -1, 1),
   (-1, 1, 1)
)
edges = (
   (0,1),
   (0,3),
   (0,4),
   (2,1),
   (2,3),
   (2,7),
   (6,3),
   (6,4),
   (6,7),
   (5,1),
   (5,4),
   (5,7)
)
def Cube():
   glBegin(GL_LINES)
   for edge in edges:
      for vertex in edge:
         glVertex3fv(verticies[vertex])
   glEnd()

def main():
   pygame.init()
   display = (800,600)
   pygame.display.set_mode(display, DOUBLEBUF|OPENGL)

   gluPerspective(45, (display[0]/display[1]), 0.1, 50.0)

   glTranslatef(0.0,0.0, -5)

   while True:
      for event in pygame.event.get():
         if event.type == pygame.QUIT:
            pygame.quit()
            quit()
      glRotatef(1, 3, 1, 1)
      glClear(GL_COLOR_BUFFER_BIT|GL_DEPTH_BUFFER_BIT)
      Cube()
      pygame.display.flip()
      pygame.time.wait(10)

main()
輸出
執行上述程式碼。您將在 Pygame 的視窗表面上看到一個旋轉的立方體。這是 PyOpenGL 功能的簡短演示。本教程不提供對該庫的詳細討論。

Pygame - 錯誤和異常
頂級 pygame 模組將 pygame.error 定義為標準 Pygame 異常。每當 pygame 或 SDL 操作失敗時,都會引發此異常。您可以捕獲任何預期的問題並處理錯誤。此異常始終會引發包含有關問題的描述性訊息。
>>> import pygame
pygame 1.9.6
Hello from the pygame community. https://www.pygame.org/contribute.html
>>> screen = pygame.display.set_mode((640, -1))
Traceback (most recent call last):
   File "<pyshell#1>", line 1, in <module>
      screen = pygame.display.set_mode((640, -1))
pygame.error: Cannot set negative sized display mode
派生自 RuntimeError 異常,也可以用來捕獲這些引發的錯誤。
>>> try:
   screen = pygame.display.set_mode((640, -1))
except pygame.error as e:
   print ("unable to set display: ", e)

unable to set display Cannot set: negative sized display mode
此模組中還有兩個函式用於設定和檢索錯誤訊息。
set_error(error_msg)
SDL 維護一個內部錯誤訊息。當引發 pygame.error() 標準 pygame 異常時,此字串用作錯誤訊息。
獲取當前錯誤訊息。
get_error()
它返回 pygame.error() 訊息的錯誤訊息字串。