- Mobile Angular UI 教程
- Mobile Angular UI - 首頁
- Mobile Angular UI - 概述
- Mobile Angular UI - 安裝
- Mobile Angular UI - 專案設定
- Mobile Angular UI - 我的第一個應用
- Mobile Angular UI - 佈局
- Mobile Angular UI - 元件
- Mobile Angular UI - 下拉選單
- Mobile Angular UI - 手風琴
- Mobile Angular UI - 標籤頁
- Mobile Angular UI - 拖放
- Mobile Angular UI - 可滾動區域
- Mobile Angular UI - 表單
- Mobile Angular UI - 滑動手勢
- Mobile Angular UI - 切換開關
- Mobile Angular UI - 區塊
- Mobile Angular UI - 核心細節
- Mobile Angular UI - 觸控事件
- Mobile Angular UI - PhoneGap & Cordova
- Mobile Angular UI - 建立 APK 檔案
- Mobile Angular UI - 應用開發
- Mobile Angular UI - 示例
- Mobile Angular UI 資源
- Mobile Angular UI - 快速指南
- Mobile Angular UI - 有用資源
- Mobile Angular UI - 討論
Mobile Angular UI - 拖放
拖放功能允許您透過抓取 HTML 元素並將其拖放到另一個位置來控制該元素。
要在 Mobile Angular UI 中使用拖放功能,您需要新增手勢模組。
首先,將 JavaScript 檔案新增到 index.html 中,如下所示:
<script src="node_modules/mobile-angular-ui/dist/js/mobile-angular-ui.gestures.min.js"></script>
然後,在 app.js 中將手勢模組新增為依賴項,如下所示:
var app=angular.module('myFirstApp', [
   'ngRoute',
   'mobile-angular-ui',
   'mobile-angular-ui.gestures'
]);
我們需要建立一個自定義指令來拖動專案,使用 $drag 模組。
使用 $drag 模組的語法如下:
$drag.bind(element, dragOptions, touchOptions);
引數
element - 您要拖動的 HTML 元素。
dragOptions - 它是一個包含以下詳細資訊的物件:
var dragOptions= {
   transform: $drag.TRANSLATE_BOTH,
   start: function(dragInfo, event){},
   end: function(dragInfo, event){},
   move: function(dragInfo, event){},
   cancel: function(dragInfo, event){}
};
對於transform,您可以使用以下選項:
$drag.NULL_TRANSFORM - 元素沒有變換移動。
$drag.TRANSLATE_BOTH - 元素將在 x 和 y 軸上移動。
$drag.TRANSLATE_HORIZONTAL - 元素將在 x 軸上移動。
$drag.TRANSLATE_UP - 元素將在負 y 軸上移動。
$drag.TRANSLATE_DOWN - 元素將在正 y 軸上移動。
$drag.TRANSLATE_LEFT - 元素將在負 x 軸上移動。
$drag.TRANSLATE_RIGHT - 元素將在正 x 軸上移動。
$drag.TRANSLATE_VERTICAL - 元素將在 y 軸上移動。
$drag.TRANSLATE_INSIDE - 它使用如下所示的函式:
{
   transform: $drag.TRANSLATE_INSIDE(myElement)
}
start、end、move、cancel 是帶有draginfo和事件詳細資訊作為引數的函式。
draginfo - 它是 $touch 模組的擴充套件版本。它具有以下詳細資訊:
originalTransform - 繫結 $drag 之前相對於 CSS transform 的 $transform 物件。
originalRect - 繫結任何拖動操作之前繫結元素的邊界客戶端矩形。
startRect - 在開始事件中註冊的繫結元素的邊界客戶端矩形。
startTransform - 開始事件時的 $transform。
rect - 繫結元素的當前邊界客戶端矩形。
transform - 當前的 $transform。
reset - 將元素恢復到 originalTransform 的函式。
undo - 將元素恢復到 startTransform 的函式。
touchOptions - 要傳遞給底層 $touch 服務的選項物件。
在 src/js/app.js 中使用 $drag 模組建立指令,如下所示:
app.directive('dragItem', ['$drag', function($drag) {
   return {
      controller: function($scope, $element) {
         $drag.bind($element,
            {
               transform: $drag.TRANSLATE_BOTH,
               end: function(drag) {
                  drag.reset();
               }
            },
            {
               sensitiveArea: $element.parent()
            }
         );
      }
   };
}]);
讓我們看看一個拖動元素的工作示例:
Index.html
<!DOCTYPE html>
<html>
   <head>
      <meta charset="utf-8" />
      <title>Mobile Angular UI Demo</title>
      <meta http-equiv="X-UA-Compatible" content="IE=edge,chrome=1" />
      <meta name="apple-mobile-web-app-capable" content="yes" />
      <meta name="viewport" content="user-scalable=no, initial-scale=1.0, maximum-scale=1.0, minimal-ui" />
      <meta name="apple-mobile-web-app-status-bar-style" content="yes" />
      <link rel="shortcut icon" href="/assets/img/favicon.png" type="image/x-icon" />
      <link rel="stylesheet" href="node_modules/mobile-angular-ui/dist/css/mobile-angular-ui-hover.min.css" />
      <link rel="stylesheet" href="node_modules/mobile-angular-ui/dist/css/mobile-angular-ui-base.min.css" />
      <link rel="stylesheet" href="node_modules/mobile-angular-ui/dist/css/mobile-angular-ui-desktop.min.css" />
      <script src="node_modules/angular/angular.min.js"></script>
      <script src="node_modules/angular-route/angular-route.min.js"></script>
      <script src="node_modules/mobile-angular-ui/dist/js/mobile-angular-ui.min.js"></script>
      <script src="node_modules/angular-route/angular-route.min.js"></script>
      <script src="node_modules/mobile-angular-ui/dist/js/mobile-angular-ui.gestures.min.js"></script>
      <link rel="stylesheet" href="src/css/app.css" />
      <script src="src/js/app.js"></script>
   </head>
   <body ng-app="myFirstApp" ng-controller="MainController">

      <!-- Sidebars -->
      <div class="sidebar sidebar-left">
         <div class="scrollable">
            <h1 class="scrollable-header app-name">Tutorials</h1>
            <div class="scrollable-content">
               <div class="list-group" ui-turn-off='uiSidebarLeft'>
                  <a class="list-group-item" href="/">Home Page </a>
                     <a class="list-group-item" href="#/academic"><i class="fa fa-caret-right"></i>Academic Tutorials </a>
                     <a class="list-group-item" href="#/bigdata"><i class="fa fa-caret-right"></i>Big Data & Analytics </a>
                     <a class="list-group-item" href="#/computerProg"><i class="fa fa-caret-right"></i>Computer Programming </a>
                     <a class="list-group-item" href="#/computerscience"><i class="fa fa-caret-right"></i>Computer Science </a>
                     <a class="list-group-item" href="#/databases"><i class="fa fa-caret-right"></i>Databases </a>
                     <a class="list-group-item" href="#/devops"><i class="fa fa-caret-right"></i>DevOps </a>
                  </div>
               </div>
            </div>
         </div>
         <div class="sidebar sidebar-right">
            <div class="scrollable">
               <h1 class="scrollable-header app-name">eBooks</h1>
               <div class="scrollable-content">
                  <div class="list-group" ui-toggle="uiSidebarRight">
                     <a class="list-group-item" href="#/php"><i class="fa fa-caret-right"></i>PHP </a>
                     <a class="list-group-item" href="#/Javascript"><i class="fa fa-caret-right"></i>Javascript </a>
                  </div>
               </div>
            </div>
      </div>
      <div class="app">
         <div class="navbar navbar-app navbar-absolute-top">
            <div class="navbar-brand navbar-brand-center" ui-yield-to="title">
               TutorialsPoint
            </div>
            <div class="btn-group pull-left">
               <div ui-toggle="uiSidebarLeft" class="btn sidebar-left-toggle">
                  <i class="fa fa-th-large "></i> Tutorials
               </div>
            </div>
            <div class="btn-group pull-right" ui-yield-to="navbarAction">
               <div ui-toggle="uiSidebarRight" class="btn sidebar-right-toggle">
                  <i class="fal fa-search"></i> eBooks
               </div>
            </div>
         </div>
         <div class="navbar navbar-app navbar-absolute-bottom">
            <div class="btn-group justified">
               <a ui-turn-on="aboutus_modal" class="btn btn-navbar"><i class="fal fa-globe"></i> About us</a>
               <a ui-turn-on="contactus_overlay" class="btn btn-navbar"><i class="fal fa-map-marker-alt"></i> Contact us</a>
            </div>
         </div>

         <!-- App body -->
         <div class='app-body'>
            <div class='app-content'>
               <ng-view></ng-view>
            </div>
         </div>
      </div><!-- ~ .app -->
      <!-- Modals and Overlays -->
      <div ui-yield-to="modals"></div>
   </body>
</html>
src/js/app.js
/* eslint no-alert: 0 */

'use strict';
//
// Here is how to define your module
// has dependent on mobile-angular-ui
//
var app=angular.module('myFirstApp', [
   'ngRoute',
   'mobile-angular-ui',
   'mobile-angular-ui.gestures'
]);
app.config(function($routeProvider, $locationProvider) {
   $routeProvider
   .when("/", {
      templateUrl : "src/home/home.html"
   });
   $locationProvider.html5Mode({enabled:true, requireBase:false});
});
app.directive('dragItem', ['$drag', function($drag) {
   return {
      controller: function($scope, $element) {
         $drag.bind($element,
            {
               transform: $drag.TRANSLATE_BOTH,end: function(drag) {
                  drag.reset();
               }
            },
            {
               sensitiveArea: $element.parent()
            }
         );
      }
   };
}]);
app.controller('MainController', function($rootScope, $scope, $routeParams) {
   $scope.msg="Welcome to Tutorialspoint!"
   $scope.js="JavaScript is a lightweight, interpreted programming language. It is designed
   for creating network-centric applications. It is
   complimentary to and integrated with Java.
   JavaScript is very easy to implement because it
   is integrated with HTML. It is open and cross-platform.";
   $scope.angularjs="AngularJS is a very powerful
   JavaScript Framework. It is used in Single Page
   Application (SPA) projects. It extends HTML DOM
   with additional attributes and makes it more
   responsive to user actions. AngularJS is open
   source, completely free, and used by thousands of
   developers around the world. It is licensed under the Apache license version 2.0.";
   $scope.reactjs="React is a front-end library
   developed by Facebook. It is used for handling
   the view layer for web and mobile apps. ReactJS
   allows us to create reusable UI components. It is
   currently one of the most popular JavaScript
   libraries and has a strong foundation and large community behind it.";
});
拖動元素新增到 src/home/home.html 中:
<div style="height: 100%; width: 100%; padding: 40px;">
   <div style="height: 100%; width: 100%; border: 1px solid #444; position: relative;">
      <div drag-Item>
         <img src="src/img/test.png" width="100" height="100" />
      </div>
   </div>
</div>
使用影像進行拖動,如下所示:

瀏覽器中的顯示如下:
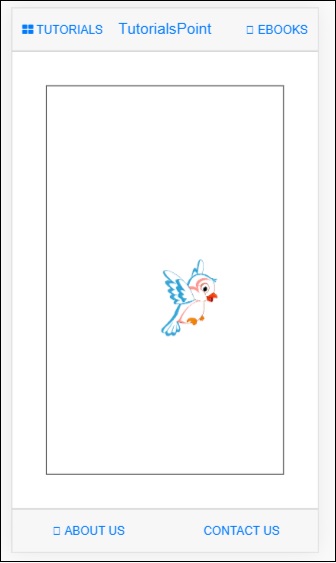
您可以在 UI 中拖動影像,並且一旦釋放滑鼠,它將重置回原始位置,因為我們在end 函式中使用了drag.reset()。
$drag.bind($element, {
      transform: $drag.TRANSLATE_BOTH,
      end: function(drag) {
         drag.reset();
      }
   },
   {
      sensitiveArea: $element.parent()
   }
);