
 資料結構
資料結構 網路
網路 關係資料庫管理系統 (RDBMS)
 作業系統
作業系統 Java
Java iOS
iOS HTML
HTML CSS
CSS Android
 Python
 C語言程式設計
 C++
C++ C#
C# MongoDB
 MySQL
MySQL Javascript
 PHP
PHP在Snack中製作雙螢幕應用程式
在React Native應用中,通常需要多個螢幕,使用者需要在螢幕之間切換。本文使用兩種不同的方法來製作雙螢幕應用程式,使用者可以在兩個螢幕之間來回切換。在示例1中,使用'react-navigation'中的createStackNavigator模組實現導航,而在示例2中,使用createSwitchNavigator建立導航。
演算法
演算法1
步驟1 − 從'react-navigation'匯入createStackNavigator
步驟2 − 建立App.js並在javascript檔案中編寫從一個螢幕導航到另一個螢幕的程式碼。
步驟3 − 在App.js檔案中建立兩個螢幕作為類My_Home和My_School。
步驟4 − 設定導航選項,例如標題和headerStyle。
步驟5 − 編寫從My_Home導航到My_School,然後再返回My_Home的程式碼。
步驟6 − 在WebView上立即檢視線上結果。
演算法2
步驟1 − 建立一個名為screens的資料夾,並建立名為FirstScreen.js和SecondScreen.js的javascript檔案。在這些檔案中為FirstScrr和SecondScrr編寫程式碼。
步驟2 − 從'react-navigation'庫匯入名為createAppContainer和createSwitchNavigator的模組。
步驟3 − 建立App.js並在其中編寫從FirstScrr到SecondScrr,然後再返回FirstScrr的程式碼。
步驟4 − 使用按鈕的onPress()函式在FirstScrr和SecondScrr之間切換。
步驟5 − 在WebView上立即檢視線上結果。
多種方法
我們提供了多種不同的解決方案。
使用'react-navigation'中的createStackNavigator
使用'react-navigation'庫中的createAppContainer和createSwitchNavigator
讓我們逐一檢視程式及其輸出。
方法1:使用'react-navigation'中的createStackNavigator
專案中的重要檔案
App.js
package.json
兩個影像檔案myhome.jpg和myschool.jpg
App.js:這是主要的javascript檔案。
示例
import {Component} from 'react';
import { Button,Image, View } from 'react-native';
import {createStackNavigator} from 'react-navigation';

export default class TheTwoScreenApp extends Component {
   render() {
      return <TheTwoScreenNavigator />;
   }
}

class My_Home extends Component {
   navopt = {
      title: 'The Home',
      headerStyle: {backgroundColor:"#499AC8"}
   };
   render() {
      return (
         <View
            style={{
               flex: 1,
               justifyContent: 'center'
            }}>

            <Image
               style={{ width: 300, height: 300, margin:15 }}
               source={require('./myhome.jpg')} />
            <Button
               title="Go to Your School"
               onPress={() =>
              this.props.navigation.navigate('My_School')
            }
            />
         </View>
      );
   }
}

class My_School extends Component {
   navopt = {
      title: 'The School',
      headerStyle: {backgroundColor:"#499AC8"}
   };
   render() {
      return (
         <View
            style={{
               flex: 1,
               justifyContent: 'center',
            }}>
            <Image
               style={{ width: 300, height: 300, margin:15 }}
               source={require('./myschool.jpg')} />
            <Button
               title="Go back to Your Home"
               onPress={() =>
               this.props.navigation.navigate('My_Home')
            }
            />
         </View>
      );
   }
}
const TheTwoScreenNavigator = createStackNavigator(
   {
      My_Home: My_Home,
      My_School: My_School,
   },
);
package.json:這個檔案包含所需的依賴項。
示例
{
   "dependencies": {
      "react-navigation": "2.0.0-rc.2",
      "@expo/vector-icons": "^13.0.0"
   }
}
檢視結果
起始螢幕輸出
結果可以線上檢視。
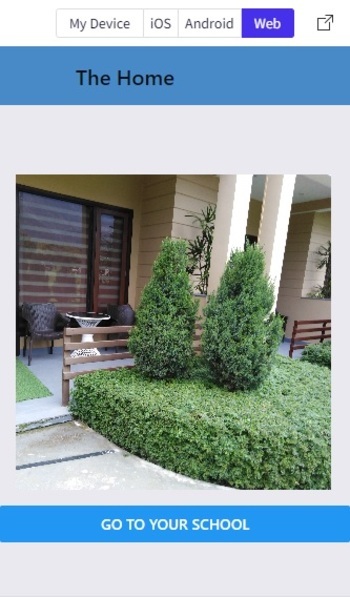
顯示起始螢幕(主頁)作為WebView
下一個螢幕輸出
如果使用者點選第一個螢幕上的按鈕,導航將跳轉到下一個螢幕。
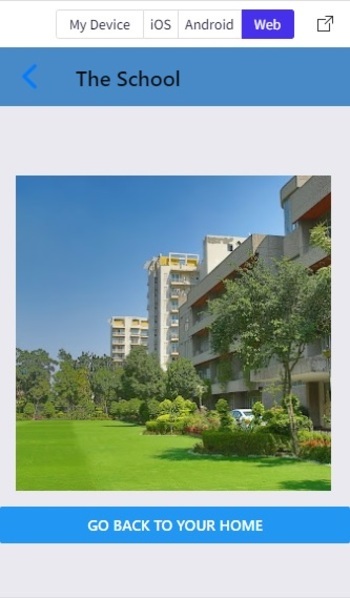
顯示下一個螢幕(學校)作為WebView。
方法2:使用'react-navigation'庫中的createAppContainer和createSwitchNavigator
專案中的重要檔案
資料夾名稱screens包含FirstScreen.js和SecondScreen.js
App.js
兩個影像檔案myhome.jpg和myschool.jpg
FirstScreen.js:這是包含FirstScrr程式碼的javascript檔案
示例
import {Component} from 'react';
import {View,Button, Text, Image, StyleSheet} from 'react-native';

export default class FirstScrr extends Component {
   render() {
      return (
         <View style={styles.mainSpace}>
            <Text style={{textAlign:"center", fontSize:30, color: "#357EC7"}}>The Home</Text>
            <Image
                style={{ width: 304, height: 304, margin:15, paddingTop: 40}}
               source={require('../myhome.jpg')} />
            <Button
               title="Go to Your School"
               onPress={() =>
               this.props.navigation.navigate('SecondScrr')
            }
            />
         </View>
      );
   }
}
const styles = StyleSheet.create({
   mainSpace: {
      flex: 1,
      alignItems: 'center',
      justifyContent: 'center',
      marginTop: 36,
      backgroundColor: '#ecf0f1',
   },
});
SecondScreen.js:這是包含第二個螢幕程式碼的javascript檔案
示例
import{Component}from'react';
import{View,Button,Text,Image,StyleSheet}from'react-native';

exportdefaultclassSecondScrrextendsComponent{
   render(){
      return(
         <Viewstyle={styles.mainSpace}>
            <Textstyle={{textAlign:"center",fontSize:30,color:"#357EC7"}}>TheSchool</Text>
            <Image
               style={{width:304,height:304,margin:15}}
               source={require('../myschool.jpg')}/>
            <Button
               title="GobacktoYourHome"
               onPress={()=>
                  this.props.navigation.navigate('FirstScrr')
            }
            />
         </View>
      );
   }
}
conststyles=StyleSheet.create({
   mainSpace:{
      flex:1,
      alignItems:'center',
      justifyContent:'center',
      marginTop:36,
      backgroundColor:'#ecf0f1',
   },
});
App.js:這是該專案的主要javascript檔案。
示例
import {Component} from 'react';
import {View} from 'react-native';
import { createAppContainer, createSwitchNavigator } from 'react-navigation';
import FirstScrr from './screens/FirstScreen';
import SecondScrr from './screens/SecondScreen';

export default class TheTwoScreenDemoExample extends Component {
   render() {
      return (
         <View>
            <AppBox />
         </View>
      );
   }
}

var AppNav = createSwitchNavigator({
   FirstScrr: FirstScrr,
   SecondScrr: SecondScrr,
});

const AppBox = createAppContainer(AppNav);
檢視結果
FirstScreen輸出
結果可以線上檢視。

顯示FirstScreen作為WebView
SecondScreen輸出
如果使用者點選FirstScreen上的按鈕,導航將跳轉到SecondScreen。

顯示第二個螢幕作為WebView。
本文展示了在應用程式中使用多個螢幕的兩種方法。使用兩種不同的導航方法給出瞭如何在螢幕之間導航的過程。在第一種方法中,使用StackNavigator,而在第二種方法中,使用SwitchNavigator。

瀏覽量:321
