
 資料結構
資料結構 網路
網路 關係型資料庫管理系統
 作業系統
作業系統 Java
Java iOS
iOS HTML
HTML CSS
CSS Android
 Python
 C 語言程式設計
 C++
C++ C#
C# MongoDB
 MySQL
MySQL Javascript
 PHP
PHP如何在 OpenCV 中使用 Python 進行影像旋轉?
要將影像旋轉一定角度,我們首先需要獲取旋轉矩陣。要查詢旋轉矩陣,我們應用 cv2.getRotationMatrix2D() 函式。此函式的語法如下:
M = cv2.getRotationMatrix2D(cr, degree, scale)
其中cr是旋轉中心,degree是影像旋轉的角度,scale是用於放大或縮小影像的縮放因子。
旋轉矩陣 M 是一個 2×2 矩陣(NumPy 陣列)。我們將旋轉矩陣 M 作為引數傳遞給 cv2.warpAffine() 函式。請參見下面的語法:
語法
cv2.warpAffine(img, M, (width, height))
這裡,
img - 要旋轉的輸入影像。
M - 上述定義的旋轉矩陣。
(width, height) - 旋轉後圖像的寬度和高度。
步驟
要執行影像旋轉,您可以按照以下步驟操作:
匯入所需的庫。在以下所有 Python 示例中,所需的 Python 庫是OpenCV。確保您已安裝它。
import cv2
使用 cv2.imread() 函式讀取輸入影像。傳遞輸入影像的完整路徑。
img = cv2.imread('interior1.jpg')
使用 cv2.getRotationMatrix2D(cr, degree, scale) 函式定義旋轉矩陣 M。例如,將旋轉中心cr、旋轉角度 degree 和縮放因子 scale 傳遞給函式,例如,cr=(width/2, height/2), degree=30, scale=1。
M = cv2.getRotationMatrix2D(cr,30,1)
使用 cv2.warpAffine() 方法旋轉影像。
img = cv2.warpAffine(img,M,(w,h))
顯示旋轉後的影像。
cv2.imshow('Image Translation', img)
cv2.waitKey(0)
cv2.destroyAllWindows()
讓我們看一些示例,以便清楚地瞭解問題。
輸入影像
我們在下面的示例中使用以下影像作為輸入檔案。

示例 1
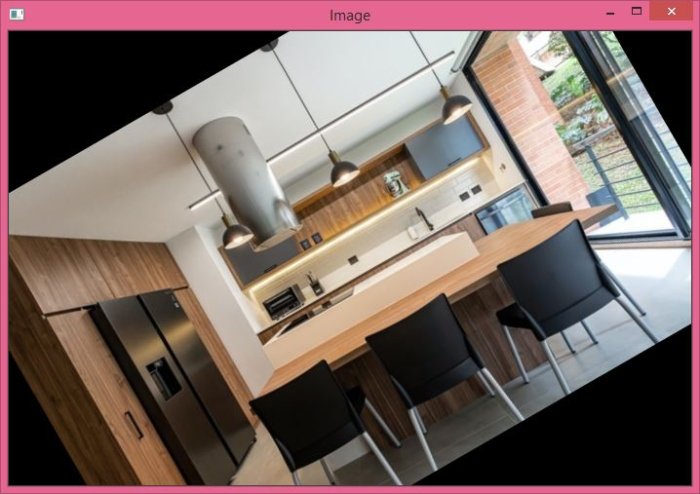
在此程式中,我們將輸入影像逆時針旋轉 30 度。旋轉中心是影像的中點(中心),即 (width/2, height/2)。
# import required libraries
import cv2

# read the input image
img = cv2.imread('interior1.jpg')

# access height and width of the image
height, width, _ = img.shape

# define center of rotation
cr = (width/2,height/2)

# get the rotation matrix
M = cv2.getRotationMatrix2D(cr,30,1)

# apply warpAffine() method to perform image rotation
dst = cv2.warpAffine(img,M,(width,height))

# display the rotated image
cv2.imshow('Image',dst)
cv2.waitKey(0)
cv2.destroyAllWindows()
輸出
執行後,它將生成以下輸出視窗:
請注意,均方誤差是一個標量值。
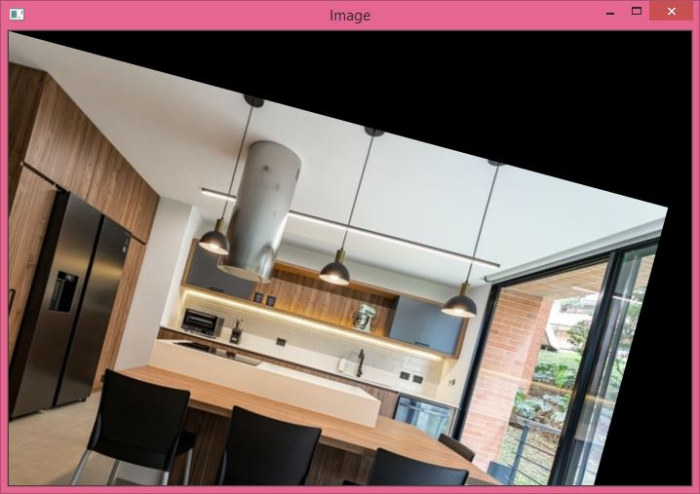
示例 2
在此程式中,我們將輸入影像順時針旋轉 15 度。旋轉中心為 (0,0)。
import cv2
import numpy as np

img = cv2.imread('interior1.jpg')
h,w, _ = img.shape

M = cv2.getRotationMatrix2D((0,0),-15,1)
dst = cv2.warpAffine(img,M,(w,h))

cv2.imshow('Image',dst)
cv2.waitKey(0)
cv2.destroyAllWindows()
輸出
執行上述 Python 程式時,它將生成以下輸出視窗:

2K+ 次檢視
