
 資料結構
資料結構 網路
網路 關係資料庫管理系統
 作業系統
作業系統 Java
Java iOS
iOS HTML
HTML CSS
CSS Android
 Python
 C 程式設計
 C++
C++ C#
C# MongoDB
 MySQL
MySQL Javascript
 PHP
PHP如何使用 Python OpenCV 對影像執行 Otsu 閾值分割?
Otsu 閾值分割是一種閾值分割技術。還有其他型別的閾值分割技術,例如簡單閾值分割和自適應閾值分割。
簡單閾值分割技術使用全域性閾值,而自適應閾值分割技術對不同區域使用不同的閾值。
Otsu 閾值分割技術使用全域性閾值,但該閾值不是人為選擇的。它是自動確定的。它對雙峰影像非常有效。雙峰影像是指直方圖有兩個峰值的影像。閾值是這兩個峰值中間的近似值。如果影像不是雙峰的,則此閾值分割方法不準確。
要應用Otsu閾值分割,我們使用額外的標誌cv2.THRESH_OTSU應用簡單的閾值分割cv2.threshold()。請參閱以下語法。
語法
cv2.threshold(img, thresh_val, max_valu, thresh_techniques)
引數
img − 輸入灰度影像。它是一個numpy.ndarray。
thresh_val − 閾值。如果畫素值高於閾值,則分配一個值,否則分配另一個值。
max_valu − 要分配給畫素的最大值
thresh_techniques − 使用的閾值分割技術。我們可以應用任何簡單閾值分割 + Otsu 閾值分割,即cv2.THRESH_BINARY + cv2.THRESH_OTSU
它返回全域性自適應閾值和閾值。
讓我們藉助一些 Python 示例來了解 Otsu 閾值分割
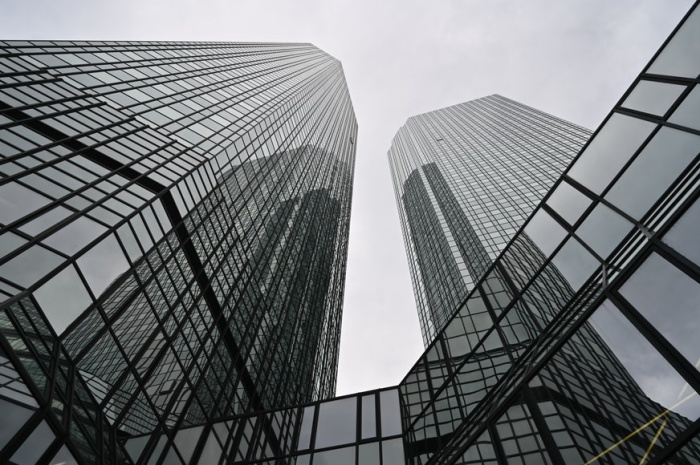
輸入影像
我們將在以下示例中使用此影像作為輸入檔案。
示例 1
在此程式中,我們對輸入影像應用Otsu閾值分割。
# import required libraries
import cv2

# read the input image as a gray image
img = cv2.imread('architecture2.jpg',0)

# Apply Otsu's thresholding
_,th = cv2.threshold(img,0,255,cv2.THRESH_BINARY+cv2.THRESH_OTSU)

# display the output image
cv2.imshow("Otsu's Thresholding", th)
cv2.waitKey(0)
cv2.destroyAllWindows()
輸出
執行以上程式後,將生成以下輸出:
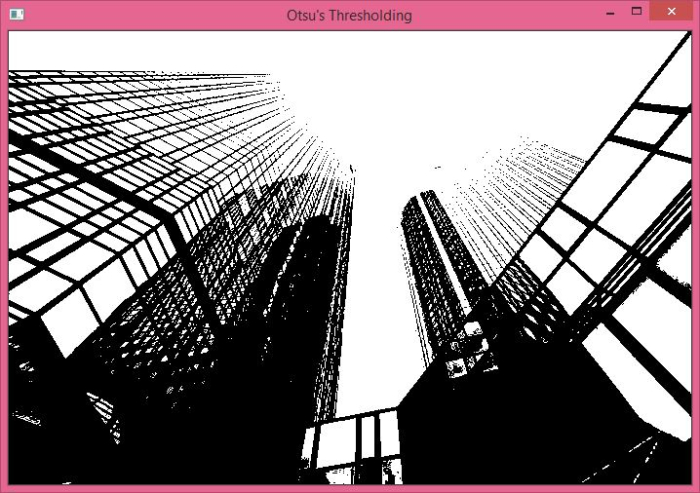
以上輸出顯示了應用 Otsu 閾值分割後的影像。
示例 2
在此程式中,我們對輸入影像應用Otsu閾值分割。我們還應用了全域性閾值分割和高斯濾波 + Otsu 閾值分割。
import cv2

from matplotlib import pyplot as plt
img = cv2.imread('architecture2.jpg',0)

# Apply global (simple) thresholding on image
ret1,th1 = cv2.threshold(img,127,255,cv2.THRESH_BINARY)

# Apply Otsu's thresholding on image
ret2,th2 = cv2.threshold(img,0,255,cv2.THRESH_BINARY+cv2.THRESH_OTSU)

# Apply Otsu's thresholding after Gaussian filtering
blur = cv2.GaussianBlur(img,(5,5),0)
ret3,th3 = cv2.threshold(blur,0,255,cv2.THRESH_BINARY+cv2.THRESH_OTSU)

titles = ['Original Image','Global Thresholding (v=127)',"Otsu's Thresholding",'Gaussian Filter + Otsu']
images = [img,th1,th2,th3]

for i in range(4):
   plt.subplot(2,2,i+1)
   plt.imshow(images[i], 'gray')
   plt.title(titles[i])
   plt.axis("off")
plt.show()
輸出
執行以上程式後,將生成以下輸出:
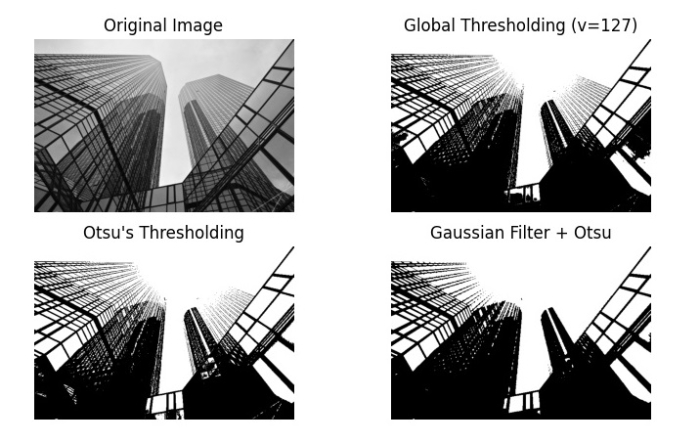
以上輸出顯示了應用全域性閾值分割、Otsu 閾值分割和高斯濾波 + Otsu 閾值分割後的不同影像。

更新於: 2022年9月27日
4K+ 閱讀量

廣告