
 資料結構
資料結構 網路
網路 RDBMS
RDBMS 作業系統
作業系統 Java
Java iOS
iOS HTML
HTML CSS
CSS Android
 Python
 C 程式設計
 C++
C++ C#
C# MongoDB
 MySQL
MySQL Javascript
 PHP
PHP如何使用 C# 中的 Windows 命令提示符安裝 Windows 服務?
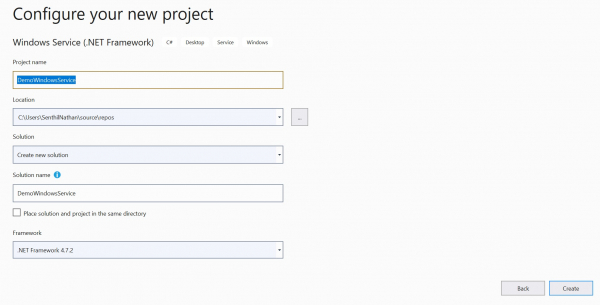
步驟 1 −
建立一個新的 Windows 服務應用程式。
步驟 2 −
若要執行 Windows 服務,你需要安裝 Installer,該 Installer 會將其註冊到服務控制管理器。右鍵單擊 Service1.cs[設計]並新增安裝程式。


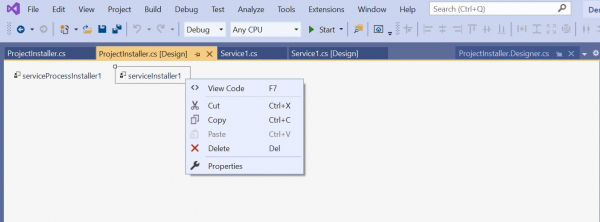
步驟 3 −
右鍵單擊 ProjectInstaller.cs [設計]並選擇檢視程式碼。
using System;
using System.Collections;
using System.Collections.Generic;
using System.ComponentModel;
using System.Configuration.Install;
using System.Linq;
using System.Threading.Tasks;
namespace DemoWindowsService{
   [RunInstaller(true)]
   public partial class ProjectInstaller : System.Configuration.Install.Installer{
      public ProjectInstaller(){
         InitializeComponent();
      }
   }
}
按 F12 並轉至 InitializeComponent 類的實現。新增將在安裝過程中成為 Windows 服務名稱的名稱和描述。
private void InitializeComponent(){
   this.serviceProcessInstaller1 = new
   System.ServiceProcess.ServiceProcessInstaller();
   this.serviceInstaller1 = new System.ServiceProcess.ServiceInstaller();
   //
   // serviceProcessInstaller1
   //
   this.serviceProcessInstaller1.Account =
   System.ServiceProcess.ServiceAccount.LocalService;
   this.serviceProcessInstaller1.Password = null;
   this.serviceProcessInstaller1.Username = null;
   //
   // serviceInstaller1
   //
   this.serviceInstaller1.Description = "My Demo Service";
   this.serviceInstaller1.ServiceName = "DemoService";
   //
   // ProjectInstaller
   //
   this.Installers.AddRange(new System.Configuration.Install.Installer[] {
   this.serviceProcessInstaller1,
   this.serviceInstaller1});
}
步驟 4 −
現在讓我們在 Service1.cs 類中新增以下邏輯,以便在文字檔案中寫入日誌資料。
using System;
using System.IO;
using System.ServiceProcess;
using System.Timers;
namespace DemoWindowsService{
public partial class Service1 : ServiceBase{
Timer timer = new Timer();
public Service1(){
InitializeComponent();
}
protected override void OnStart(string[] args){
WriteToFile("Service started at " + DateTime.Now);
timer.Elapsed += new ElapsedEventHandler(OnElapsedTime);
timer.Interval = 5000;
timer.Enabled = true;
}
protected override void OnStop(){
WriteToFile("Service stopped at " + DateTime.Now);
}
private void OnElapsedTime(object source, ElapsedEventArgs e){
WriteToFile("Service recall at " + DateTime.Now);
}
public void WriteToFile(string Message){
string path = @"D:\Demo";
if (!Directory.Exists(path)){
Directory.CreateDirectory(path);
}
string filepath = @"D:\Demo\Log.txt";
if (!File.Exists(filepath)){
using (StreamWriter sw = File.CreateText(filepath)){
sw.WriteLine(Message);
}
} else {
using (StreamWriter sw = File.AppendText(filepath)){
sw.WriteLine(Message);
}
}
}
}
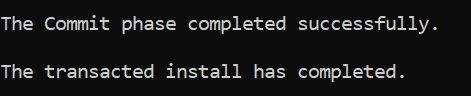
}步驟 5(安裝)−
現在我們使用命令提示符安裝 Windows 服務。以管理員身份開啟命令提示符並提供以下命令。
cd C:\Windows\Microsoft.NET\Framework\v4.0.30319

開啟我們 Windows 服務 exe 檔案所在的資料夾,執行以下命令。
InstallUtil.exe C:\Users\[UserName]
source\repos\DemoWindowsService\DemoWindowsService\bin\Debug\
DemoWindowsService.exe

現在從 Windows 應用程式選單開啟服務。
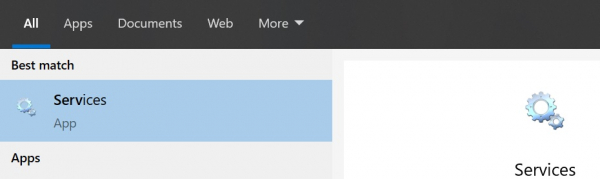

我們可以看到我們的 Windows 服務已安裝並且如期執行。
以下輸出表明該服務正在執行並將日誌按預期寫入文字檔案。


更新於:2020 年 9 月 24 日
3K+ 瀏覽次數

廣告