
 資料結構
資料結構 網路
網路 關係型資料庫管理系統
 作業系統
作業系統 Java
Java iOS
iOS HTML
HTML CSS
CSS Android
 Python
 C 程式設計
 C++
C++ C#
C# MongoDB
 MySQL
MySQL Javascript
 PHP
PHP如何用 tkinter 根據滑鼠座標畫一條線?
為了根據滑鼠座標畫一條線,我們需要建立一個函式來獲取每次滑鼠點選的座標,進而繪製兩相鄰點之間的線。我們來舉個例子,看看可以如何完成。
步驟 -
匯入 tkinter 庫並建立一個 tkinter 幀例項。
使用 geometry 方法設定幀的大小。
建立一個使用者自定義方法 "draw_line",用於獲取每一次滑鼠點選的 x 和 y 座標。然後使用 Canvas 的 create_line() 方法在兩相鄰點之間繪製一條線。
將滑鼠左鍵點選繫結到 draw_line 方法。
最後,執行應用程式視窗的 mainloop。
示例
# Import the library
import tkinter as tk
# Create an instance of tkinter
win = tk.Tk()
# Window size
win.geometry("700x300")
# Method to draw line between two consecutive points
def draw_line(e):
x, y = e.x, e.y
if canvas.old_coords:
x1, y1 = canvas.old_coords
canvas.create_line(x, y, x1, y1, width=5)
canvas.old_coords = x, y
canvas = tk.Canvas(win, width=700, height=300)
canvas.pack()
canvas.old_coords = None
# Bind the left button the mouse.
win.bind('<ButtonPress-1>', draw_line)
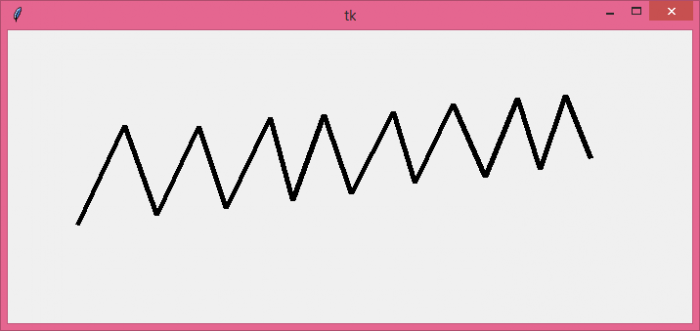
win.mainloop()輸出
它將追蹤滑鼠左鍵點選並繪製每兩相鄰點之間的一條線。

更新時間: 2021 年 10 月 26 日
3K+ 次檢視

廣告